.svg)
Overview
Infrastructure as Code (IaC) findings help you identify misconfigurations, insecure defaults, and policy violations within your cloud infrastructure definitions before they are deployed to production.
As a Security Champion or AppSec Manager, you can use the Mend.io AppSec Platform to review IaC findings across applications and projects, understand the root cause of each issue, and guide remediation efforts with development and cloud teams.
Getting it done
Review the top Application with the highest severity IaC Findings
Beginning on the Mend Application Security Dashboard, ensure only the IaC engine is enabled.
-
Click the Dependencies, Code, and/or Containers scan engines to disable them if they aren’t already.
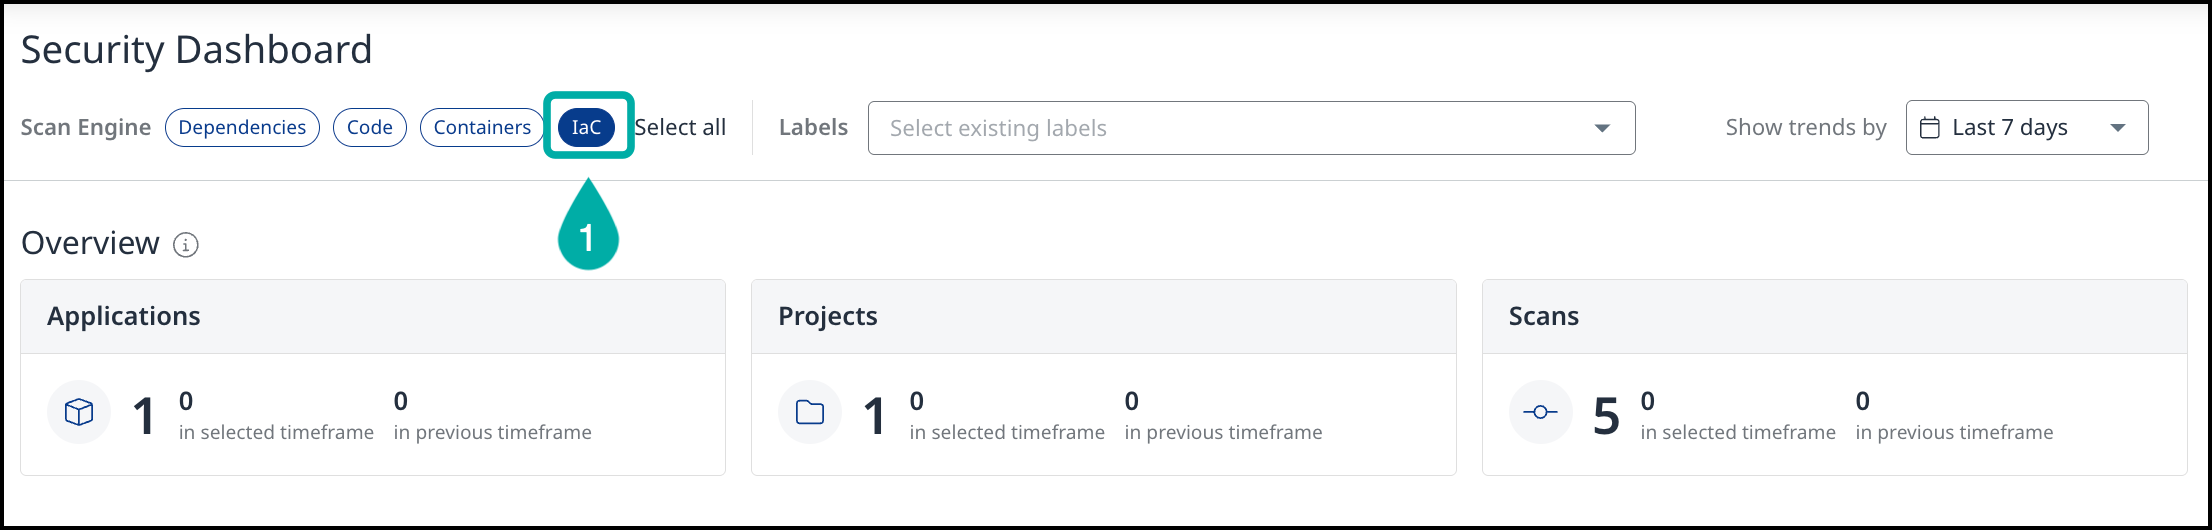
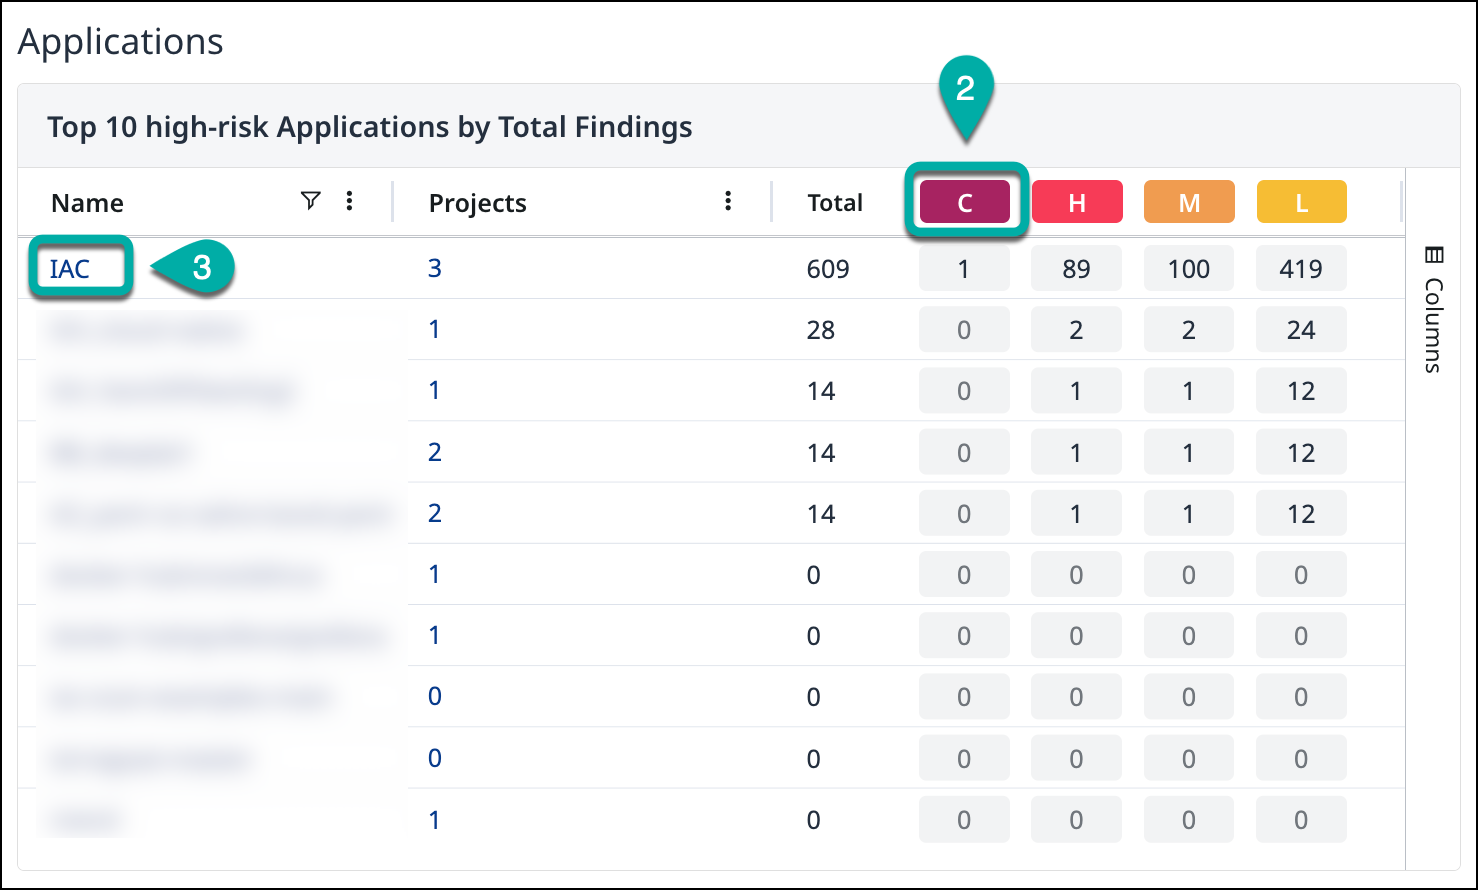
By default, the Applications widget showing the Top 10 high-risk Applications by Total Findings is ranked by the total number of findings.
-
Click the “C” in the box on the Applications widget to rank by the most critical severity findings.
If multiple applications are tied for the selected ranking order, they will be listed alphabetically.
-
Click the Application that has been sorted to the top with the most critical-risk findings. You will be redirected to that application's summary page.
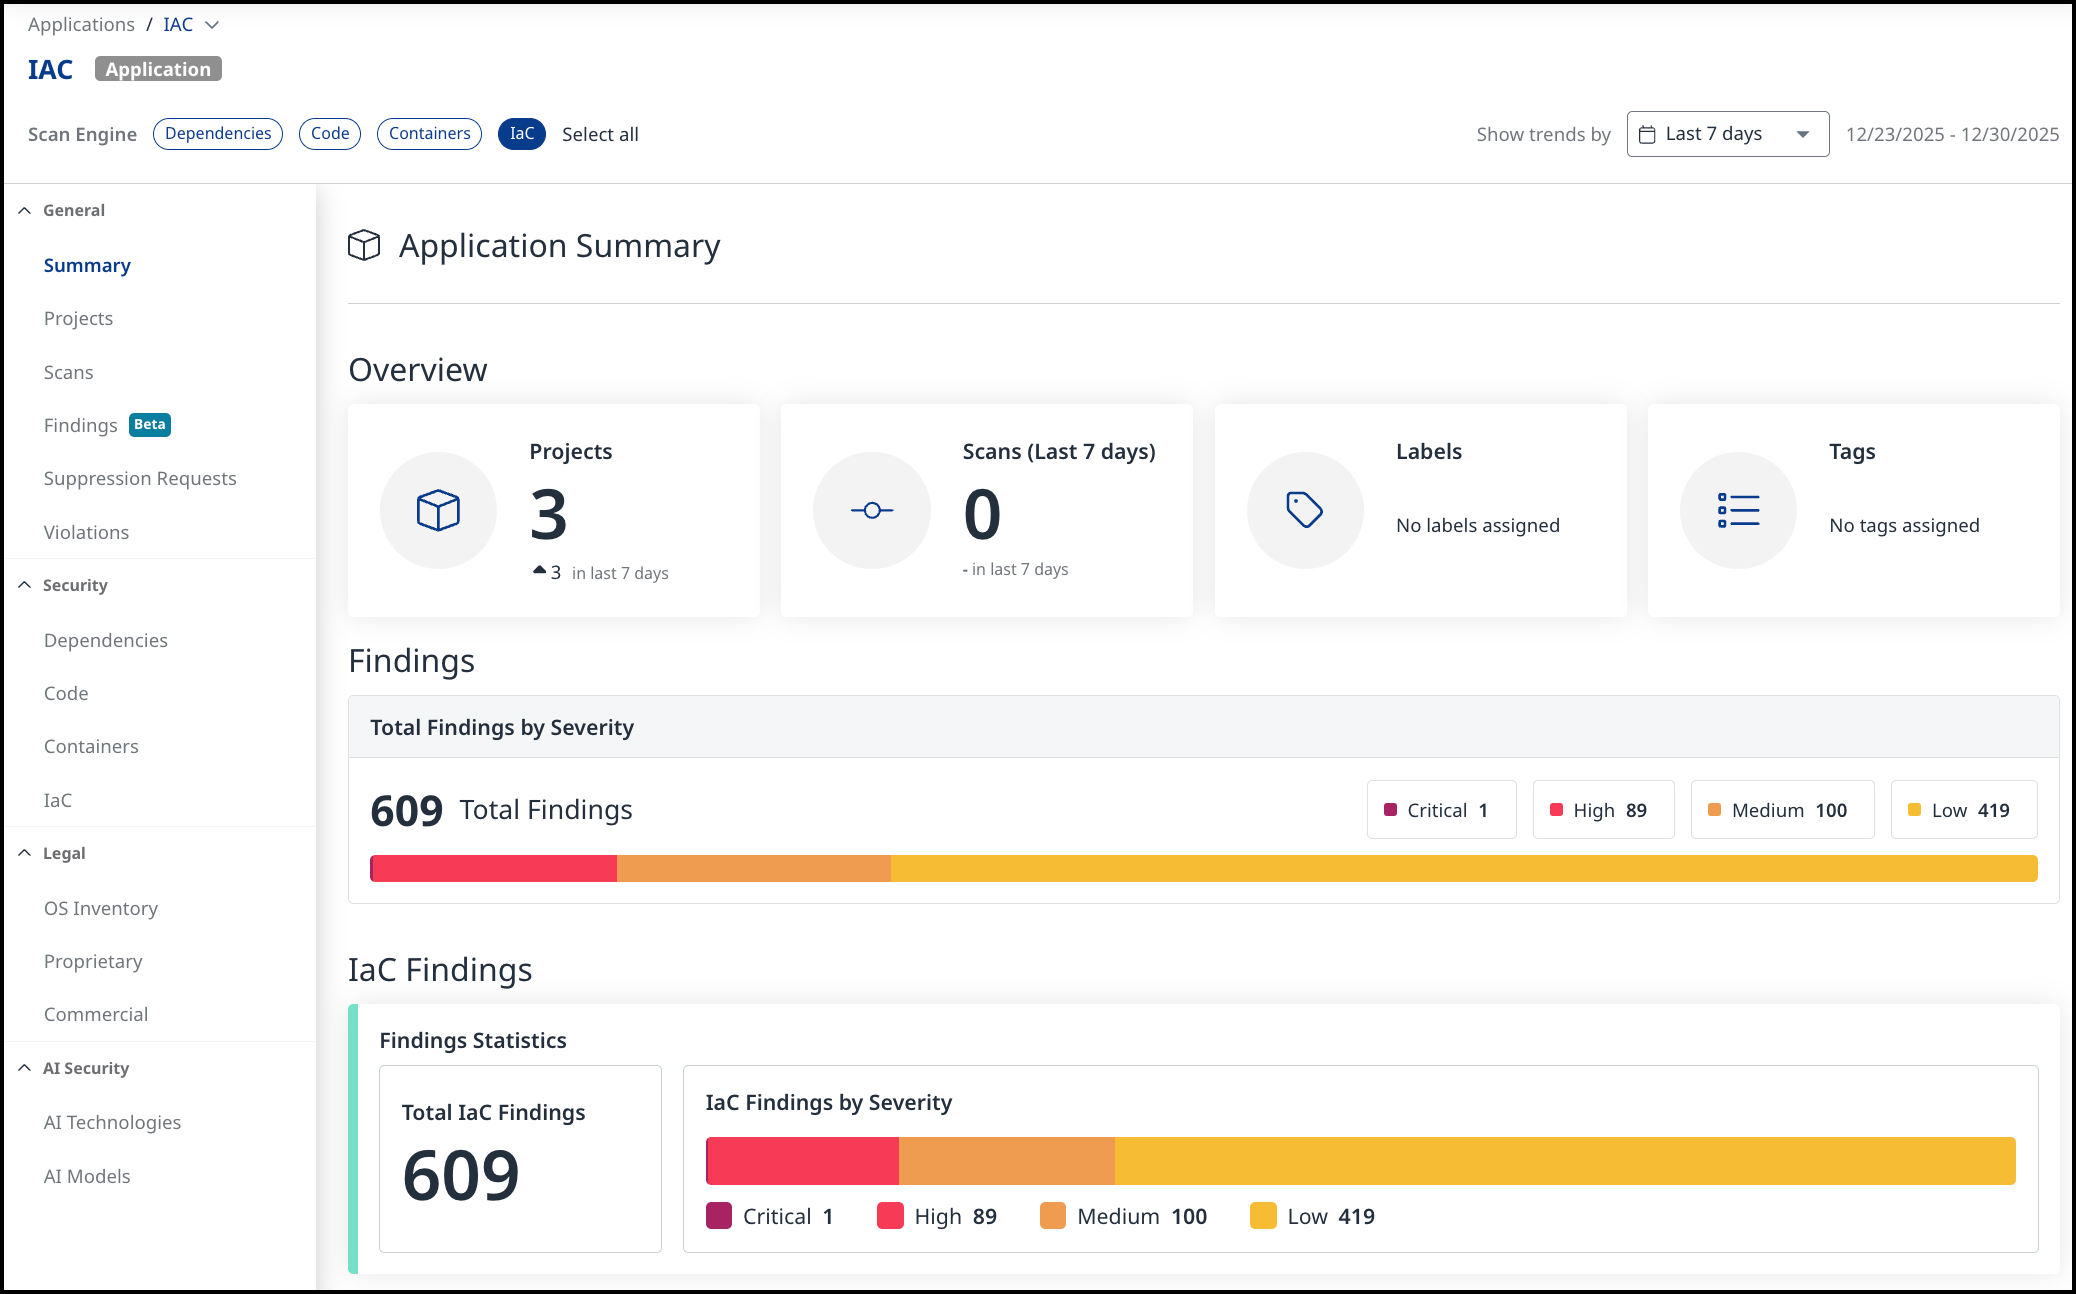
The Application Summary screen contains some findings-related information about your application, including the overall number of IaC findings distributed by severity:
-
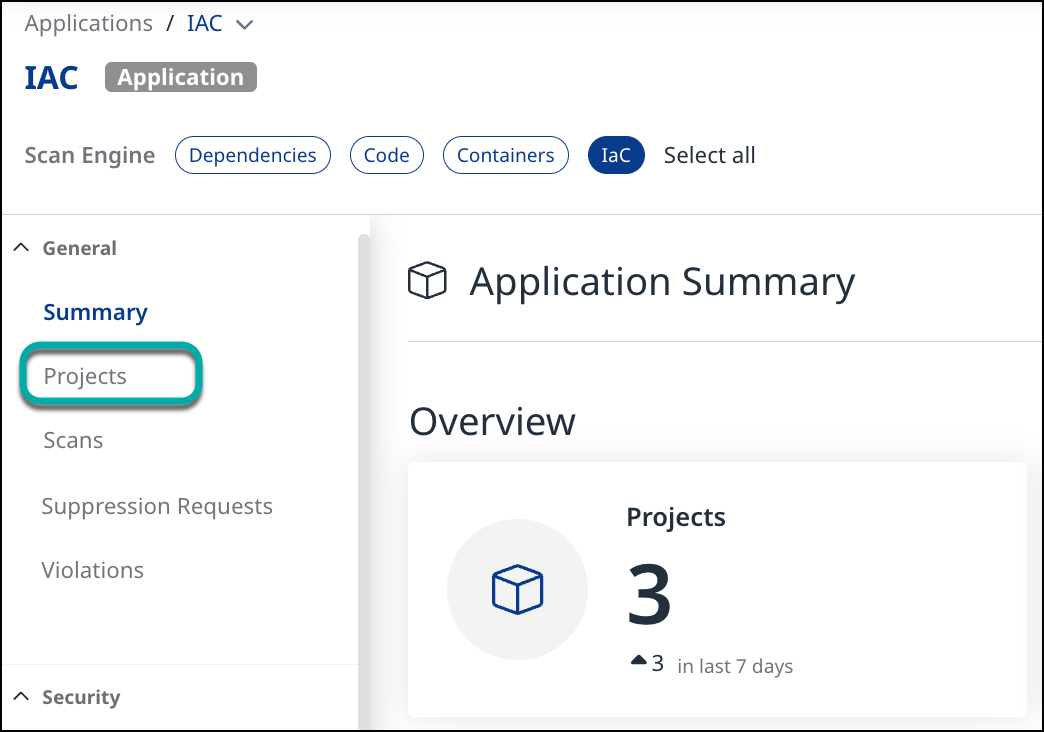
Click Projects in the left pane or click the Projects widget in the Overview section to view the Projects associated with the Application.
Review the top Project within the Application with highest severity IaC Findings
-
Click the “C” in the red box on the Projects table to rank by most critical-severity findings.
-
Click the Project that has been sorted to the top with the most high-risk findings. You will be redirected to that project's summary page.
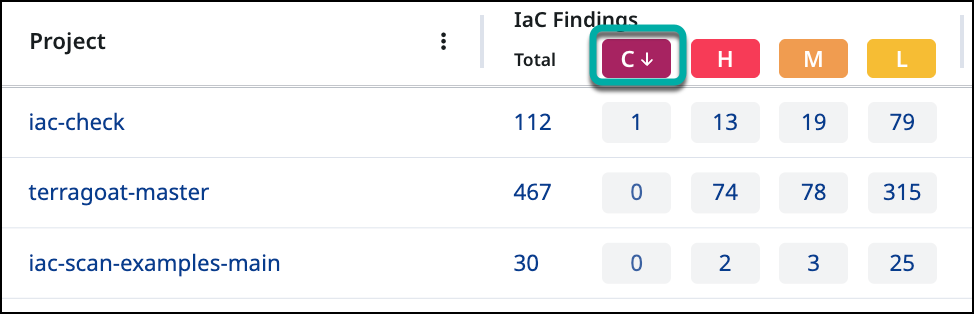
-
Click IaC in the left pane to view the latest container image findings associated with the Project (1). By default, the findings will be sorted by Severity (2), but we encourage you to add filters (3), to sort the findings in a manner that suits your needs.
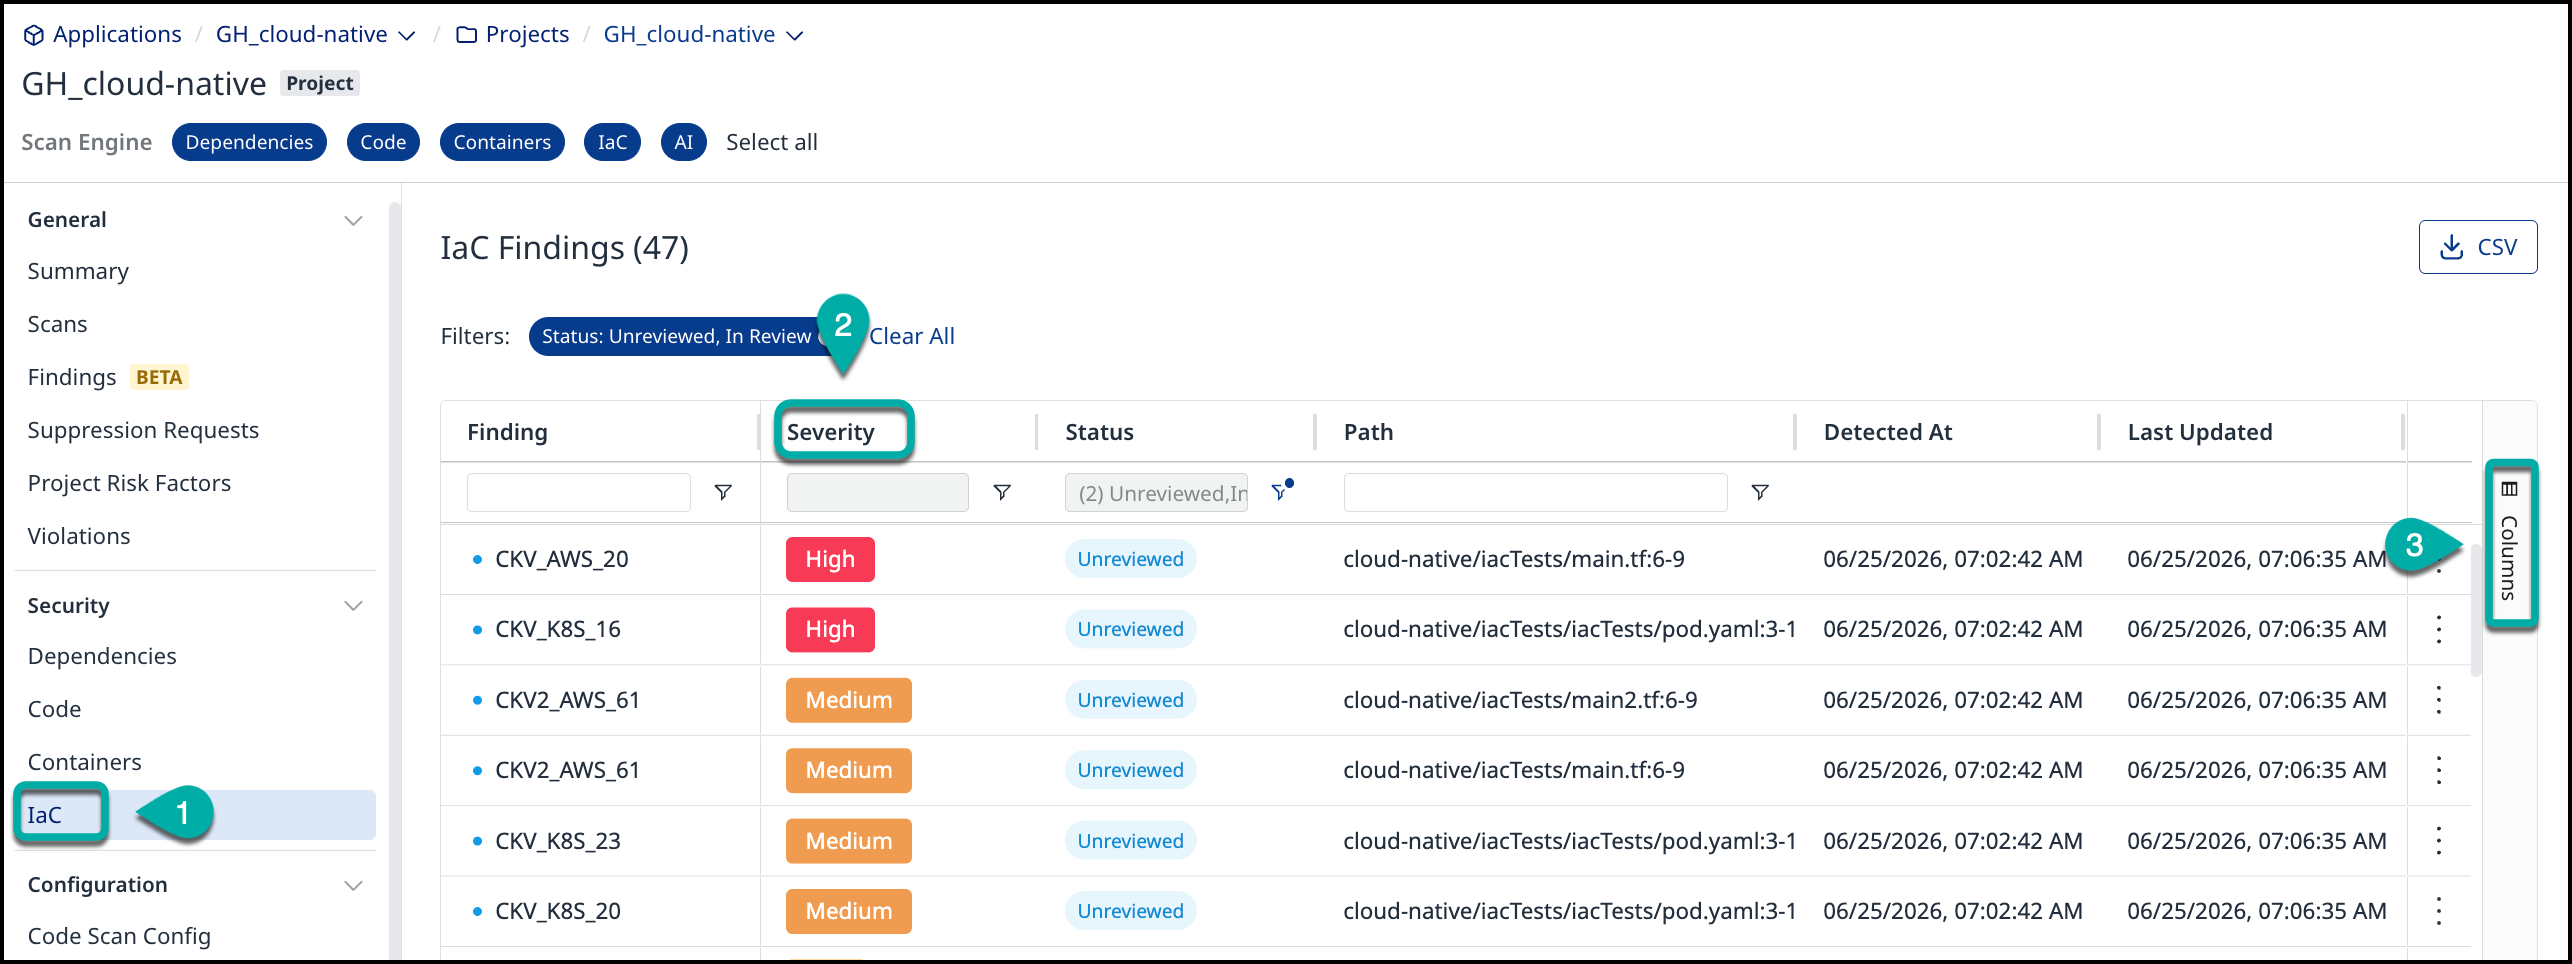
Note: More information about the Findings Table is available here.
Filtering & Sorting options
While hovering with the mouse cursor over a column name, an options icon (kebab menu) will appear:
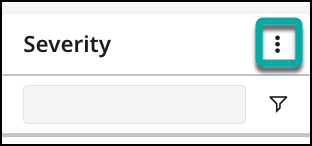
Clicking it reveals a menu that lets you change the settings for that column.
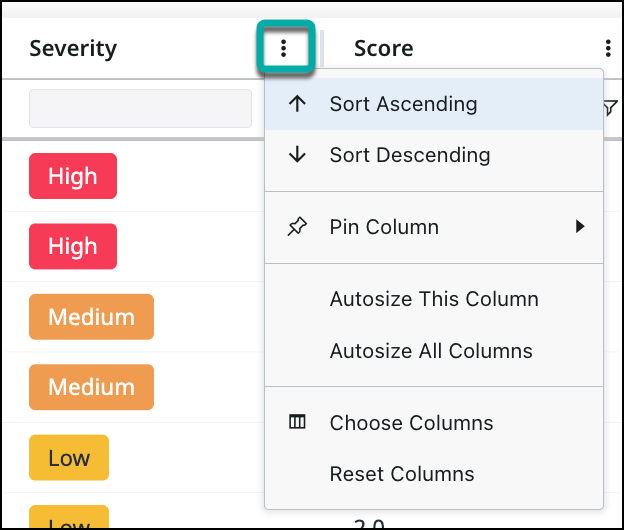
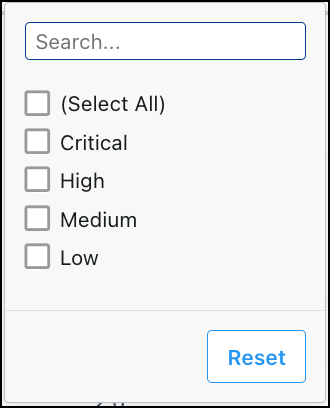
Severity
In the Severity column menu, you can select the severity levels you wish to include in the findings table:
Score
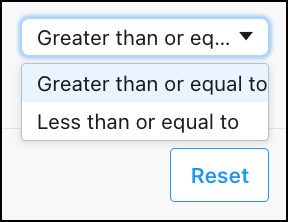
In the Score column menu, you can select which items to include, greater than, equal to, or less than.
Reviewing the high-risk findings
-
Click a high-risk finding to show the details of that finding on the right side of the screen.
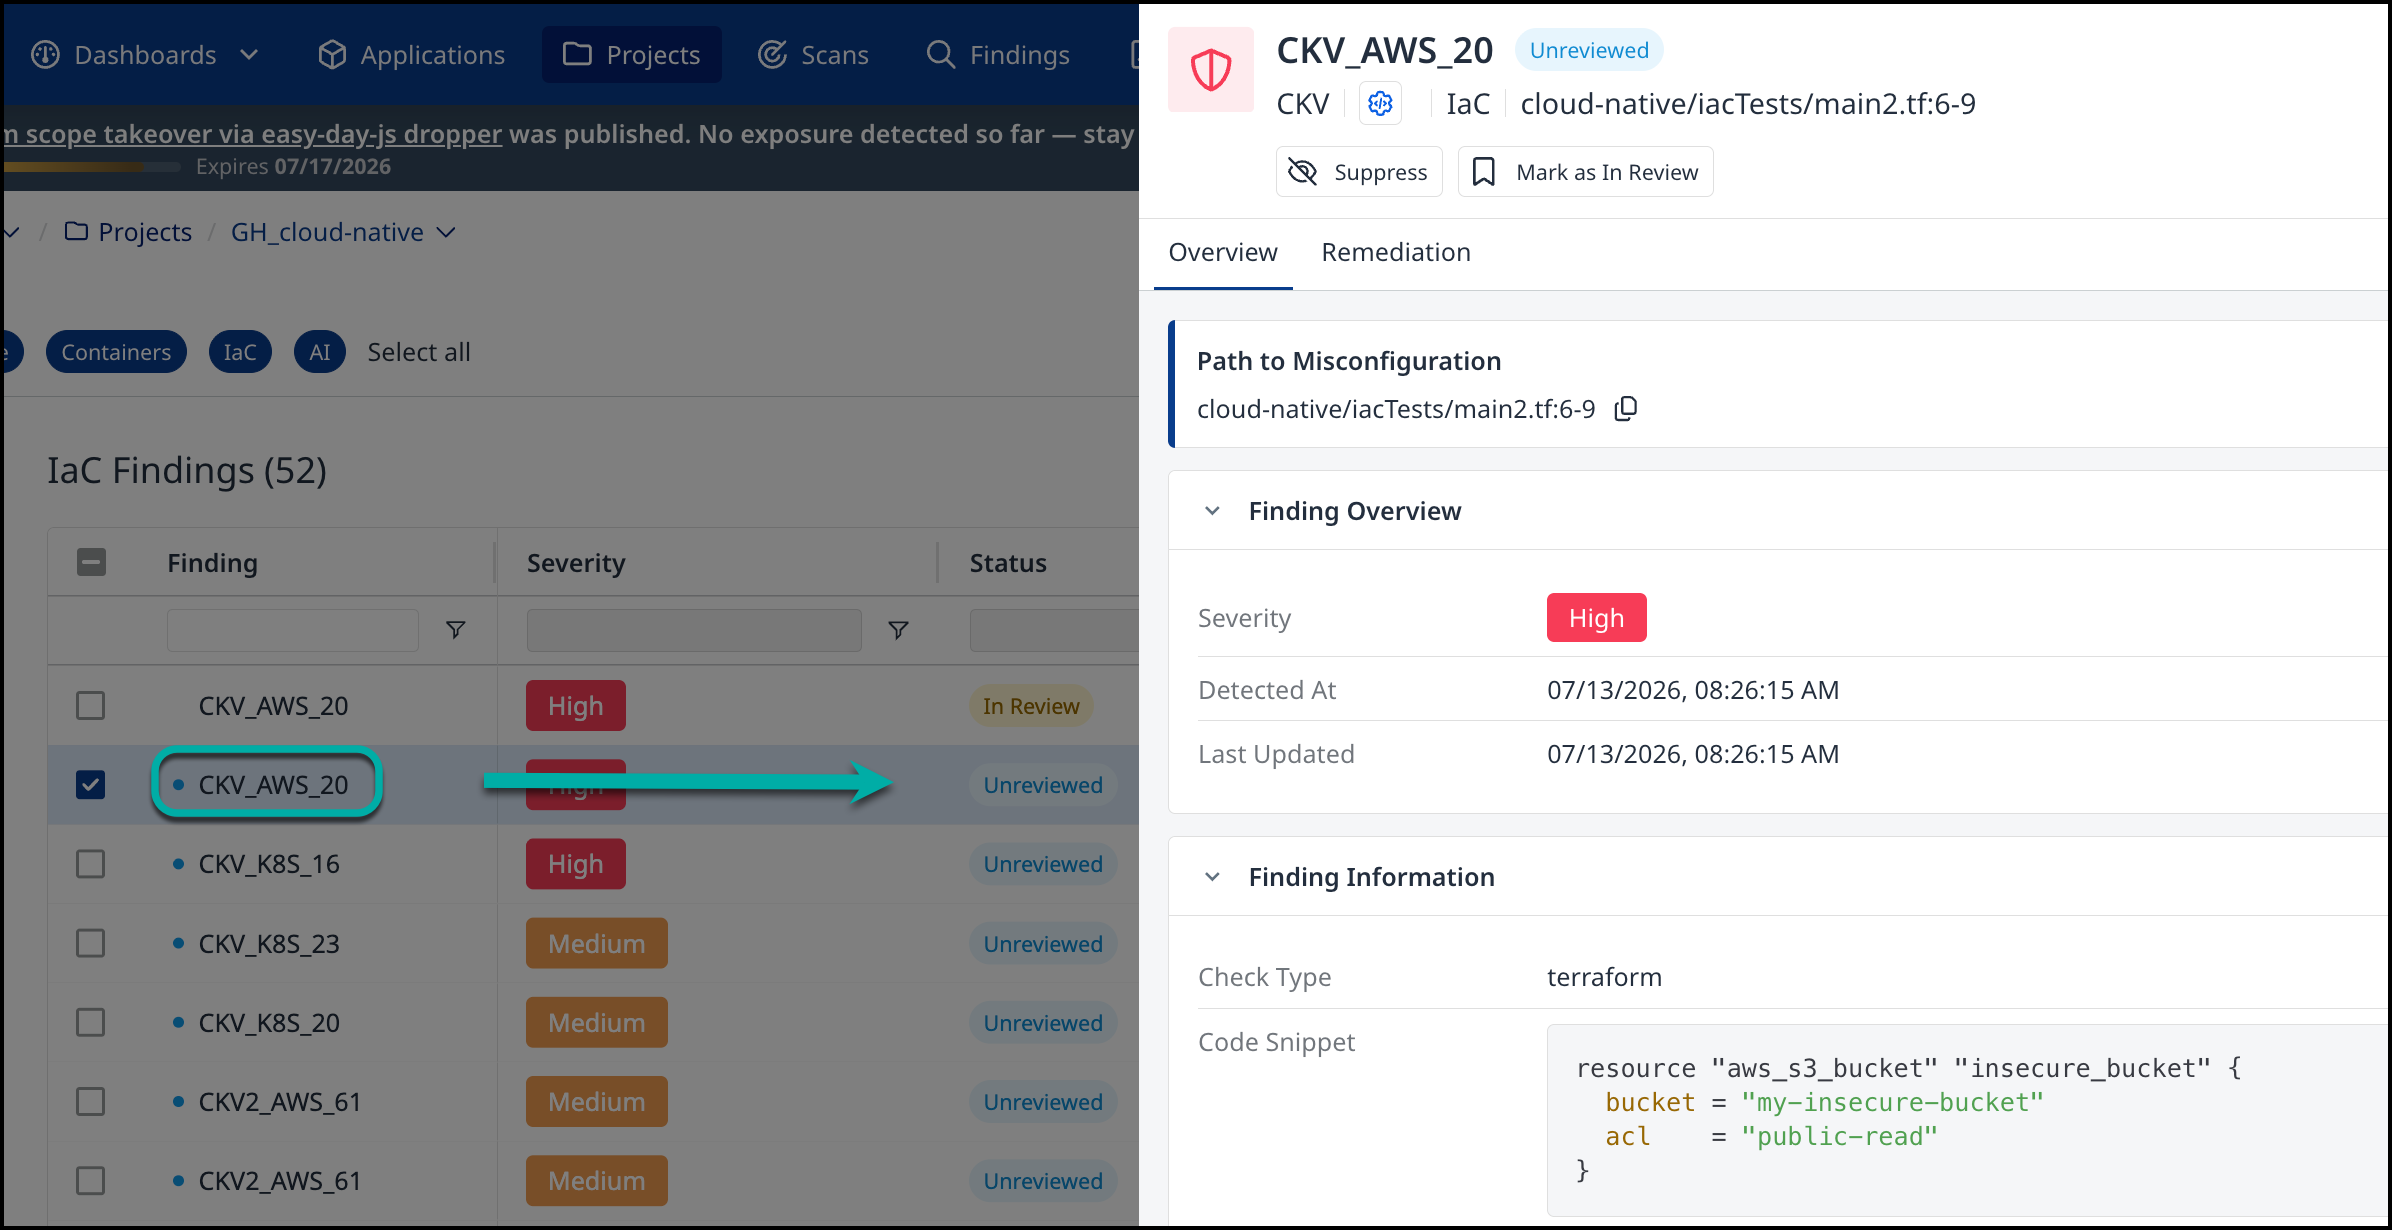
The finding details window defaults to the Overview tab.
At the top of the finding details side panel you will see:
-
The ID of the finding (for example,
CKV_K8S_23) -
A review-status badge indicating the current status of the finding (for example, Unreviewed, In Review, or Suppressed)
-
The findings' scan source, type (IaC), and the path and line range of the affected file
-
Suppress and Mark as In Review actions (see Suppressing and reviewing IaC findings below)
-
Up / Down navigation arrows in the top-right corner, used to step to the previous or next finding without closing the details window. Navigation follows the active sort and filter order of the findings table.
The top section of the finding details shows:
-
Path to Misconfiguration
-
Severity
-
Detected At
-
Last Updated
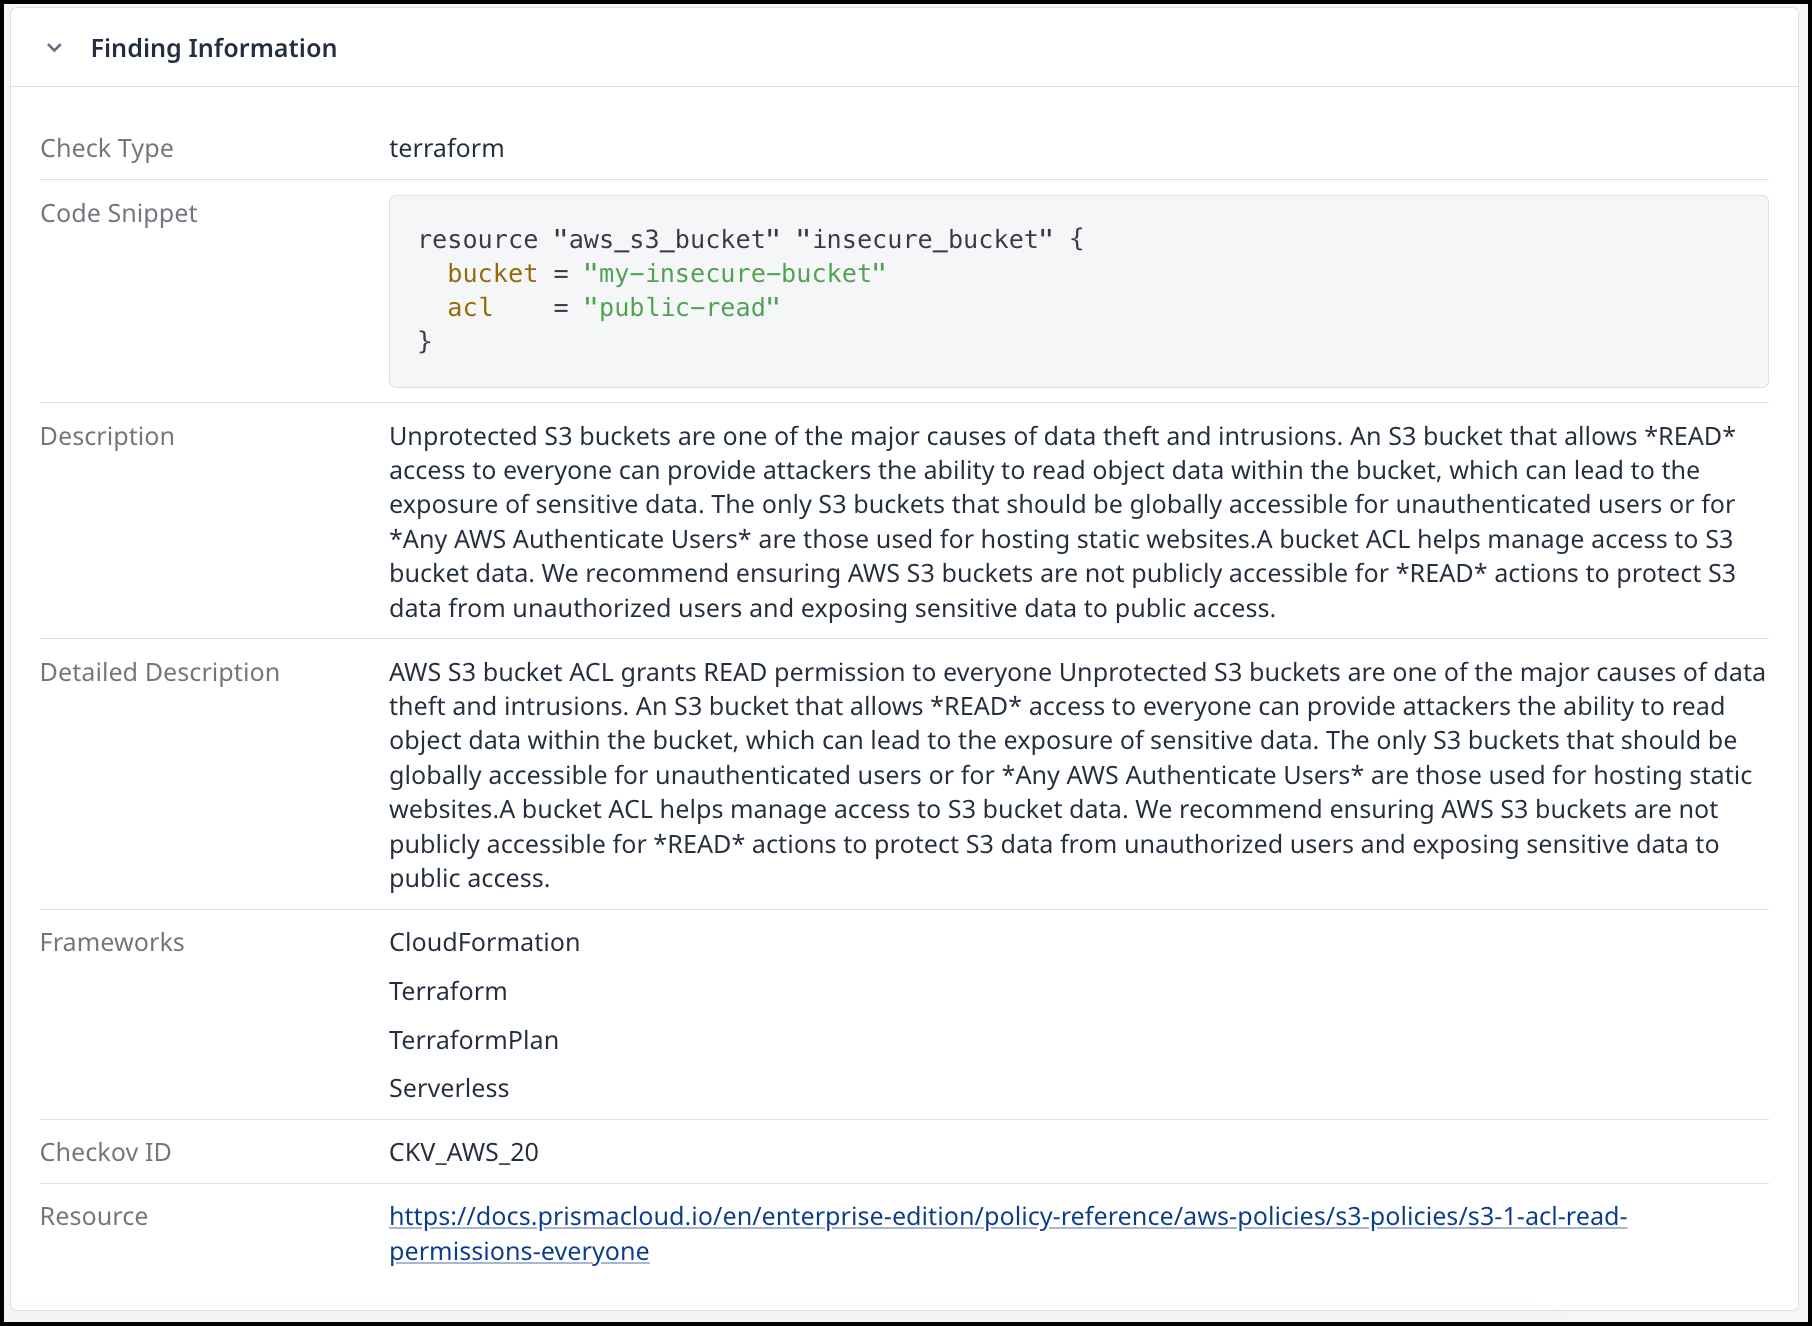
The bottom section shows the Finding Information:
-
Check Type
-
Code Snippet
-
Description
-
Detailed Description
-
Frameworks
-
Checkov ID
-
Resource
-
Click the Remediation tab to view more details on how to remediate the detected misconfiguration finding.
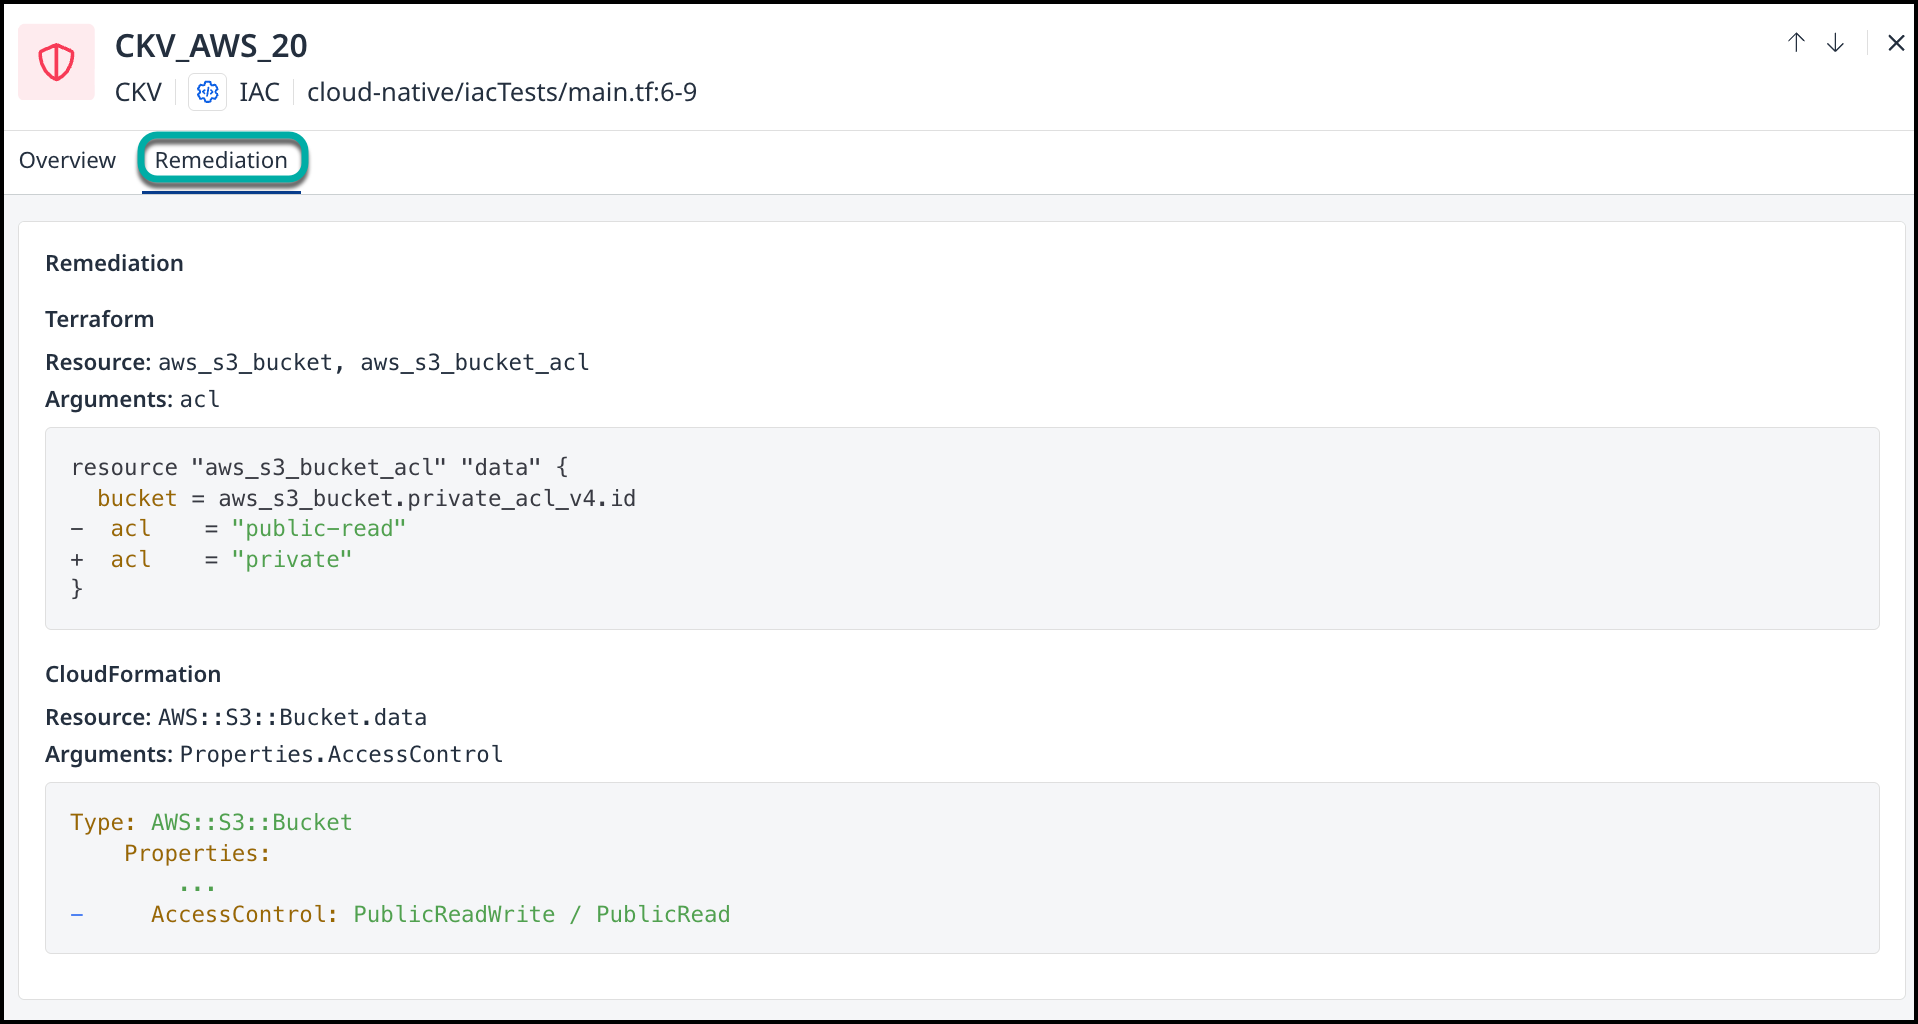
To close the finding details window, click the “X“ in the top right corner.
Suppressing and reviewing IaC findings
Use the Actions ("kebab") menu at the right edge of a finding's row in the IaC findings table to manage the status of that finding. The same actions are also available at the top of the finding details window.
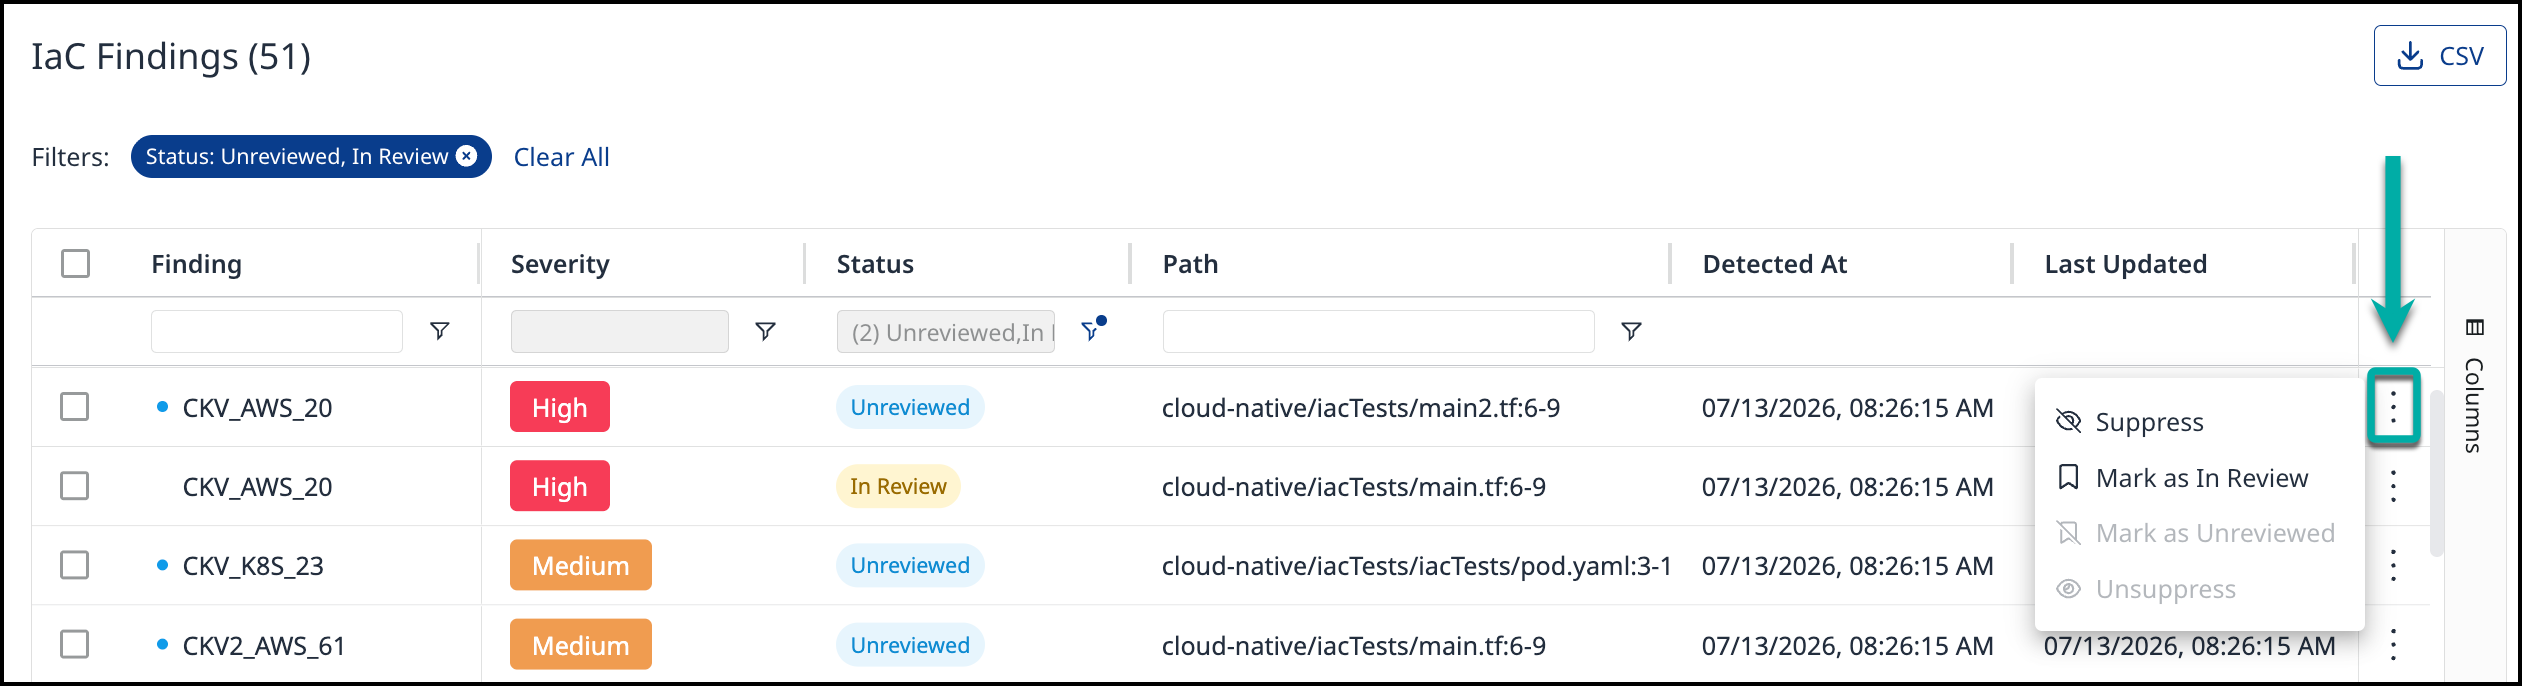
Mark as In Review — flags a finding as actively being triaged. The review-status badge updates to In Review. To clear it, open the finding again and remove the review flag.
Suppress — removes the finding from your active findings view (for example, when it is an accepted risk or is not relevant to your environment). While suppressing a finding, it is recommended to select a Suppression Reason. You can opt for one of the pre-defined reasons:
-
Acceptable risk
-
No fix available
-
No risk
-
Ignore
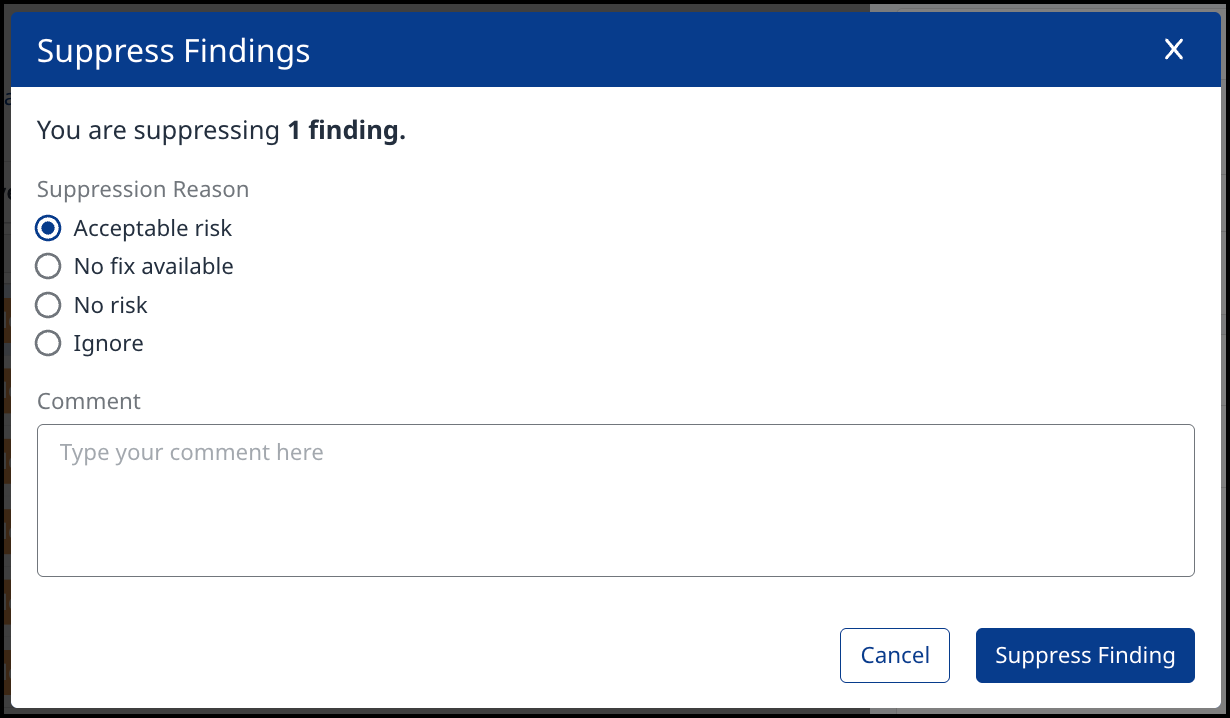
You can also add an optional free-text Comment to record context for your team. After confirming, a message indicates how many findings were suppressed, and the finding's status badge updates to Suppressed.
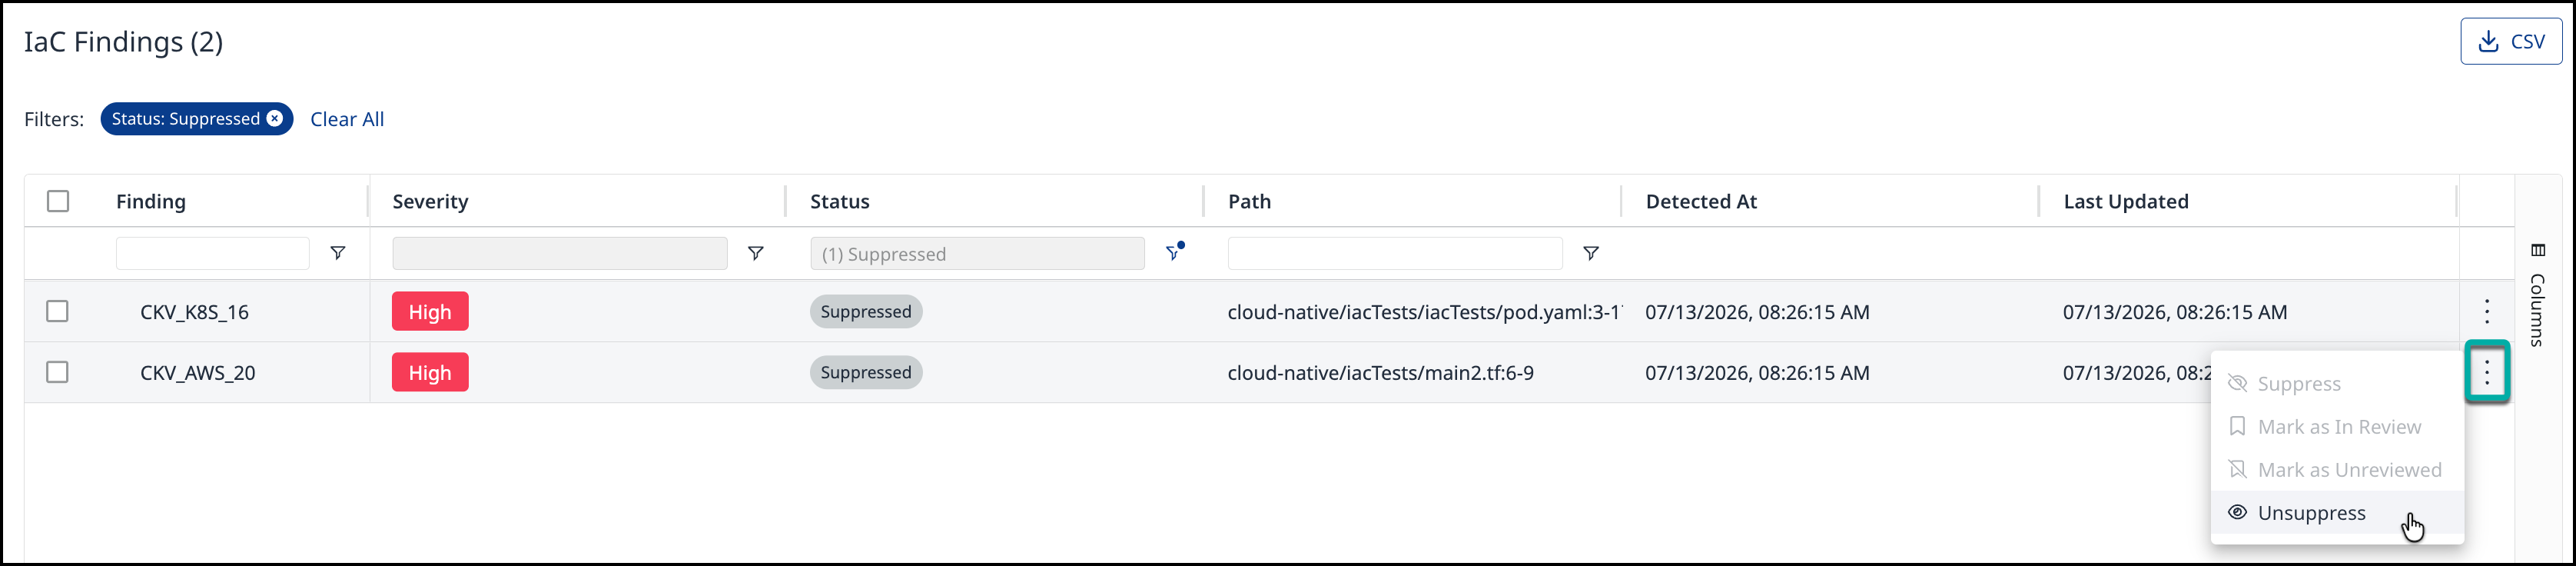
Unsuppress — undoes a suppression and returns the finding to the active view. Only available for suppressed findings; the status returns to Unreviewed.
Bulk actions
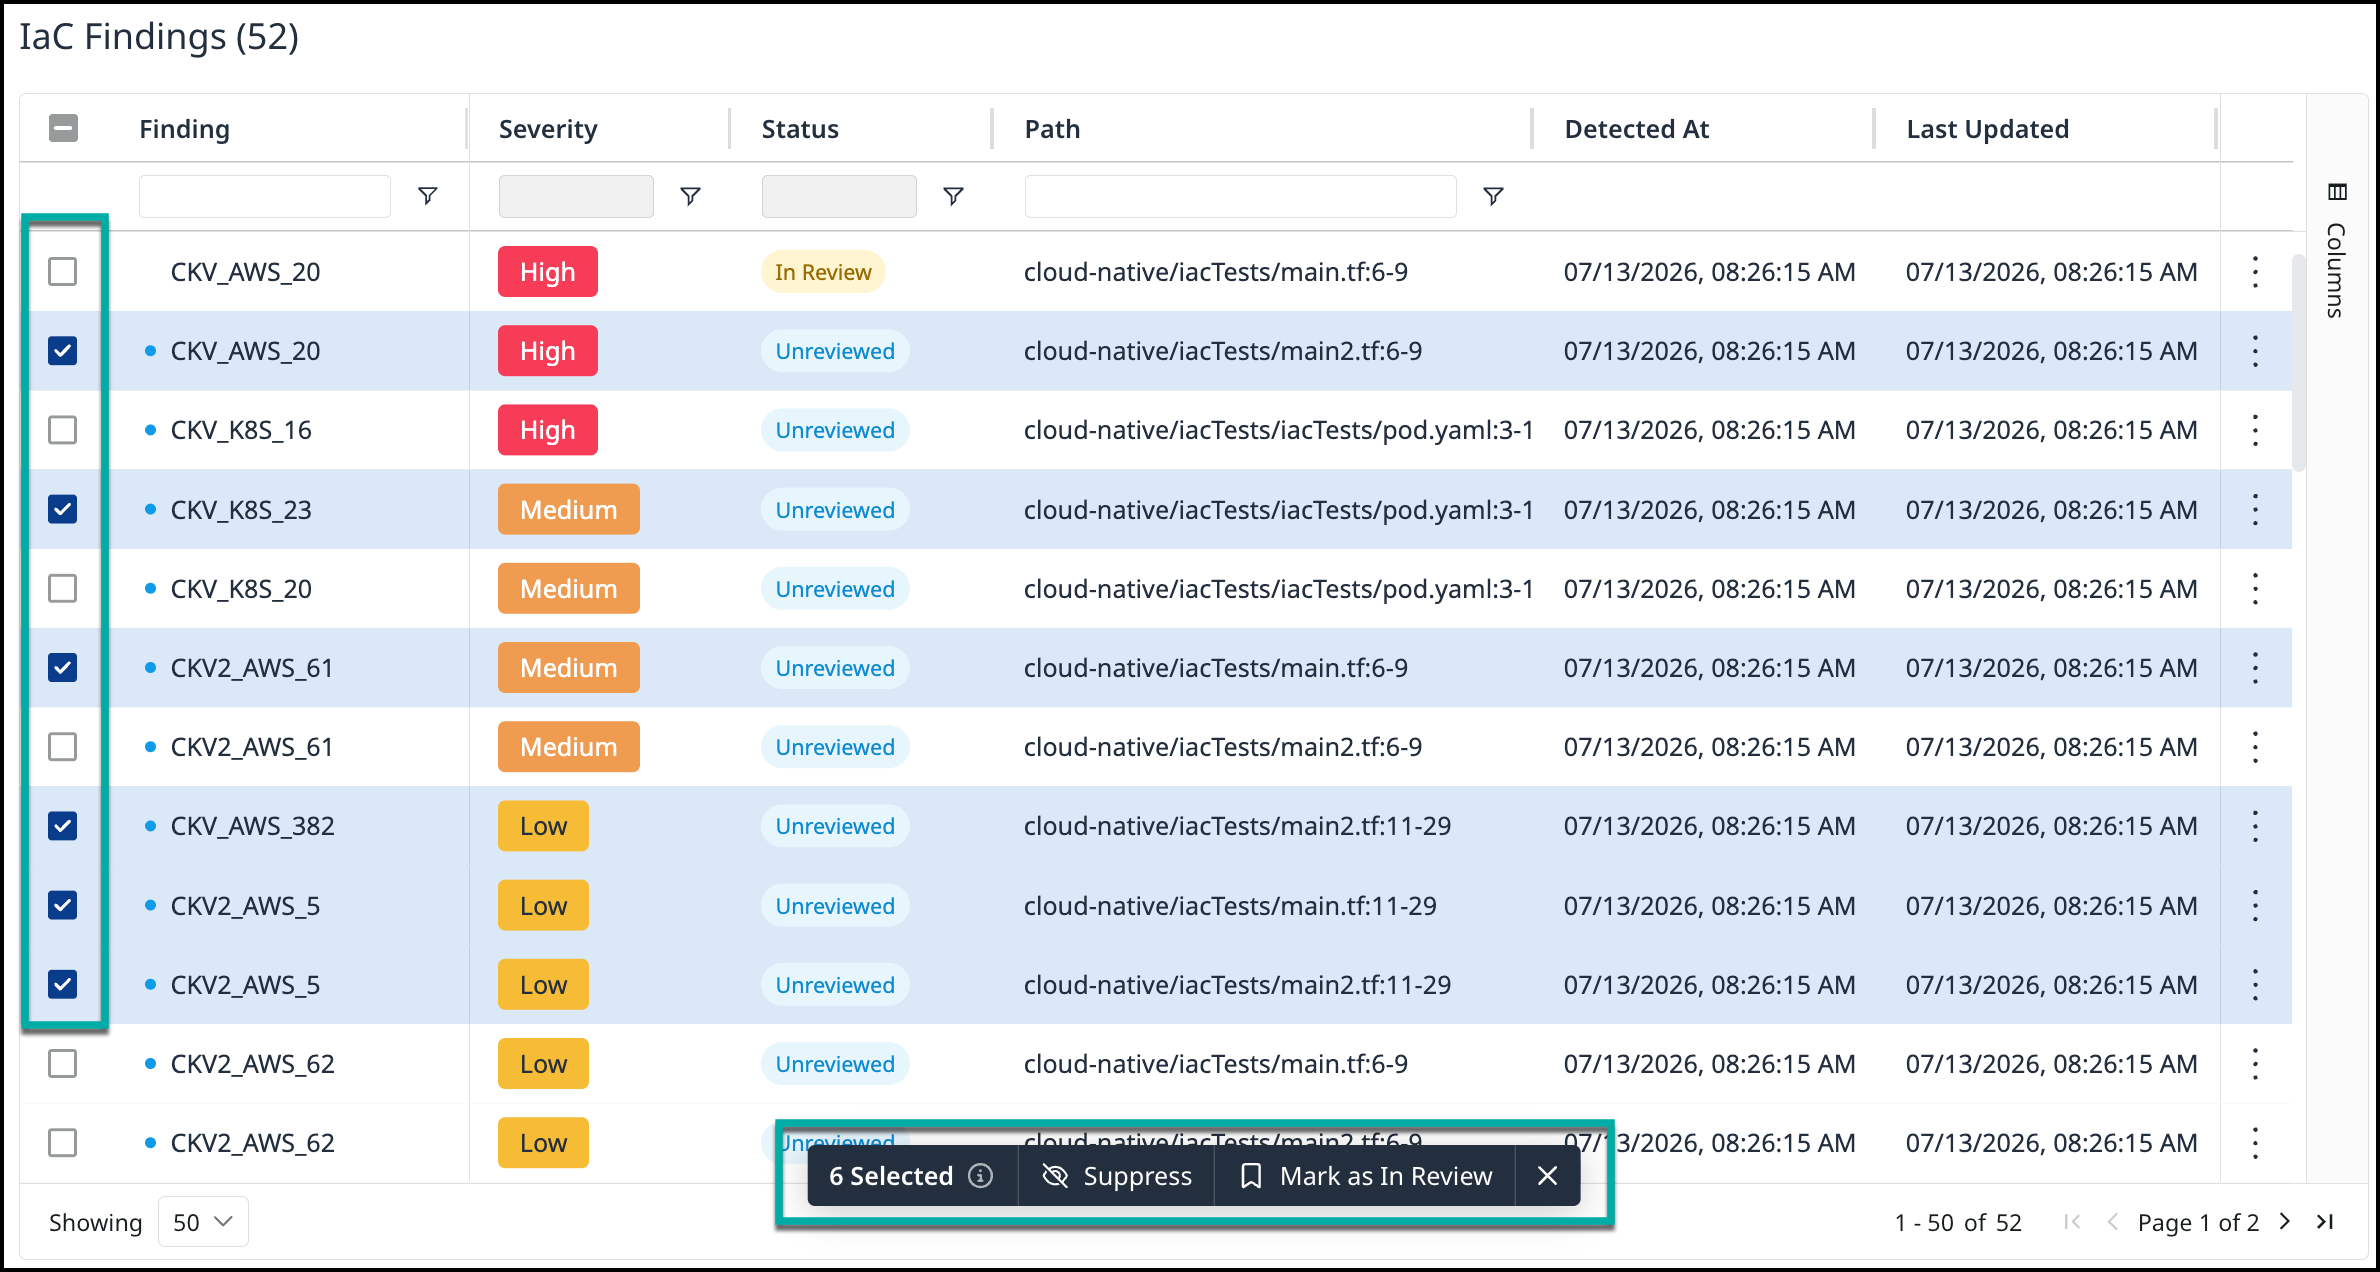
Both suppress and review actions are supported as bulk actions, consistent with the other engines. Multi-select the findings you wish to act on, then click the Actions button located above the top-right corner of the table and choose Suppress or Mark as In Review. For suppression, select a reason and confirm; the dialog indicates how many findings you are updating.
Export the IaC findings view
You can export the current IaC findings view to a CSV file for offline analysis or reporting. The export respects the filters and sort order currently applied to the findings table.
-
Apply any filters you want reflected in the export.
-
Click Export (or the export icon) above the findings table.
-
Save the generated CSV file.