.svg)
Overview
Users can review the organization’s scans in the Scans view, available via the top navigation bar:

Note:
-
Users only see scans associated with applications/projects they are authorized to access.
-
The Scans view is also available within an application/project under General → Scans.
Filtering
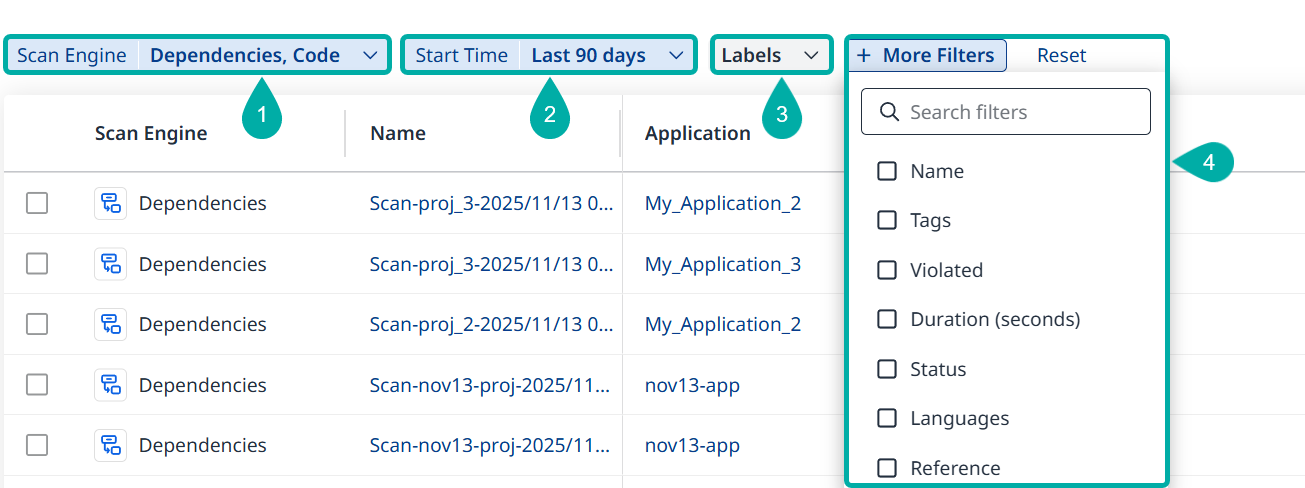
The Scans view allows you to filter the organization’s scans based on the following criteria:
-
Scan Engine (Dependencies, Code, Container, AI, etc.)
-
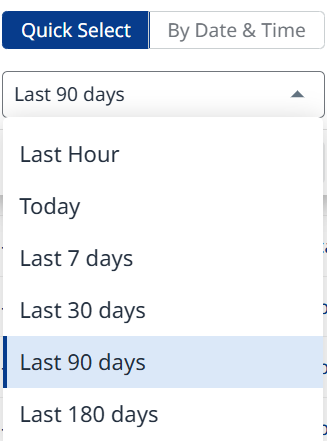
Start Time (when the scan was executed).
-
Use Quick Select to choose a preset (Last Hour, Today, Last 7 days, Last 30 days, etc.)
-
Use By Date & Time to specify a range of dates for the scans (up to 180 days).
-
-
Labels - If you have preexisting labels in your org, use them here to filter the scans accordingly.
-
More Filters:
-
Name - Filter scans by their name.
-
Tags - Filter scans by the tags associated with them, if applicable.
-
Triggered By - Filter scans by the user who initiated them.
-
Violated - Filter scans by whether or not they violated a workflow (Yes/No).
-
Duration (seconds) - Filter scans by their duration. Input in seconds. Results are displayed in the Duration column as “HH:MM:SS”.
-
Status - Filter scans by scan status (Running / Partial / Finished / Failed).
-
Agent - Filter scans by the engine version used to perform them, e.g., “25.12.2”.
-
Languages - Filter scans by programming languages detected in them, e.g., “Java”.
-
Reference - Filter scans according to the reference updated by the user, if applicable.
-
Sorting
Use the Start Time column to sort the filtered results in an ascending/descending order.
The Scans Table
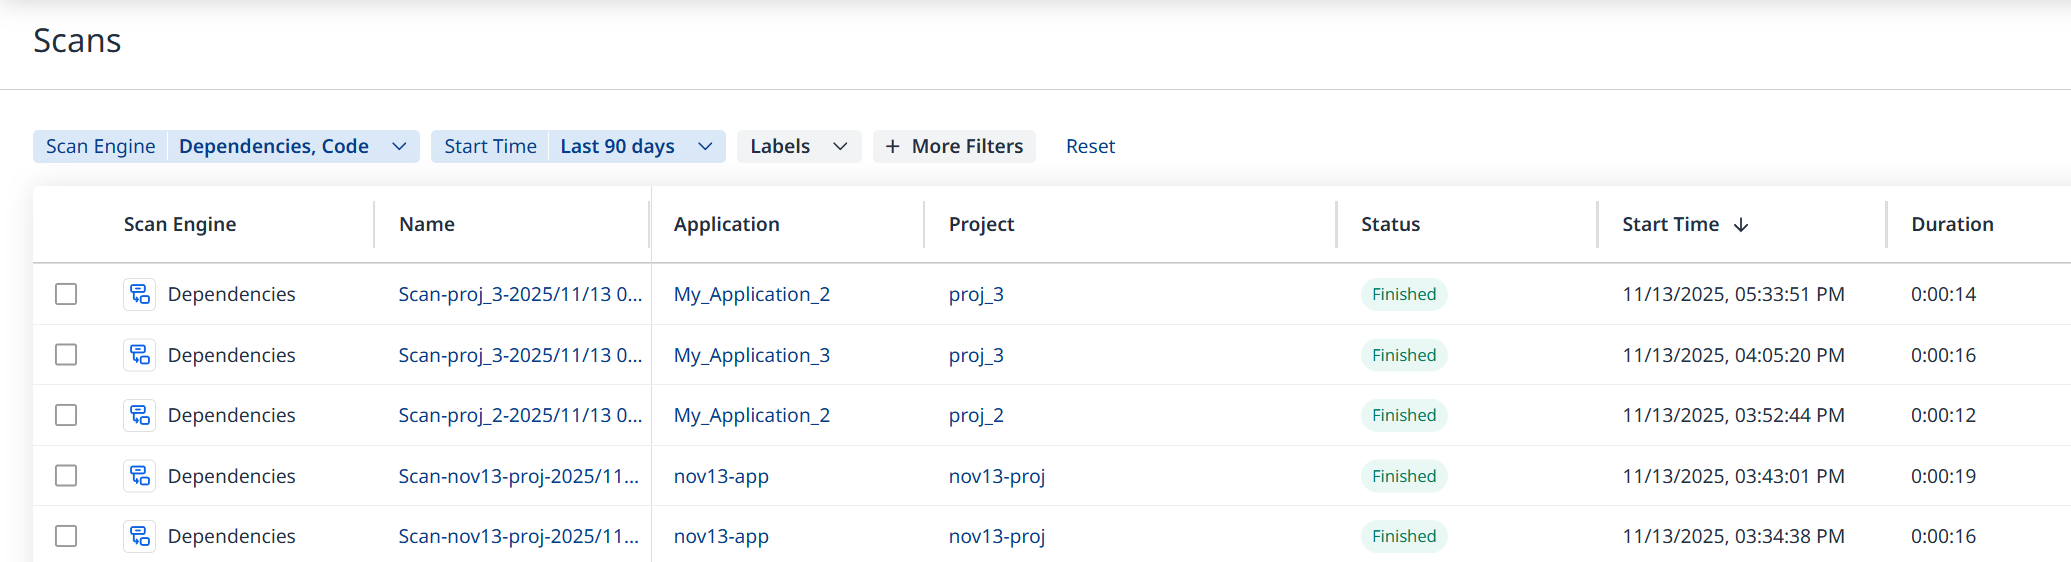
The Scans table will display the filtered results, with information about each scan.
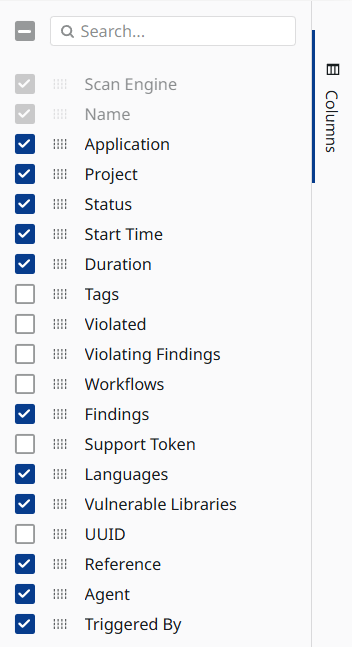
Use the Columns drawer on the right to add/remove columns based on your needs.
Limitations
-
The Scans view cannot currently be exported.
-
Results cannot be sorted by any column other than Start Time.
Scan Comparison
Within the Scans table you have the option to compare the results of two scans.
Step A – Scan Selection
Users can select scans to compare either by clicking a checkbox in the table or by clicking the kebab menu on a row and selecting “Select to Compare”. When two scans are selected, a drawer will pop up at the bottom of the screen, displaying the selected scans. Click Compare to compare them.
If only one scan is selected, users can compare it to the latest scan/project.
Note that scans must be of the same engine to be compared (AI<->AI, Code<->Code, etc.).

Step B – Results
-
When one scan is selected, the selected scan will be used as the comparison, and the latest scan/project will serve as the baseline.
-
When two scans are selected, the first scan selected will be the baseline, and the second will be the comparison.
-
Click the Swap Comparison Direction (

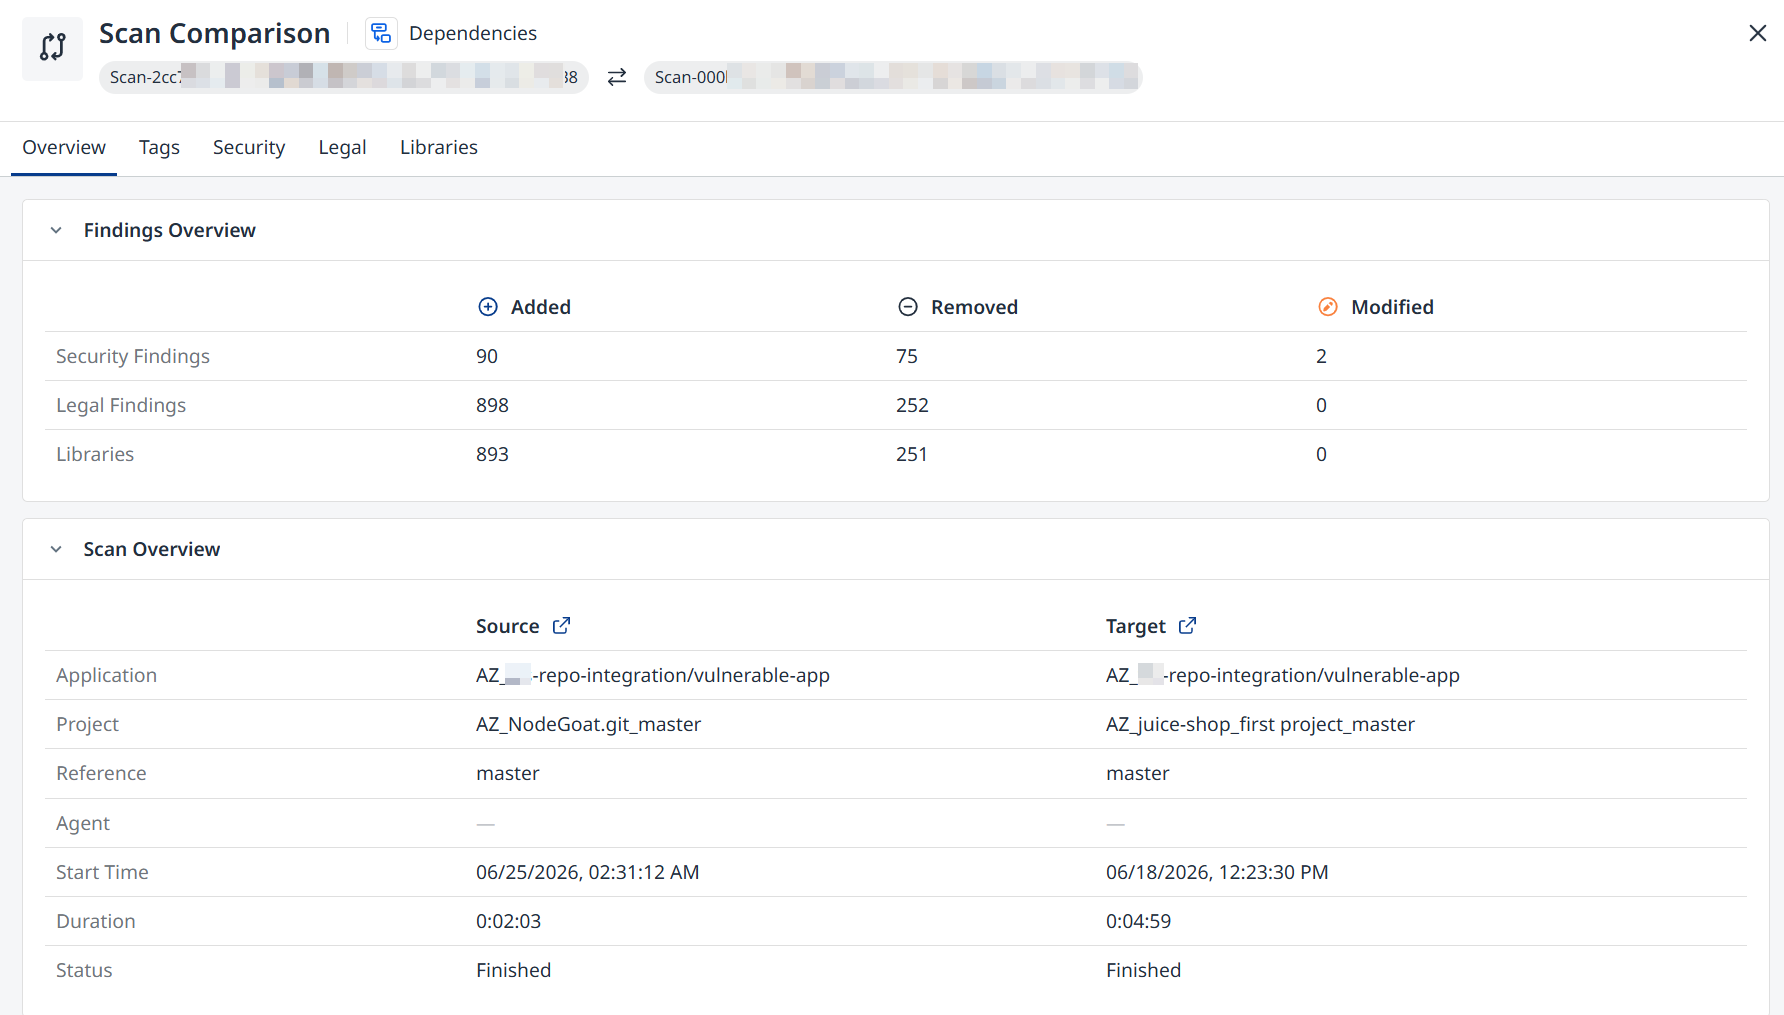
Comparison results will be arranged by the following tabs:
-
Overview(default tab) -
Tags -
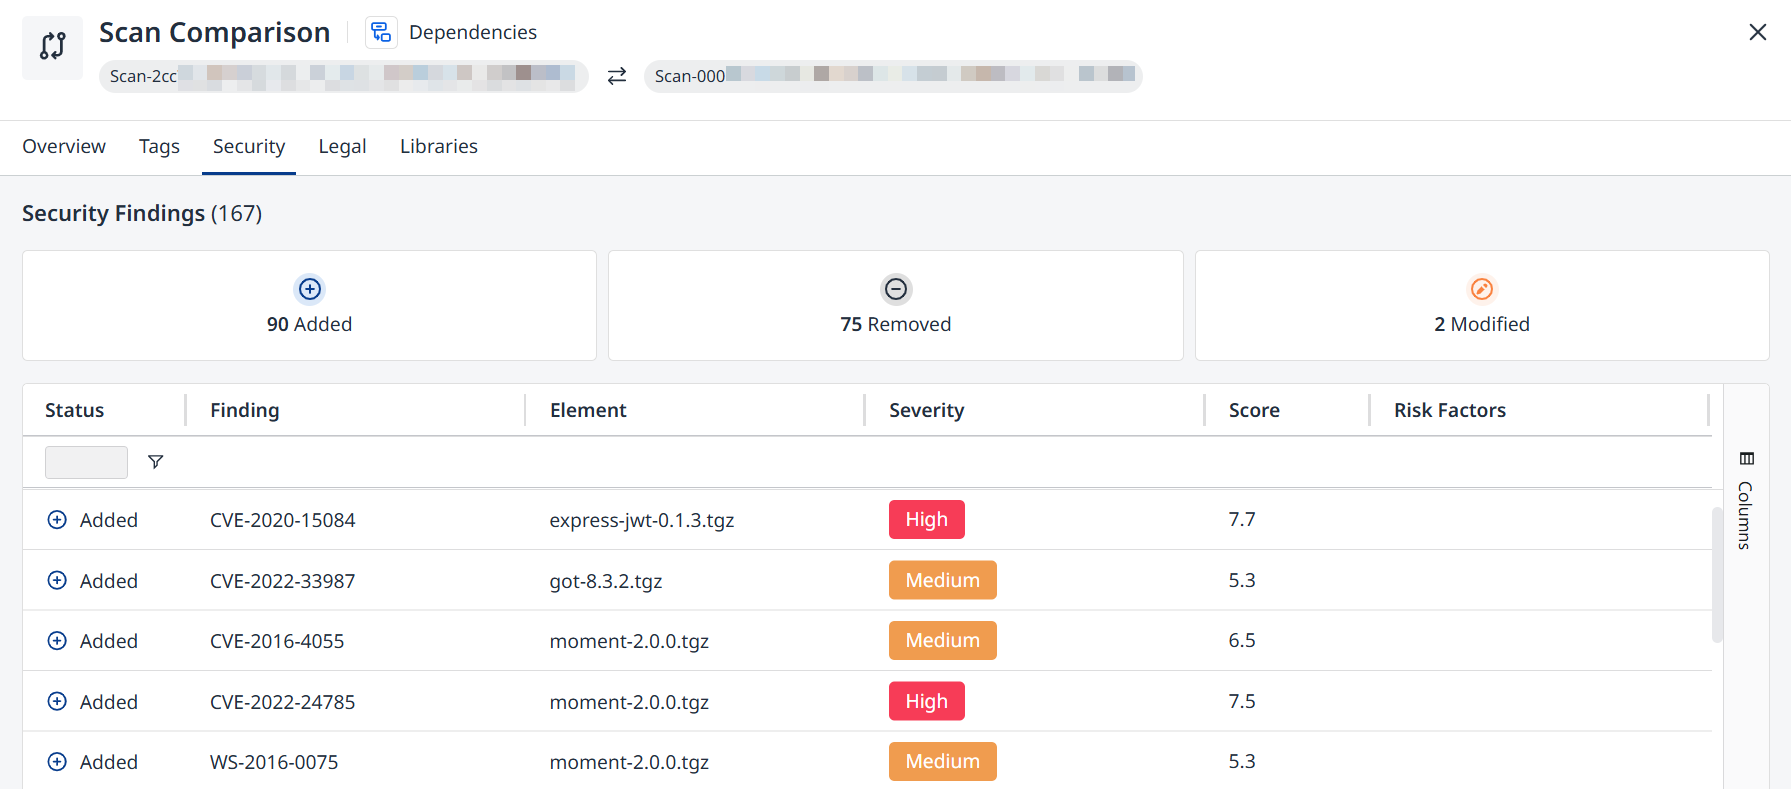
Security -
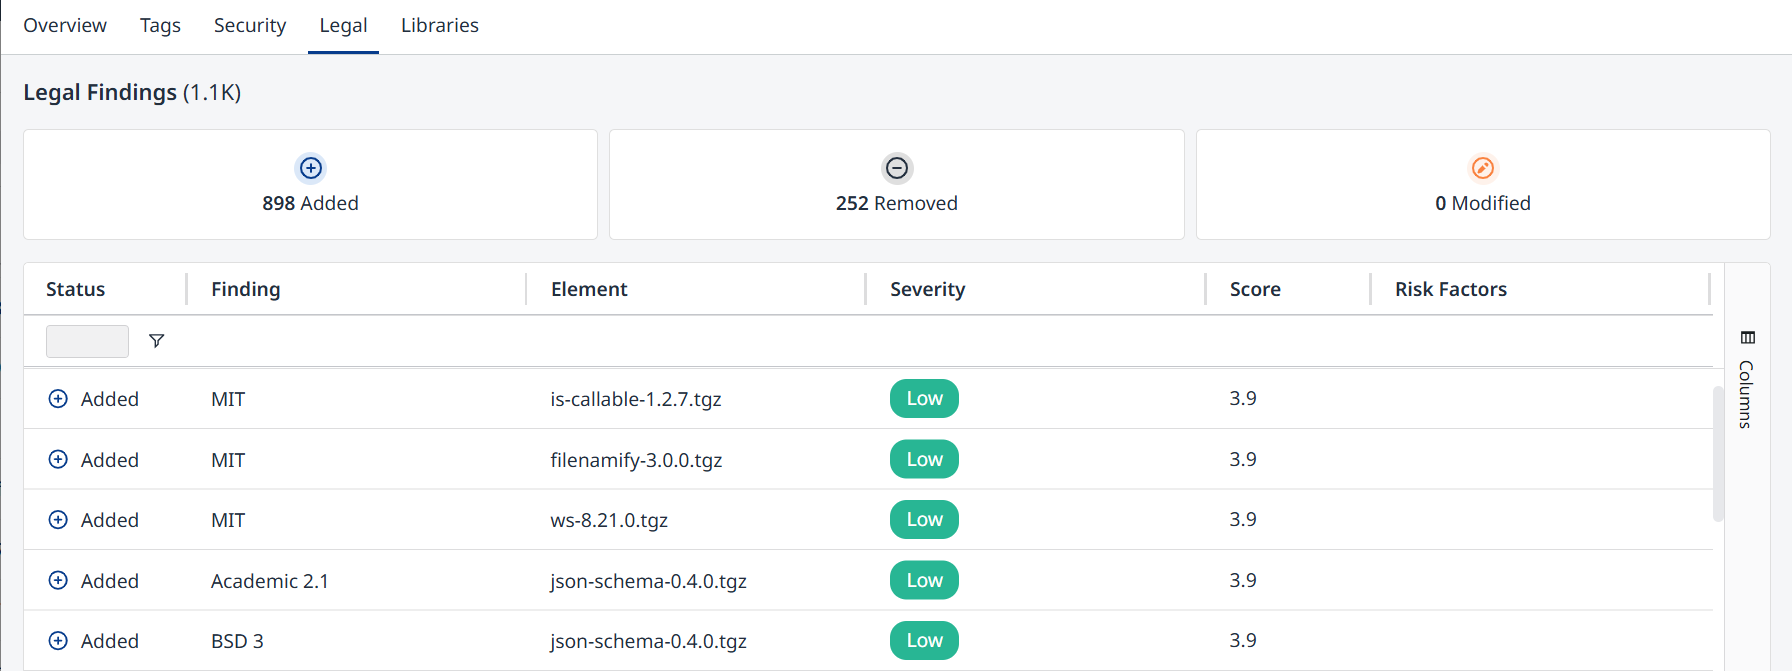
Legal -
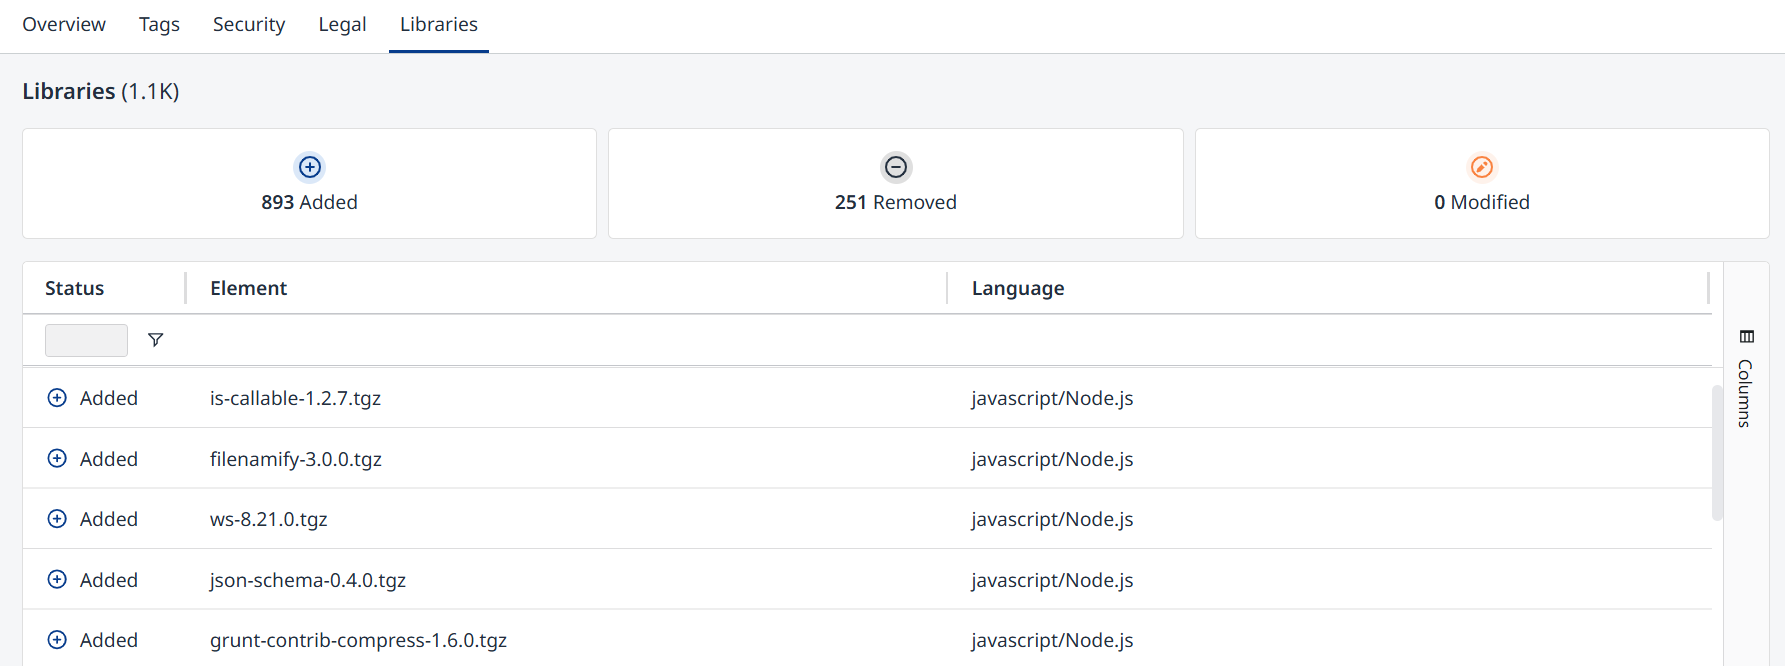
Libraries
Overview
-
Findings Overview table
-
Scan Metadata Overview
Tags

Security
Legal
Libraries
Comparison Logic
-
Comparison is based on a strict unique identifier per finding (defined by engine/organization).
-
Only same types are compared (e.g., CVE ↔ CVE, Secrets ↔ Secrets).
-
If a field exists in one scan only, it will be excluded from the comparison.
-
“Added”: Findings that appear in the comparison (target) scan but not in the baseline (source) scan, based on the unique identifier.
-
“Modified”: Findings present in both scans (same unique identifier) where one or more fields changed.
-
Empty vs. populated values are treated as Modified.
-
-
A scan is a different object in the system than project. It is a snapshot of a project. This means, among other things, that the latest scan is not necessarily the current state of the project, as the project can have additional layers of information such as suppressed findings and new findings added to the Mend.io database post-scan. Those will not be reflected in the scan object.
-
By extension, you can compare scans of different projects.
-
The Scans API
The Scans API provides a programmatic way to retrieve organization-level scan metadata, identical to the metadata available in the UI.
The Scan Comparison API accepts two scan IDs as input and returns the comparison result in structured JSON format.