Review the Container Image Scan Findings within your Organization
Overview
As Security Champion or AppSec manager, you will be reviewing the top Applications and Projects with critical and high-severity container image security findings. You will want to drill down into them to review their summaries and findings, including their information and suggested remediations.
Security Updates Cadence
The most recent container Image scan in each project will receive security updates every six hours in an asynchronous manner, without requiring a new scan, resulting in potentially new/updated findings.
CVE updates include: Details, CVSS Score, Severity, CVSS Vector and Vulnerability Fix.
Policy violations will be updated according to the new finding results.
Vulnerabilities that were updated, as well as newly added vulnerabilities, will be marked in the Mend AppSec Platform UI and have their last update date updated, accordingly.
This cadence of security updates increases Security Managers' confidence in the security information provided by the Mend AppSec Platform, both during day-to-day and zero-day scenarios, knowing the container images' security findings are up-to-date. It also significantly reduces overhead by not requiring new scans for updated container image findings.
Getting it done
Review the top Application with the highest severity Container Image Security Findings
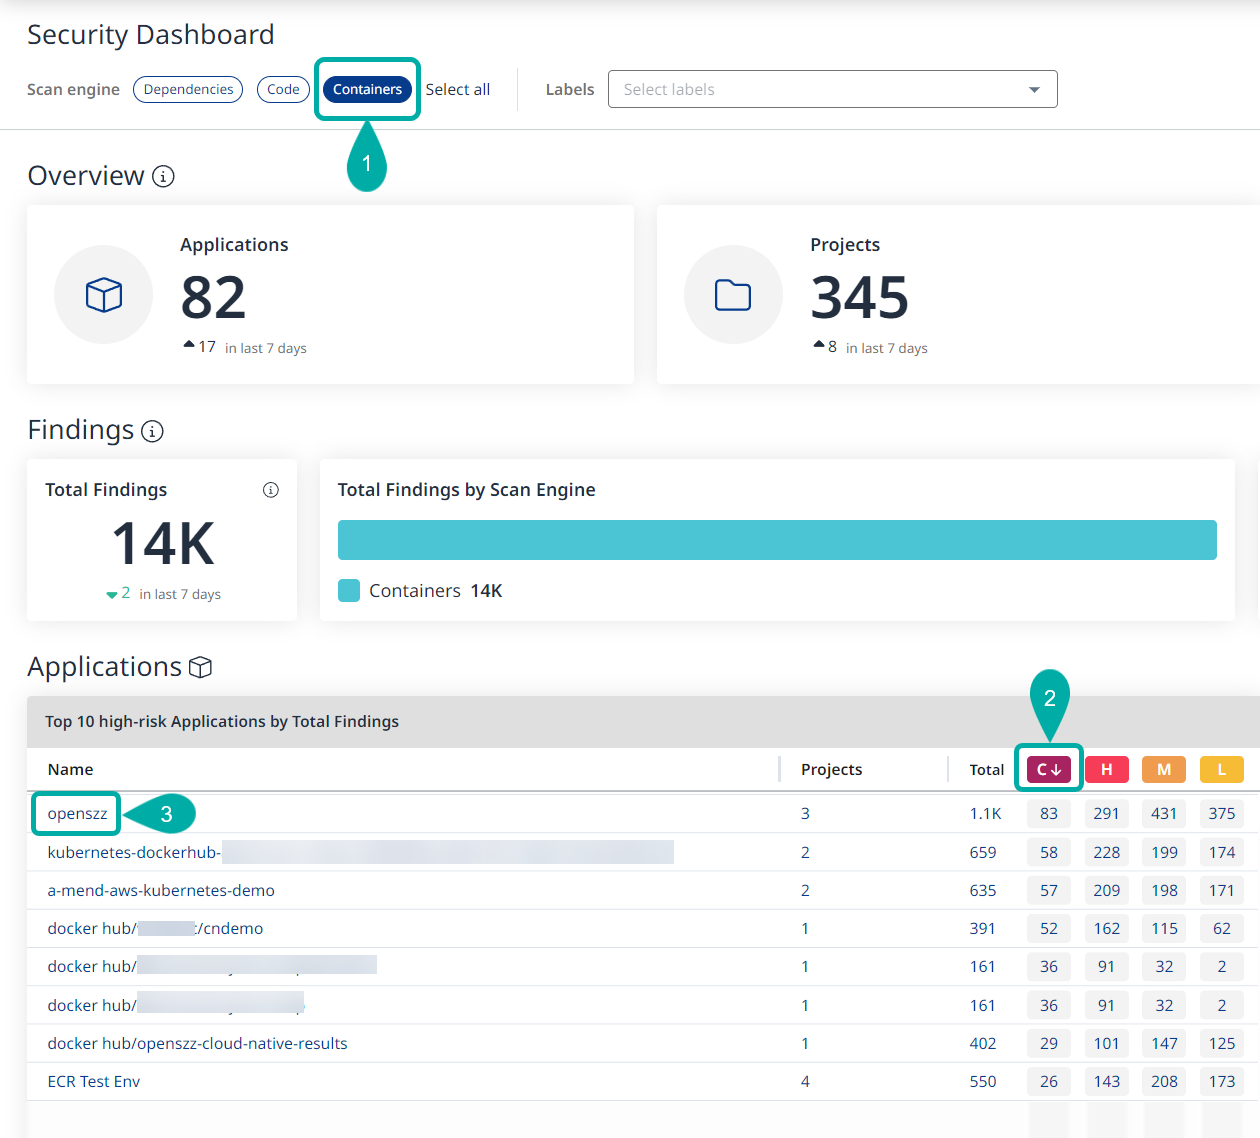
Beginning on the Mend Application Security Dashboard, ensure only the Containers engine is enabled.
Click the Dependencies and/or Code scan engines to disable them if they aren’t already.
By default, the Applications widget showing the Top 10 high-risk Applications by Total Findings is ranked by the total number of findings.
Click the “C” in the box on the Applications widget to rank by most critical severity findings.
If multiple applications are tied for the selected ranking order, they will be listed alphabetically.
Click the Application that has been sorted to the top with the most critical-risk findings. You will be redirected to that application's summary page.
The Application Summary screen contains some vulnerability-related information about your application, including the overall number of vulnerabilities distributed by severity as well as secrets:
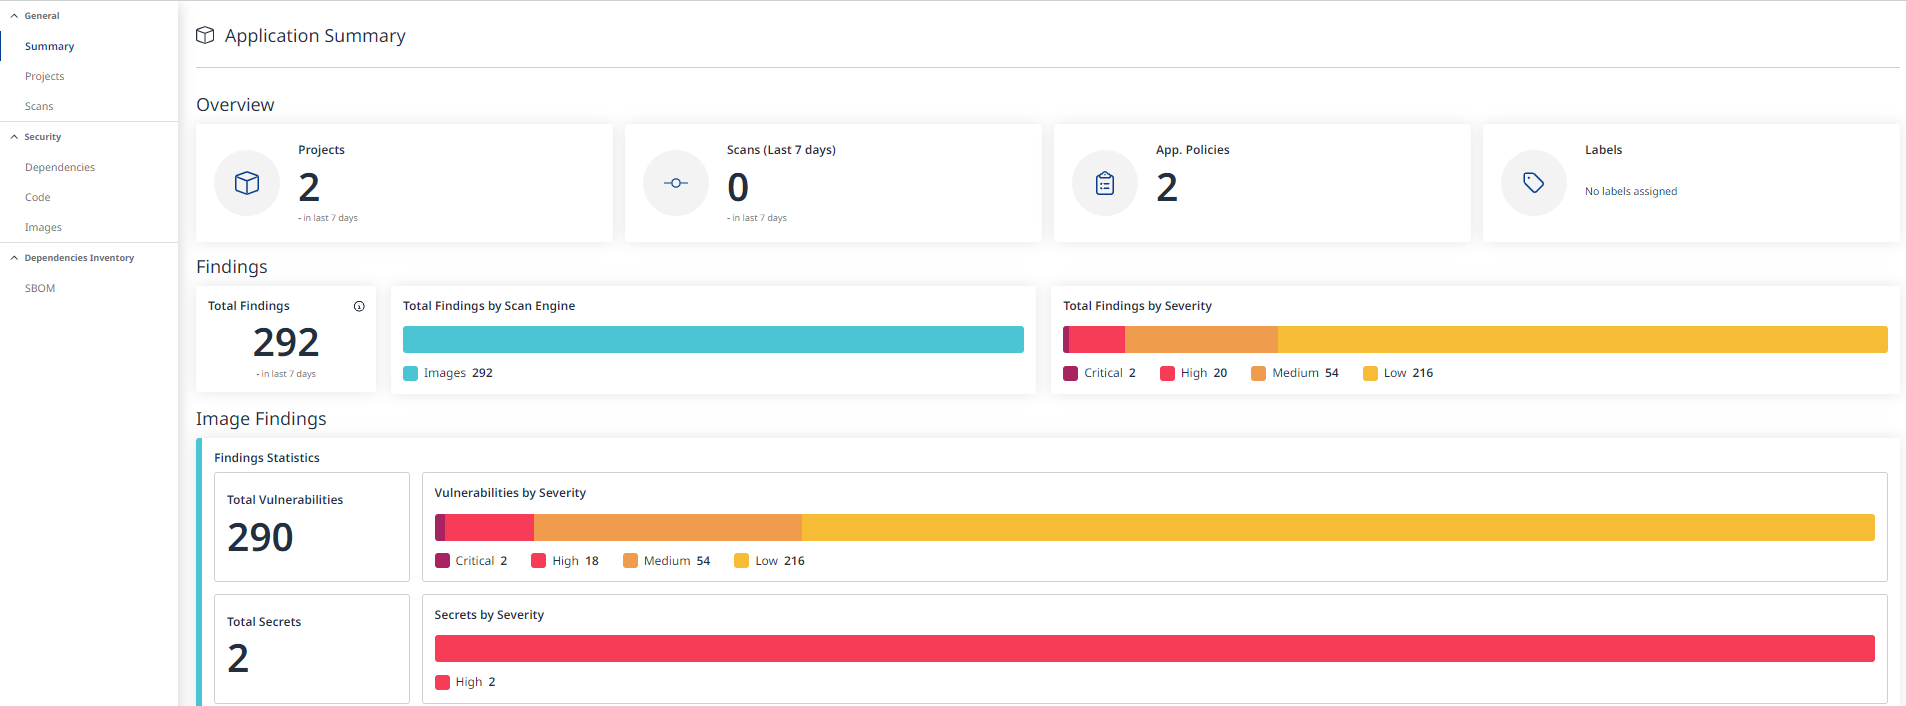
Click Projects in the left pane or click the Projects widget in the Overview section to view the Projects associated with the Application.
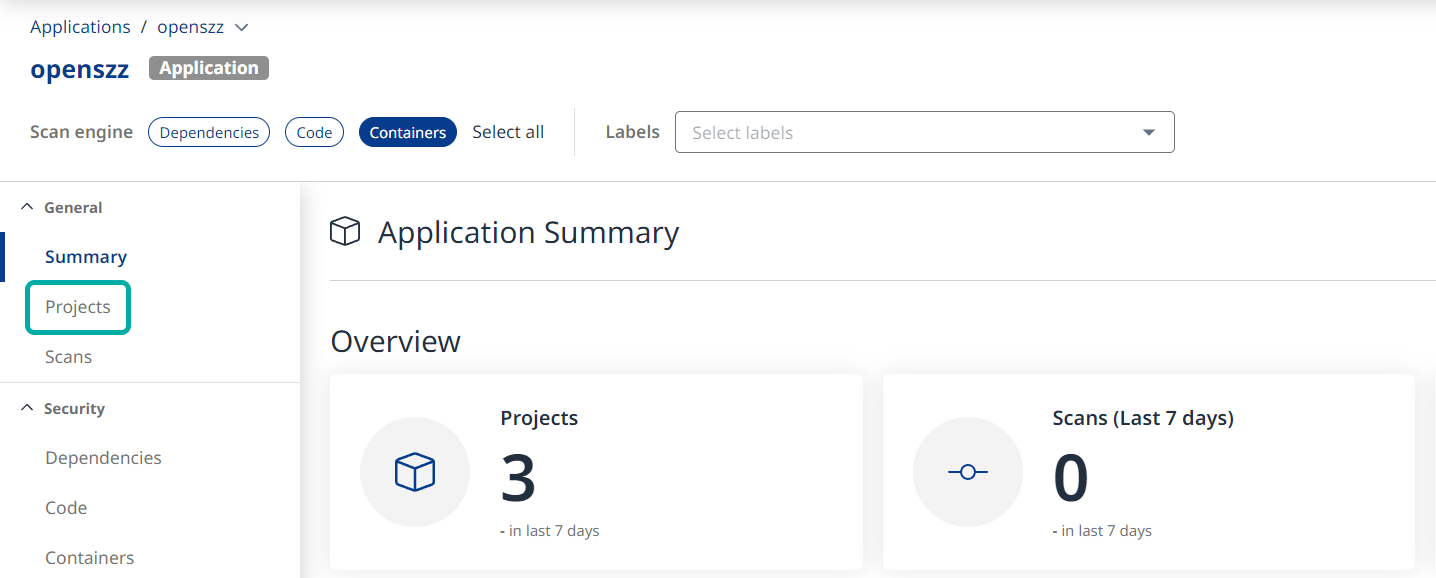
Review the top Project within the Application with highest severity Security Findings
Click the “C” in the red box on the Projects table to rank by most critical-severity findings.
Click the Project that has been sorted to the top with the most high-risk findings. You will be redirected to that project's summary page.

Click Containers in the left pane to view the latest container image findings associated with the Project (1). By default, the findings will be sorted by Severity (2), but we encourage you to add filters (3), to sort the findings in a manner that suits your needs.

Note: More information about The Findings Table is available here.
Filtering & Sorting options
While hovering with the mouse cursor over a column name, an options icon (3 lines) will appear:
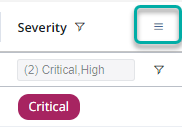
Clicking on it will reveal a menu that will enable you to change the settings of that particular column.
Severity
On the Severity column menu, you can select the severity levels you wish to include in the findings table:
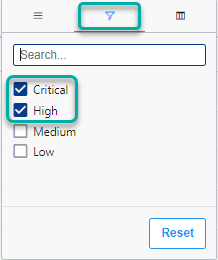
Fix Availability
Click the Fix Version column's options icon to filter by ‘Has Fix’ or ‘No Fix’:
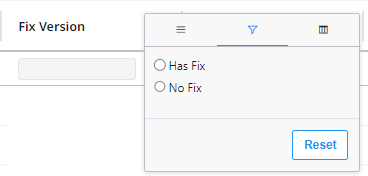
EPSS Score
Click the EPSS Score column's options icon to filter by Exploitability Probability in the next 30 days*:
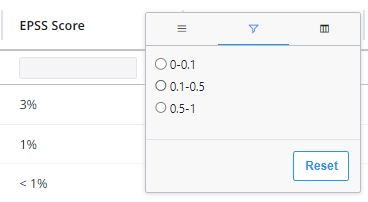
* The probability is displayed in decimal fractions in the filter while in the findings table, it is displayed in percentages.
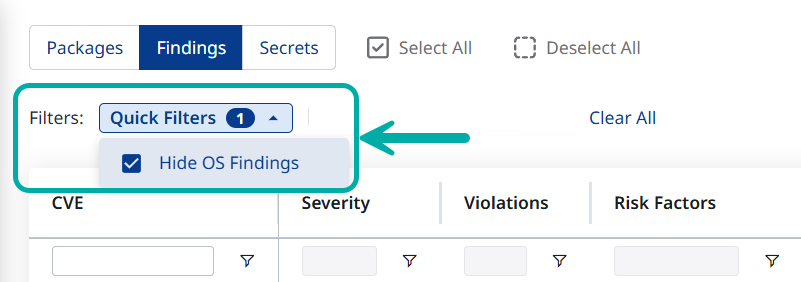
Hide OS Findings
This filter is available at the application and project levels, under the Findings tab.
Checking this option will exclude operating-system findings from the findings table. This option is useful if you don’t update base-image packages:
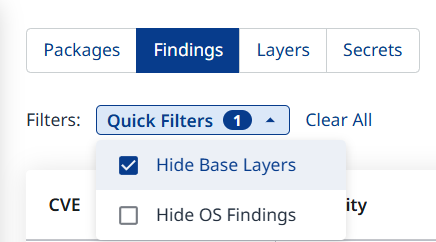
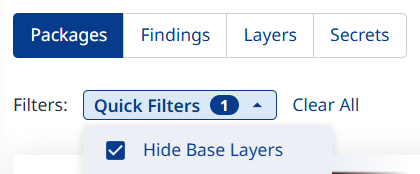
Hide Base Layers
This filter is available at the project level, under both the Packages and Findings tabs.
Checking this option will hide base-image findings identified as such by Mend Container:
View by layer
Note: The Layers tab is available at the Project level.
Typically when it comes to container images, multiple layers might contain vulnerabilities. For accurate navigation within your Image scan results, navigate to Layers tab:

In the Layers tab, the findings will be arranged according to Base or Application, denoting their image/layer of origin:

Read the section below for more information about Base-image findings.
Identifying and Filtering Base Images
You may want to distinguish between base-image findings and findings identified in the application.
Such a distinction may be important for Security teams, for properly managing base images and reducing the noise for application teams.
During the container-image scan, Mend Container will detect the base image of the scanned image.
Note: The base image (uniquely identified by its SHA-256 value) must be scanned to the organization first, separately, as a prerequisite for its identification as the base image in other container-image scans. That initial scan should be executed like any image scan, no extra configuration is required.
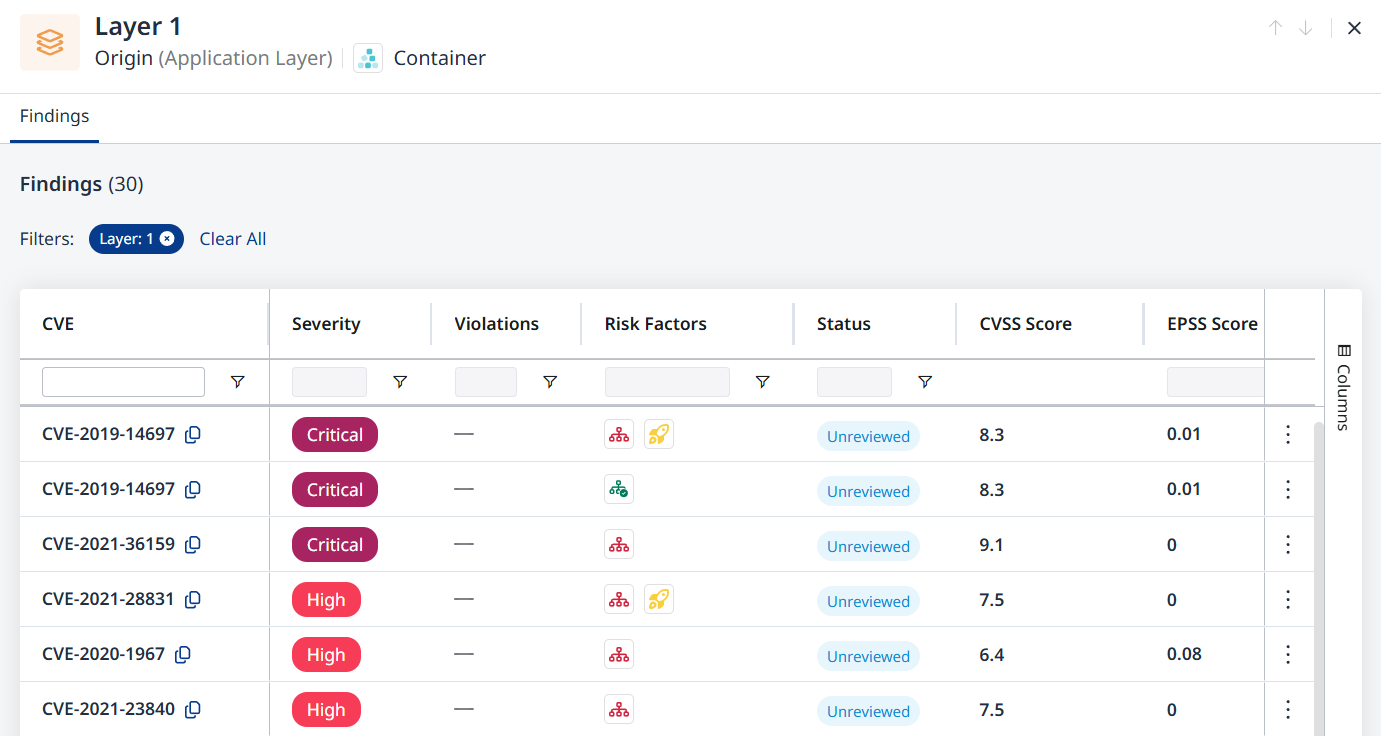
To view the findings Base/Application image, navigate to the Layers tab:

This will arrange the findings according to Base or Application, denoting their layer of origin:
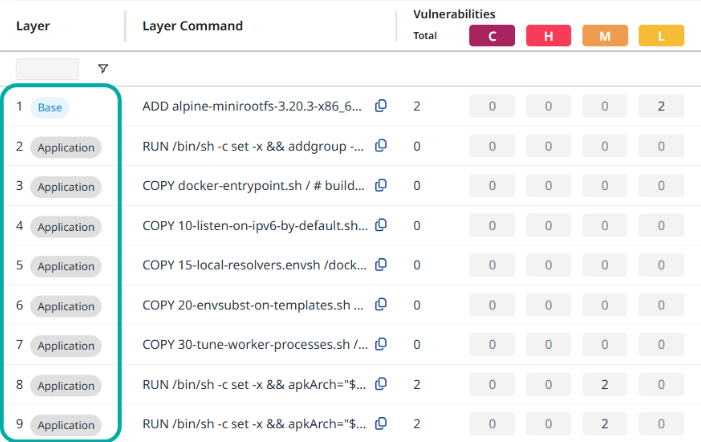
At this stage, click the value in the Layer column (e.g., “Application”) to review the selected layer’s findings:
Exporting the data
After you’ve filtered and sorted the findings, you can export them to CSV by clicking the Export to CSV button at the right edge of the screen:

Secrets
Secrets are any kind of sensitive or private data that permits authorized users to access your IT infrastructure. These include keys and credentials such as SSH keys and certificates, TLS keys, encryption keys, API keys, database credentials, and more.
Secrets should be kept strictly private as attackers can easily find and use them to access and control the assets they are meant to protect. Developers may leave hard-coded secrets in container images, especially during rapid development and deployment cycles, thereby putting your organization and infrastructure at risk.
Secrets detected during your Container Image scan will be displayed in a separate tab from the rest of the findings:

Packages
The Project scope will always show the latest image scan for the selected project.
Within the Project, click on the Packages tab to see a full package inventory of all detected packages in the image, their type, package version, compliance status, number of vulnerabilities by severity, and layer indication:

The Packages table groups the vulnerabilities by the packages they were detected in.
Any package in the table is displayed in a separate line, that can be clicked, to display the Package Details pane on the right and, among other things, review the package licenses:

You can hide packages originating from the base-image by checking the Hide Base Layers option:
Package Licenses
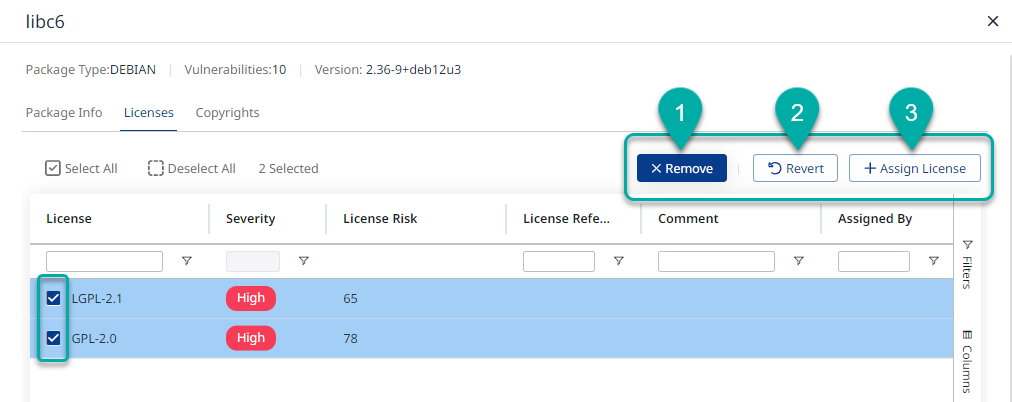
The Licenses screen allows you to perform 3 main actions:
Remove licenses (can be performed in bulk).
Revert manually performed license changes (can be performed in bulk).
Assign new licenses.
Note: License modifications will be saved between scans.
Deleted licenses will no longer appear, and any added custom licenses will be displayed.
The License Side Panel
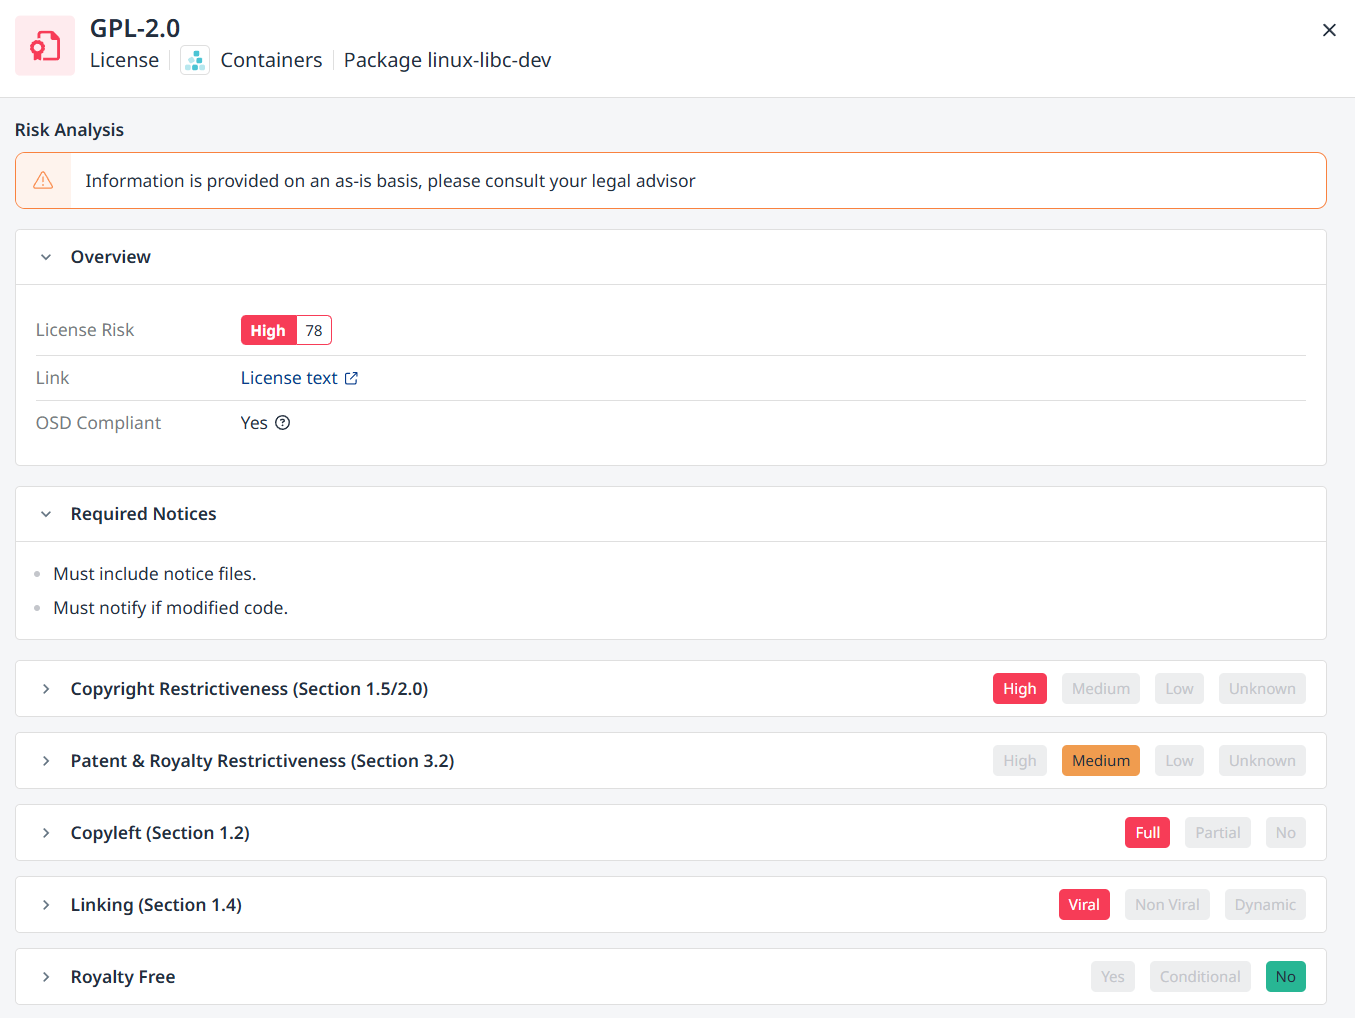
Clicking a license will spawn a side panel, containing general information about the license compliance data and sources.
Example:
Package Copyrights
Note: Copyrights for Linux packages are not supported.
Similarly to the Licenses screen, the Copyrights screen allows you to perform 3 main actions:
Remove copyrights (can be performed in bulk).
Revert manually performed copyright changes (can be performed in bulk).
Assign new copyrights.

Assign a new Copyright
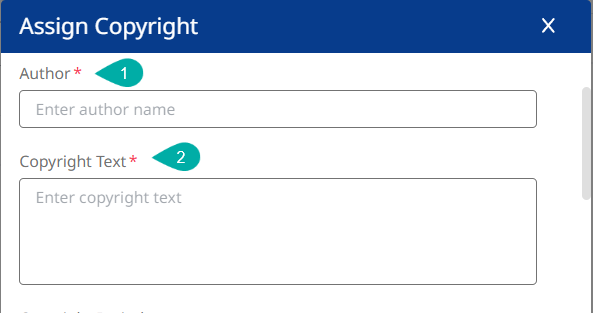
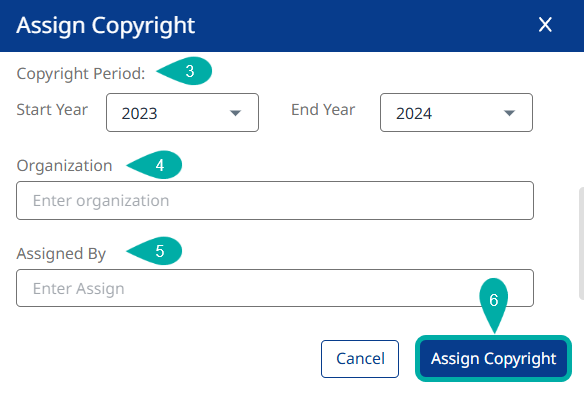
To assign a new copyright, fill in the fields below in the Assign Copyright wizard:
Author (mandatory)
Copyright Text (mandatory)
Copyright Period (optional)
Organization (optional)
Assigned By (optional)
Click the Assign Copyright button when you are done.
