Triage your Code Security Findings
Overview
As a Security Champion or AppSec manager, Mend.io helps you triage the Mend SAST findings more efficiently.
This article will explain how to investigate code findings, deal with false positives, and communicate findings that need to be fixed to developers.
Getting it done
Prerequisites
Access to the Mend Platform with Code entitlement (SAST) is required to browse the Findings details.
To use the feature, at least one Code scan must be performed, either via CLI/Pipeline or through the repo.
Triaging your Code Findings
Before triaging your Code findings, it is recommended that you spend a few moments grouping and sorting them using a variety of filters. When you are satisfied with how the findings are displayed in the findings table, read on to start triaging.
Part 1 - Analysis
This section will help you obtain information about your finding, so you can determine its level of relevance.
To analyze a code finding, click a row of a finding in the findings table, to show the details of that finding on the right side of the screen. This area on the right will be referred to as the Finding Details pane.
The CWE number and name will be displayed at the top of the finding details pane.

To easily navigate through the findings, the Finding Details pane contains 3 tabs: Overview, CWE Description, and Comments. Each tab contains information/actions that allow you to triage the finding as intuitively as possible, as explained below.
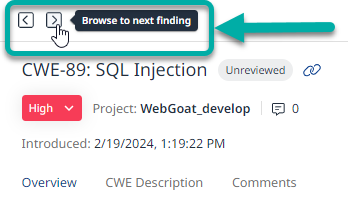
Note: You can easily jump to the next/previous finding, by using the arrow buttons at the very top of the finding details pane:
Overview
The finding details pane defaults to the Overview tab.
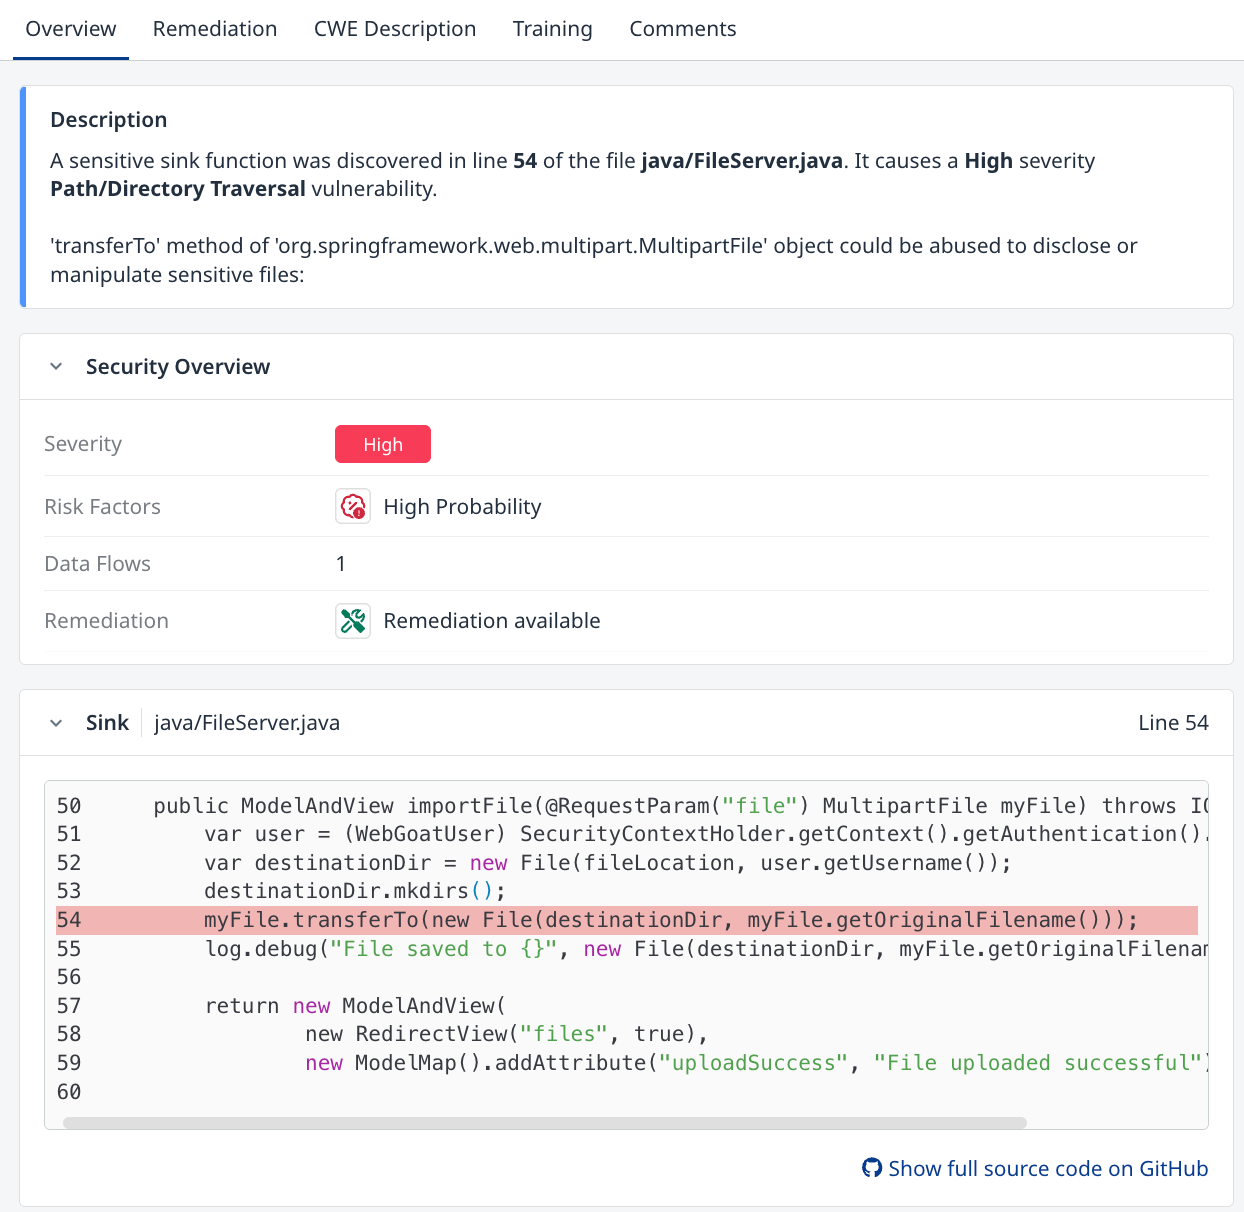
The Description section of the Overview tab briefly describes the finding and provides the path to the vulnerable file within the Project, the line number for the affected line of code within the file, and a snippet of the code with the affected line highlighted. At the bottom of the code snippet, there’s a button that contains a link to view the entire source code of the affected file in its repository of origin (GitHub, BitBucket, GitLab, or Azure DevOps), provided that the repository information is available at the time of the scan’s execution. This requirement can be met by locally cloning a repo or by running a scan, be it via a repository integration or via a pipeline scan using the CLI.
Risk Factors
Risk Factors in Mend SAST help you prioritize security findings by highlighting key indicators that make a vulnerability more critical or urgent to fix. Each finding may include one or more risk factors based on confidence level, data flow characteristics, and known exploitation patterns.
By default, Mend SAST focuses on high-confidence findings to reduce noise and ensure developers receive actionable issues without the need for prior triage. If needed, you can adjust the scan configuration to broaden detection and include lower-confidence findings, which may result in a more comprehensive but noisier report.
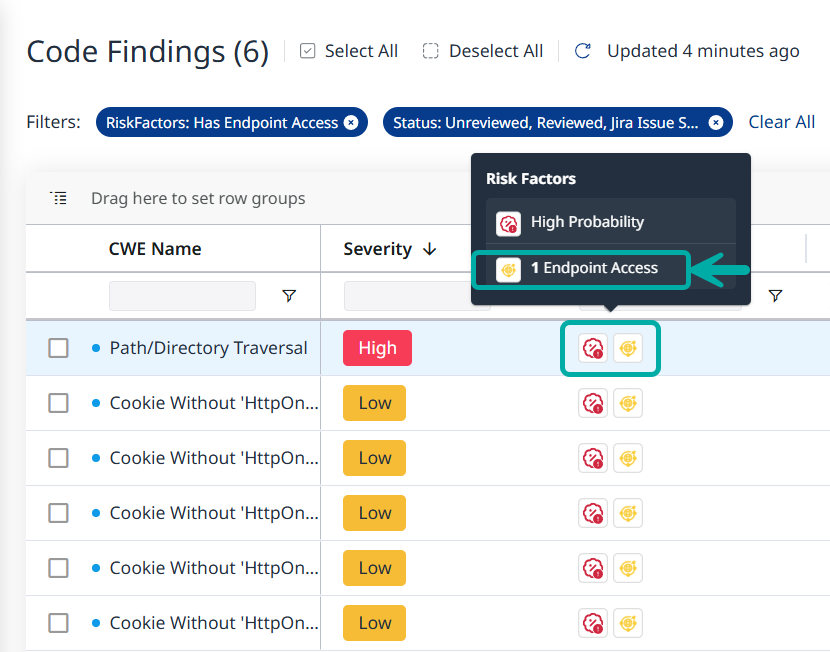
When a finding is accessible via an API endpoint or multiple endpoints, this will be denoted by a corresponding icon in the Risk Factors column (![]() ).
).
Hovering over the risk factors will spawn a tooltip which contains complementary information such as the number of API endpoints through which a finding is accessible:
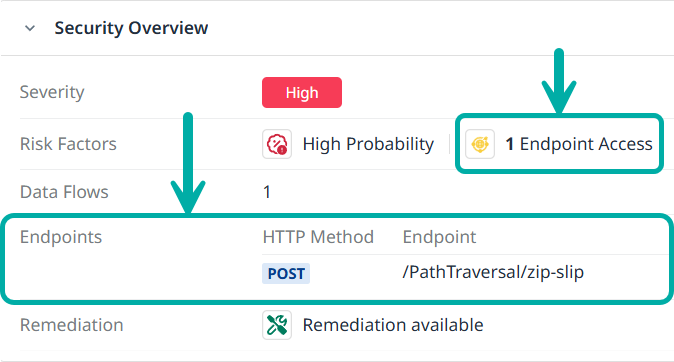
Clicking the risk factors will spawn the drawer which contains the information about the finding, including the API endpoints through which it is accessible under the Security Overview section:
Data Flows
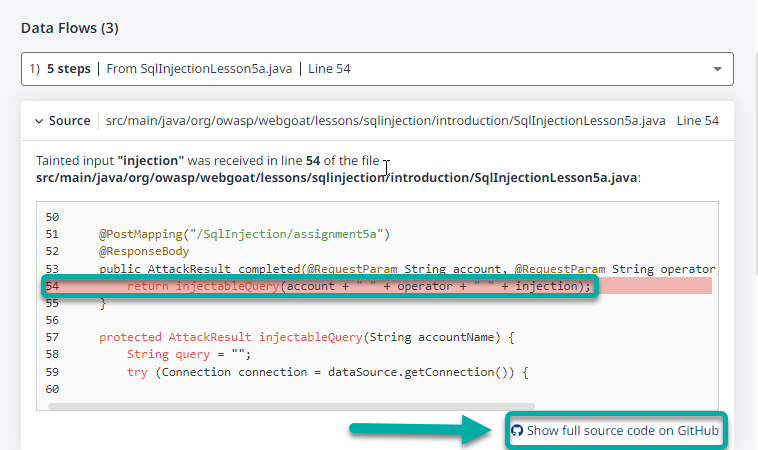
To minimize the noise level, the application consolidates findings by taint sink (the snippet at the top). All tainted data flows that reach this sink are combined into one finding.
These data flows are visible in the finding details pane. You can follow the flow of your tainted data from the different start locations through your system until it reaches the common sink.
Each item in the Data Flows section briefly describes the finding and provides the path to the affected file within the project, the line number for the affected line of code, and a snippet of the code with the affected line highlighted. The bottom of each item in the Data Flows section also has a link to view the entire source code of the affected file in its source of origin (e.g., GitHub).
CWE Description
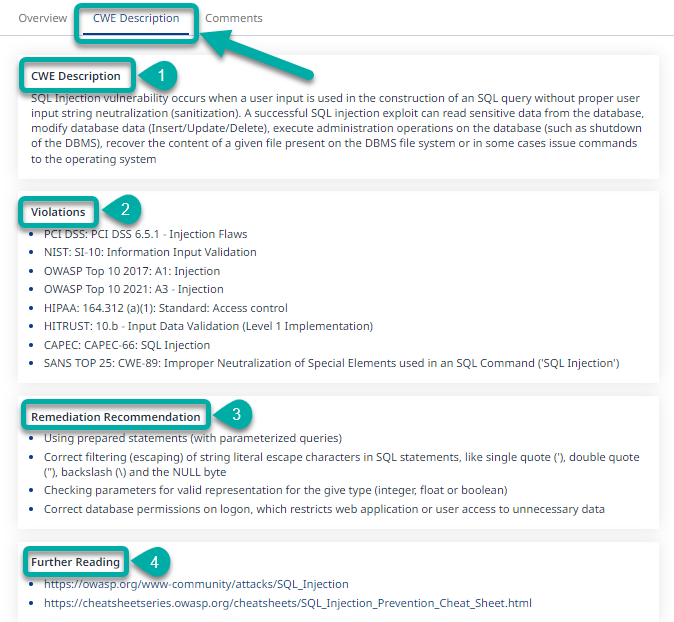
If you are unfamiliar with a certain CWE type and want to understand more about it, click the CWE Description tab. This tab contains the full description of the CWE in question. It also lists all the Compliance Standard Violations related to the CWE, lists the recommended ways to remediate the finding, and provides resources for further reading related to the type of CWE found.
Training
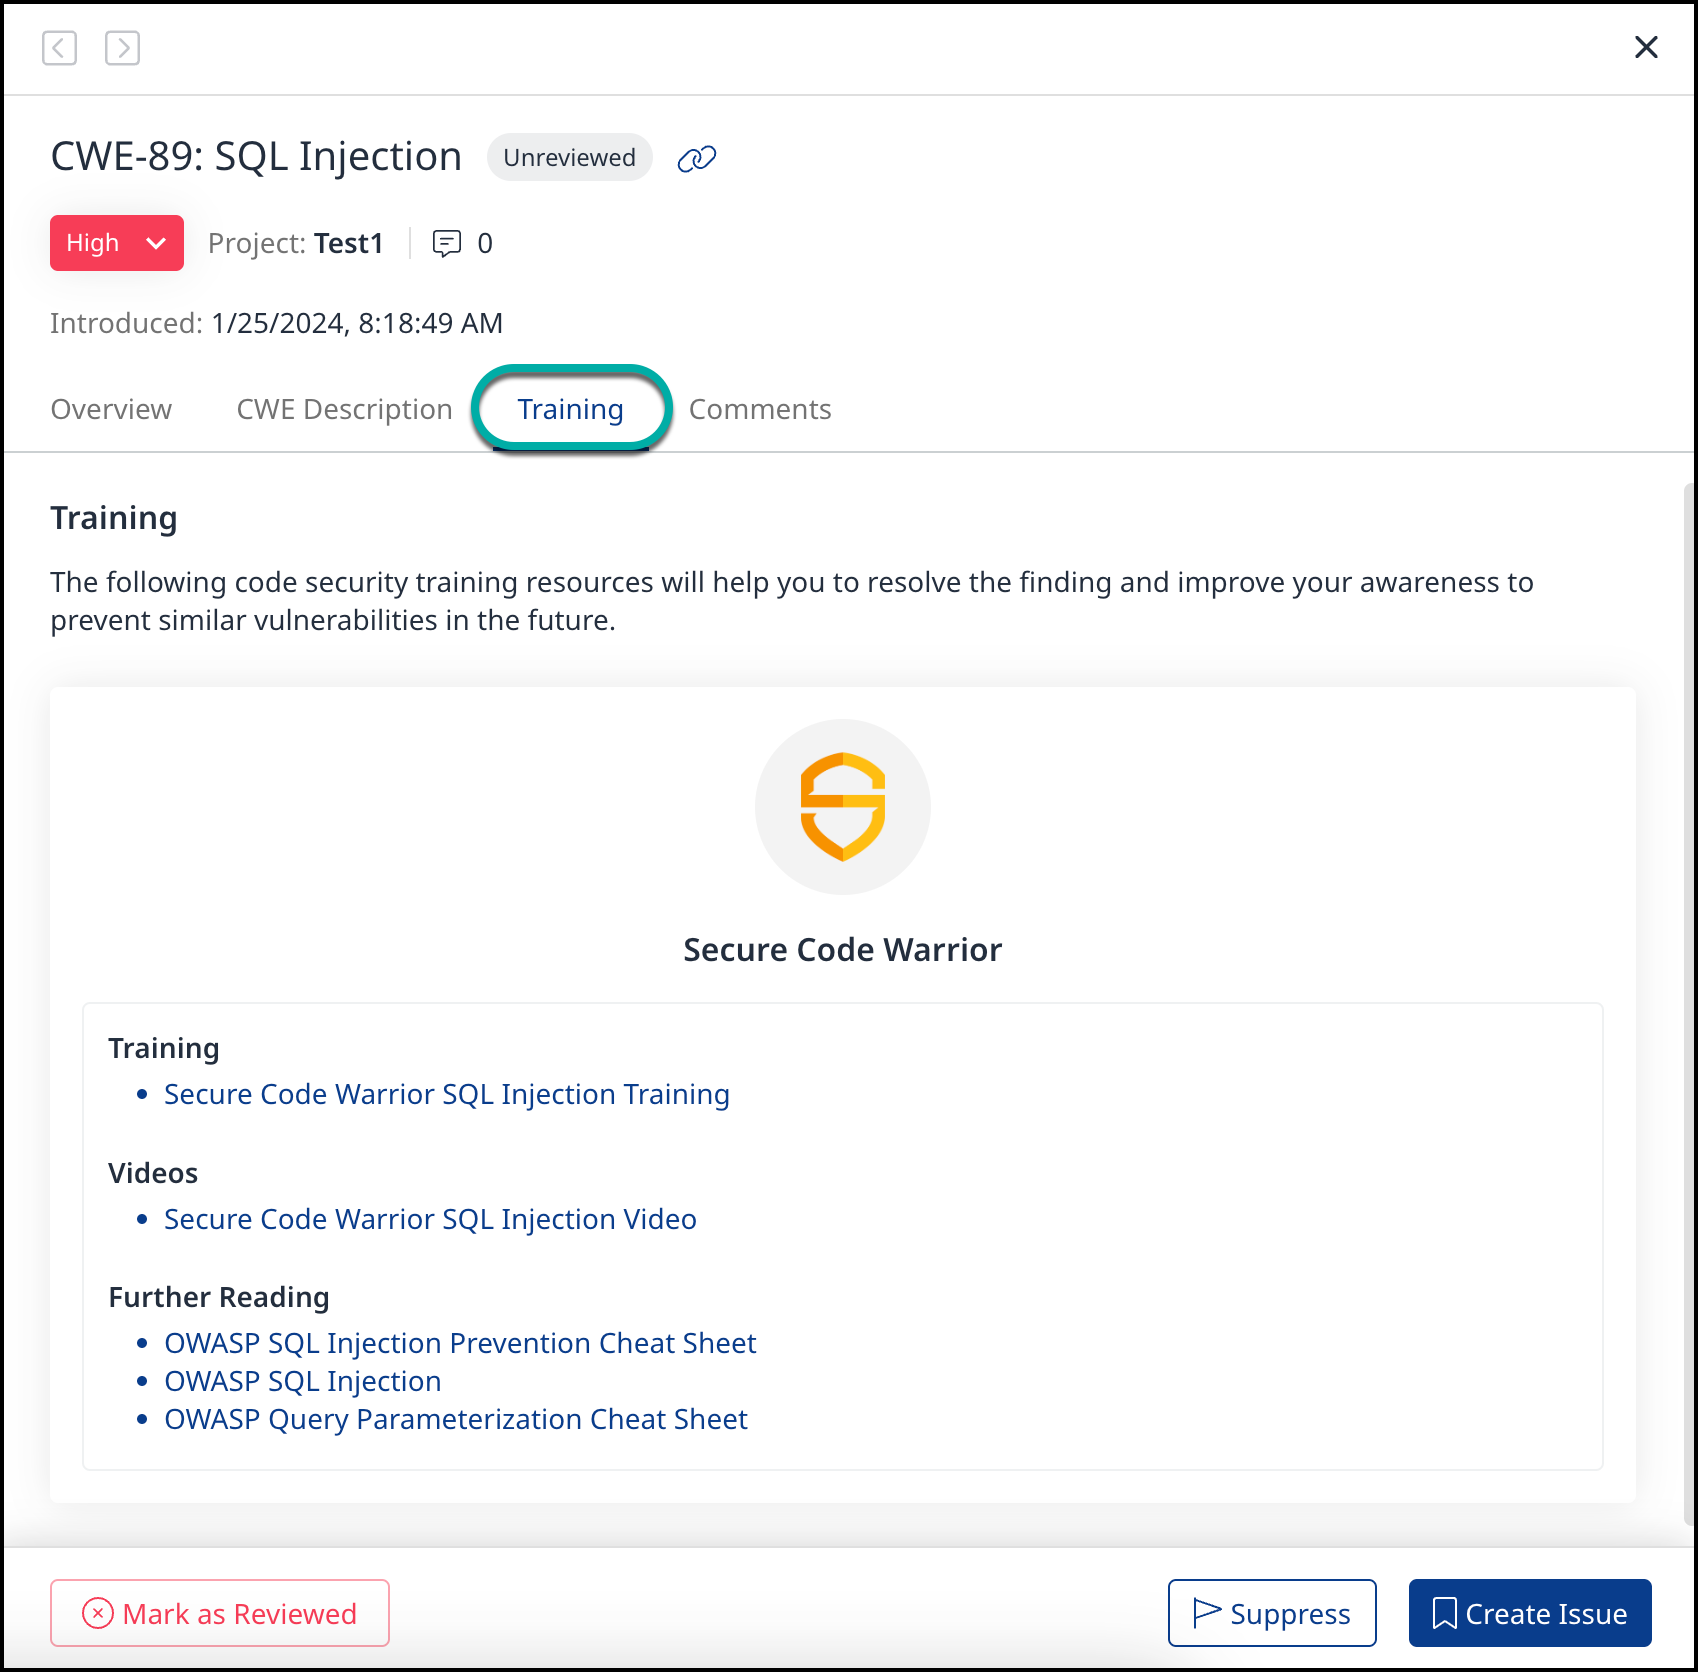
To read more about the Secure Code Warrior Training Materials, refer to our Get Training on Typical Vulnerabilities documentation.
The Training section is available for each finding to see context-based links to content for established training material provided by Secure Code Warrior. The links provide training resources directly for each finding within the Mend SAST scan. This will allow you to understand better and remediate vulnerabilities faster and increase awareness to prevent similar issues in the future.
In case either a whole language or a certain finding is not supported, you’ll get a message saying that no training material is available.
Part 2 - Action
This section will help you take action on each finding analyzed in Part 1, depending on its level of relevance. Possible actions include (but are not limited to) changing the severity, suppressing the finding (usually for findings regarded as false-positives), creating a Jira issue, sharing the finding with your developers, and more.
In the Finding Details panel, there are several actions you can perform:
True Positives
If a finding is deemed a true-positive, you have a variety of ways to deal with it, depending on its level of relevance.
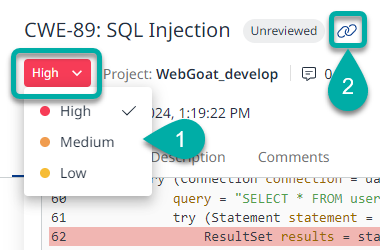
Change Severity: If you disagree with the severity assigned to the finding, you can change it by clicking it and selecting a different severity from the drop-down menu.
Share: You can share the finding hyperlink (deep link) with your developers, by clicking the pin icon at the top right corner of the finding details pane. Once clicked, the URL will be copied to your clipboard. This feature may also be useful for integrating into reports, tickets, etc.
The three action buttons pinned at the bottom of the finding details pane allow you to mark the finding as Reviewed or Unreviewed, Suppress or Unsuppress it, or create a Jira issue for it.
Mark as Reviewed: Finding classified as true positive, but no immediate action will be taken (maybe because there are other priorities).
Create Issue: Create a task for the developers.

Note: Creating Jira Issues from within the Mend Platform requires you to have Mend's Jira Integration installed and configured.
False Positives
Suppressing Findings
When a false-positive/acceptable risk is reported, the workflow is to suppress it. This action can be coupled with a suppression reason, for tracking and future reference.
To suppress a finding within the findings details pane, click the ‘Suppress’ button:
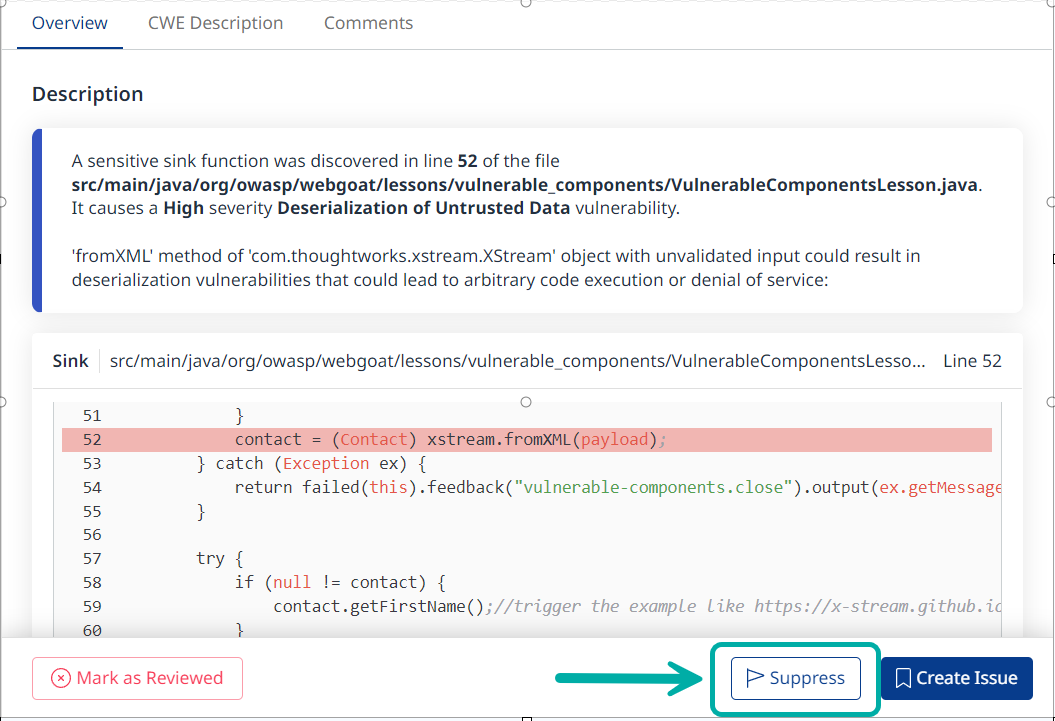
Note: The suppress action can also be performed in bulk from the findings table, as explained in the Bulk Actions section.
Next, select a Suppression reason and add a descriptive Comment (Optional). Once done, click ‘Suppress’:
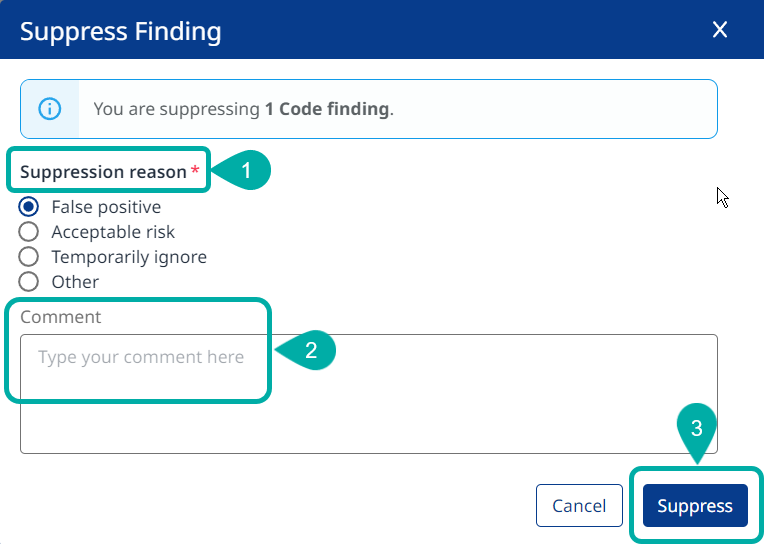
Once suppressed, a proper indication will pop up at the bottom-left corner of the screen:

Note: This action can be reverted, by clicking ‘Unsuppress’ on a suppressed finding:

The unsuppressed option is handy for instance when you discover that a finding was suppressed accidentally, or if down the line there’s some uncertainty regarding the correct status of the finding (Suppressed/Unsuppressed) and it should be further debated within your team.
Note: After a finding is suppressed, it is not possible to create Jira tickets for it. In such scenarios, you will need to unsuppress the finding and only then create Jira tickets for it.
After you suppress a finding, the suppression details will be displayed in the finding’s Overview section:
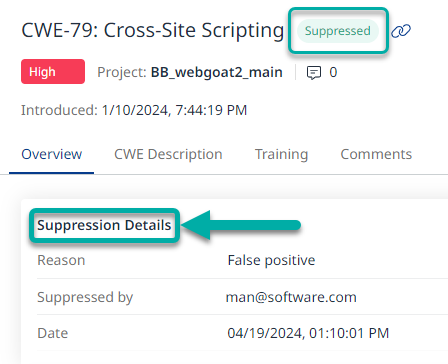
The suppression details will help you easily understand who suppressed the finding and why it was suppressed.
You can view the Suppression Information using two methods:
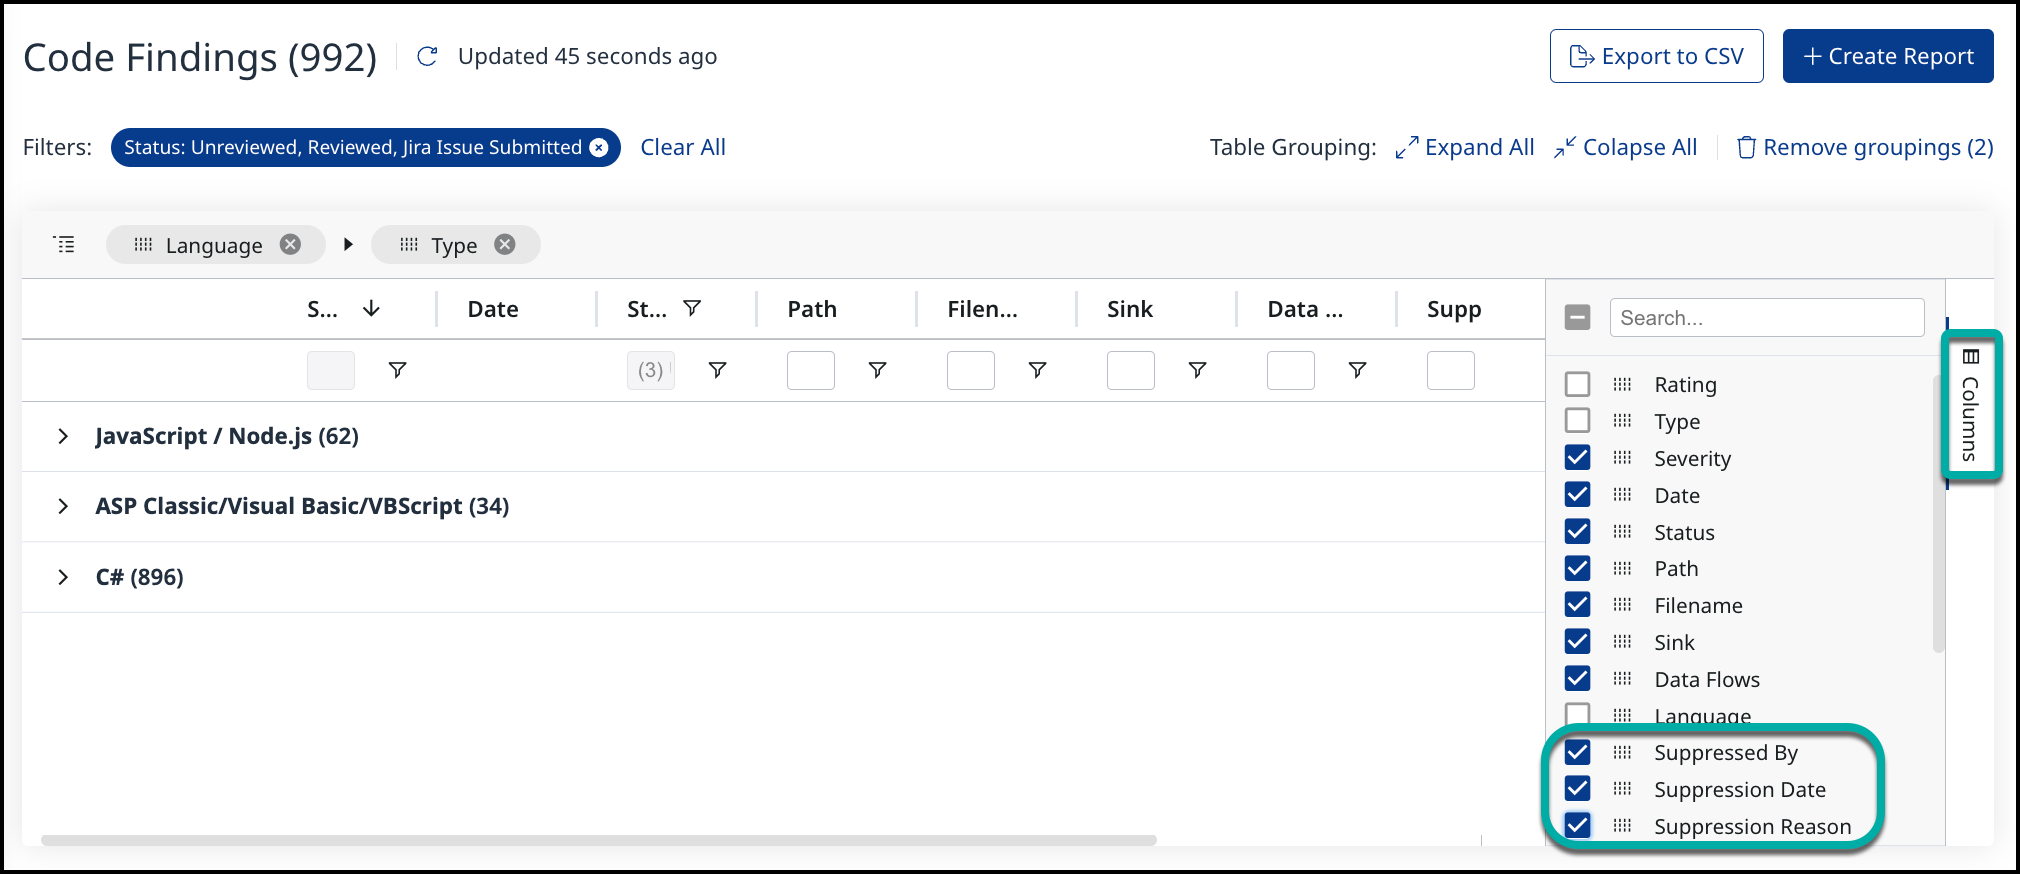
Findings table: You can modify and add the following columns to the Code Findings view -
Suppressed By
Suppression Date
Suppression Reason
To learn more about report column configuration, refer to our Create reports and Advanced Filters documentation.
Note: The three Suppression Information columns are hidden by default.
The Suppression Report: You can generate a report of all of your code finding suppressions and their reasons, to detect findings that were suppressed too hastily or accidentally.
To generate a Code Suppressions report, follow the steps listed in this article and make sure to select Code Suppressions as the Report Type.
Comments
The Comments tab of the finding details pane allows you to comment on the finding, regardless of whether it’s a false-positive or a true-positive. It also displays the finding’s detection date.
To add a comment, click the “Add a Comment” button, type in your comment and then click the check button at the right to save the comment.
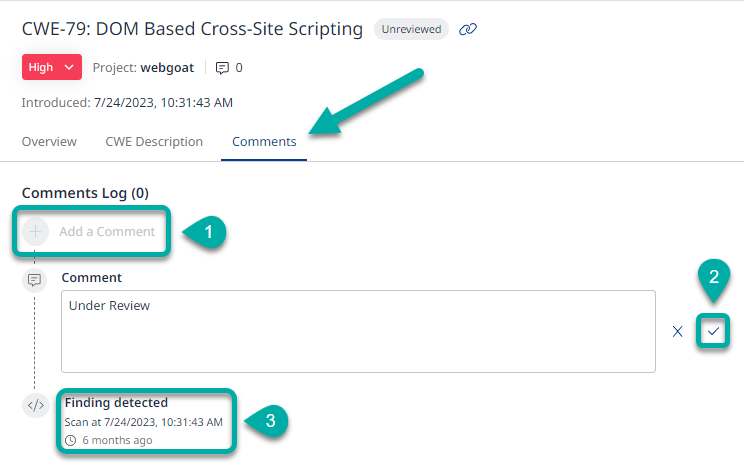
To close the finding details window, click the “X“ in the top right corner.

Bulk Actions
Triage actions described earlier in this article can be performed in bulk on a selection of findings.
To perform a bulk action, select at least one row in the Findings table. This should spawn the Actions drop-down menu.
This menu allows you to submit Jira issues (requires integration with Jira), suppress/unsuppressed findings, mark findings as reviewed/unreviewed, change severity levels, and add comments.

