Create Code Scan Configurations per Project
Overview
As an AppSec Manager or Security Champion, you have the ability to configure how the Code Scans are performed and what findings are displayed in the Mend Platform and the Code Security Report in Repo Integrations.
Use Case for Projects Code Scan Configurations
As an AppSec manager or Security Champion, you may want to customize your Project Code Scan Configurations to:
Configure the set of CWEs that the Code scan checks for - to reduce the noise by reporting only the findings you are interested in.
Customize Taint Sources, Taint Sinks, and Taint Sanitizers - to get higher accuracy by fine-tuning the analysis.
Configure (default) exclusions - to ignore external or irrelevant code.
Getting it done
Navigate to the Projects Code Scan Configuration page
Log into the Mend Application.
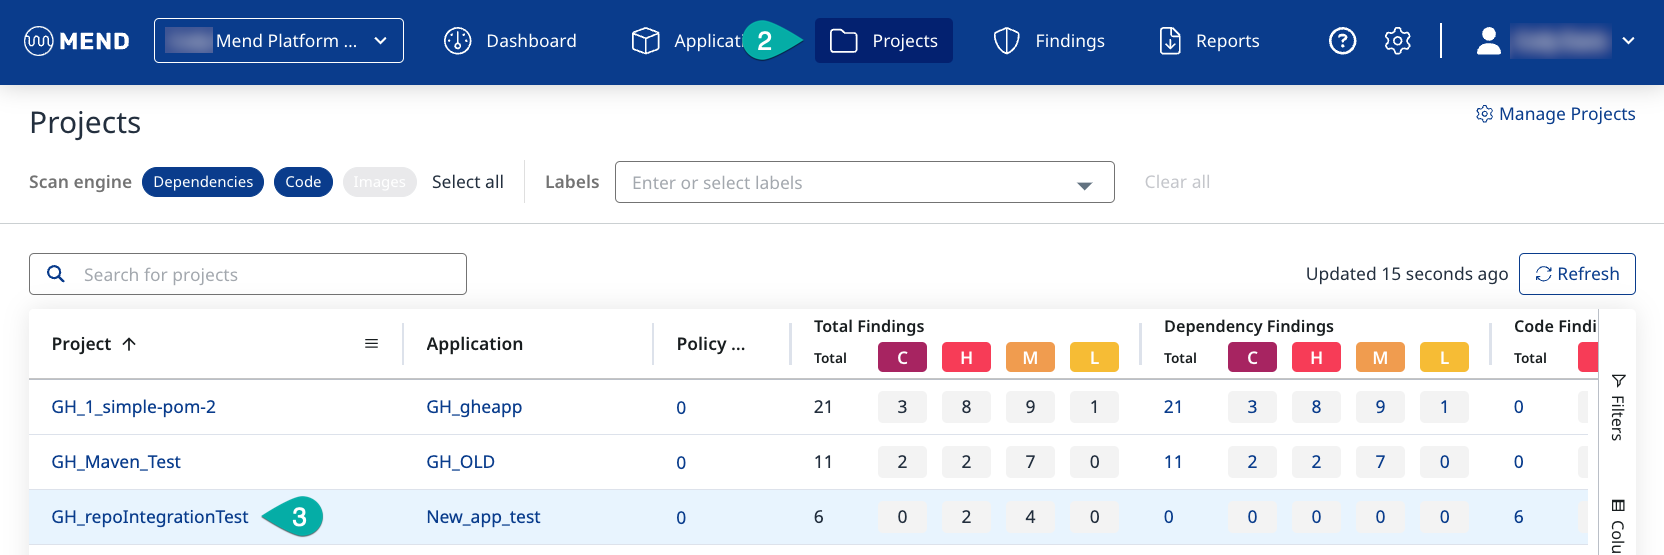
Click Projects in the top navigation.
Click the project name for which you want to create the Code Scan Configuration.
Click Code Scan Config in the Configuration section in the left list to navigate to the Code Scan Configuration page.
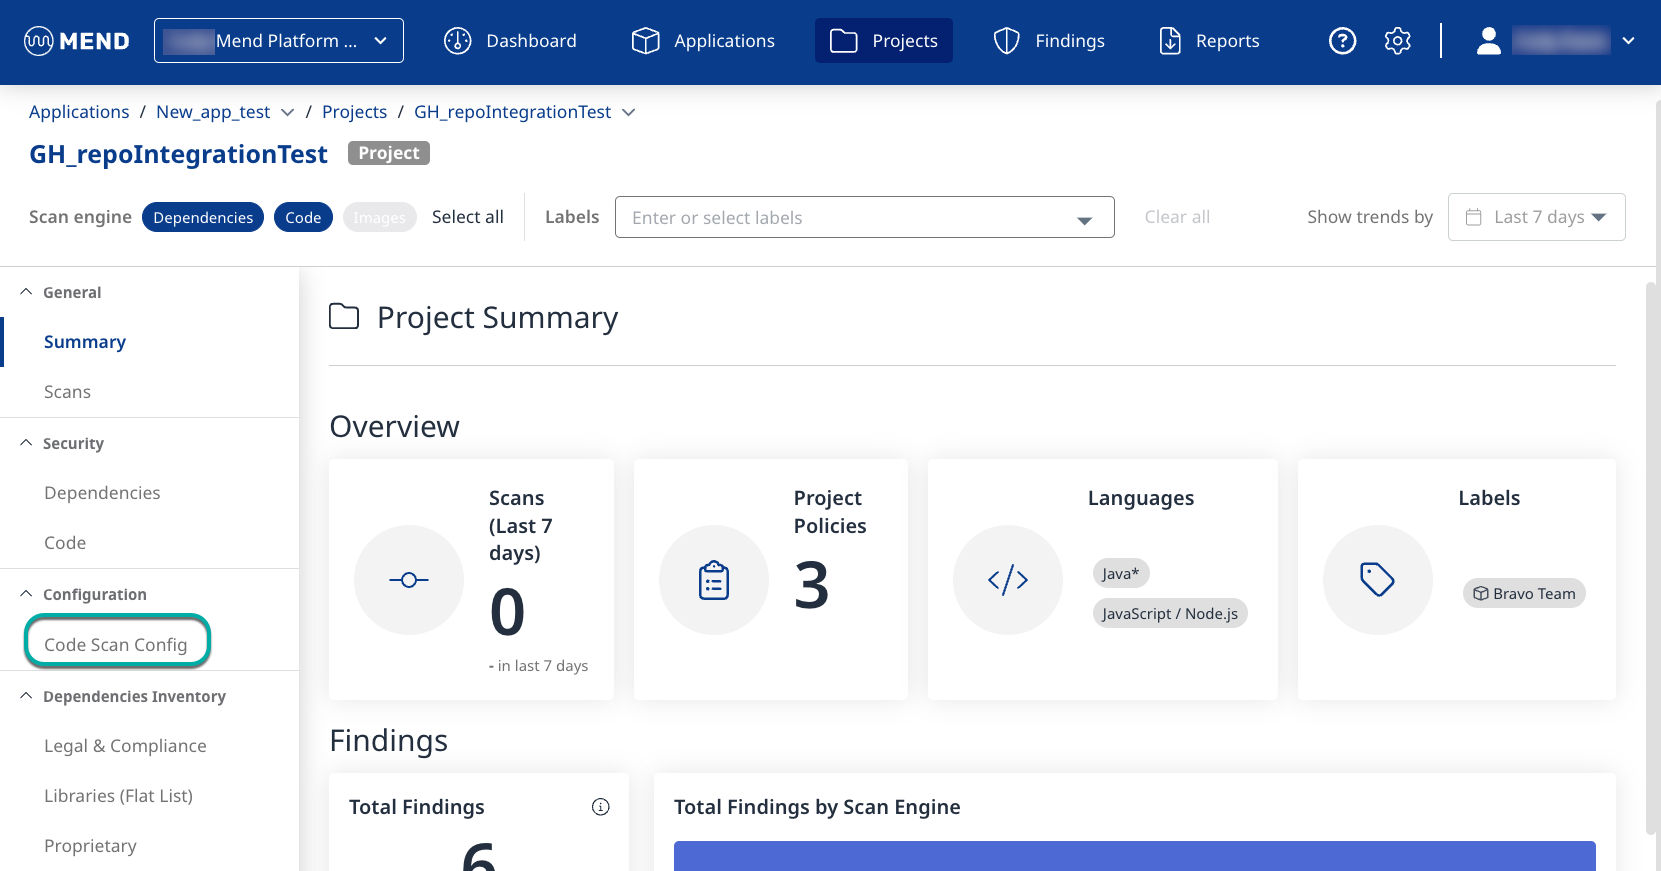
The Code Scan Configuration page
The Code Scan Configuration page has two tabs: the Language-Specific Configuration tab and the Path Exclusions tab. The Language-Specific Configuration tab is the default tab. It is divided into the Language-Specific Configuration section, and for each language, you have six sections to fine-tune the analysis behavior:
Edit the Code Scan Configurations
As an AppSec Manager or Security Champion, you may want to customize the scan configurations to suit the project's needs better, such as which programming languages should be analyzed, which CWEs, and which severities for them, and add custom Taint Sources, Taint Sinks and Taint Sanitizers that are used during the scans.
Click the Edit Configuration button.
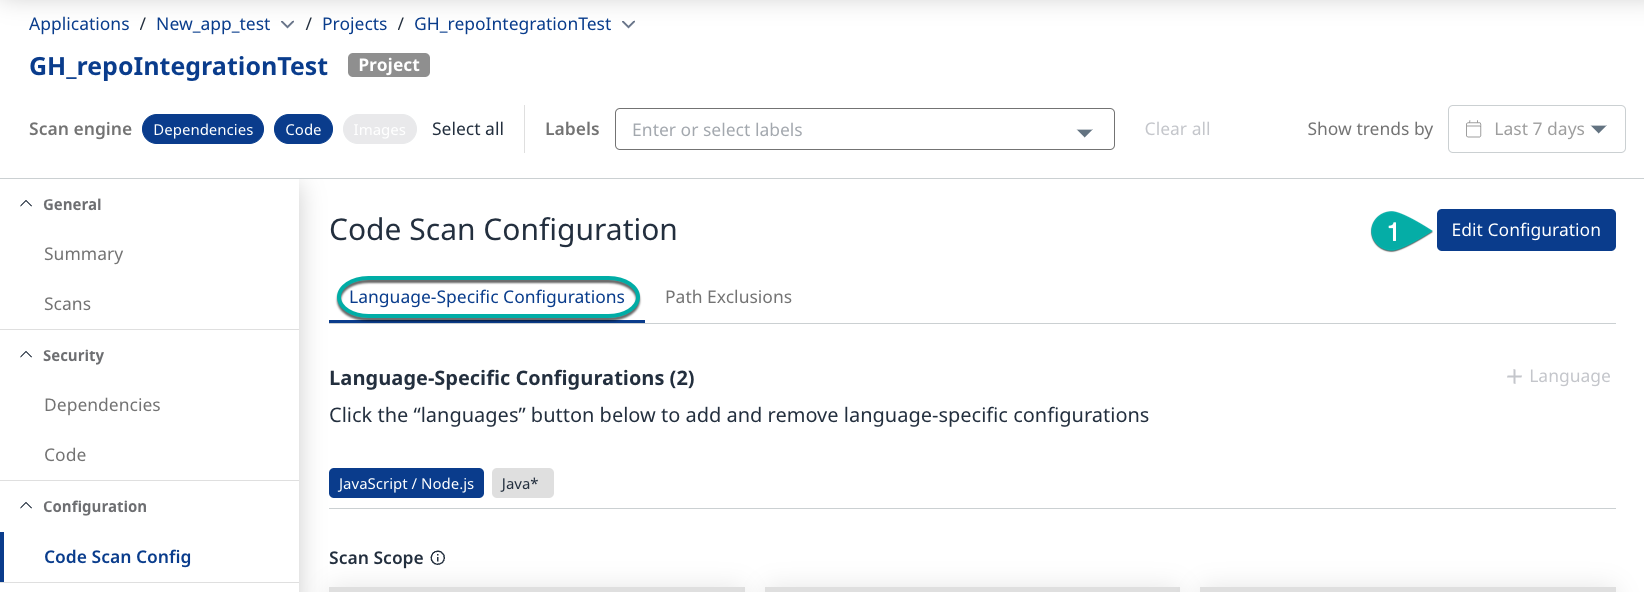
Language-Specific Configurations
The Language-Specific Configurations section allows you to add or remove the programming languages you want to scan for. The selected programming languages determine which CWEs are available in the Scope, the Predefined Taint Sources, and which CWE Types are available for Custom Taint Sinks.
Add Languages
Click the + Language button to display a list of languages that can be added to the scan.
Click a language to add it to the configuration.

Remove Languages
Click the X to the right of the language you want to remove from the configuration.

Scan Scope
The Scan Scope is only accessible when no Global Code Scan Configuration template is assigned to a project. If a Code Scan Configuration is assigned, a message indicating that a global configuration is in use will be displayed:

The Scan Scope section is divided into three severity widgets, High, Medium, and Low, and allows you to determine the CWEs (Common Weakness Enumeration) that the Code Scans should check for and customize the severity level assigned to them. By default, all CWEs are enabled.
Select the CWEs for the scan scope
Uncheck the boxes next to a CWE to remove it from the scope.
Check the boxes to add the CWE back to the scope.

Assign a Custom Severity to a CWE
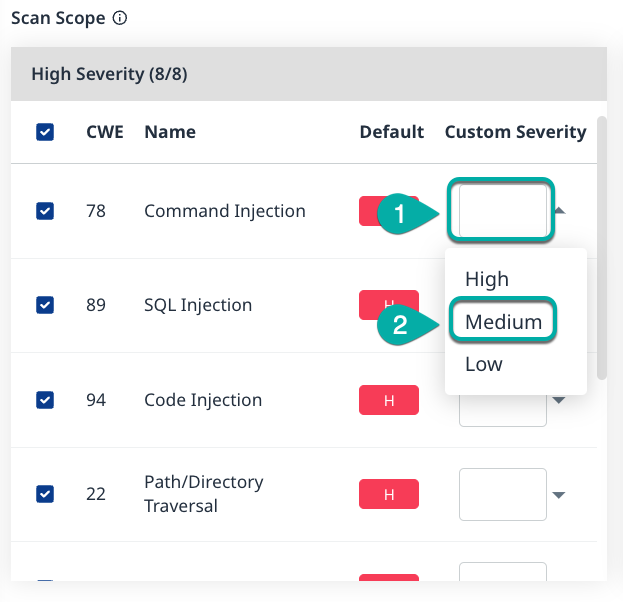
Click on the Custom Severity field to the right of the CWE you wish to assign a Custom Severity. A dropdown list will be displayed.
Click the severity to assign to the CWE.
Understanding Taint Sources, Taint Sanitizers, and Taint Sinks
Taint Sources
Taint Sources represent any function or property corresponding to an input into the program, such as HTTP request parameters, files, file metadata, command line arguments, network services, and others. An attacker can use these unsanitized channels to trigger many different types of security vulnerabilities, for example, command injections, cross-site scripting, or path traversal.
Taint Sanitizers
Taint Sanitizers represent any function that is used to ensure that data from taint sources can not cause any harm. Standard HTML encoders, string-to-integer conversions, and similar input cleansers will be recognized automatically. If you utilize any project-specific input sanitization, like custom encoders or validation functions, you can add them to prevent false alarms.
Taint Sinks
Taint Sinks represent locations in your code where the data from a taint source is being used and could cause harm if unsanitized. A large set of taint sinks is preconfigured, but you can add more function definitions in case of any missing rules to potentially detect more findings.
Dataflow
The Code scan identifies the data flows of untrustworthy inputs from taint sources and whether or not the inputs go through a taint sanitizer before being used by taint sinks or other parts of the system.
Predefined Taint Sources
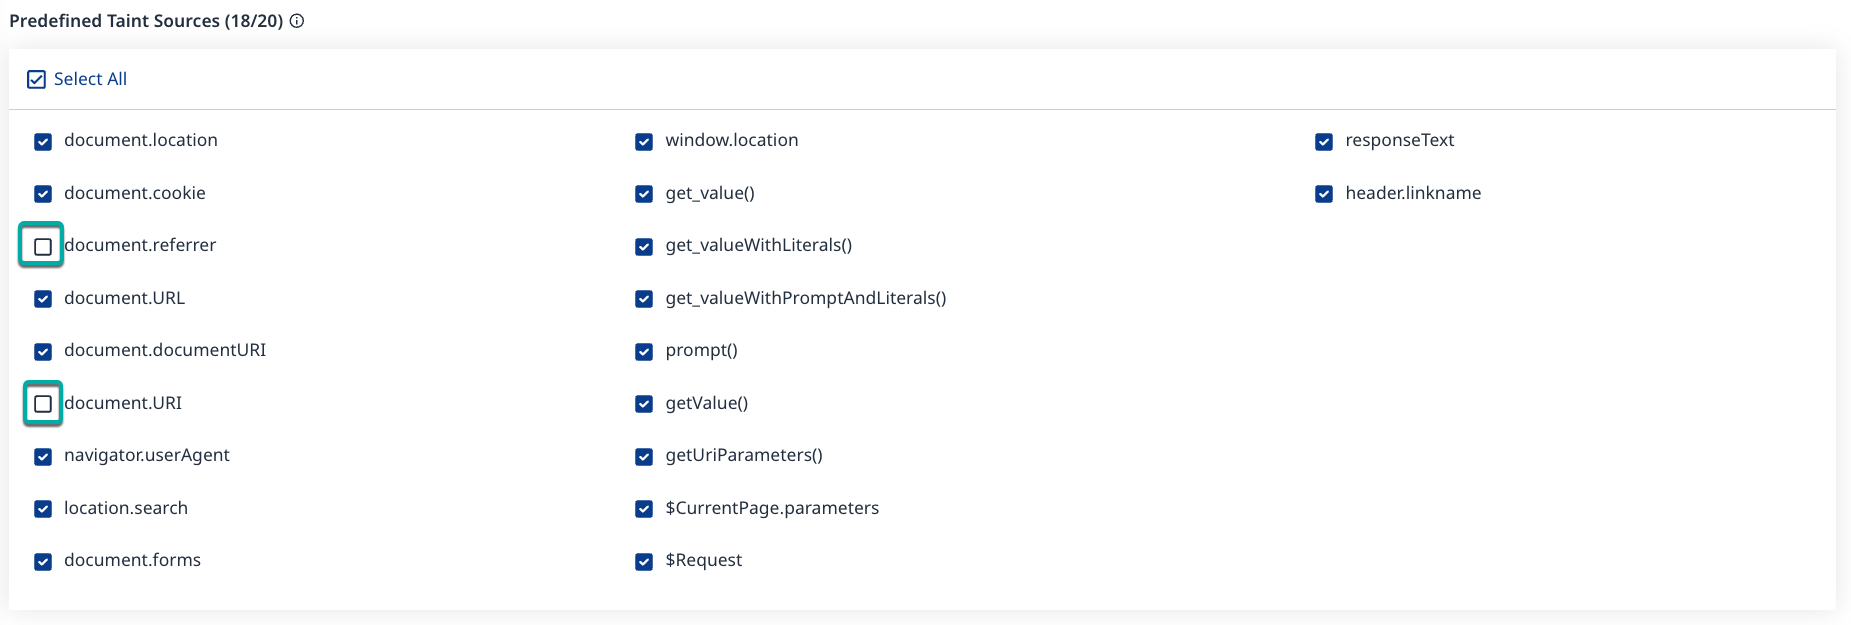
The Predefined Taint Sources section lists all the Taint Sources identified by Mend for the currently selected language in the Language-Specific Configuration section. By default, all Predefined Taint Sources are enabled.
Select the Predefined Taint Sources that fit the Project
Uncheck the boxes next to a Taint Source to remove it.
Check the boxes to add the Taint Source back.
Custom Taint Sources
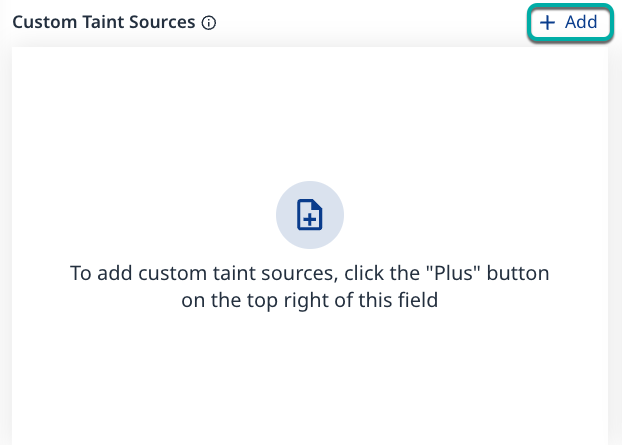
The Custom Taint Sources section provides the ability to add Taint Sources beyond the predefined ones.
Add Custom Taint Sources
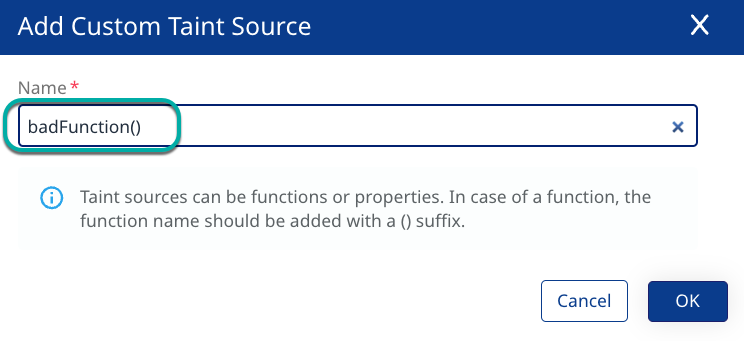
Click + Add in the top right corner of the Custom Taint Sources widget. The Add Custom Taint Source dialog box will appear.
Enter the name of the Custom Taint Source.
Click OK.
Edit Custom Taint Sources
Click the pencil icon next to the Custom Taint Source you wish to edit. The Edit Custom Taint Source dialog box will appear.

Change the name of the Custom Taint Source.
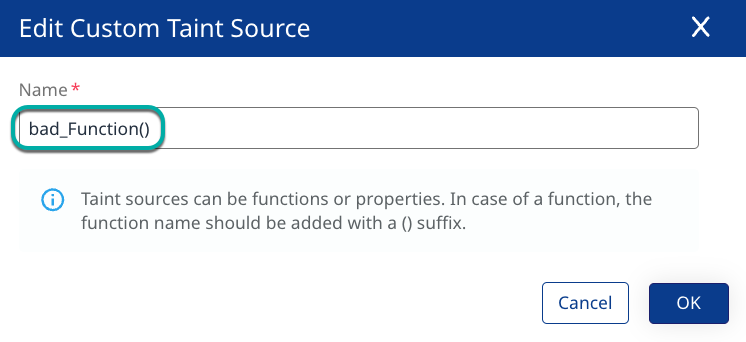
Click OK.
Remove Custom Taint Sources
Click the trash can icon next to the Custom Taint Source you wish to remove. A confirmation dialog box will appear.

Click Yes.
Custom Taint Sanitizers
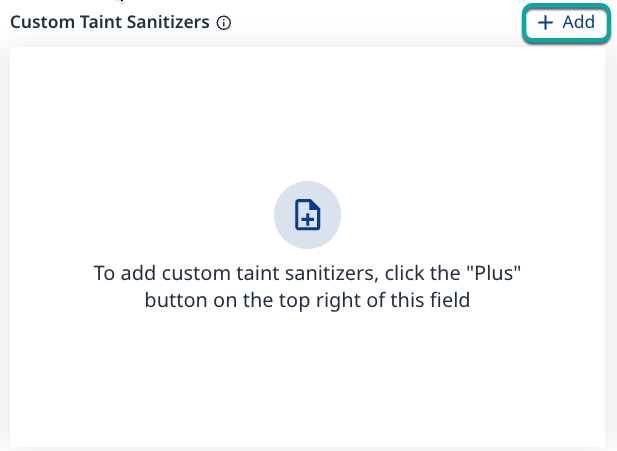
The Custom Taint Sanitizers section provides the ability to add Taint Sanitizers if any project-specific input sanitization is utilized.
Add Custom Taint Sanitizers
Click + Add in the top right of the Custom Taint Sanitizers widget. The Add Custom Taint Sanitizer dialog box will appear.
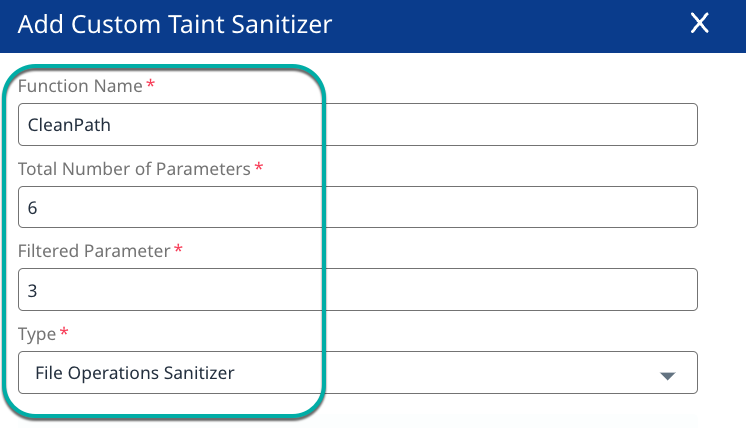
Enter or select values for the following fields when configuring Gen1 engines:
All fields are mandatory.Function Name: The name of the custom taint sanitizer function.
Total Number of Parameters: The number of parameters the custom taint sanitizer function expects.
Filtered Parameter: The position of the parameter, counting from 1, in the list of expected parameters that is sanitized by this function.
Type: A dropdown list to select the Sanitizer type the custom taint sanitizer function is for. Sanitizers are specific for certain vulnerability types.
Enter or select values for the following fields when configuring Gen2 engines:
Function Name: The name of the custom taint sanitizer function, e.g.,
encodeForHTML.Total Number of Parameters: The number of parameters the custom taint sanitizer function expects.
Filtered Parameter: The position of the parameter, possible options:
-1If one of the parameters or the object itself is vulnerable, the return value is sanitized.
e.g.,
var xssSafe = encoder.encodeForHTML(userInputString)
0If the object on which the method is called itself is vulnerable, the object itself is sanitized.
e.g.,
userInputObject.encodeFor(EncodingOptions.HTML)
1+If the parameter is a positive number, then only the parameter is sanitized if the parameter was vulnerable. All other parameters are unchanged.
e.g.,
Library2.encodeForXSS(userInputObject)-userInputObjectwill be considered as sanitized after that call.
Type: A dropdown list to select the vulnerability type the custom taint sanitizer function is for.
Note that if the function sanitizes more than one vulnerable parameter, the sanitizer has to be defined multiple times for all the sanitized parameters. However, that method cannot be used if the return value is also sanitized.
Click OK.
Edit Custom Taint Sanitizers
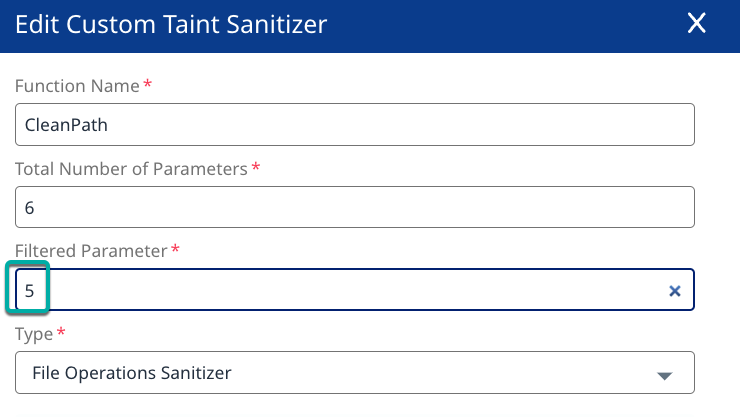
Click the pencil icon next to the Custom Taint Sanitizers you wish to edit. The Edit Custom Taint Sanitizer dialog box will appear.

Change the desired field values(s) on the Edit Custom Taint Sanitizers dialog box.
Click OK.
Remove Custom Taint Sanitizers
Click the trash can icon next to the Custom Taint Sanitizer you wish to remove. A confirmation dialog box will appear.
Click Yes.
Custom Taint Sinks
The Custom Taint Sinks section provides the ability to add Taint Sinks to potentially detect more unsanitized input findings.
Add Customer Taint Sinks
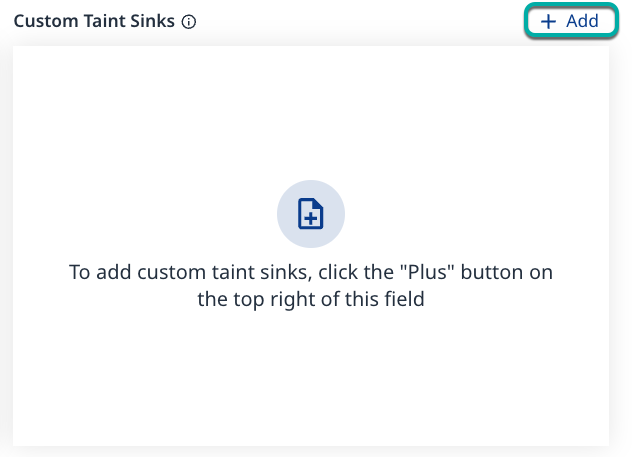
Click + Add in the top right of the Custom Taint Sinks widget. The Add Custom Taint Sink dialog box will appear.
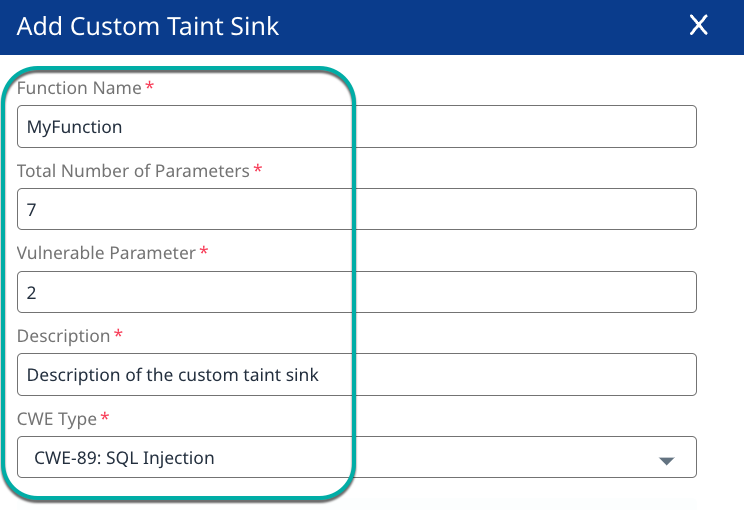
Enter or select values for the following fields:
All fields are required.
Function Name: The name of the custom taint sink function.
Total Number of Parameters: The number of parameters the custom taint sink function expects.
Vulnerable Parameter: The position of the vulnerable parameter, counting from 1, in the list of expected parameters.
Description: A description of why the custom taint sink function is vulnerable. This will be later displayed in the findings data flow.
CWE Type: A dropdown list to select the CWE type for which the custom taint sink function will report findings.
Click OK.
Edit Customer Taint Sinks
Click the pencil icon next to the Custom Taint Sink you wish to edit. The Edit Custom Taint Sink dialog box will appear.

Change the desired field value(s) on the Edit Custom Taint Sanitizers dialog box.

Click OK.
Remove Customer Taint Sinks
Click the trash can icon next to the Custom Taint Sink you wish to remove. A confirmation dialog box will appear.
Click Yes.
Depth Settings
Note: The Code scan follows the flow of the tainted input data through your system. These flows can become very complex, which results in longer scan duration. You can reduce the number of analyzed steps to improve the runtime or increase it to potentially detect more findings.
The Depth Settings section provides the ability to adjust the number of steps analyzed.
Move the Max. Function Depth slider to the left or right to reduce or increase the Max. Function Depth value.

Move the Max. Variable Copy slider to the left or right to reduce or increase the Max. Variable Copy value.

Scan Profile
Note: This feature is only available for Code Gen 2 engines: Java, C#, Python, and JavaScript/TypeScript.
Code scan follows the flow of the tainted input data through your system. These flows can become very complex, which results in a longer scan duration. You can reduce the number of analyzed steps to improve the runtime or increase it to potentially detect more findings using the Scan Profile section.

(1) Scan Mode
Fast - Scans prioritize speed, completing quickly but with a potential trade-off of missing some relevant findings.
Balanced - Scans optimize for efficient scan duration while maximizing the detection of findings, ensuring thorough yet timely analysis.
Deep - Scans perform comprehensive analysis without limitations, uncovering more findings but requiring significantly longer durations to complete.
(2) Include Findings with a Low Probability
To prevent unnecessary noise Mend SAST only reports code findings that are very likely true positives and can be directly communicated to developers without triaging them first. You can check for low probability findings as well if you are more compliance-driven and want to make sure that nothing is missed. Enabling this toggle will result in a higher rate of false positives and a longer scan runtime.
The Path Exclusions tab
Note: You do not need to save configuration changes before switching between the Language-Specific Configuration and Path Exclusion tabs.
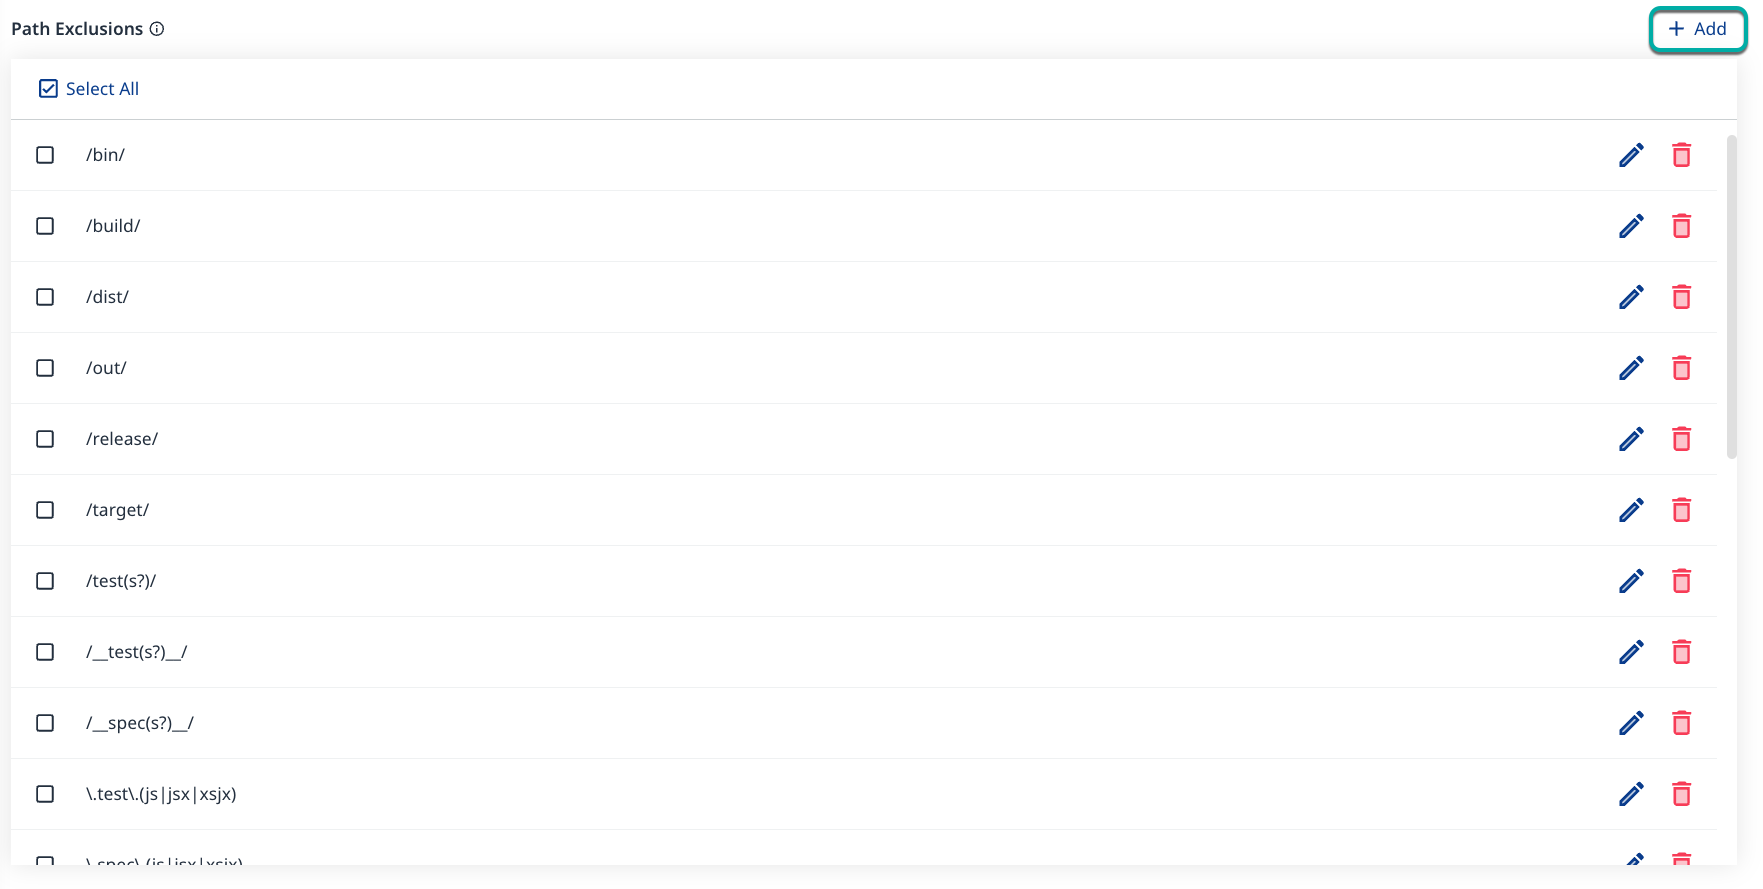
Note: The Code scan can be limited to only relevant files and directories to improve the performance and reduce the noise by defining exclusions from the scanned project. Patterns for typical build, library or test directories are predefined, but you can either adjust them or add more exclusions. These are defined as Perl-Compatible Regular Expressions (PCRE) path matching.
The Path Exclusions section provides the ability to add, remove, or modify Paths that will be ignored by the Code Scan.
Add Path Exclusions
Click + Add in the top right of the Path Exclusions widget. The Add Path Exclusion dialog box will appear.
Enter the desired Path to be added to the Path Exclusions list.
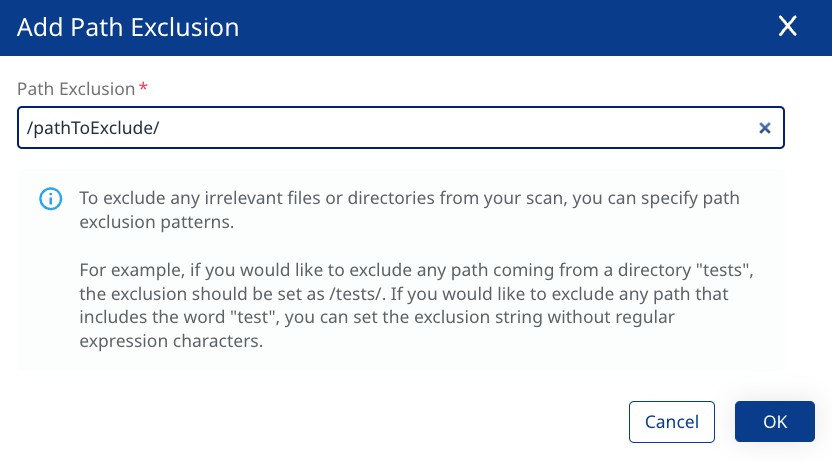
Click OK.
Edit Path Exclusions
Note: The Code scan can be limited to only relevant files and directories to improve the performance and reduce the noise by defining exclusions from the scanned project. Patterns for typical build, library or test directories are predefined, but you can either adjust them or add more exclusions. These are defined as Perl-Compatible Regular Expressions (PCRE) path matching.
Click the pencil icon next to the excluded Path you wish to edit. The Edit Path Exclusion dialog box will appear.

Change the value in the Path Exclusion field.
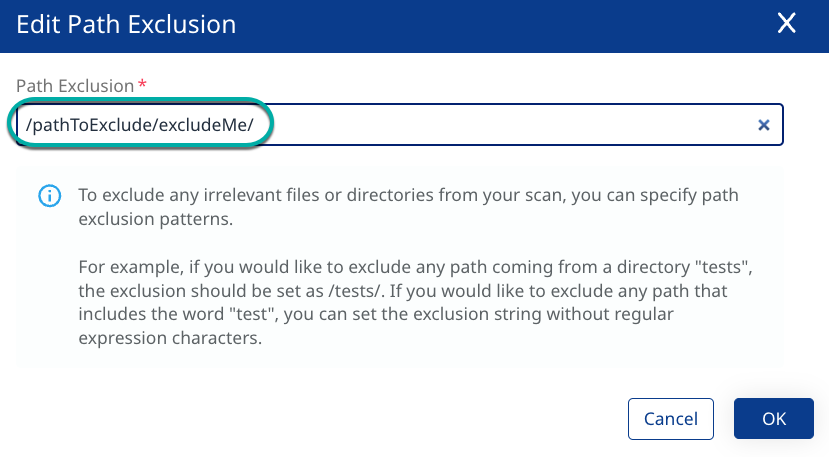
Click OK
Remove a single Path Exclusion
Click the trash can icon next to the excluded Path you wish to remove. A confirmation dialog box will appear.

Click Yes.
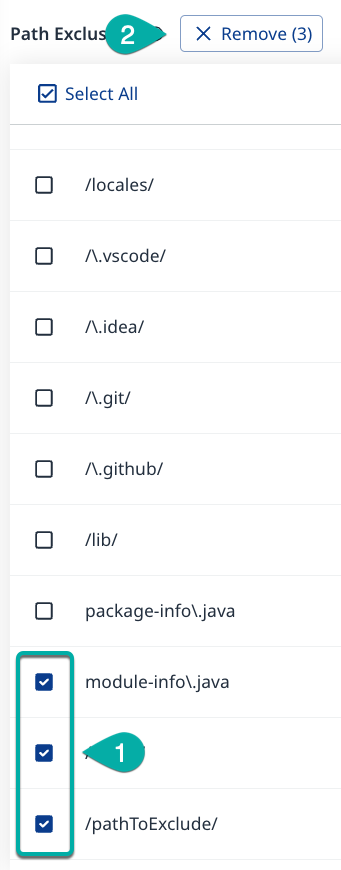
Remove multiple Path Exclusions
Check the boxes next to the excluded Paths you want to remove. The Remove button will appear next to the Path Exclusions widget title.
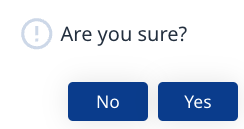
Click Remove. A confirmation dialog box will appear.
Click Yes.
Save the Project Code Scan Configuration
Click Save in the top right corner of the Projects Code Scan Configuration page after completing the desired Project Code Scan Configuration changes.

