Create reports and Advanced Filters
Overview
As a Security Champion or AppSec manager, you will export Reports with the security findings from the Applications and Projects within your Organizaion. You will want to add new columns and filters to the findings pages to create the Reports that best fit your needs.
Getting it done
On an Applications or Projects summary page, all pages listed in the left list except for the Summary page have the options to add or remove Columns and Filters to change how the data is viewed. The right side of each page's data table has two buttons: Filters and Columns.

Manage table Columns
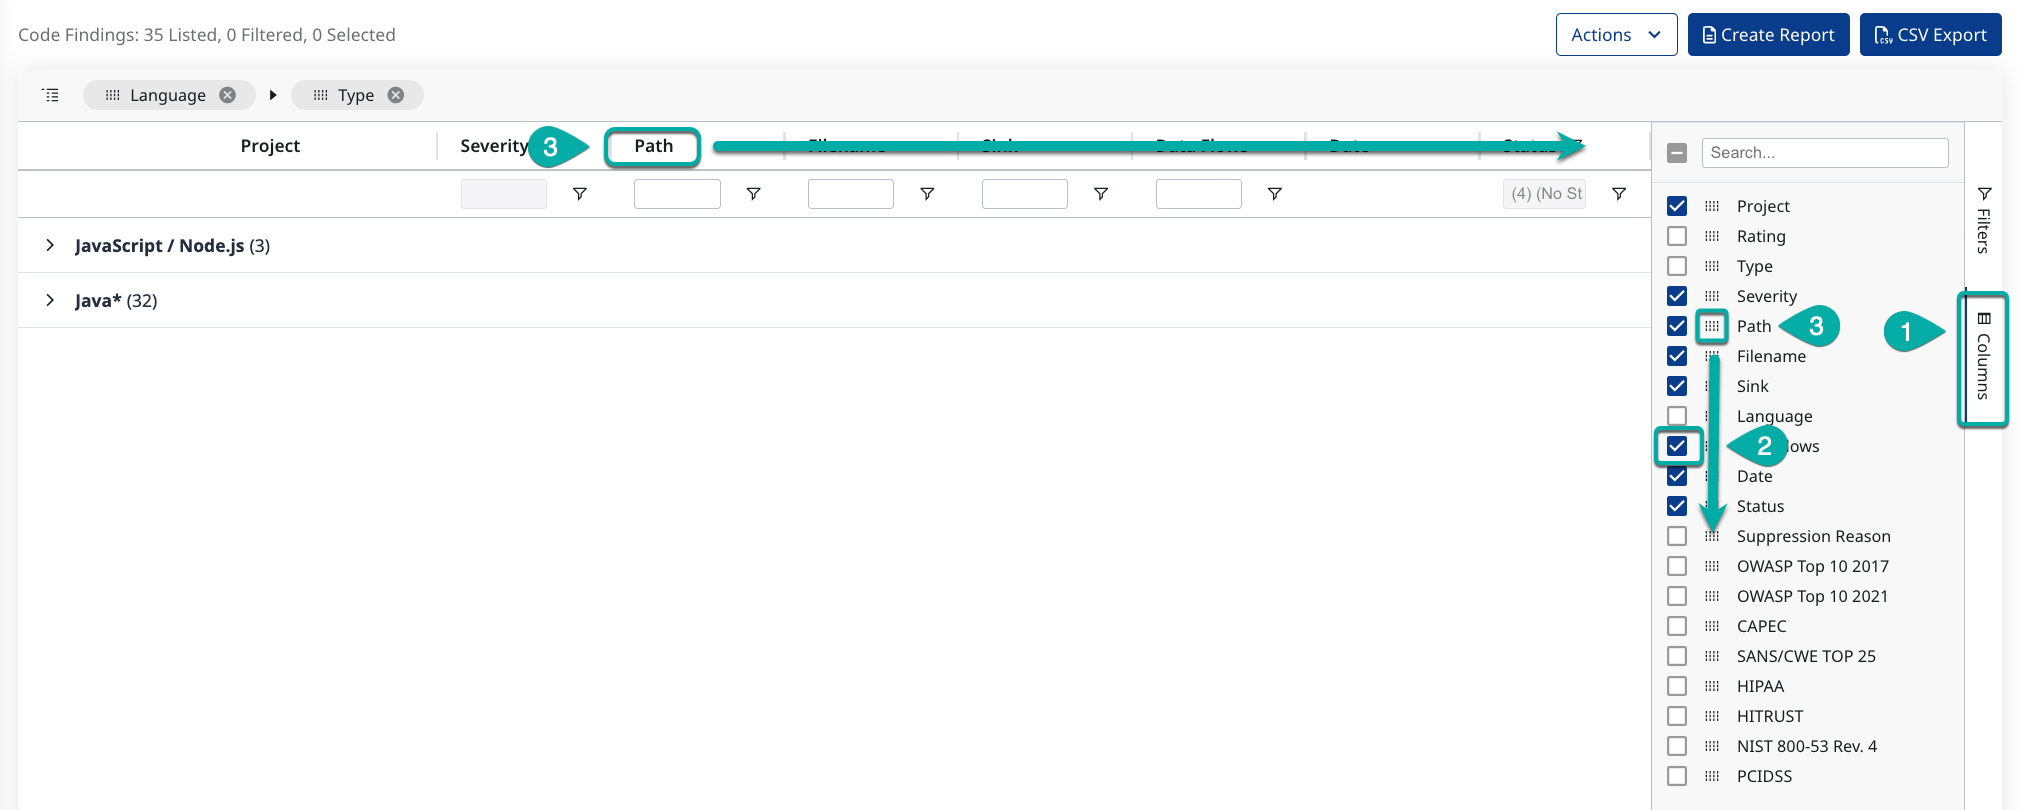
Click the Columns button on the right side of the table. The list of available columns to add will appear on the right side of the table. The order in which they are listed is reflected in the table headers from left to right.
Check the box next to the desired column name to add a column to the table, or uncheck the box to remove it.
Click and drag a column name to where you want it, or click on the grid between the checkbox and column name in the column list and drag it to where you want it in the table.
Manage table Filters
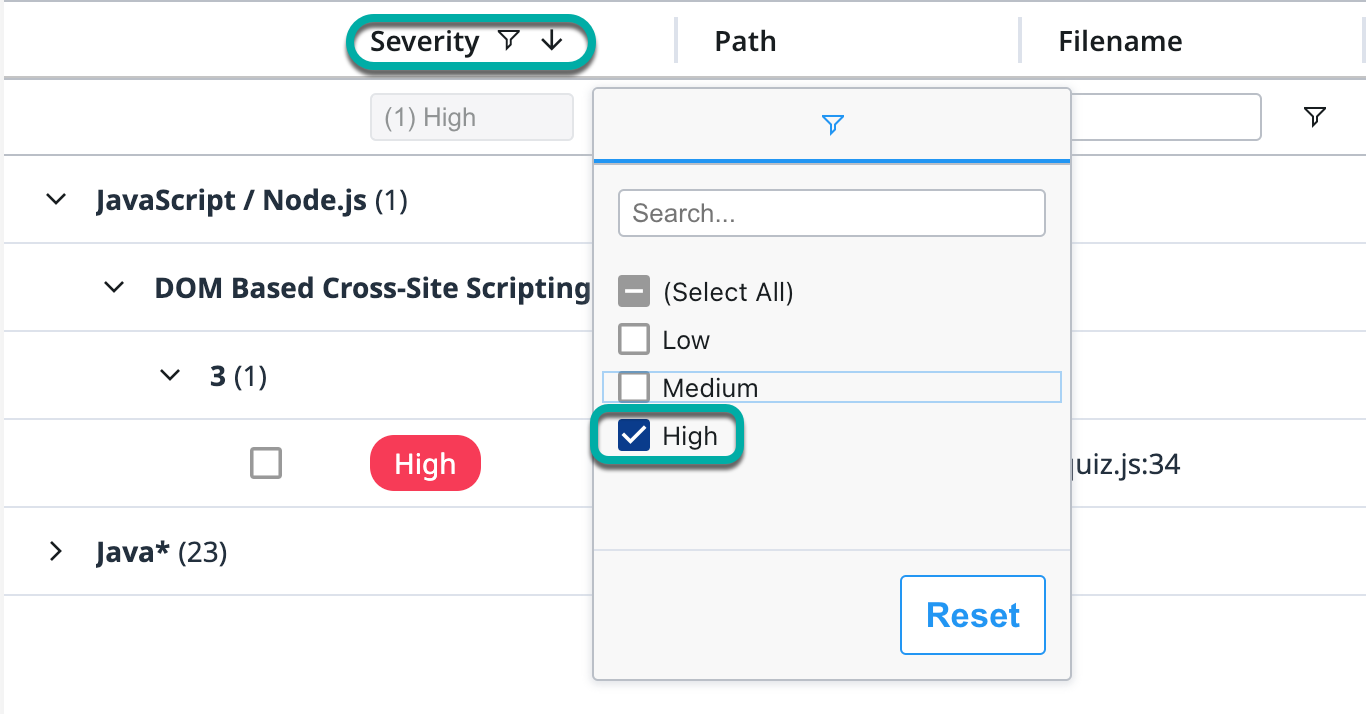
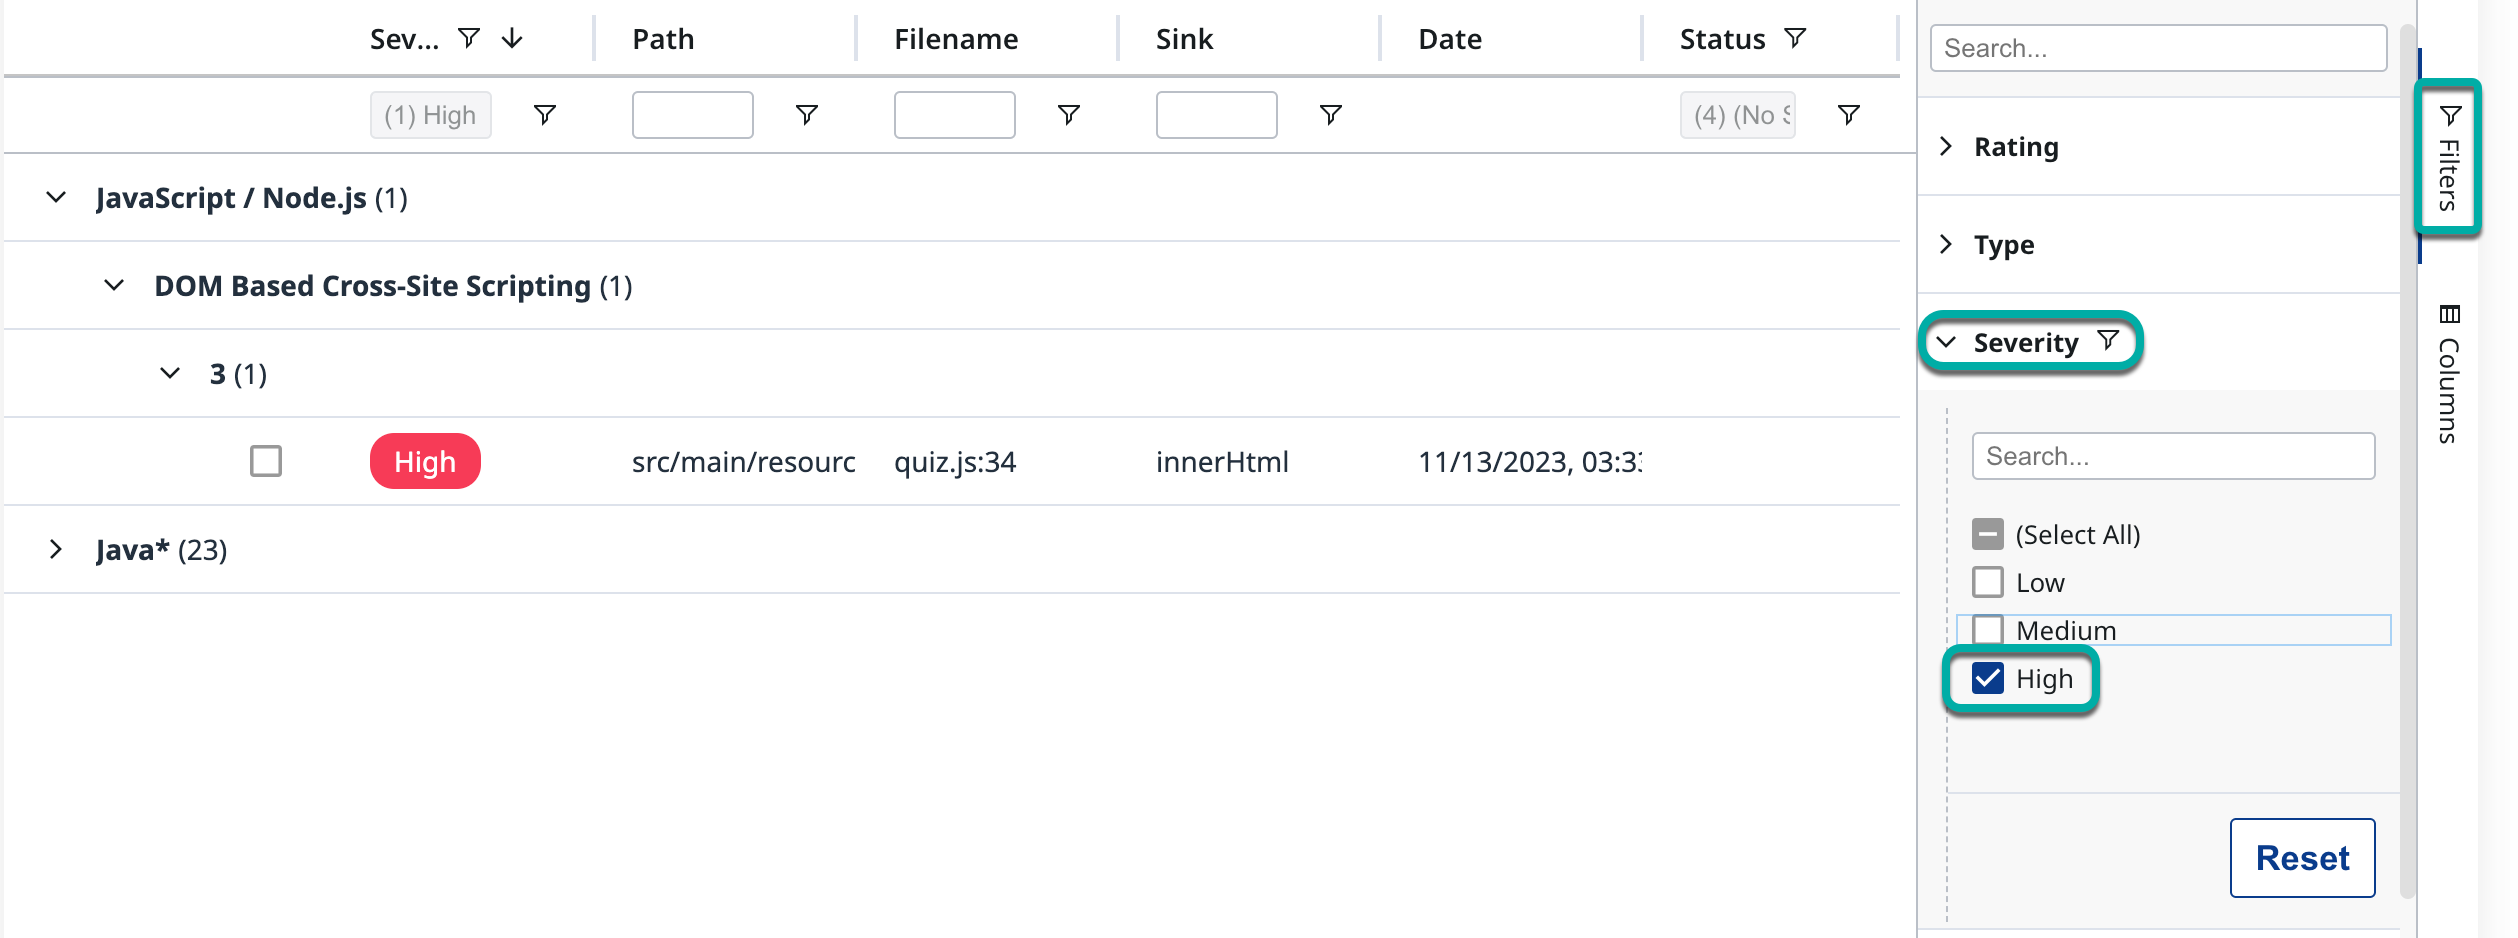
Click the filter icon under each column name or the Filters button on the right side of the table. The list of available filters to add will appear on the right side of the findings table. Each filter corresponds to the column of the same name.
Note: You can apply a filter for a column that hasn’t been added to the findings table.
Using the table Column Filters

and
Using the Filters button on the side of the table
Manage the Code Findings Table Groupings
By default, the code findings are Grouped by Language and Type and presented in a collapsed state.
Expand the desired groupings to drill down to the findings.
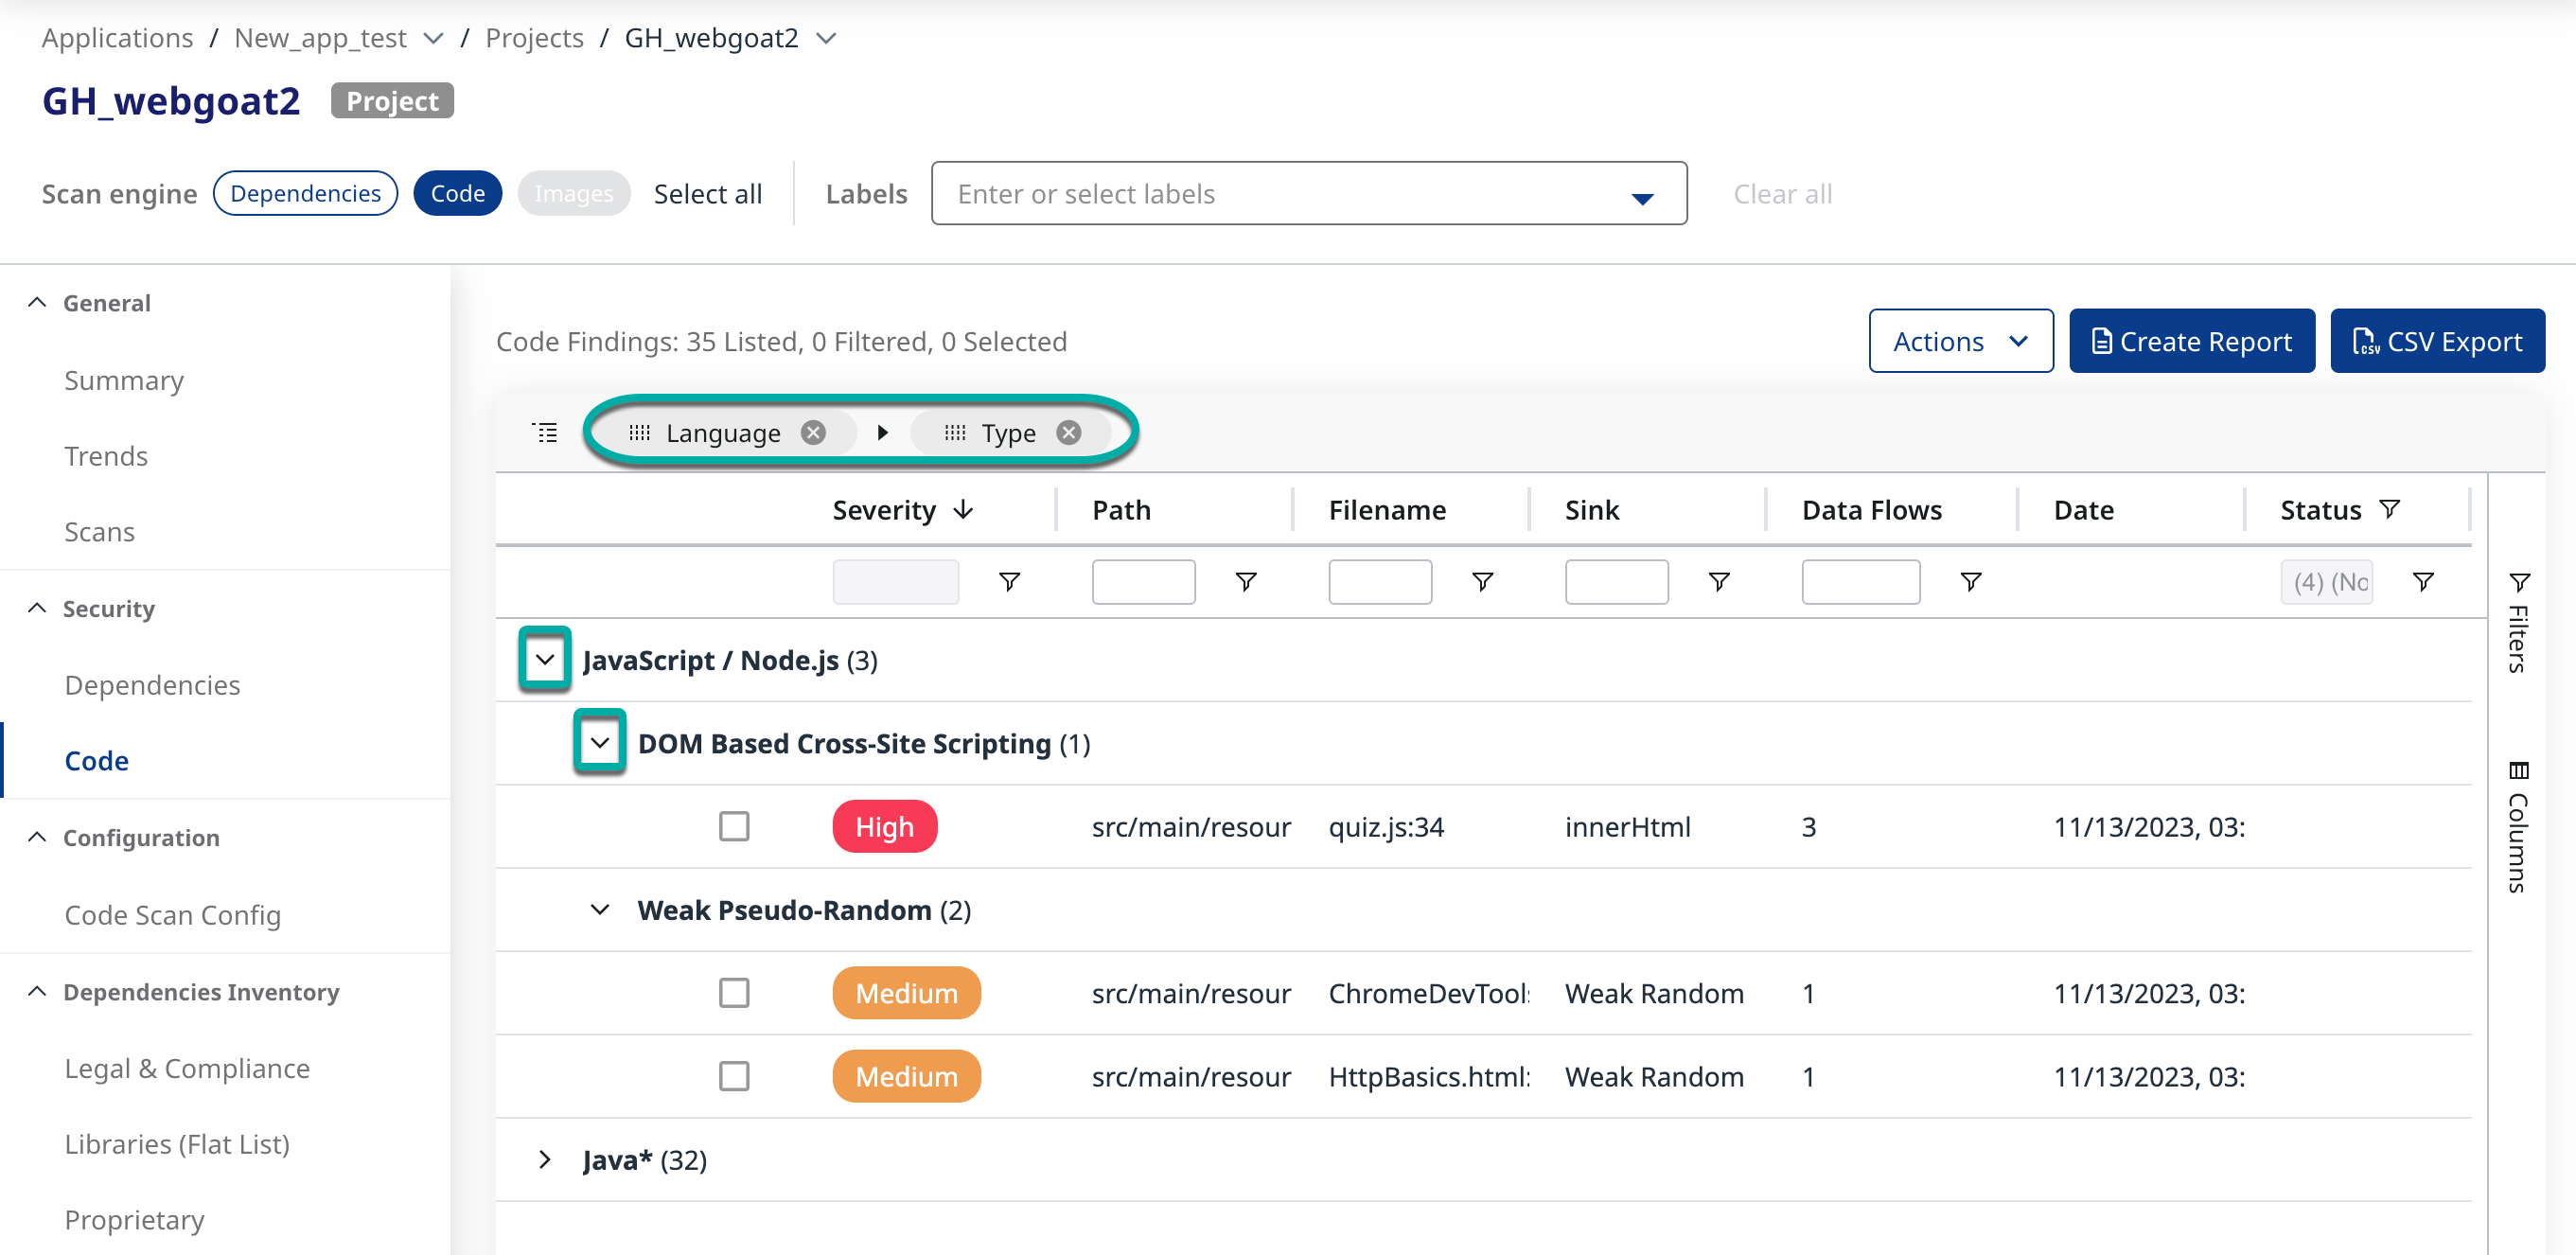
Click and drag a header from the code findings table into the groupings area to add it as a grouping.
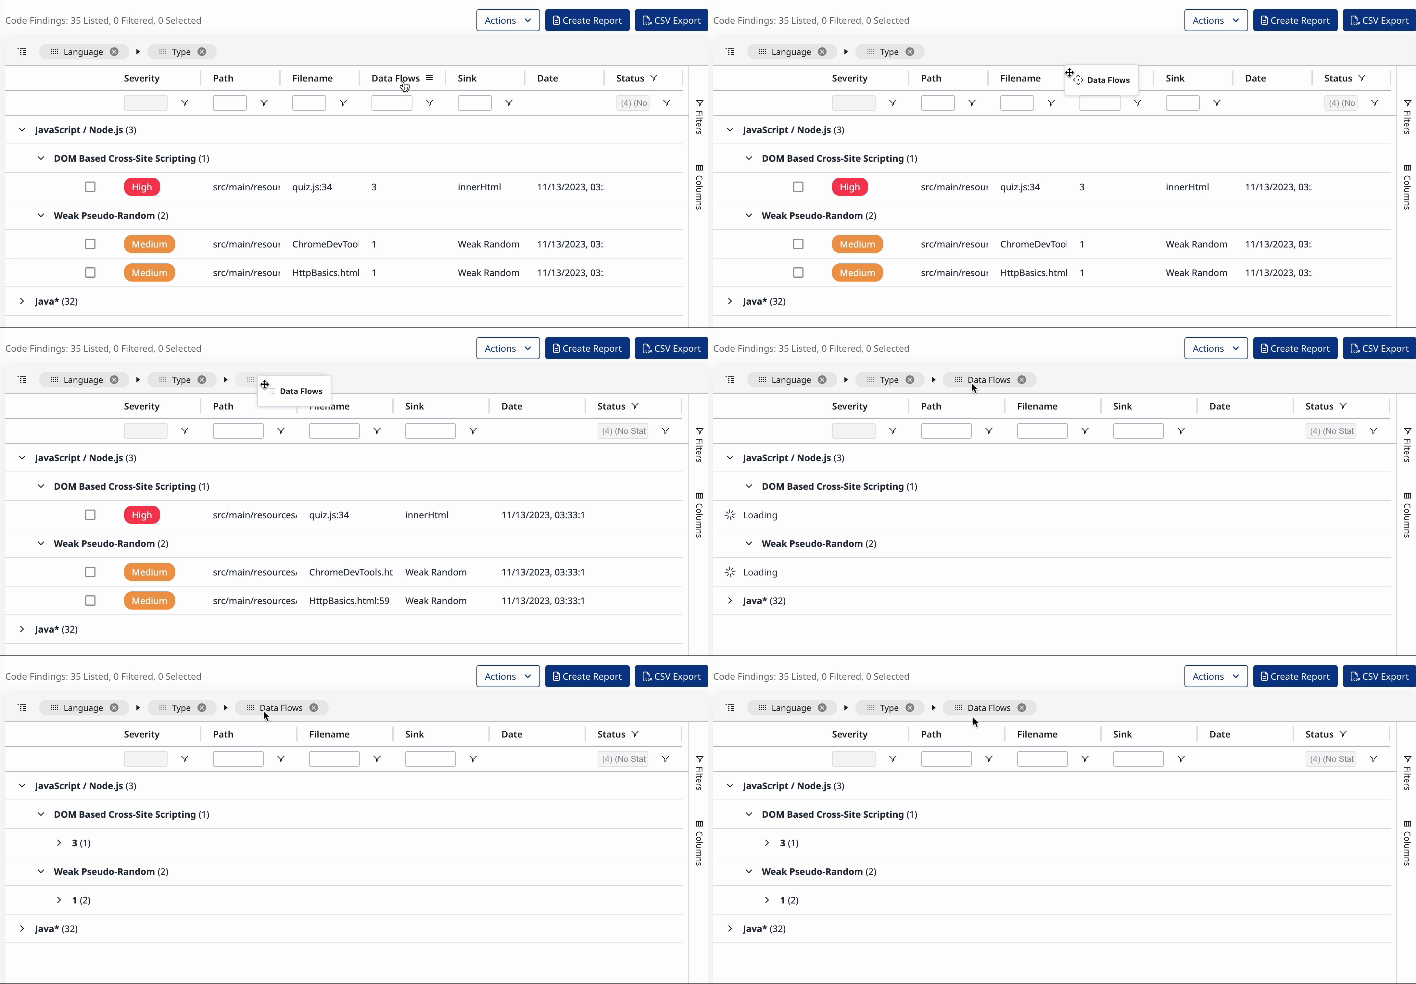
Note: The order of the groupings matter. The groupings are reflected in the in the findings table hierarchy left to right.
You can click on the grid on the left side of the grouping and drag it to the left or right of another grouping.

You can click the “X” on the right side of the grouping to remove it and return it back to the findings table as a column header.

Note: You can also add groupings by clicking and draging columns from the side columns list straight to the groupings area.
Generate Reports and Export Findings
There are two options for extracting the findings data: Create a Report and Export to CSV. From an Applications or Projects summary page, the Dependency, Code, Legal & Compliance, and Libraries (Flat List) pages have the option for CSV Export, with the Code page also having the option to Create Report.

The CSV Export option will instantly generate a CSV file and be downloaded when finished.
The CSV export will include all the possible columns and honor any filters set.
The Create Report option will cause the Generate Report window to appear on the right side of the screen.
Click Create Report.
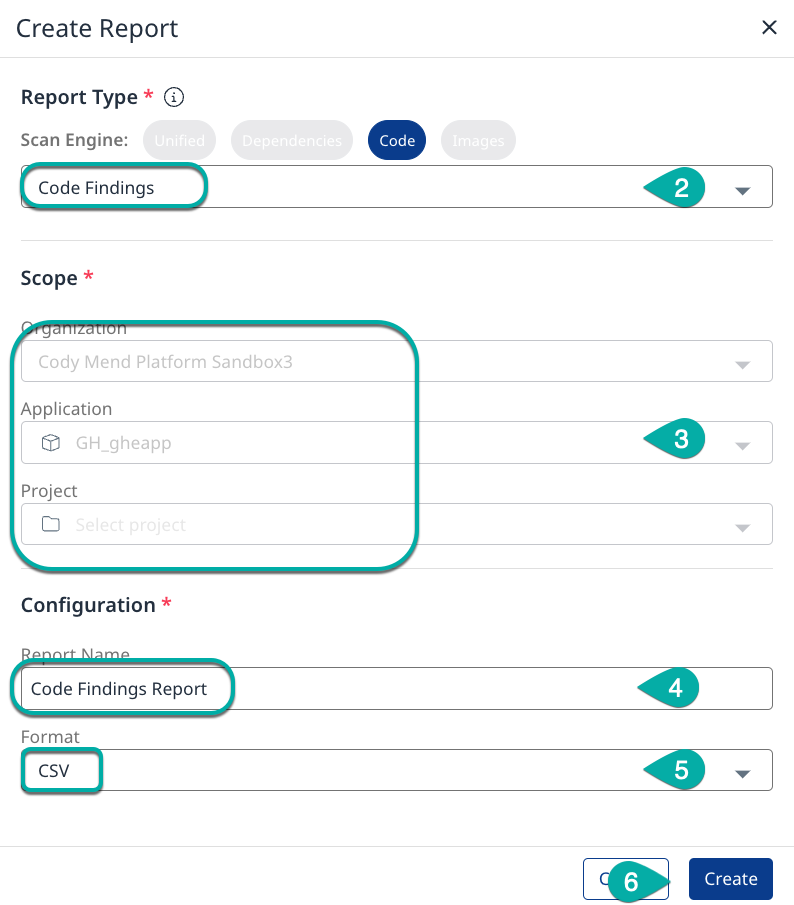
Click the dropdown in the Report Type section and choose an option.
The Report Type selection may automatically set the values for the Scope section.Click the dropdowns in the Scope section and make the desired selections if needed.
Enter a report name or leave the default
Click the format dropdown and select either XML, JSON, or CSV.
Click Create to generate the report.
To view the generated report, you must navigate to the Mend Platform's Reports page.
The most recently generated reports should be at the top.
Find the report with the name you assigned.
Click the download icon on the right.

