.svg)
Overview
Before scanning your repositories with Mend for GitHub.com, you will need to install the Mend for GitHub.com app from the GitHub Marketplace and connect your Mend organization to it.
This article provides installation instructions for Mend for GitHub.com. This article also provides instructions on how to uninstall the app.
Getting It Done
Prerequisites
This step differs between the Mend AppSec Platform and the Legacy SCA application.
The Legacy SCA instructions are listed at the bottom of this section.
Note: Setting up global configuration is recommended.
-
Access to an active Mend Platform organization and a user with organization administrator permissions.
-
The Issues tab must be enabled for each repository. Do as follows for each repository requiring a scan:
-
Go to the relevant GitHub repository, and click Settings.
-
Verify that the Issues checkbox is enabled.
-
Check that the Issues tab appears next to the Code tab.
-
-
You must have administrator permissions to your GitHub account and to the relevant repositories (owner credentials) to install the Mend for GitHub.com app.
Note: When setting up repository integrations, you can only connect one source code management (SCM) system to a single Mend organization. For example, if you integrate a GitHub organization, you cannot link additional SCM systems like GitLab groups or Bitbucket teams to the same Mend organization.
Install the Mend for GitHub.com app
-
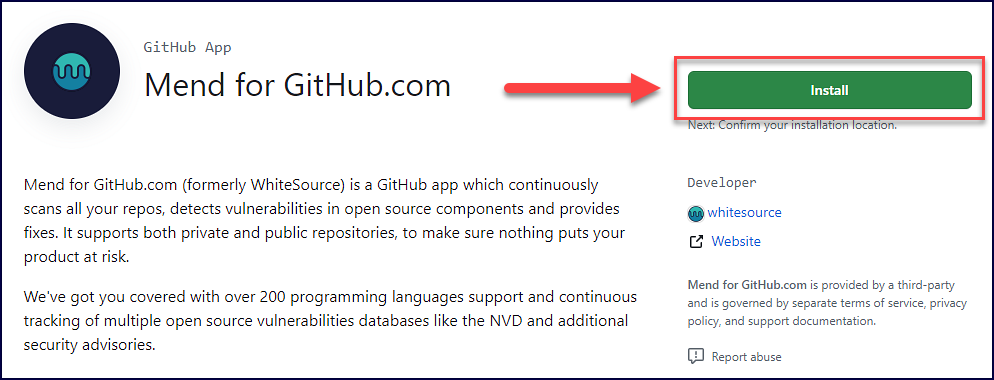
Navigate to the Mend for GitHub.com app page in the GitHub Marketplace.
-
Click Install:
-
If you have multiple organizations, select the organization you wish to install Mend for GitHub.com:
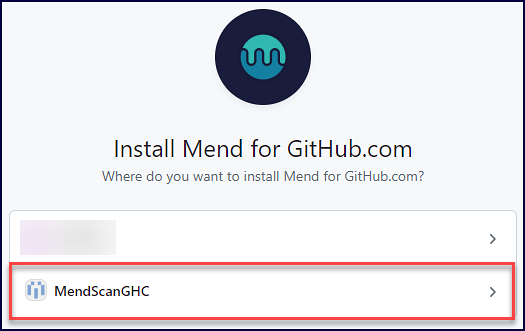
Otherwise, move to step 4.
-
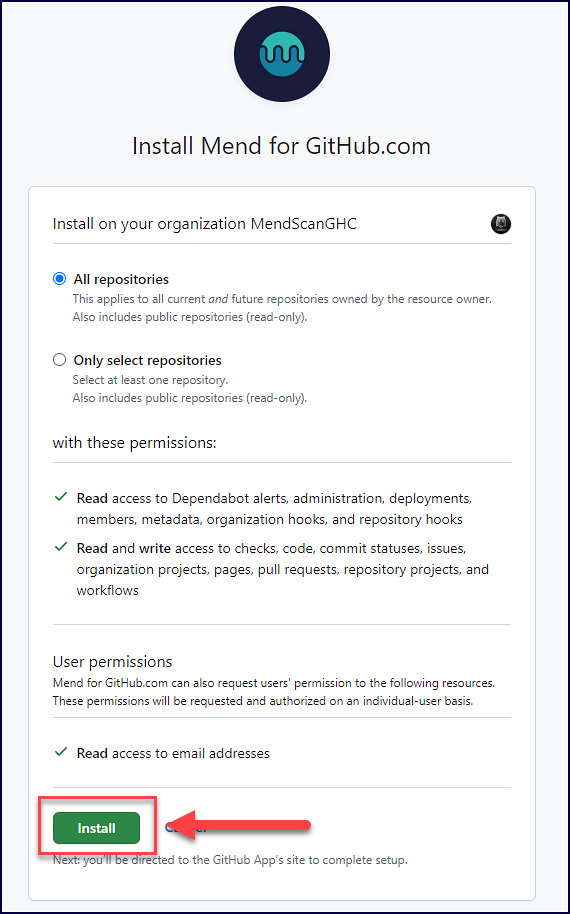
Read and select the level of access for the Mend for GitHub.com app:
-
All Repositories (Default): An option to scan all the repositories of the account.
-
Only select repositories: Select specific repositories that you would like to scan.
-
-
Click Install:
-
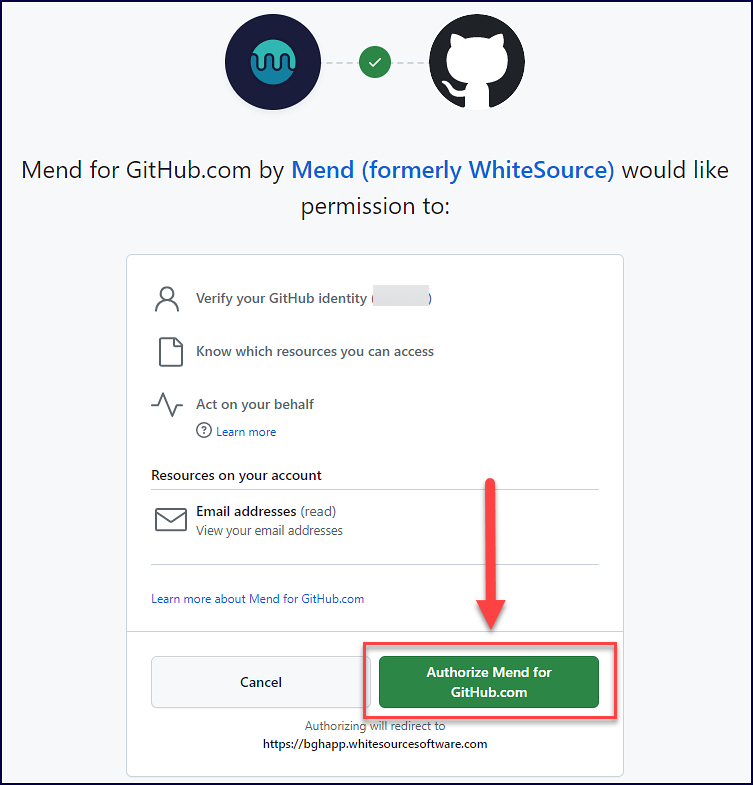
Read over the requested permissions and select Authorize Mend for GitHub.com:
Permissions and Events
This section lists every webhook event and permission the Mend for GitHub App requires, and what each one is used for. Mend.io follows a least-privilege approach: If something is not listed here, the app does not use it.
NOTE: Permission fields that are not specified below should be left as is ("No access")
Repository Permissions
-
Administration: Read-only
Reads branch protection rules so Mend knows whether its check is a required status check. Read & Write is needed only if you want Mend to manage the branch protection rule itself — this is not the default. -
Checks: Read and write
Publishes scan results as check runs on commits and PRs. Write access is also what allows the re-run button in the Checks UI to reach Mend. -
Commit statuses: Read and write
Used by the remediation engine to post status updates on Mend remediation pull requests. -
Contents: Read and write
Reads your.whitesourceconfiguration and dependency manifests to run the scan. Write access is used to create remediation branches and dependency-upgrade commits. -
Custom properties: Read-only
Reads the custom property values set on a repository, used to map repositories to Mend products. -
Issues: Read and write
Creates and updates vulnerability issues, and posts or edits their comments as findings are resolved. -
Metadata: Read-only
Basic repository information. GitHub requires this for every app and it cannot be disabled. It is also what delivers the Repository event. -
Pages: Read and write
-
Projects: Read and write
-
Pull requests: Read and write
Opens remediation pull requests, reads PR contents for PR scans, and posts findings as PR comments. -
Webhooks: Read-only
-
Workflows: Read and write
Not required: Earlier versions of the setup guide asked for the following. Mend makes no API calls to any of them and subscribes to none of their events. If your app grants them, you can safely remove them.
-
Pages
-
Projects
-
Workflows
-
Deployments
-
Webhooks
Organization Permissions
-
Custom properties: Read-only
Reads organization-level custom property definitions. GitHub also requires this permission in order to deliver the Custom property and Custom property values events. -
Members: Read-only
GitHub requires this permission in order to deliver the Organization event. Mend uses it only to detect organization deletion and clean up the installation — it does not read your member list. GHE only.
Webhook Events
Subscribe the app to the following events. Each one triggers a specific part of the Mend workflow:
-
Check run - Lets you re-run a Mend security check directly from the GitHub Checks UI.
-
Create - Starts branch-aware scanning as soon as a new branch or tag is created.
-
Custom property - Keeps Mend in sync when the organization-level custom property definitions change.
-
Custom property values - Maps repositories to Mend products using GitHub repository custom properties.
-
Installation / Installation repositories - Delivered by GitHub to every app and cannot be turned off. Mend uses them to know which repositories it has access to.
-
Issue comment - Reads Mend commands typed in issue comments, such as on-demand fix PR requests.
-
Issues - Tracks the lifecycle of Mend-created security issues and drives remediation from the master issue checkboxes.
-
Pull request - Runs PR scans on open, update and reopen, and detects when a Mend remediation PR is merged or closed.
-
Pull request review comment - Handles feedback and remediation commands on SAST findings posted as PR review comments.
-
Push - Triggers a scan when code is pushed to a tracked branch, and picks up changes to your Mend configuration file.
-
Repository - Core scanning works without it, but repository renames, product mapping and archive state silently drift — leaving stale or duplicate Mend projects. On rename, Mend updates the project to the new repository name; on a topics change, it re-resolves product mapping; on archive or unarchive, it tags the project accordingly. Each of these events also refreshes Mend's cached repository settings and configuration.
Not Required: Earlier versions of the setup guide asked for the following. Mend makes no API calls to any of them and subscribes to none of their events. If your app grants them, you can safely remove them.
-
Check suite: GitHub automatically delivers
check_suiteevents to any app with write access to Checks, so you may still see them even though the event is not listed above. Mend ignores them — no action is required on your side. -
Member
-
Membership
-
Team
-
Team add
Changing permissions on an existing GitHub App installation requires approval from an organization owner before the change takes effect. Removing any event or permission listed in this page will cause parts of the Mend integration to stop working.
Connect your Mend organization
This step differs between the Mend AppSec Platform and the Legacy SCA application.
The Legacy SCA instructions are listed at the bottom of this section.
After clicking Authorize Mend for GitHub.com you will see a registration form. To fill this out, you will need to obtain your Mend license key.
-
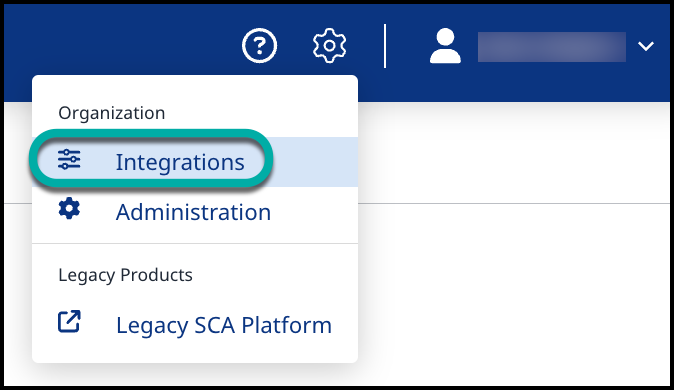
Within the Mend Application, navigate to Settings (cog icon in the top-right corner) → Integrations.
-
On the Integrations page, toggle the GitHub.com bar to expand its settings.
-
Click on Generate Activation Key and copy the value.
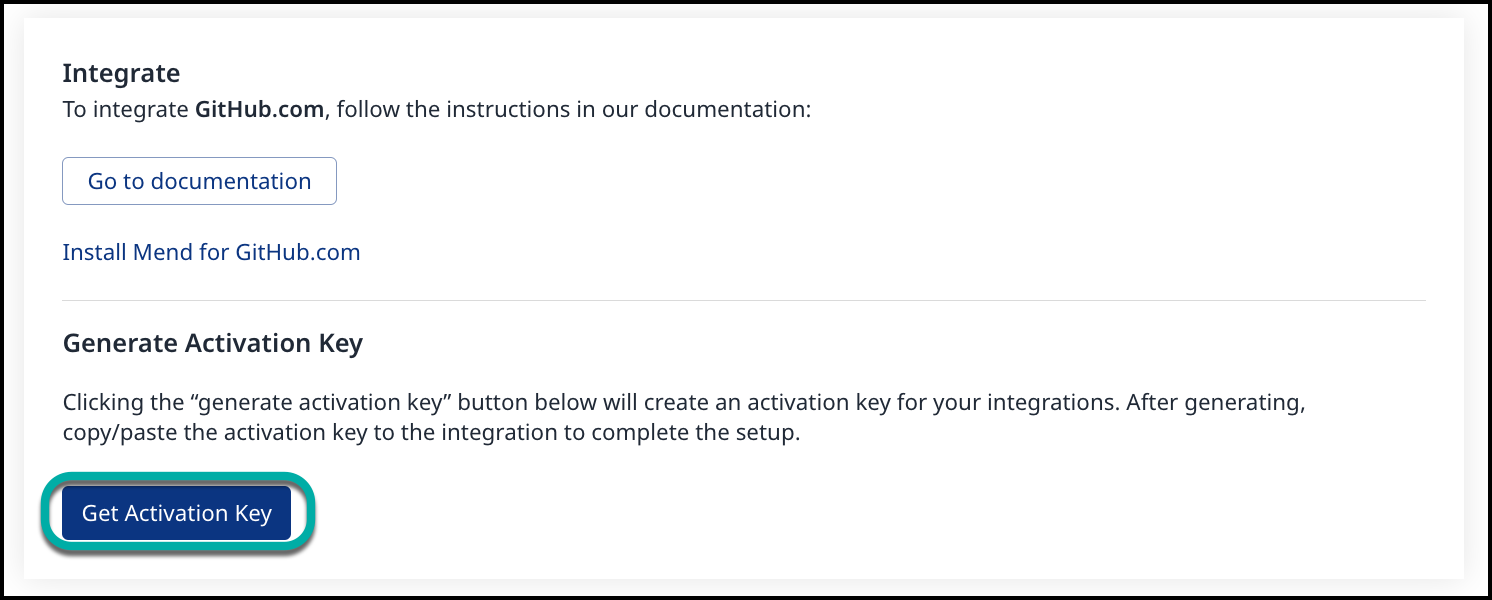
Note: The license key is valid for 24 hours. You must generate a new license key if you have not submitted the registration form below within 24 hours.
Note: After you generate the Mend license key, a service user named ws_4_ghc_service_user is created in your Mend organization in the admins group. Do not remove this service user or its permissions as it is required for the Mend GitHub.com integration to function correctly:

-
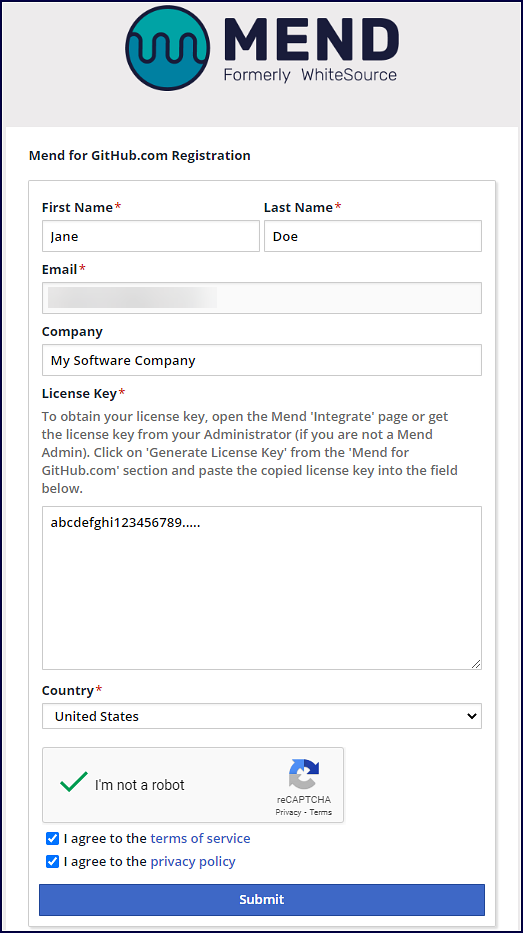
Now you can fill out the provided registration form to connect your Mend organization:
-
First Name: Your first name
-
Last Name: Your last name
-
Email: Your email address
-
Company: (Optional) Your company name
-
License Key: Your Mend license key
-
Country: Your country
-
Read and check off GitHub’s documents:
-
I agree to the terms of service
-
I agree to the privacy policy
-
-
Click on Submit
Connect your Mend organization (Legacy SCA Application)
After you install the Mend for GitHub.com app, there will be a registration form provided to connect your Mend organization. You will need to obtain your Mend license key:
-
Within your MendSCA application, navigate to the Integrate tab.
-
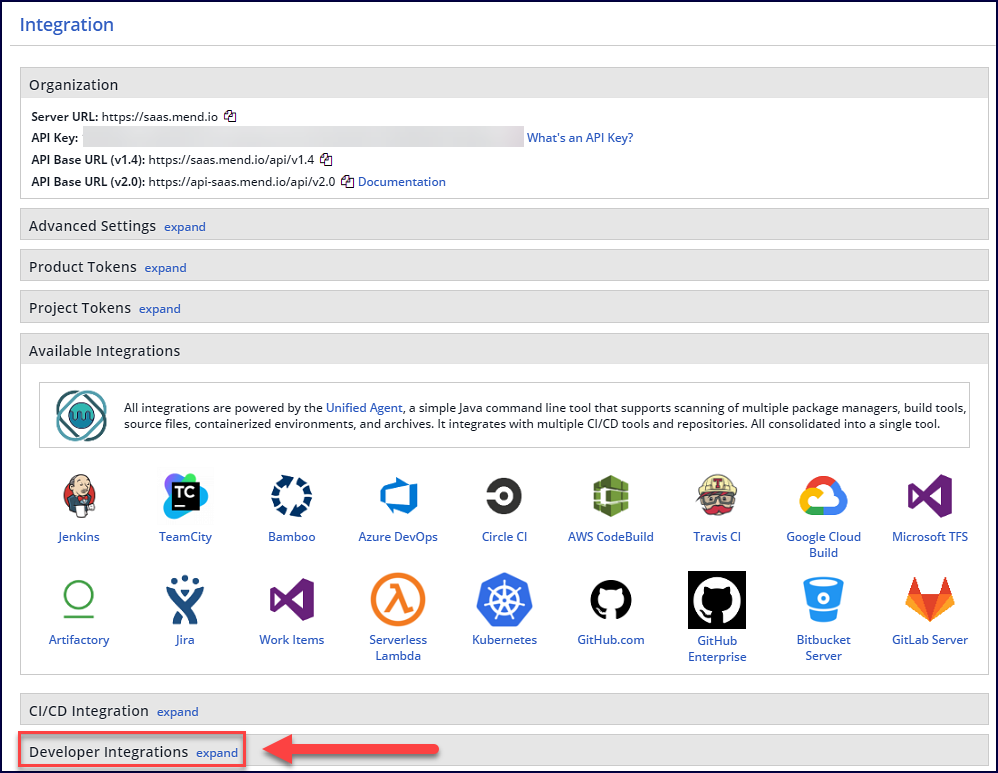
On the Integration page, navigate to the Developer Integrations section:
-
Expand the Developer Integrations section and navigate to Mend for GitHub.com.
-
Expand the Mend for GitHub.com section.
-
(SAST only) To enable SAST scanning, connect your MendSAST organization by adding the following value into the SAST Token setting:

-
A service user token. This can be found via your MendSAST organization → Administration → Users → Service Users → Select the “eye” icon next to the desired service user → copy the value. Confirm the selected service user is assigned either the Administrator User Role or Scan Initiation Role.
-
Make sure to Save your SAST Token setting. You will see a “SAST token saved successfully” message when your SAST token is accepted.
-
-
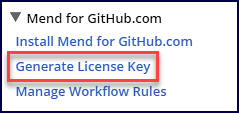
Click on Generate License Key and copy the value:
Note: The license key is valid for 24 hours. You must generate a new license key if you have not submitted the registration form below within 24 hours.
Now, you can fill out the provided registration form to connect your Mend organization:
-
First Name: Your first name
-
Last Name: Your last name
-
Email: Your email address
-
Company: (Optional) Your company name
-
License Key: Your Mend license key
-
Country: Your country
-
Read and check off GitHub’s documents:
-
I agree to the terms of service
-
I agree to the privacy policy
-
-
Click on Submit
Note: After you generate the Mend license key, a service user named WS_4_GHC_service_user is created in your Mend organization in the admins group. Do not remove this service user or its permissions as it is required for the Mend GitHub.com integration to function correctly:

Uninstall Mend for GitHub.com
To uninstall Mend for GitHub.com from your GitHub organization or personal profile:
Uninstall Mend for GitHub.com from your GitHub organization
-
Within GitHub.com, navigate to Your organizations → select the Settings option of the organization integrated with Mend:

-
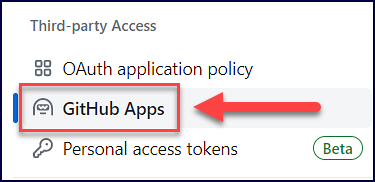
In the left-hand table of contents, find the Third-party Access section and click on GitHub Apps:
-
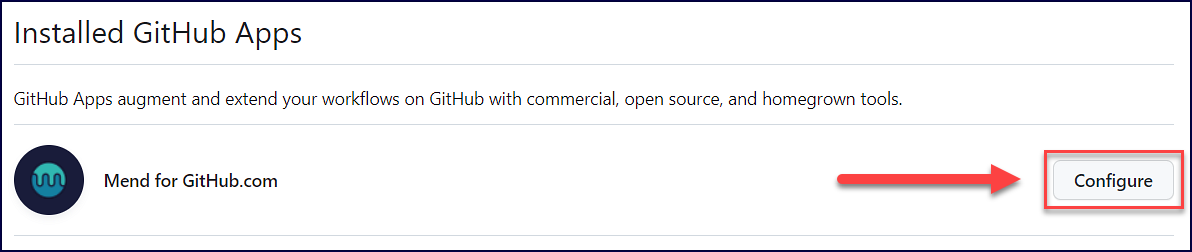
Find Mend for GitHub.com and click on Configure:
-
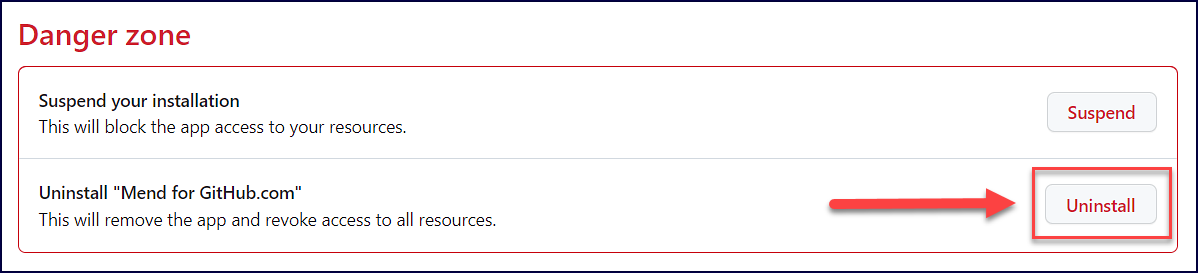
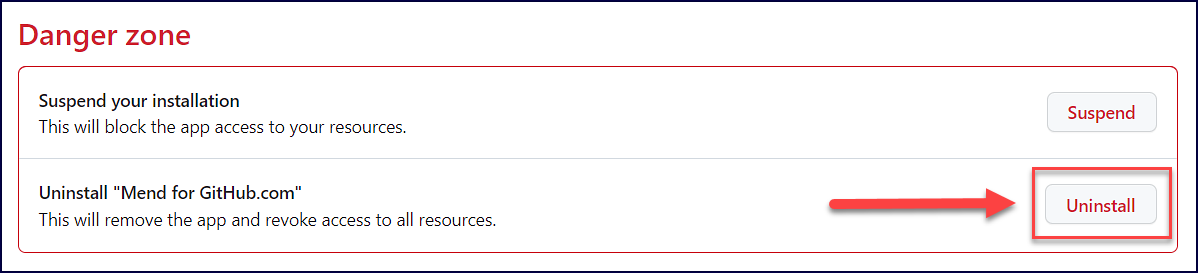
Scroll down to the Danger zone section and select Uninstall:
Uninstall Mend for GitHub.com from your personal profile
-
Within GitHub.com, navigate to your Settings section.
-
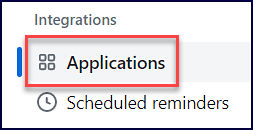
In the left-hand table of contents, find the Integrations section and click on Applications:
-
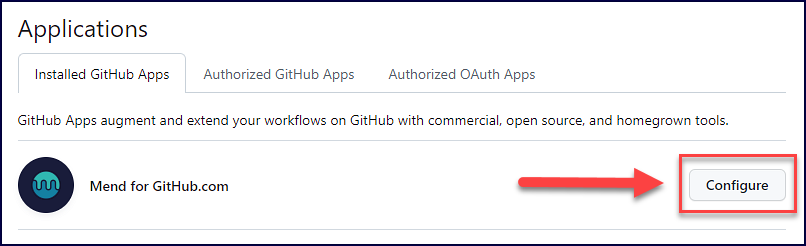
In the Installed GitHub Apps tab, find Mend for GitHub.com and click on Configure:
-
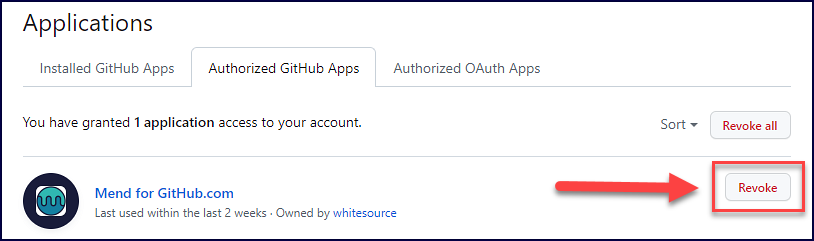
Optionally, go to the Authorized GitHub Apps tab, find Mend for GitHub.com, and click on Revoke:
-
-
On the configuration page, scroll down to the Danger zone section and select Uninstall: