Users Tab
Note: The legacy Mend SAST application was deprecated on April 1st, 2025. For assistance with migrating to the Mend AppSec Platform, please contact your customer success manager or the success team at success@mend.io.
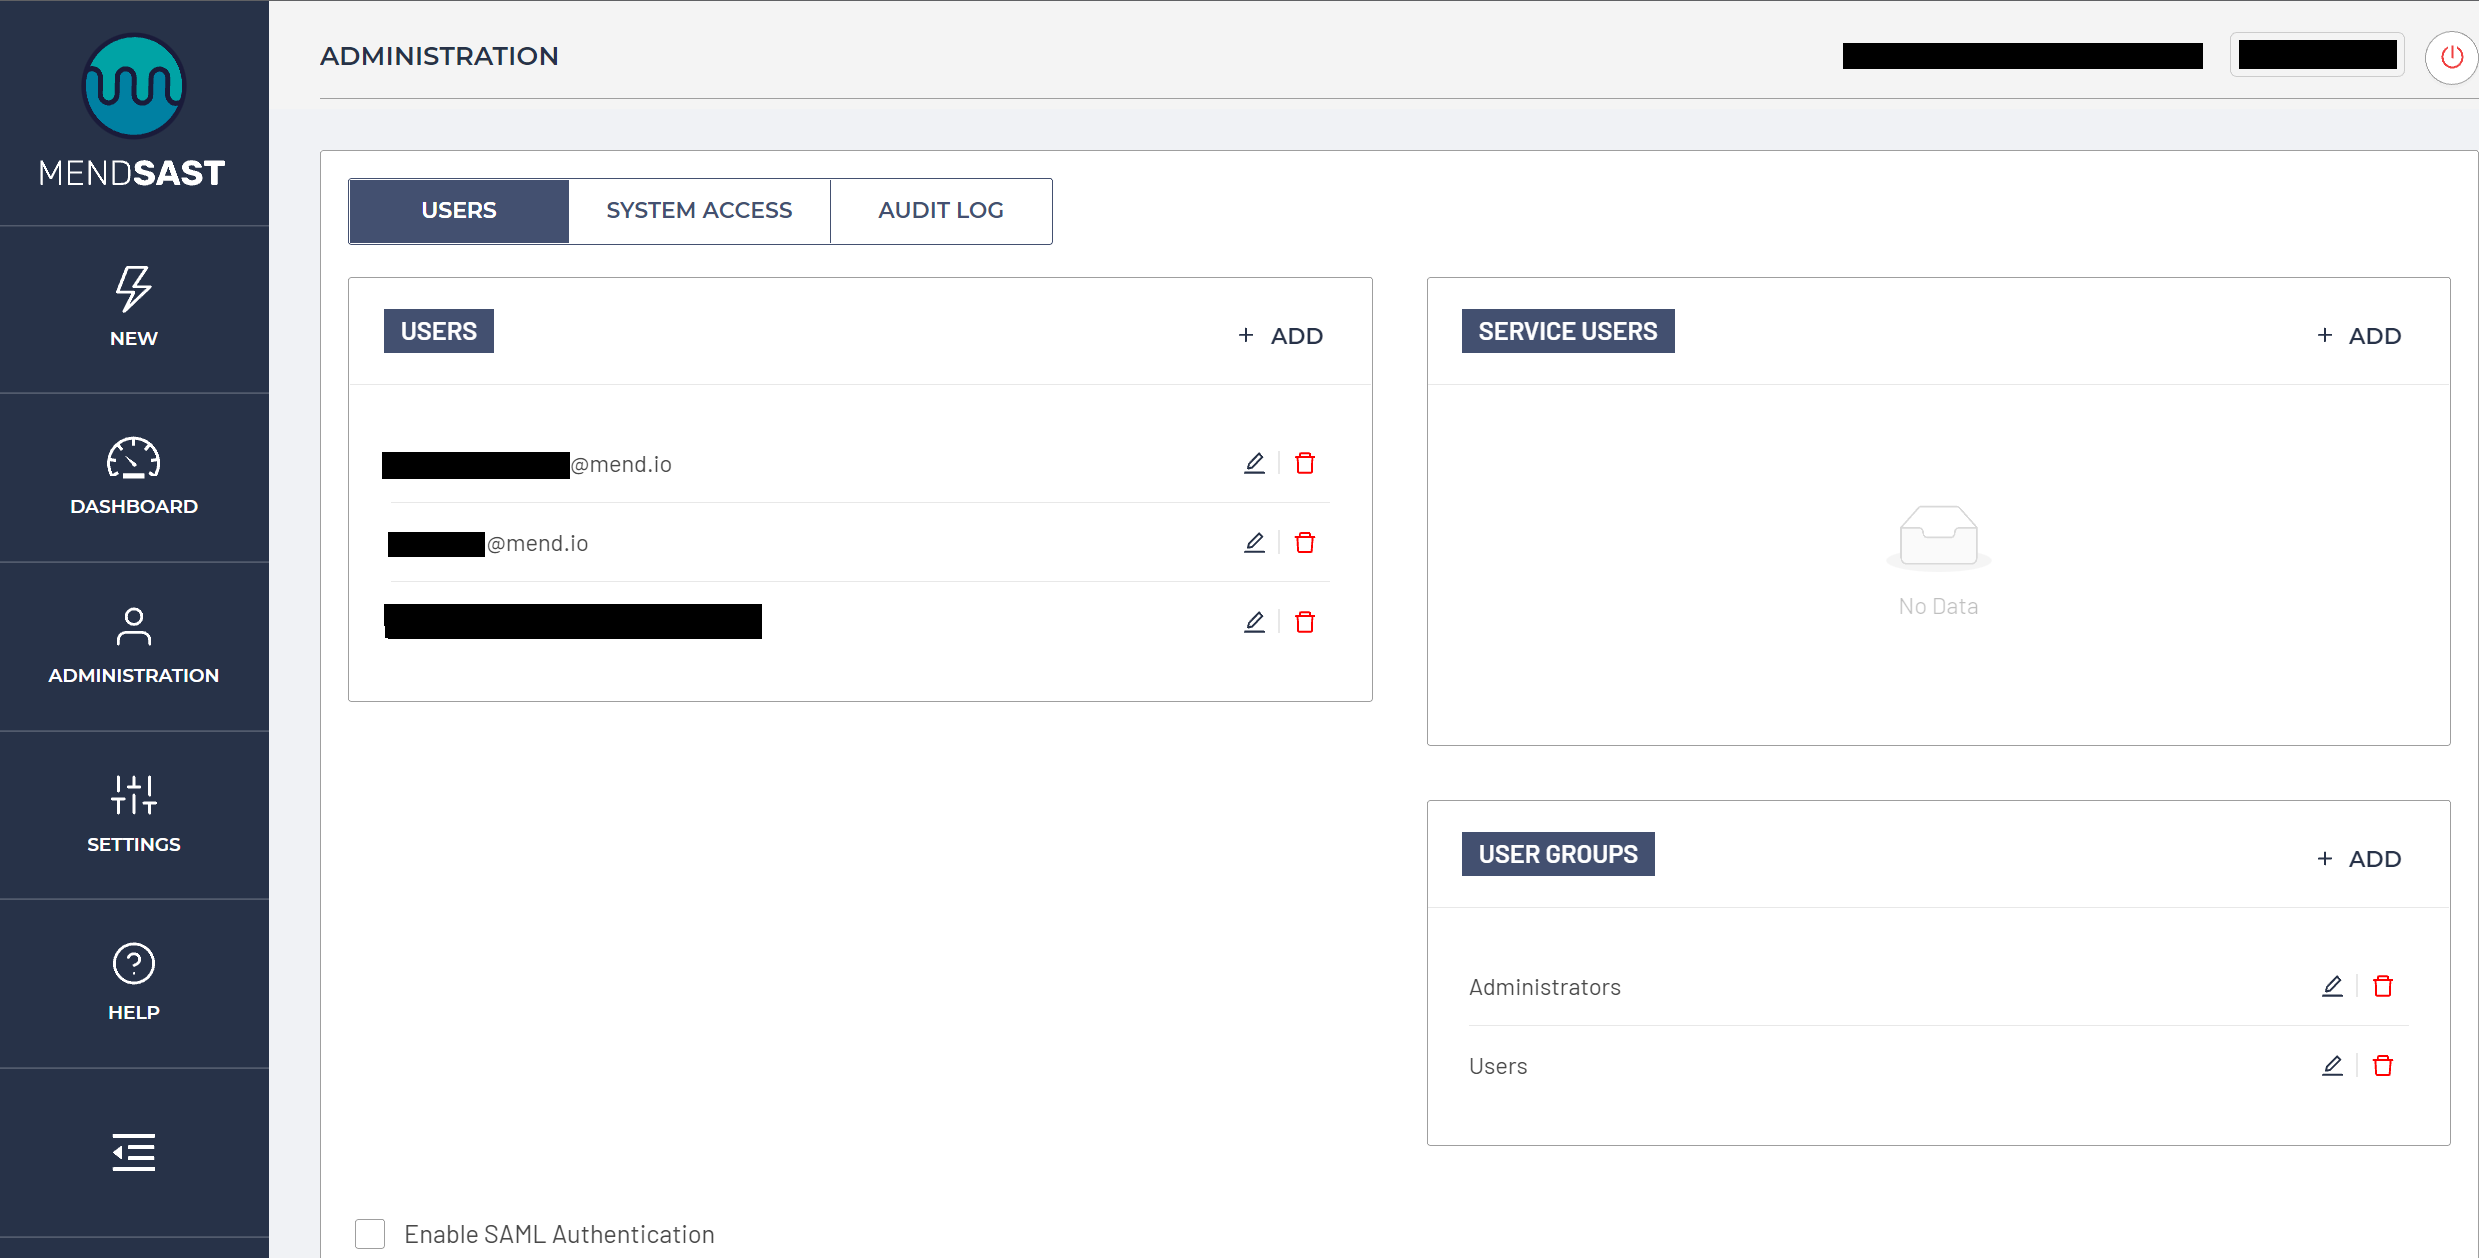
The USERS tab enables creation of users and user groups.
NOTE: You can enable SAML authentication for all users by checking Enable SAML Authentication in the lower left corner.

There are two types of users:
An ordinary “human” user;
A non-human "Service User" for the purpose of integration into pipelines, repositories, etc., for example, integrating scanning into GitHub.
To create a new user:
Click on the + ADD button in the upper right corner of the appropriate users card.
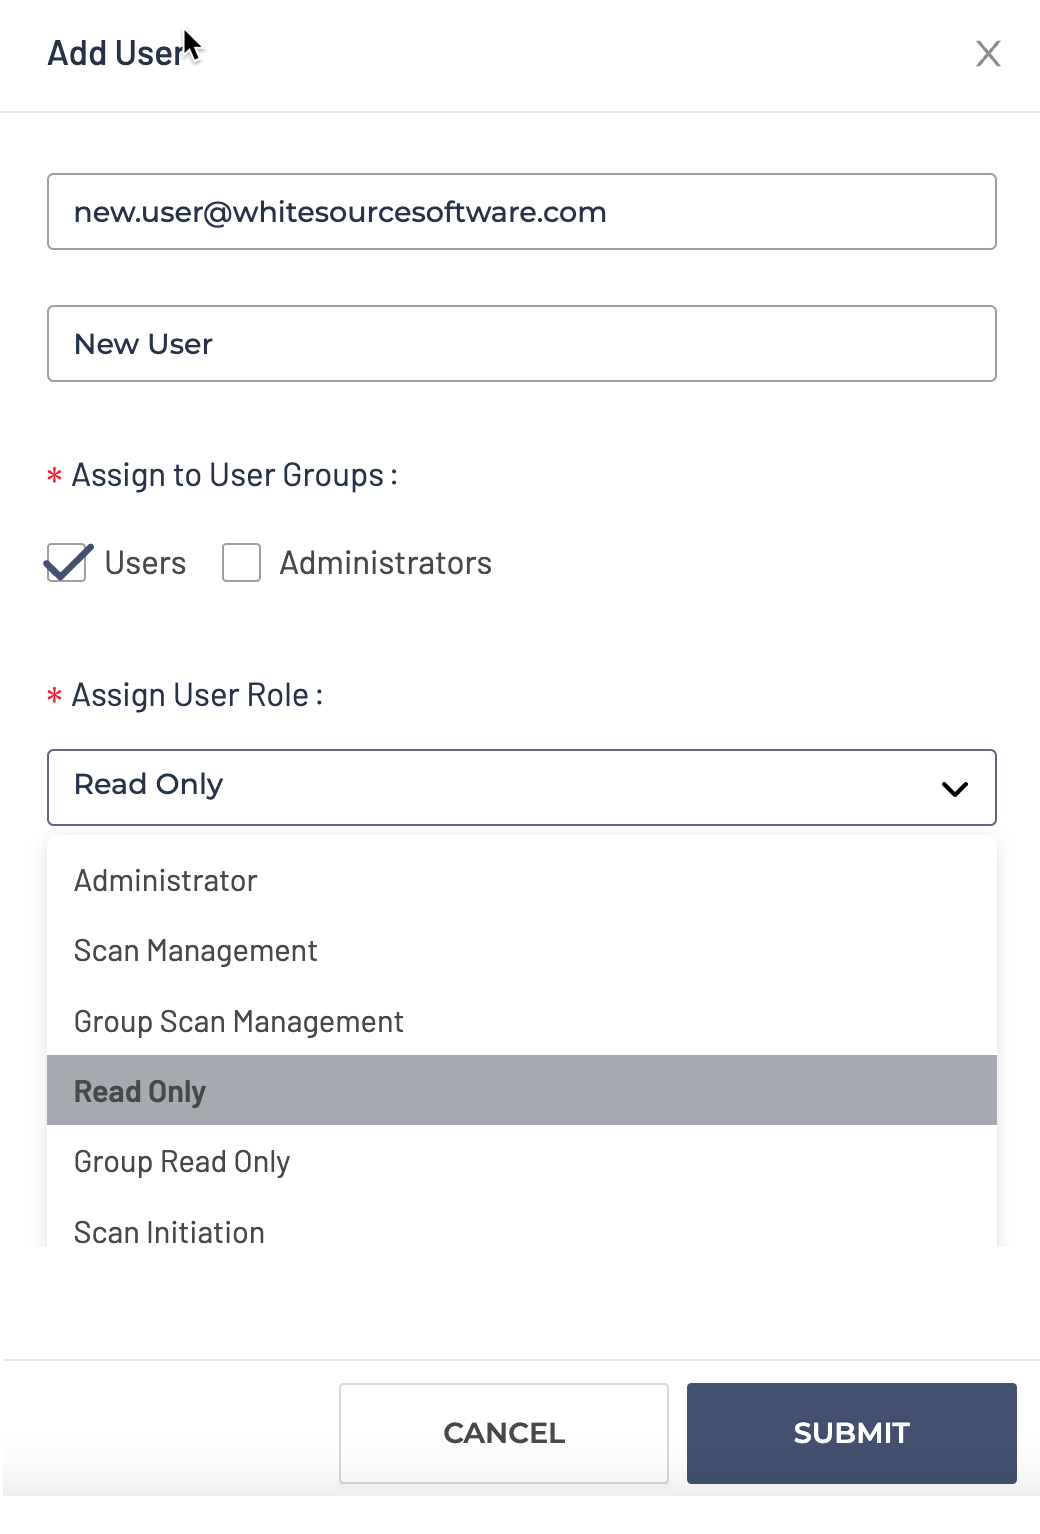
Enter the user’s email address and name. NOTE: Users are identified by their email addresses.
Choose the group to which to assign the user.
Assign the user’s role.

Users can be assigned one of six available roles:
Administrator: Administrative role with access to every available configuration and feature.
Scan Management: Role that allows for scan management across all groups (starting, deleting, suppressing, risk changes, etc.).
Group Scan Management: Role that allows for scan management for scans created by users with the same group membership.
Read Only: Role that allows the review of all scan results and report generation but disallows any actions such as starting scans, deletions, suppressions, risk changes, or integration configurations.
Group Read Only: Role that allows the review of all scan results for scans created by users with the same group membership but disallows any actions such as starting scans, deletions, false positive marking, risk changes, or integration configurations.
Scan Initiation: Role that allows the review of scans and scan initiations but disallows any actions such as deletions, suppressions, risk changes, or integration configurations.
Assigning a user to one of the created groups allows for the use of Group roles for greater separation of user permissions.
To create a new group, click on the + ADD button in the upper right corner of the user groups card. The user groups are defined only by name and description. Roles are not applied to groups themselves but only to users.
Once you have created a group, you can configure its visibility scope to a single or set of applications.
To do this, select Dashboard → Applications → select your desired application. In the application’s Summary tab, click on the ellipsis in the top right → select “Change scan groups visibility” to map the new group to the selected application.
To edit an existing user or a group, click on the pen icon in the user/group card. To delete an existing user or a group, click on the trashcan icon in the user/group card.
Removing the user from a group can be done on both the user edit and group edit views. The change will reflect the membership in both views.
