Using Mend for Bitbucket Cloud Repos
This integration is for Legacy SCA organizations. Organizations in the Mend AppSec Platform should use the designated Developer Platform integration for Bitbucket Cloud.
Initiating a Scan
A Mend scan is initiated via a valid push. A valid push meets at least one of the following requirements:
One of the commits in the push command added/removed a source file(s) that has an extension supported by Mend.
Refer to the Mend Languages page in order to find out whether or not a specific language and its extensions are supported.One of the commits in the push command includes an addition/modification of the package manager dependency file(s).
Refer to the list of supported dependency files to find out whether your dependency files are supported.
NOTE:
A push command may consist of multiple commits.
Inventory Post-Scan
Mend continuously researches new vulnerabilities and updates its vulnerability database with these findings. In order for these newly-discovered vulnerabilities to be reflected in projects as soon as possible, Mend initiates a post-scan process for all integrated projects every 6 hours and additionally at 01:00 UTC. Mend will create or update issues and pull requests for vulnerabilities that were added to the database during this period of time.
This is an automated procedure, and no action from the user is required.
Viewing Details of the Scan
Results can be viewed in the following places:
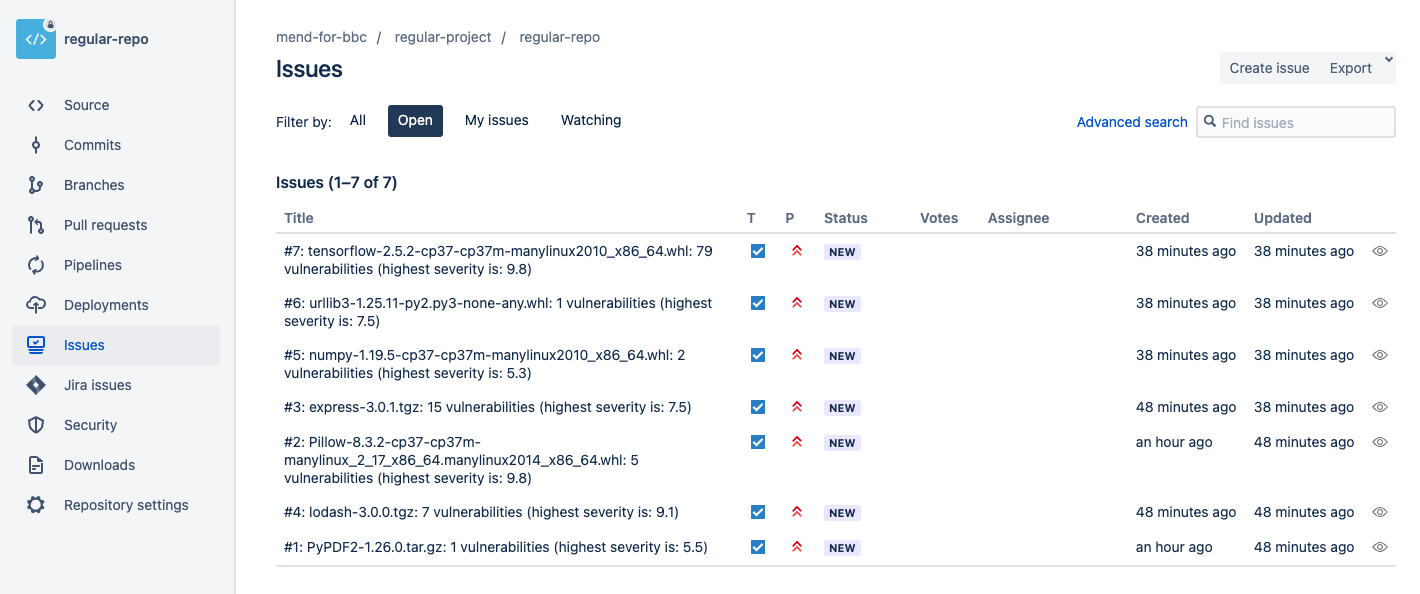
The Issues section in the repository.
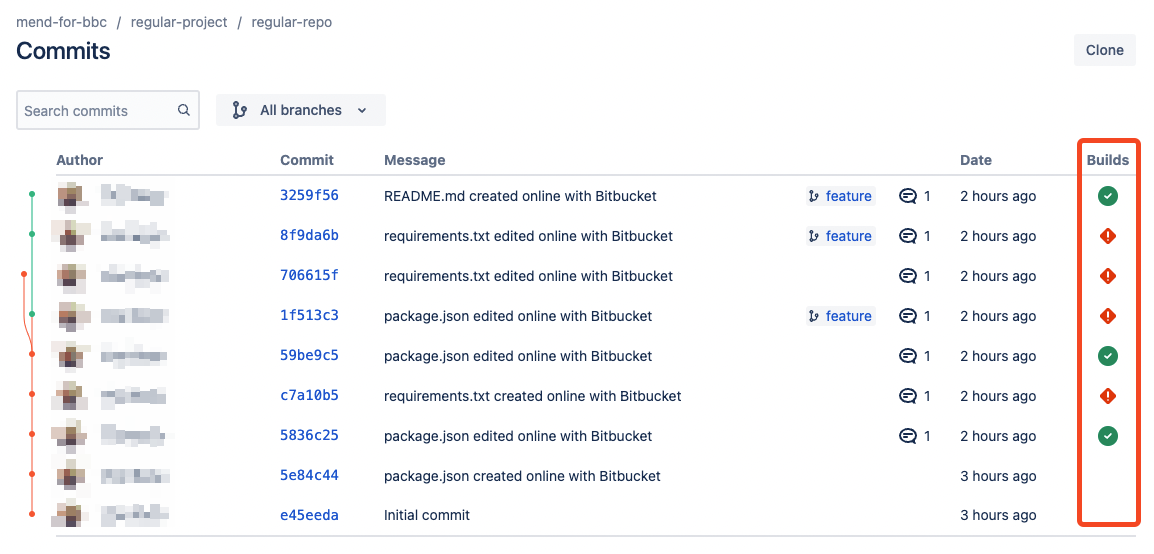
Build statuses for each commit in the Commits tab.
The commits comments inside each specific commit.
Code Insight report in the Pull Requests.
The Mend UI
Via email notifications
Viewing the Issues section
If you do not see the Issues section in the left panel of Bitbucket, please go to Repository settings → Issue tracker and enable issue tracker for this repo. Admin rights for this repository are required.
If you are performing Pull Requests or push commands via the Web browser, refresh your Web browser in order to view the issues that were generated by Mend.
NOTE: It may take a number of minutes for the issues to be scanned and displayed after a valid push command is initiated.
The Issues section displays all the issues that the Mend Integration detected.
As part of your workflow, you have the option to close issues that were resolved. Issues that were manually closed will not be re-opened during future Mend scans unless their tag and/or name were changed.
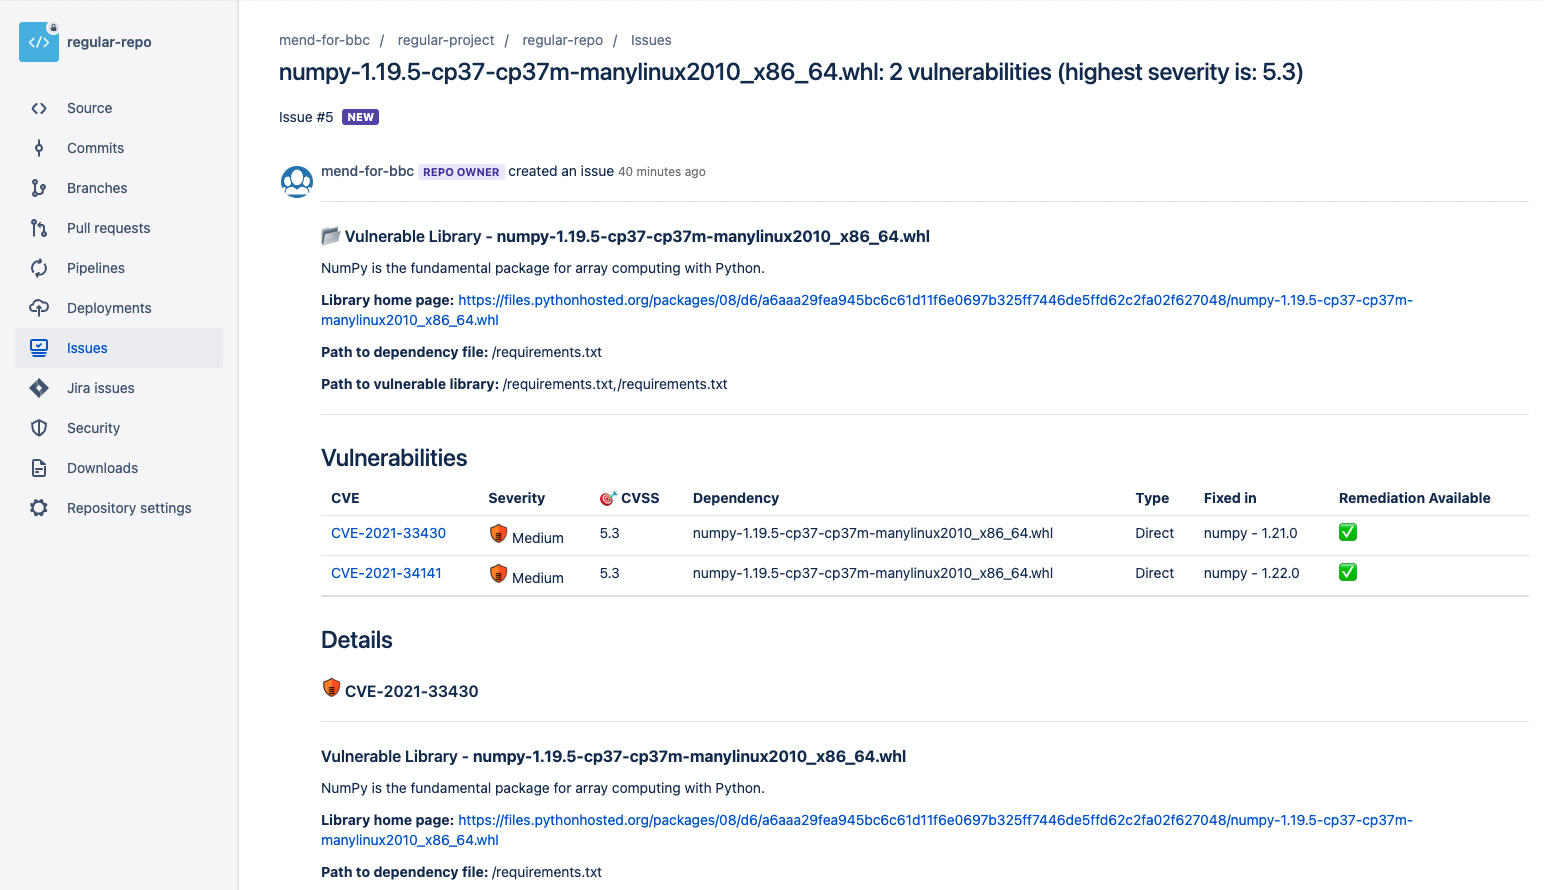
Viewing Details of an Issue
See here for more information.
Viewing Mend Security Checks
Status Check messages are displayed for each commit. Clicking a specific security check message opens a related head commit with detailed information about found vulnerabilities:

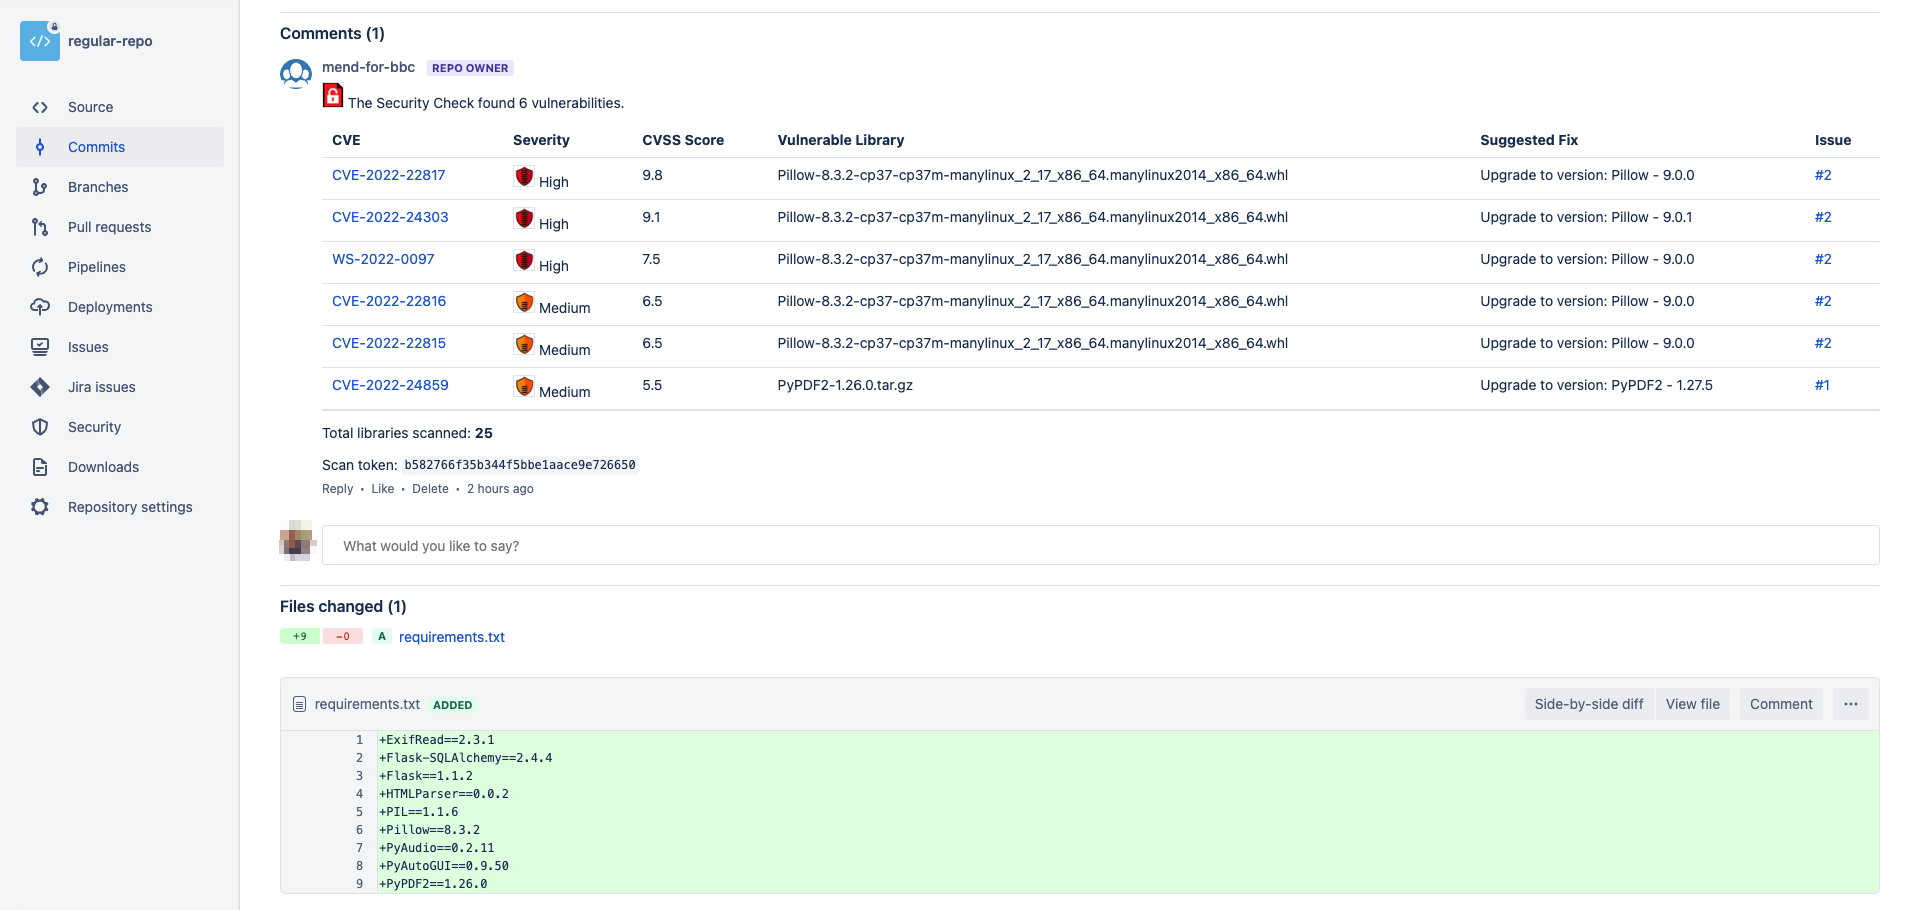
The security report displays all the vulnerabilities that were found in descending order according to the severity and CVSS score. The following information is displayed for each vulnerability:
CVE: A link to the related CVE page for the vulnerability. Displayed in a collapsible format (click the arrow to expand/collapse for more information regarding the vulnerability).
Severity: Overall score of the severity (High, Medium, or Low).
CVSS Score
Vulnerable Library
Suggested Fix
Issue: A link to the Mend issue that was generated for the vulnerability.
Types of Indicators
The following status indicators are available as feedback on a head commit:
Queued: Scan has not begun and is scheduled to begin.
In progress: Scan is in progress.
Completed: Scan completed with one of the following conclusions:
Success: When the parameter 'vulnerable.check.run.conclusion.level' is set to 'success', the status of the head commit is always success A 'Success' status is displayed for the commit even when it fails.
Failure: Default for all completed scans. When the parameter 'vulnerable.check.run.conclusion.level' is set to 'failure' (default), the status of a 'failed' head commit is 'failure', and a policy for approving merging pull requests that include failed head commits with another branch in the repository is enforced. Note that a 'failed' status can be caused due to security vulnerabilities or due to an error that occurred during the scan.
Neutral: Conclusion occurs when the push command was not valid.
Samples of Check Status Indicators
In Progress
The following is a sample of a 'Running' status, which indicates that the security check is currently scanning the head commit.

Completed with Success Conclusion
When no vulnerabilities are found and no errors occurred during the scan, Mend will display the following commit status, and a security report indicating that no vulnerabilities were detected.

Completed with Failure Conclusion
All head commits that fail the scan due to the security check detecting vulnerabilities or due to an error that occurred during the scan, will display a failed commit status.
The following screenshot displays a failure indicator for a head commit

Security Check with Partial Scan results
In case when during the scanning of the repository Mend encountered exceptions thrown by the package managers there will be a message indicating that the scan results might be partial (i.e. Mend was not able to pull all of the dependencies for scanning).
This message is displayed only in the description of the Security Check and does not affect its status. It is also possible to use the strictMode parameter so all the Checks with this message will fail even if no vulnerabilities are detected during the scan.
Viewing Mend License Checks
On the Commits page, you can view the status and results of each scan. Open a specific commit in order to view the Mend check.
Types of Indicators
The following commit status indicators are available as feedback on the head commits:
Success: No license policy violations were detected.
Failed: One or more license policy violations were detected during the Mend scan.
Create a branch restriction in Bitbucket Cloud using Mend checks
To create a Bitbucket Project branch restriction that will block pull requests to the default branch of each repository when the Mend check fails (using the default Mend configuration):
Within Bitbucket, select Projects on the top navigation bar to access the projects within the workspace.

Select the Project in which you want to add branch restrictions.
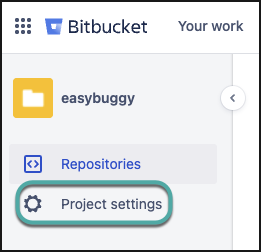
Select Project Settings on the left navigation sidebar.
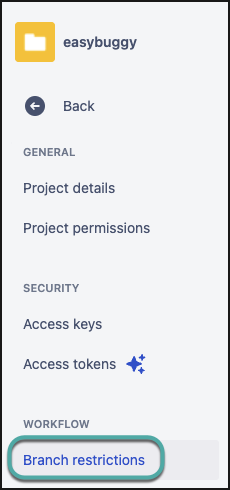
Select Branch restrictions on the left navigation sidebar.
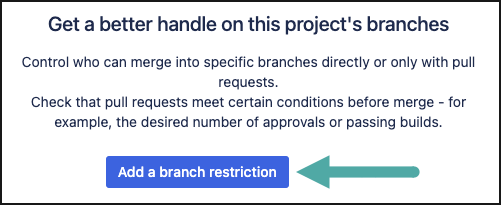
Select Add a branch restriction.
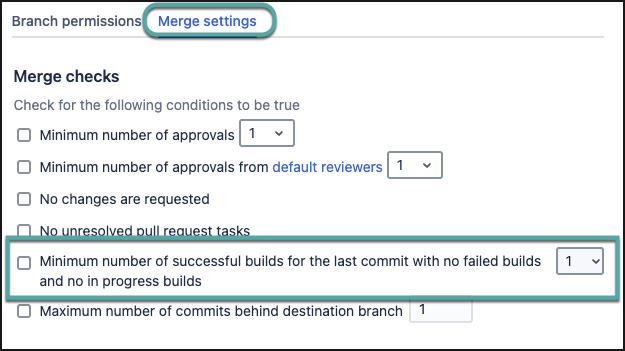
Select the Merge settings tab.
Check the following box ‘Minimum number of successful builds for the last commit with no failed builds <number> and no in progress builds' - please set 'number’ to your company policy.
Click Save.
Viewing Details in the Mend UI
In the Mend UI, Mend projects will have the same name as the corresponding Bitbucket Cloud repository, with a "BBC_" prefix.
The name of the Mend product will be your Bitbucket Cloud Project name preceded by "BBC_".
