Install Mend for Azure Repos
Overview
Before you begin scanning your repositories with Mend for Azure Repos, it's essential to establish a connection between your Mend organization and the tool.
In this article, you will find step-by-step instructions for installing Mend for Azure Repos. Additionally, you will learn how to uninstall the app if needed.
This integration covers the Legacy Mend application for Azure Devops Repos. Organizations in the Mend AppSec Platform should use the designated Developer Platform intergration for Azure Devops Repos.
Note for Dedicated Instance customers:
Mend for Azure DevOps Services is supported for customers on a Mend Dedicated Instance. Please contact your Mend sales representative.
Getting it done
Prerequisites before getting started with Mend for Azure Repos
Note: Setting up global configuration is highly recommended for centralized mass deployments.
Access to a working Mend Application and a user with Admin privileges (either Organization or Product Admin).
“Developer Integrations” enabled in your Mend organization. If Developer Integrations are not enabled, please contact your Mend Customer Service Manager for assistance.
Access to Azure DevOps Repos and a user with privileges to create a bot-user.
If your organization has conditional access to certain IP addresses, please whitelist the relevant following IPs:
saas-eu/app-eu customers - azdo-eu.mend.io - 52.19.242.94 and 52.16.40.48
saas/app customers - azdo-us.mend.io - 18.213.58.72 and 54.87.52.221
Note: When setting up repository integrations, you can only connect one source code management (SCM) system to a single Mend organization. For example, if you integrate a GitHub organization, you cannot link additional SCM systems like GitLab groups or Bitbucket teams to the same Mend organization.
Installing Mend for Azure Repos
Note: For ease of use, we recommend to follow the best practice of configuring the global configuration for Mend for Azure Repos as detailed here.
There are two global configuration levels:
Azure Organization level configuration - Using the “whitesource-config” Azure project / “whitesource-config” repo. Configuration at this level will affect all projects integrated using Mend for Azure Repos.
Azure Project level configuration - Using the "YourProjectName" Azure project / “whitesource-config” repo. Configuration at this level will also affect projects integrated using Mend for Azure Repos but can be customized separately.
Create a Service Account and generate a PAT (Personal Access Token) in your Azure DevOps organization
For the application to work correctly, Mend needs to receive a PAT from a user who has full access to the repositories. We strongly recommend creating a dedicated bot-user solely dedicated to the integration with Mend for Azure Repos.
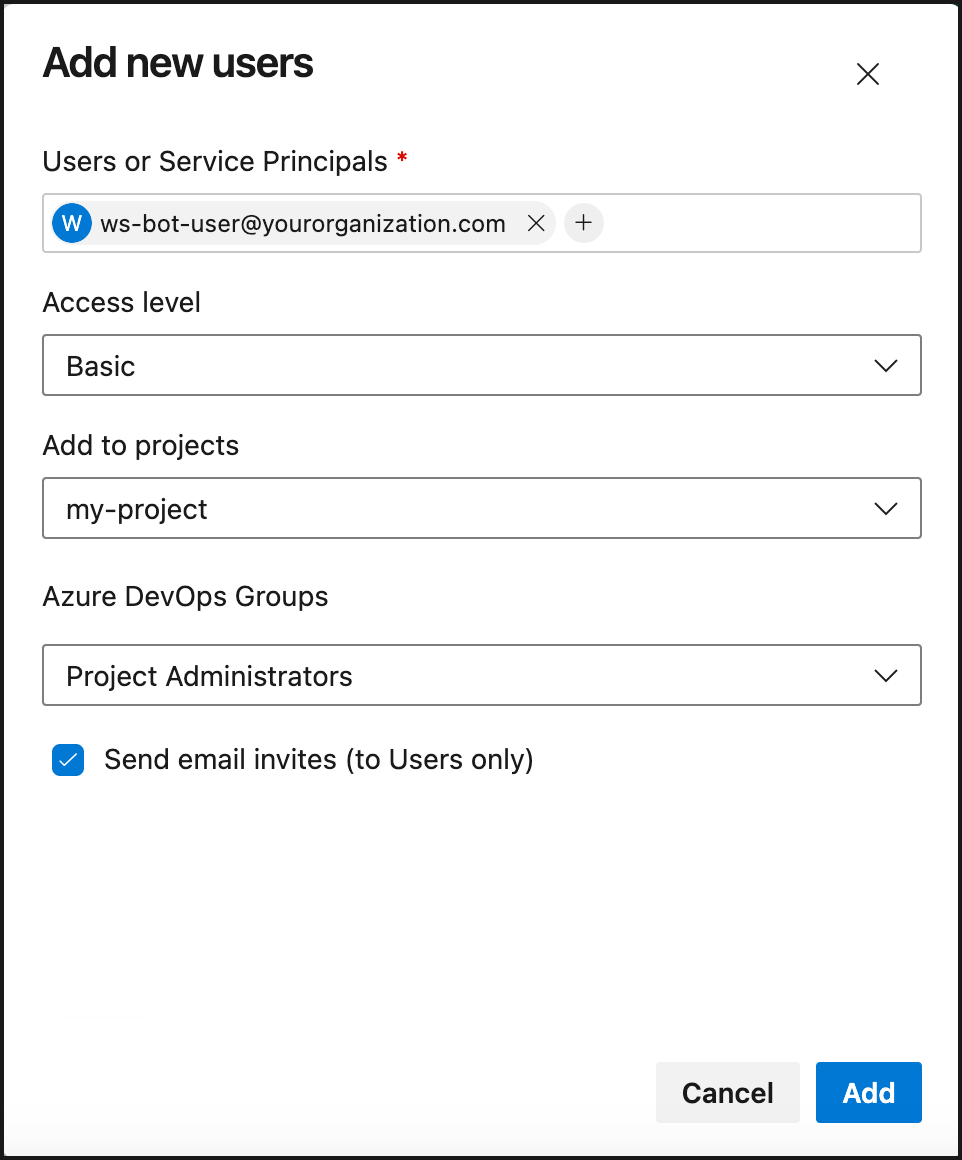
Create and add a bot-user to your organization.
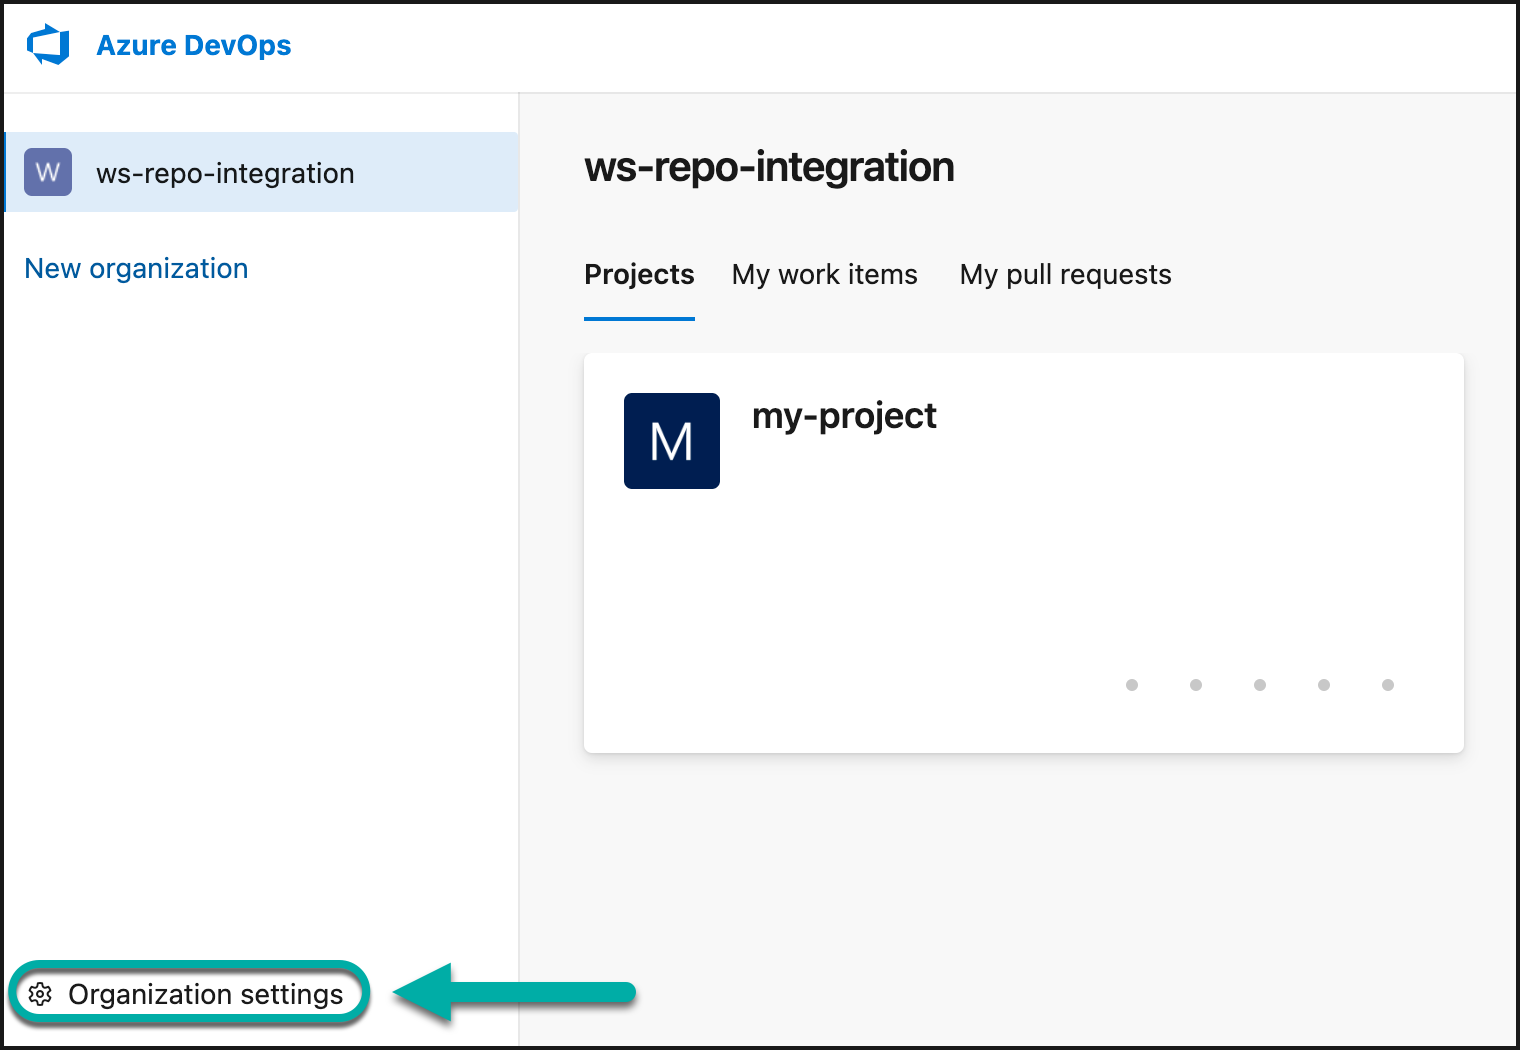
Open Organization Settings → Users in your Azure DevOps organization:
Click Add users.
Fill in an email for the bot-user, set Access level to Basic, provide access to the projects you want to integrate, and set Azure DevOps Groups to Project Administrators.
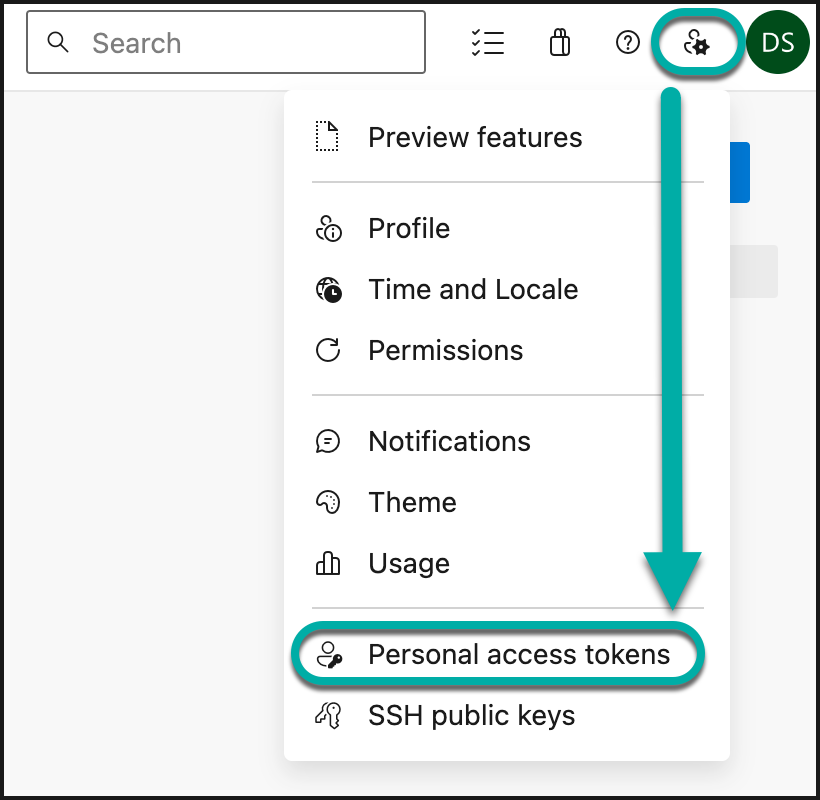
Log in as the bot-user you just created and create a PAT.
Open User settings → Personal Access Tokens:
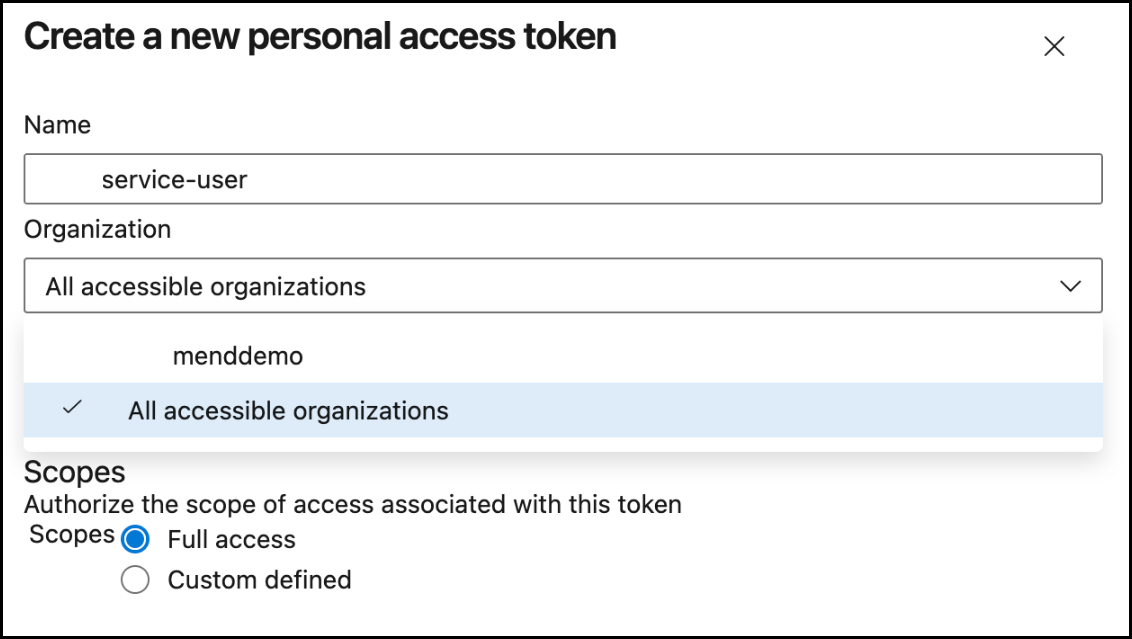
Create a new token. Give the token a name, and in the Organization dropdown, select the All accessible organizations option.
Set Expiration date. It is recommended to give the latest possible value; one year is the limit.
Note: This PAT will expire at the end of that period, and you will need to renew it. See here for more details.
Set Scopes to either of these two options:
Full access. Mend for Azure Repos requires this for displaying security checks with rich details.
Custom defined. With this option, all the details of the scan process and results are limited to the commit status.
Under the “Code” scope, select “Read & write”. This is a required scope.
Under the “Work Items” scope, select “Read & write”. This is a recommended scope. Without it, Mend will not create work items with details about detected vulnerable libraries.
Under the “Tokens” scope, select “Read & manage”. This is a recommended scope. Without it, Mend will not be able to create a notice that the provided PAT is going to expire soon.
Save the created token:
Full access example: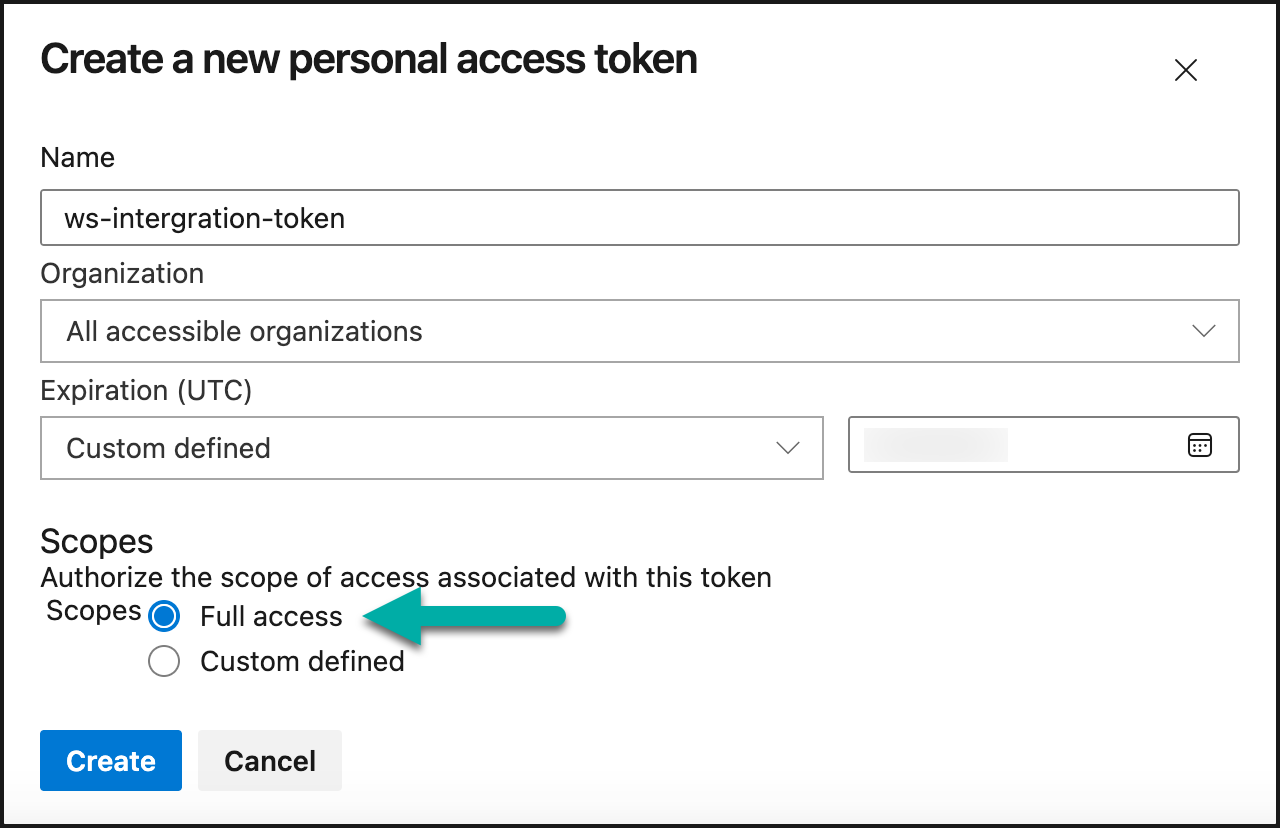
Custom-defined example: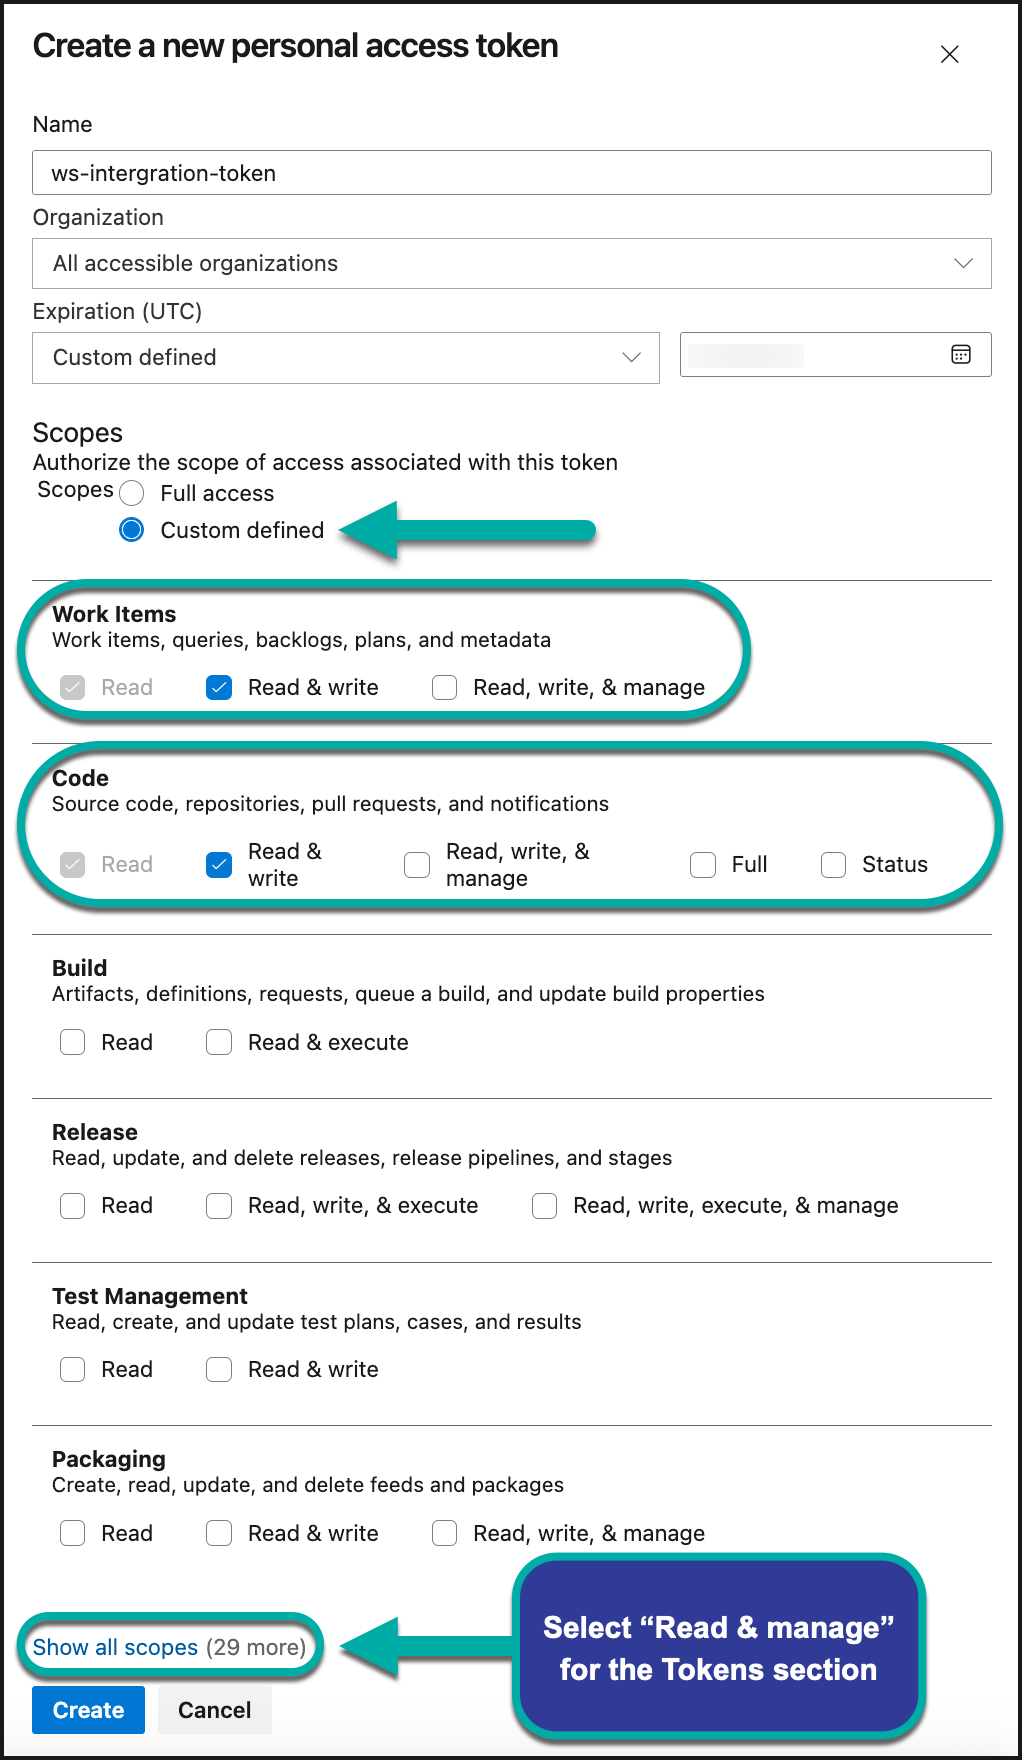
Connect your Mend organization
Note: This step differs between the Mend AppSec Platform and the Legacy SCA Application. The Legacy Application instructions are listed at the bottom of this section.
After you generate the Personal Access Token, you will have to provide it to the Mend application:
Log in to your Mend application as an Admin of the organization you want to integrate with these Azure Repos.
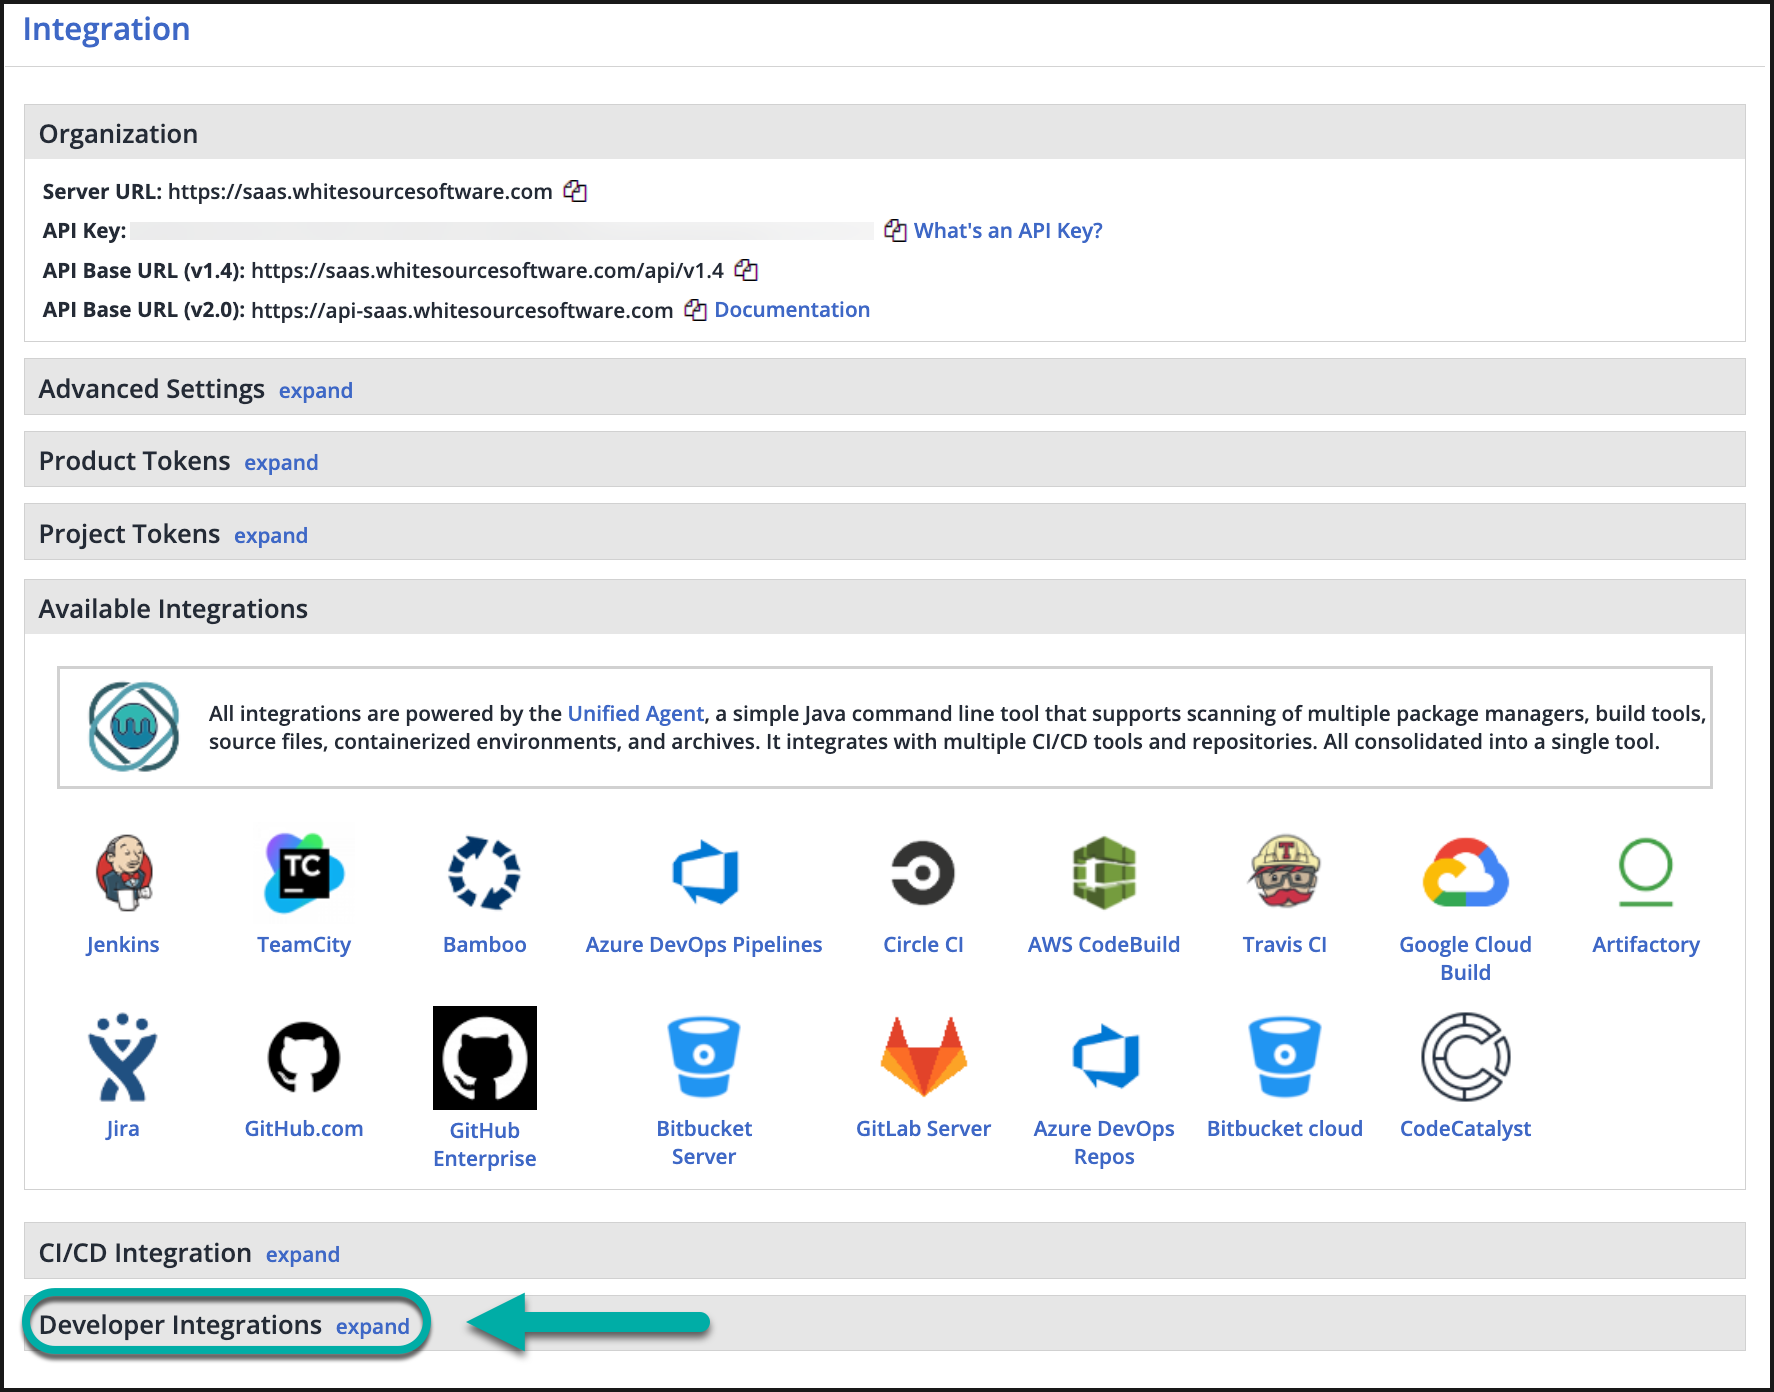
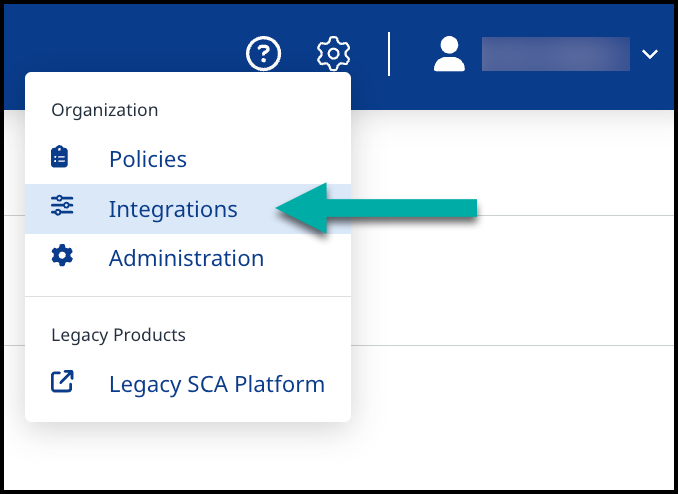
Navigate to the Integrations section:
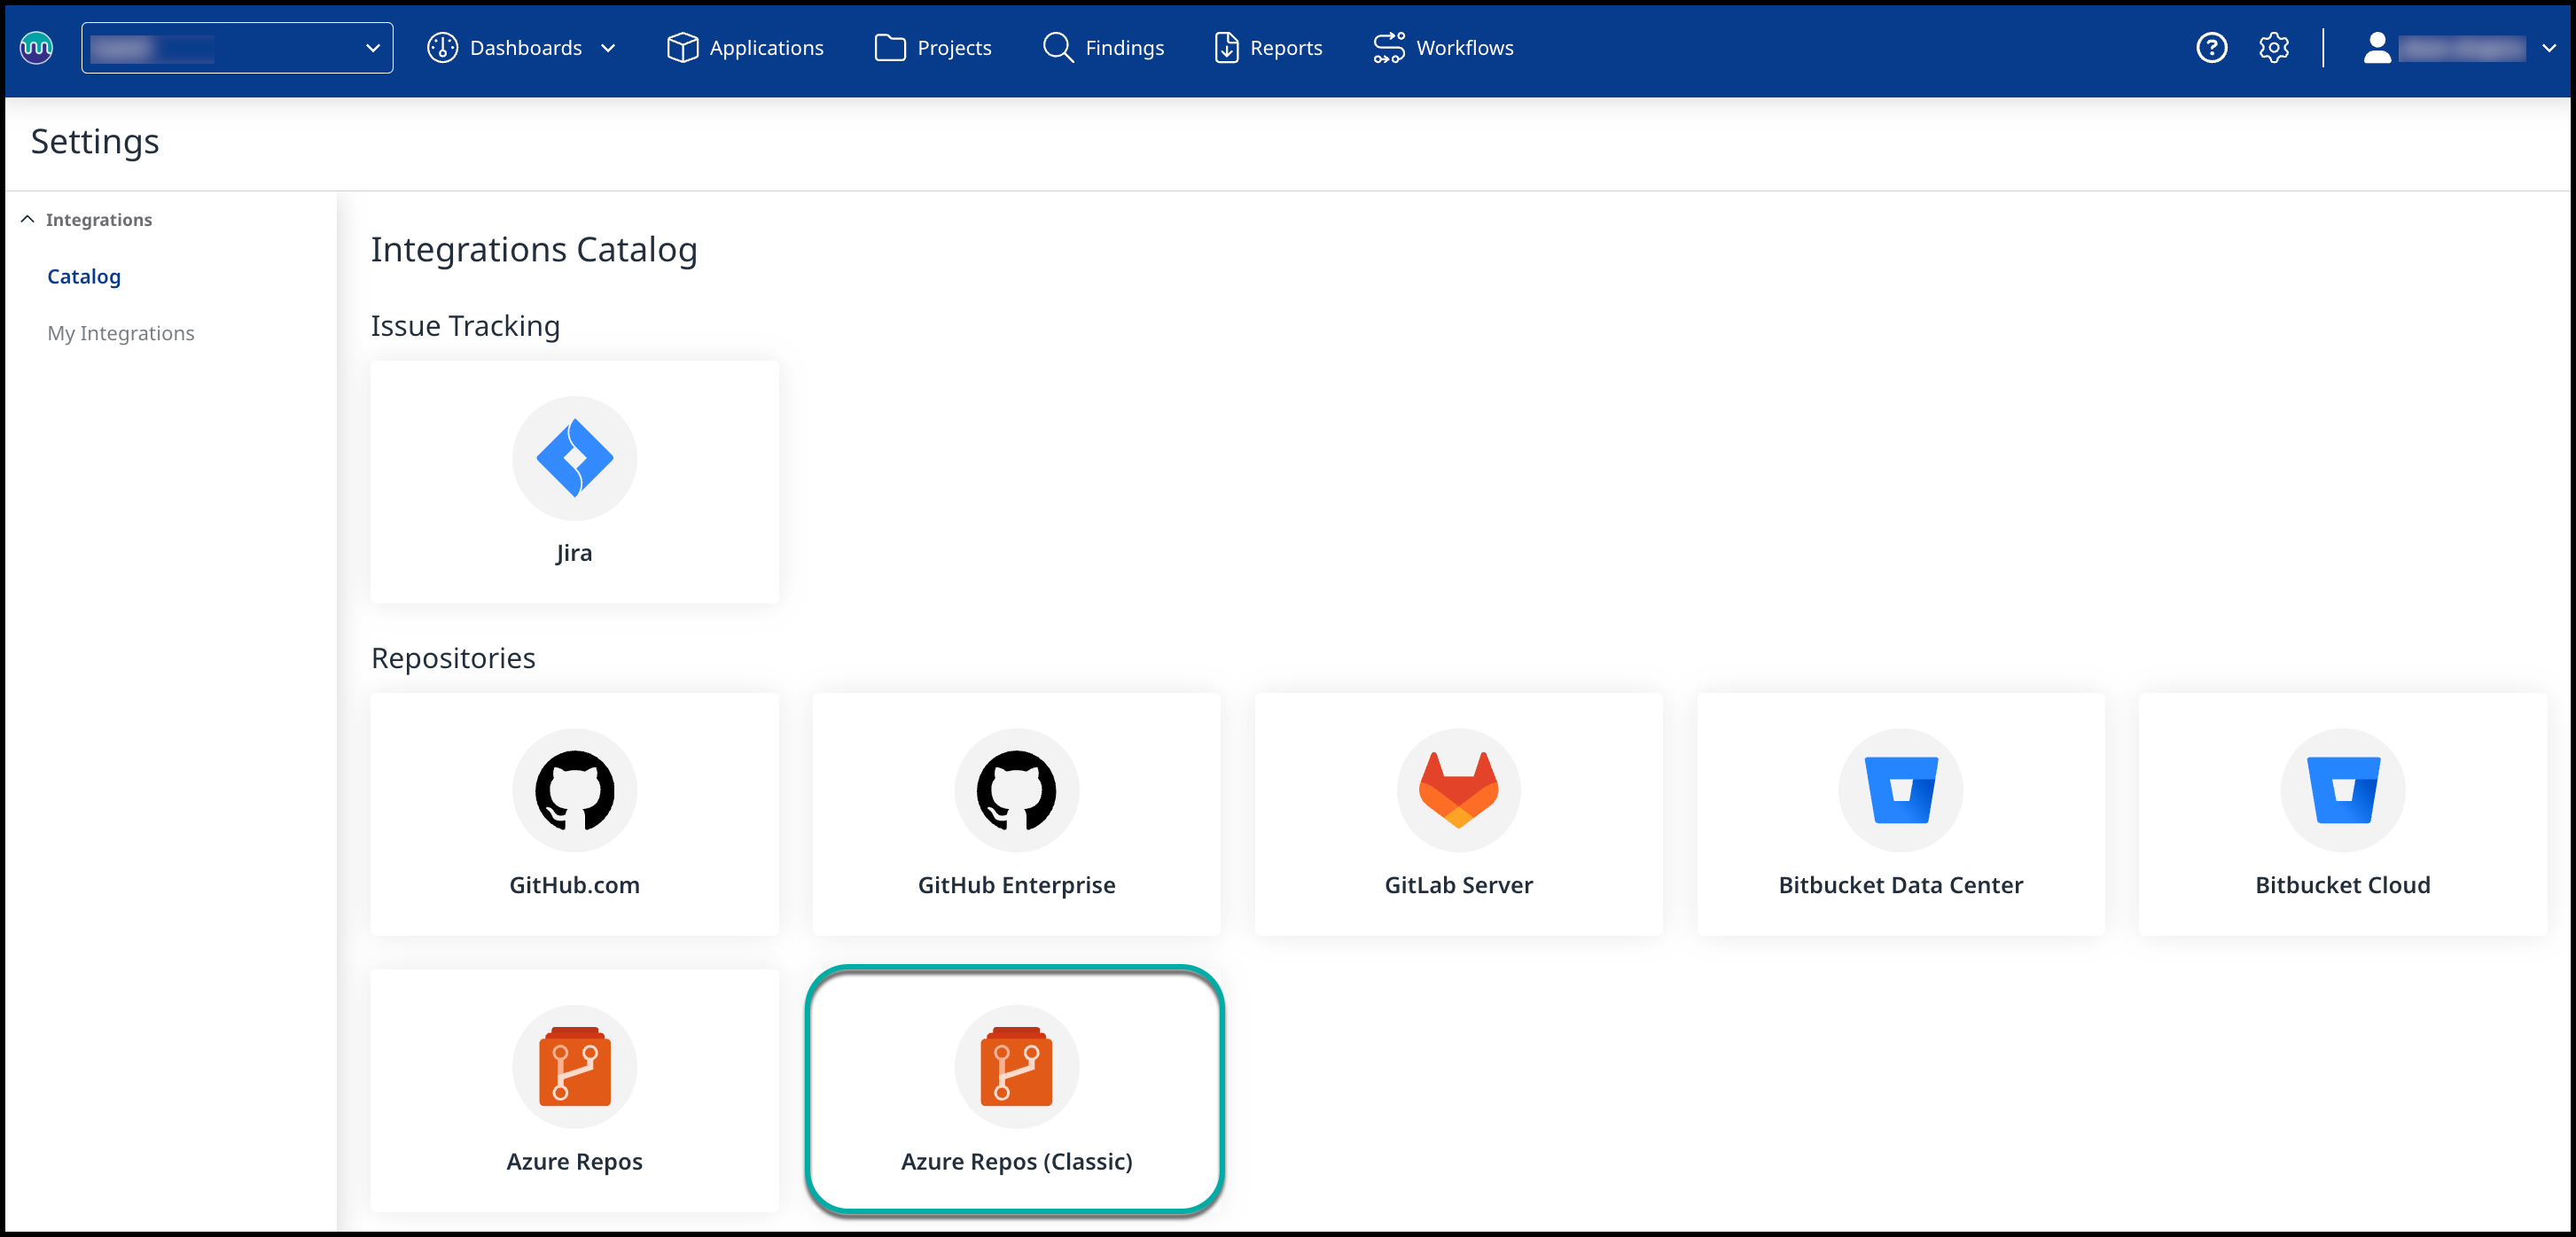
Select Azure Repos under the Repositories section.
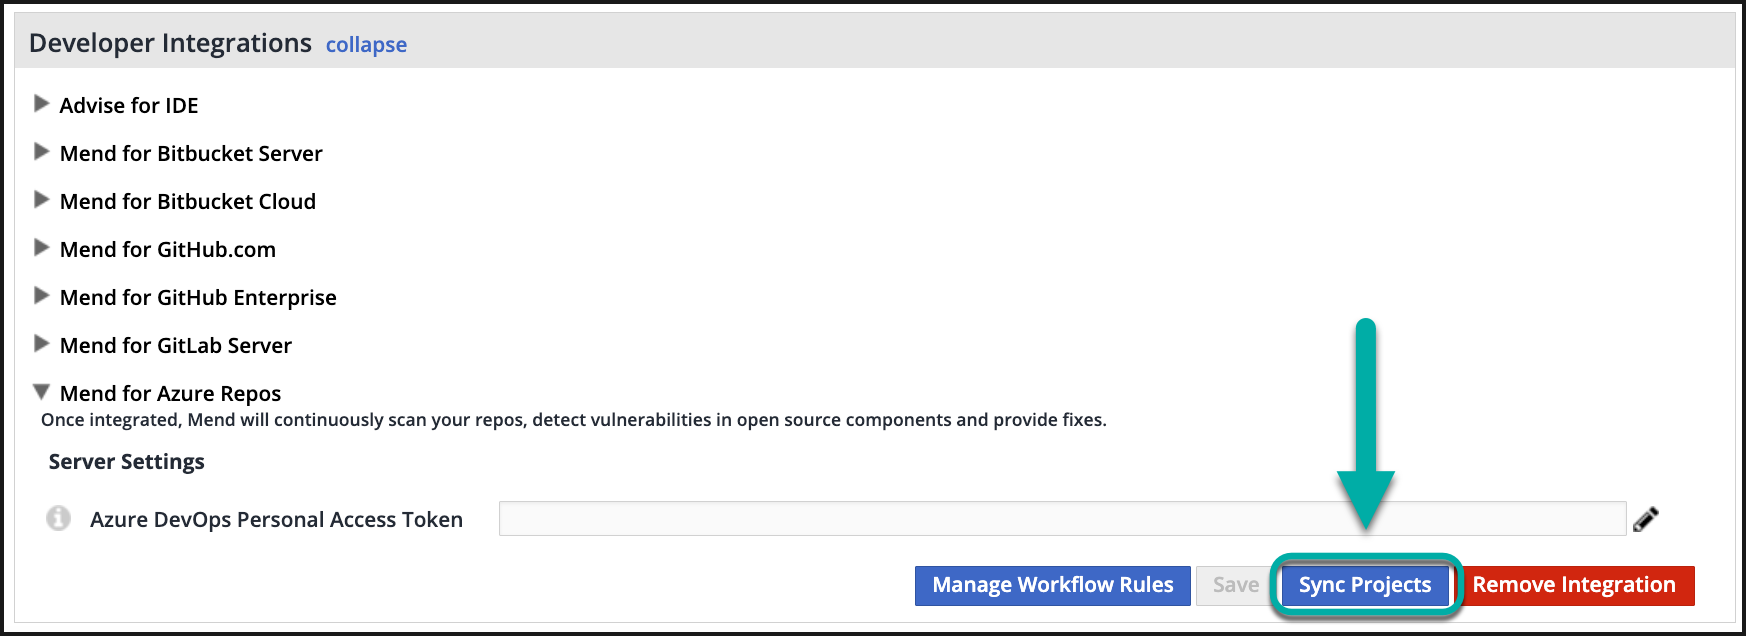
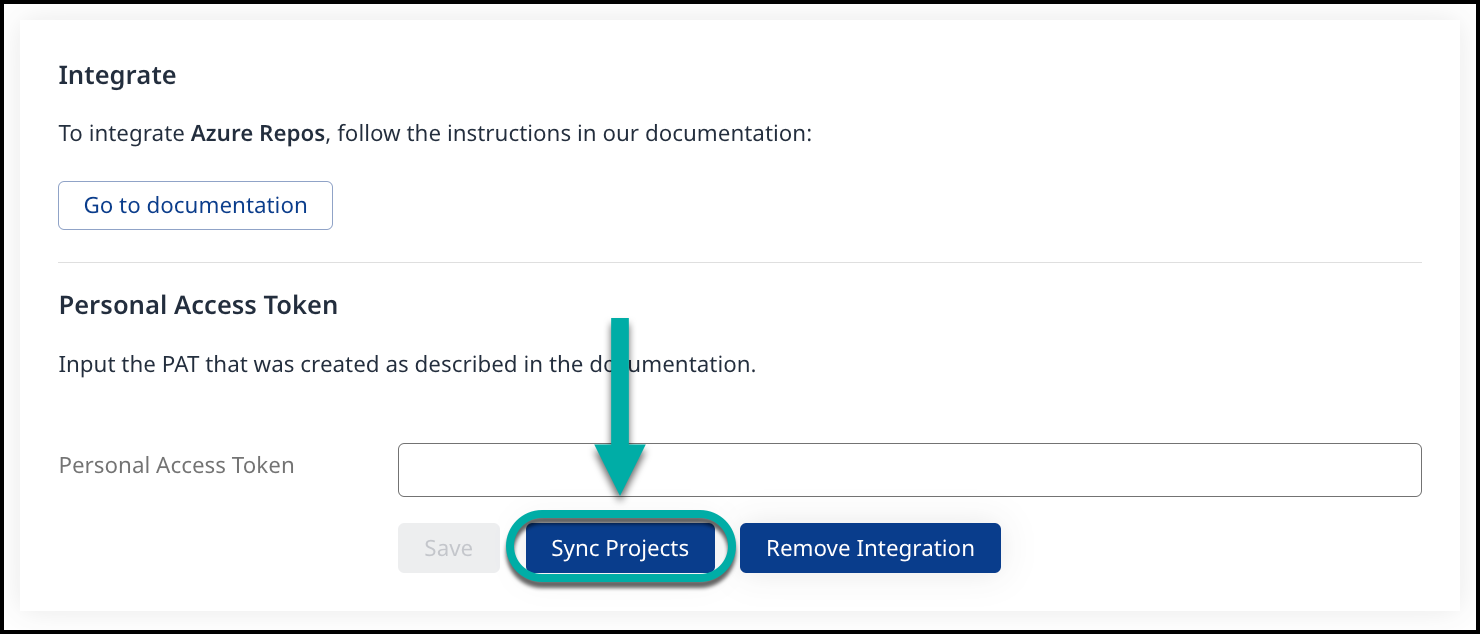
Provide the PAT in the “Personal Access Token” and click Save. After it is saved, projects that the bot-user has access to will be onboarded to the Mend for Azure Repo.
Sync your Azure project by going into your Mend UI → Integrate tab → Developer Integrations → Mend for Azure Repos → Sync Projects.
Notes:
When there is a new project created in the organization after this integration process, the bot-user must be manually added to that project. See more about this here.
It is crucial that the bot-user is set as a Project Administrator. Keep in mind, that the bot-user is provided with admin rights not to the organization, but to the projects inside the organization. So you add the bot-user only to the organizations you want to be integrated and provide the bot-user with admin rights only to the projects inside these organizations you want to be integrated.
It is important provide the PAT with the All accessible organizations setting even if there is only one organization that is going to be updated. Control integration access to the different organizations by restricting access for the bot-user.
By default, all repositories of the projects that bot-user has access to will be integrated. It is possible to specify in the global repo configuration which repositories should and shouldn’t be integrated by setting
ignoredReposorincludedReposparameters.When a pull request in the repository is created by a bot-user it will be listed under the “Active”, and not in the default “Mine” tab
Installing Mend for Azure Repos
This video demonstrates how to install the Azure DevOps Repository Integration and provides a general overview of how to use it. If you have any questions, please contact Mend Support or your Customer Success Manager.
Mend for Azure Repos service hooks and users
Once each project is integrated, there will be Service hooks created for the bot-user to work correctly. The webhooks will be created for each of the following trigger actions: Code pushed, Pull request created, and Pull request updated.
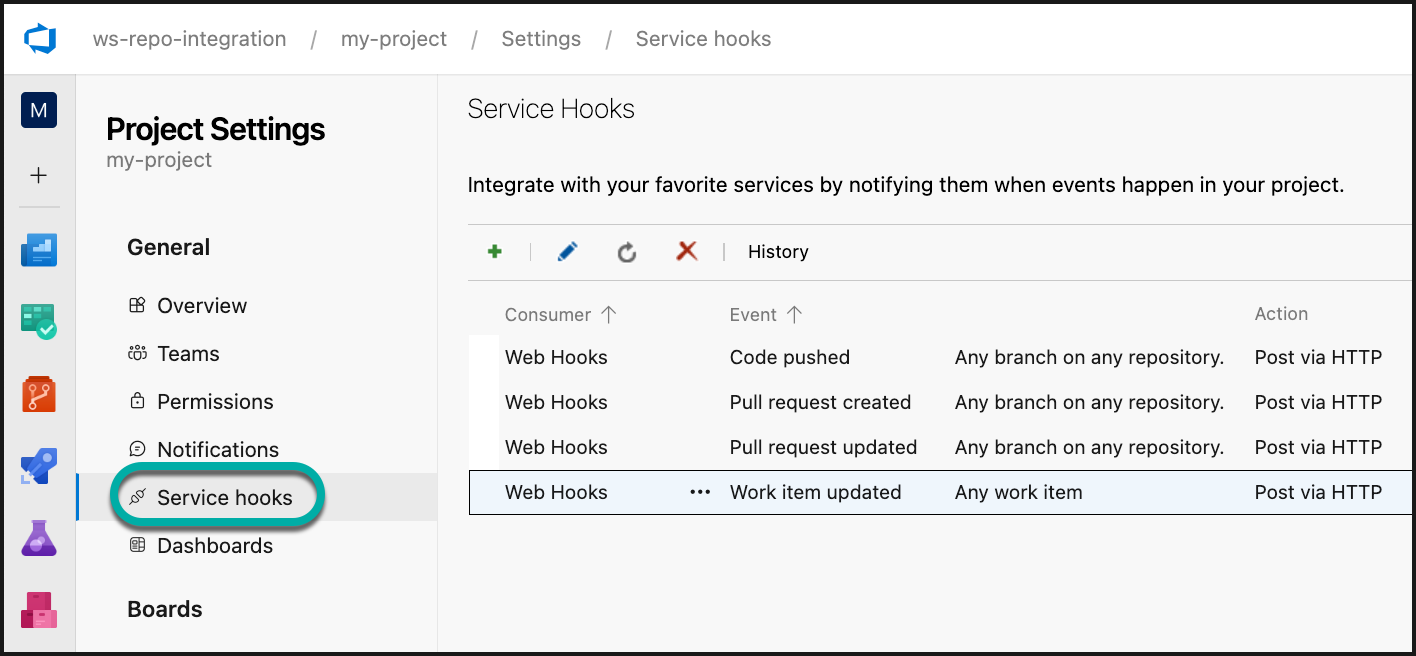
When the PAT is provided to the Mend application, there is a service user automatically created in the “admins” group in your Mend Organization. In case you have renamed your “admins” group, you will need to move the service user to that group, or the integration will not work.
Uninstall Mend for Azure Repos
Uninstall a specific project
Within Azure DevOps, navigate to Go to your Organization Settings → Admin Area → Users.
Find the bot-user that was created for the Mend for developers and click “Manage user”.

Remove access for the bot-users to the projects you want to uninstall Mend for Azure Repos.
Completely uninstall the Mend for Azure Repos Integration
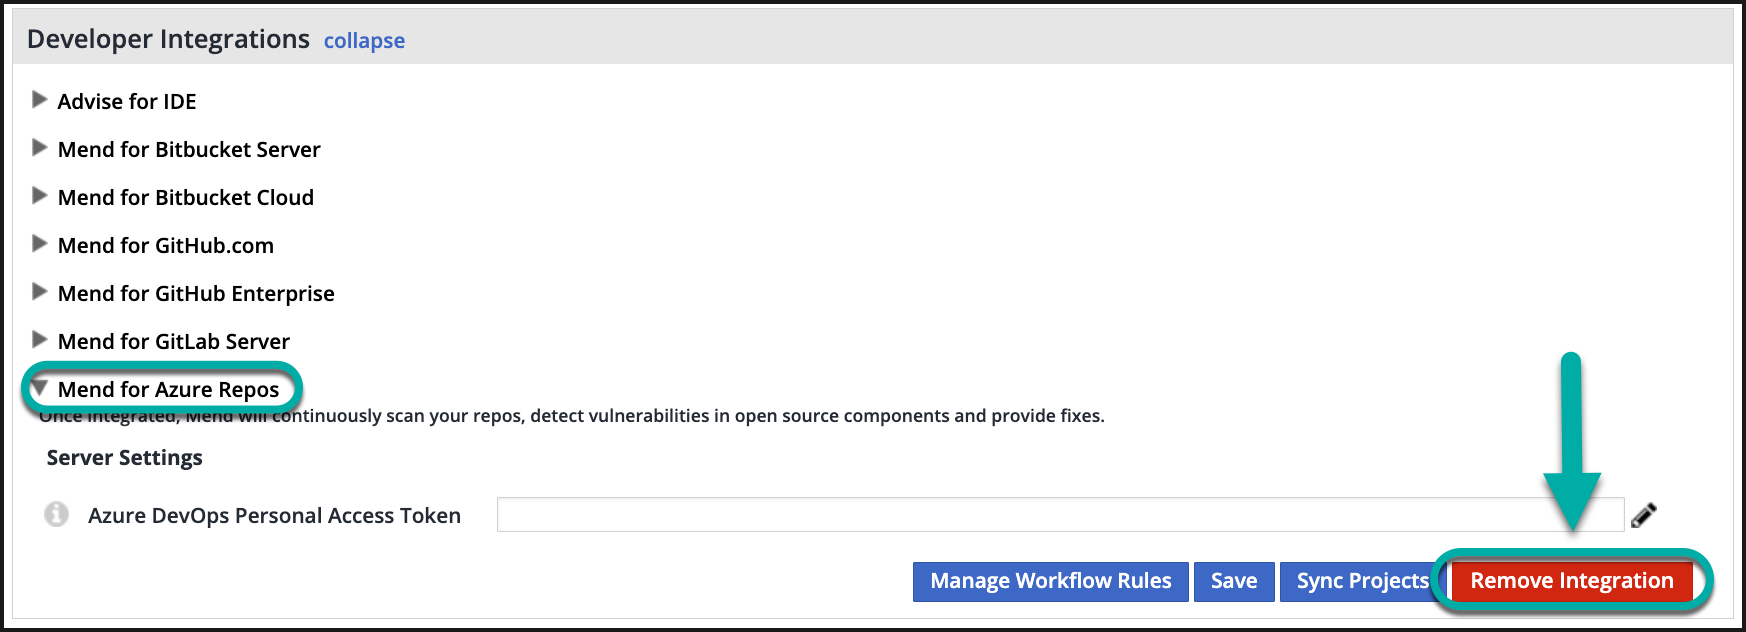
In the Mend application, navigate to Integrations → Developer Integrations → Azure Repos and press Remove Integration.
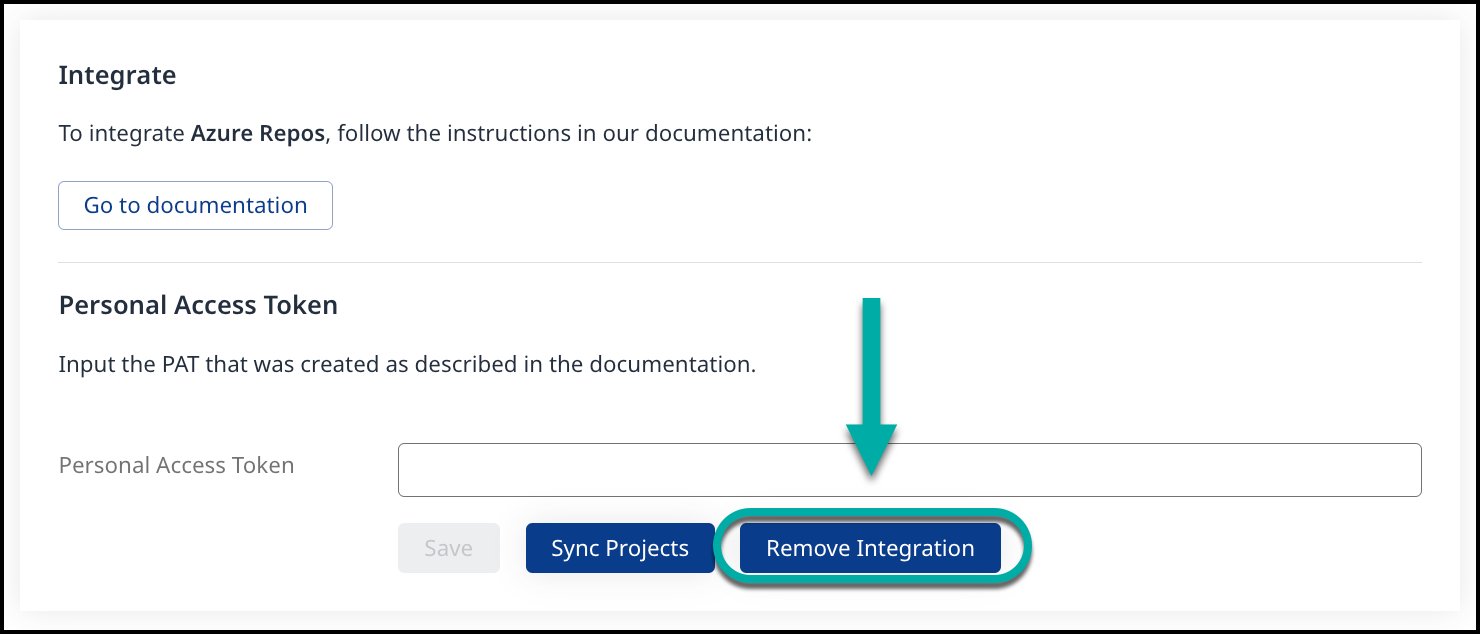
This will delete the webhooks created for the integration and the PAT of the bot-user from our system.
(optional) Delete the bot-user you have created for the Mend for developers or its PAT.

