Skip table of contents

Implementing the Mend CLI in the IDE

Recommended Approach

The current recommended approach to execute a Mend Scan in an IDE is to run the Mend CLI from either a task, or in an integrated terminal. This allows users to run a scan and see any vulnerabilities or policy violations at will from within the Mend CLI. This approach favors giving developers information they need when wanted, as opposed to the IDE integrations which force a scan during any compilation process.

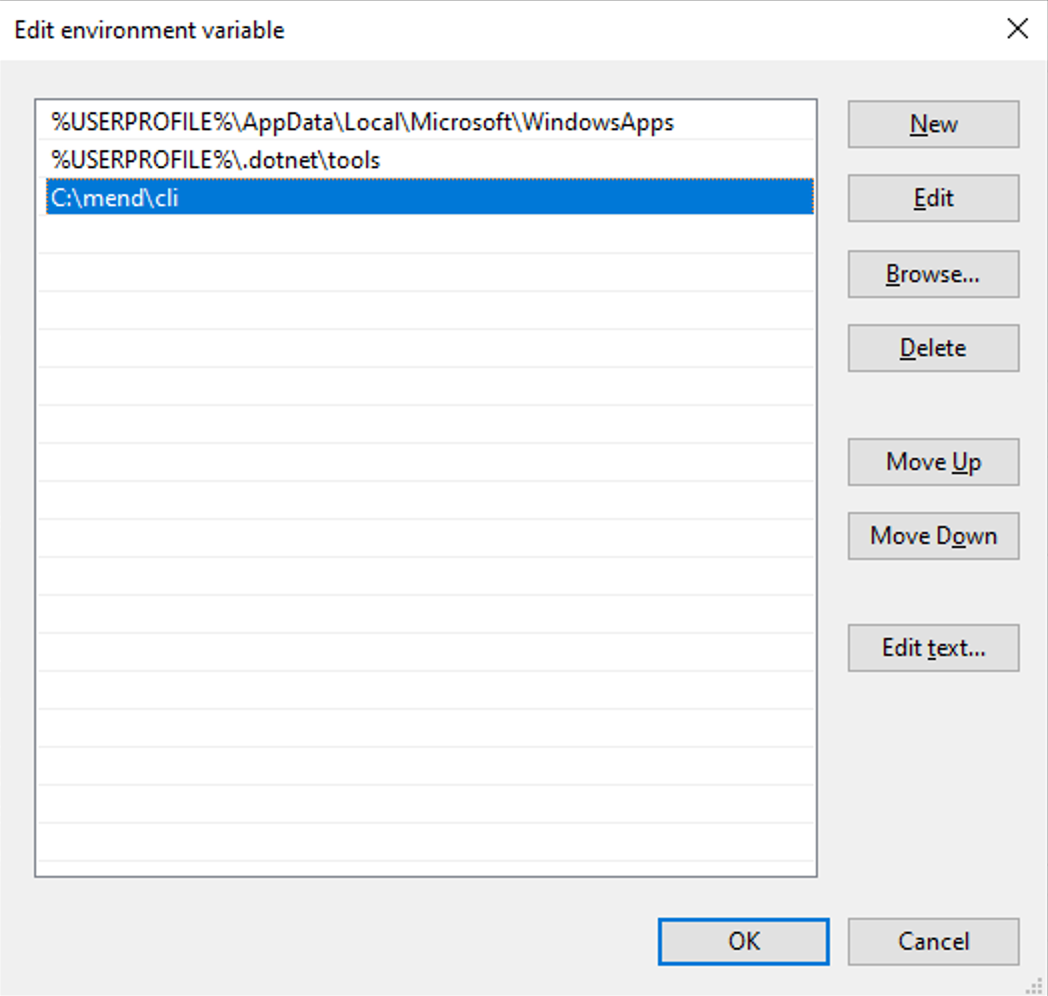
To do this, make sure the Mend CLI is downloaded to a directory that is a part of your PATH environment variable. Make sure to move the CLI to a directory that makes sense (i.e. C:\mend\cli on Windows, or /usr/local/mend on Linux/Mac OS) and then add it to your PATH environment variable.

To add the directory to your PATH environment variable, follow these steps:

Windows
image-20240731-161829.png

Linux/Mac OS
  • Add the directory to the PATH variable by exporting it in your .bashrc or equivalent file for your shell. This should look like: export PATH="$PATH:/usr/local/mend"

After doing this, the CLI can be checked by running the mend command in any terminal.
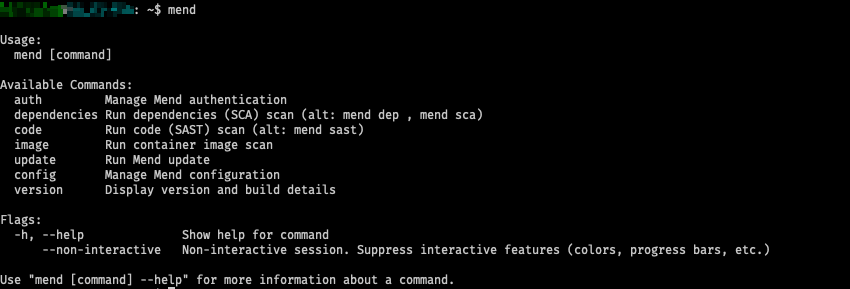
image-20240722-224541.png

From there open your preferred IDE and continue with one of the preferred methods below:

Preferred Method 1: Running in an Integrated Terminal

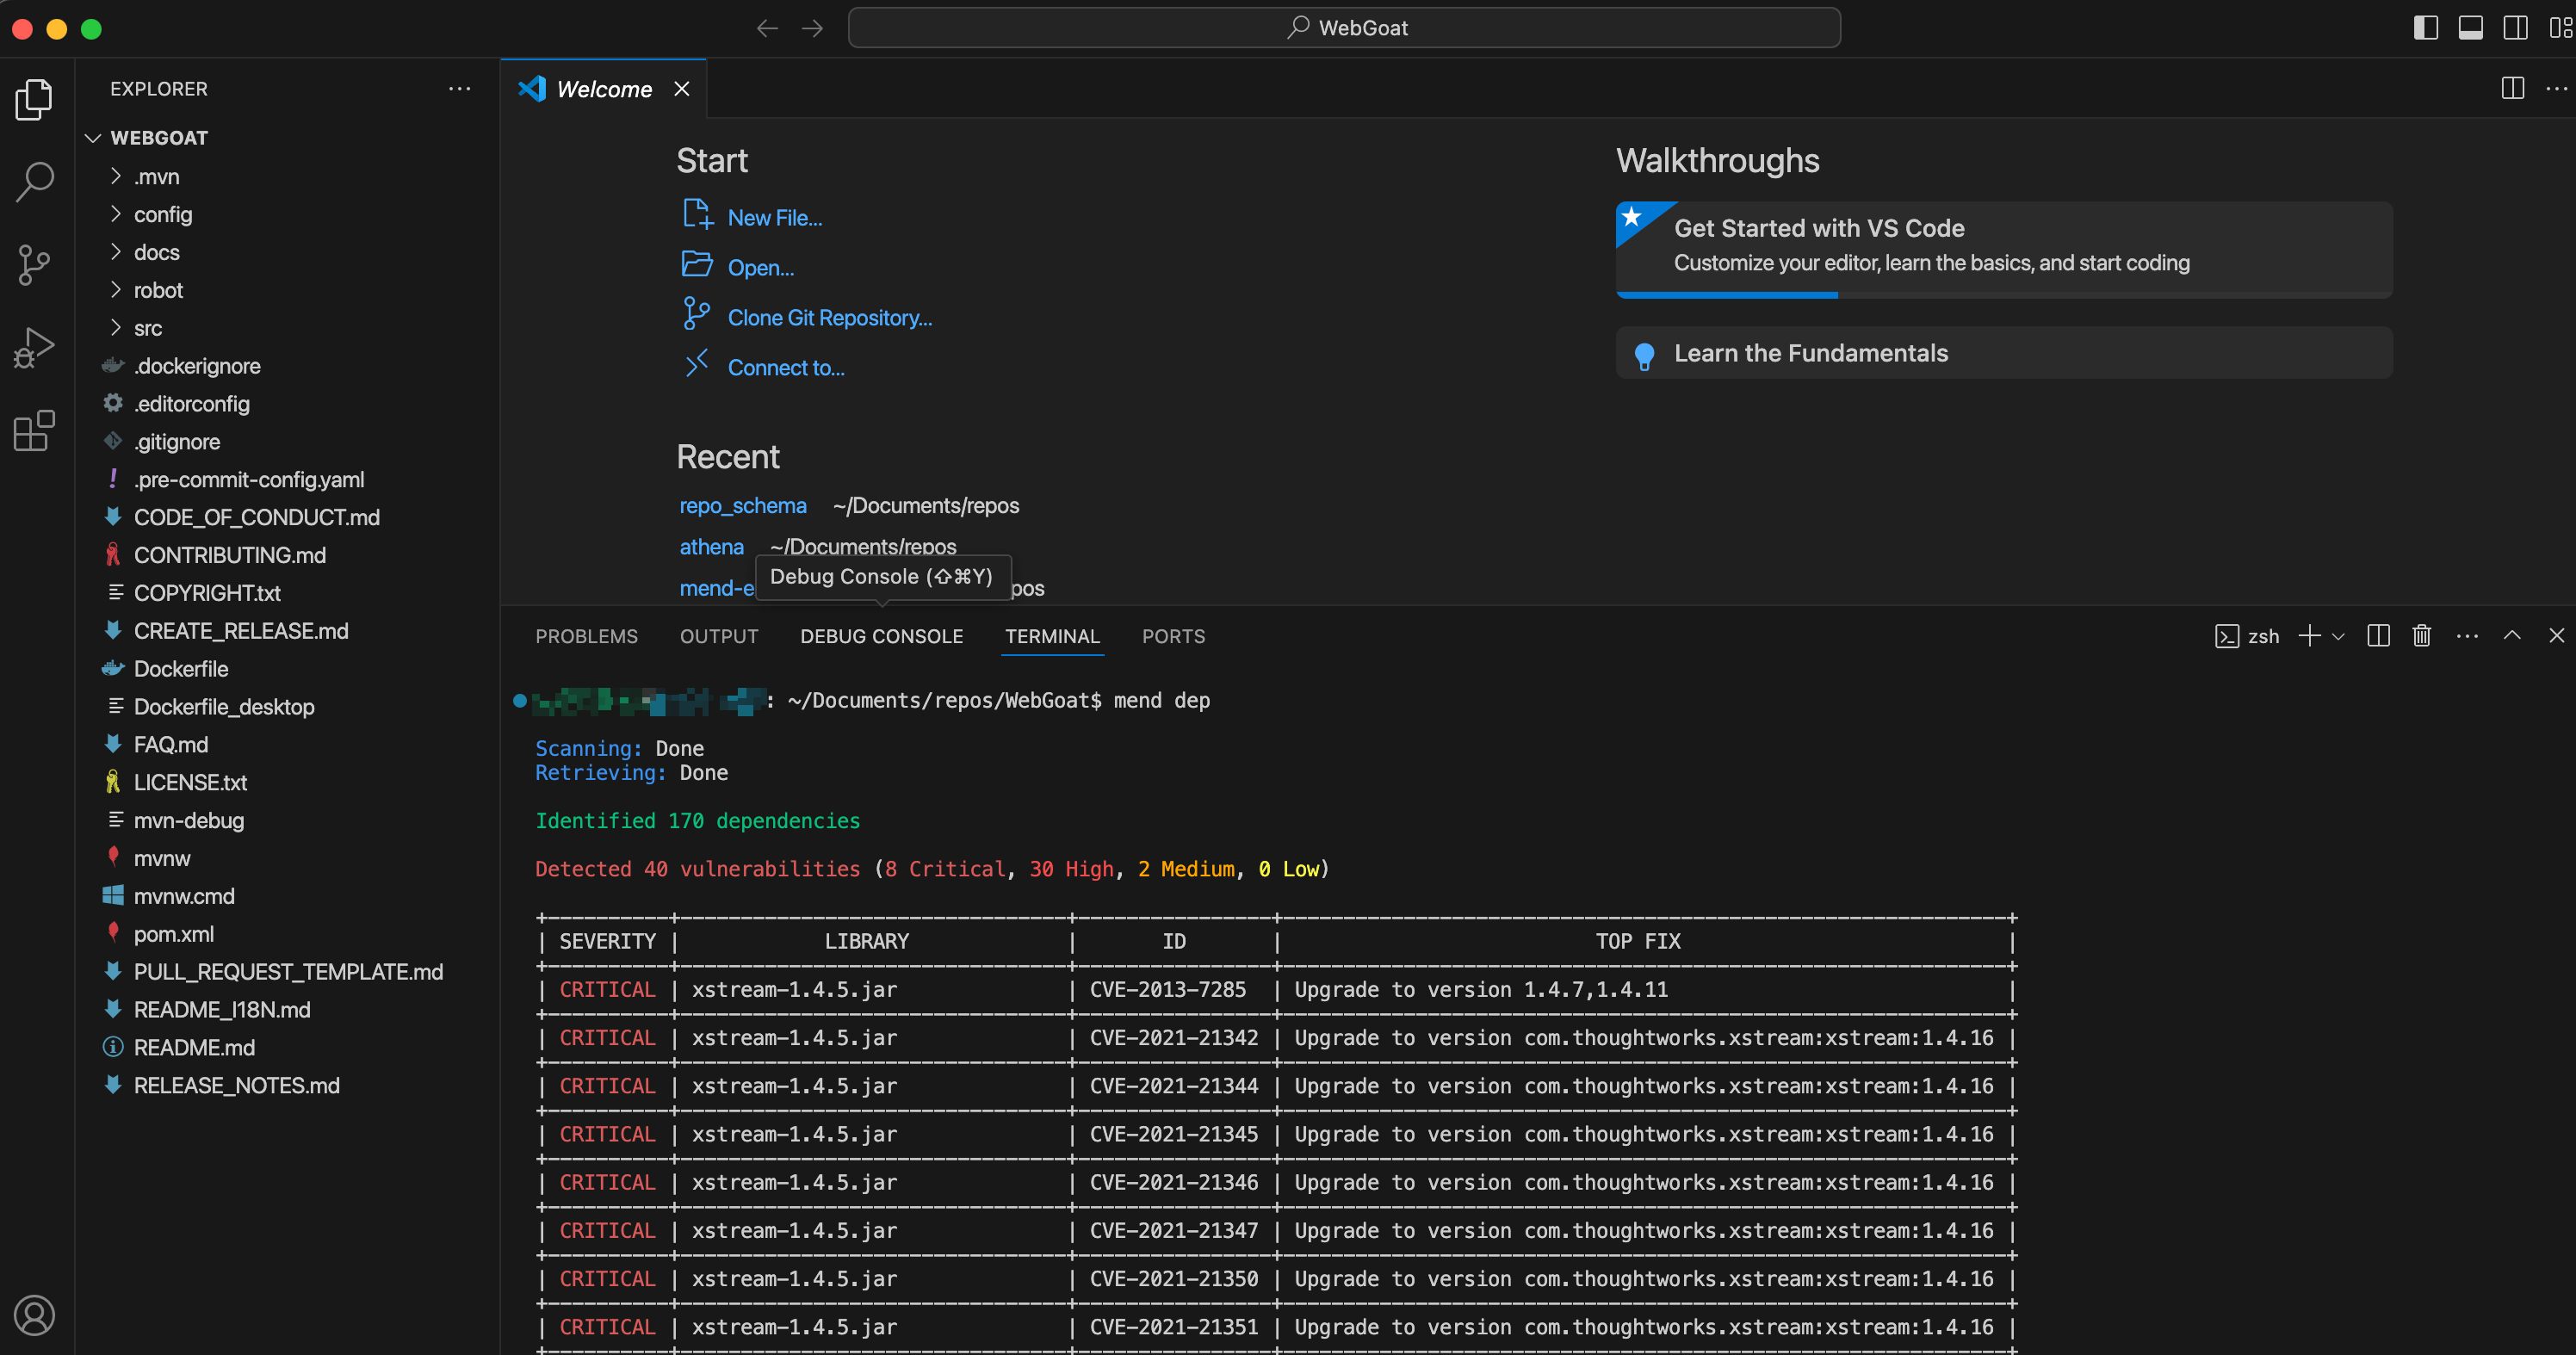
To run in an integrated terminal, simply open a terminal window in your IDE, make sure that you are logged in with the command: mend auth info. Then follow the instructions required for the type of scan desired:

SCA

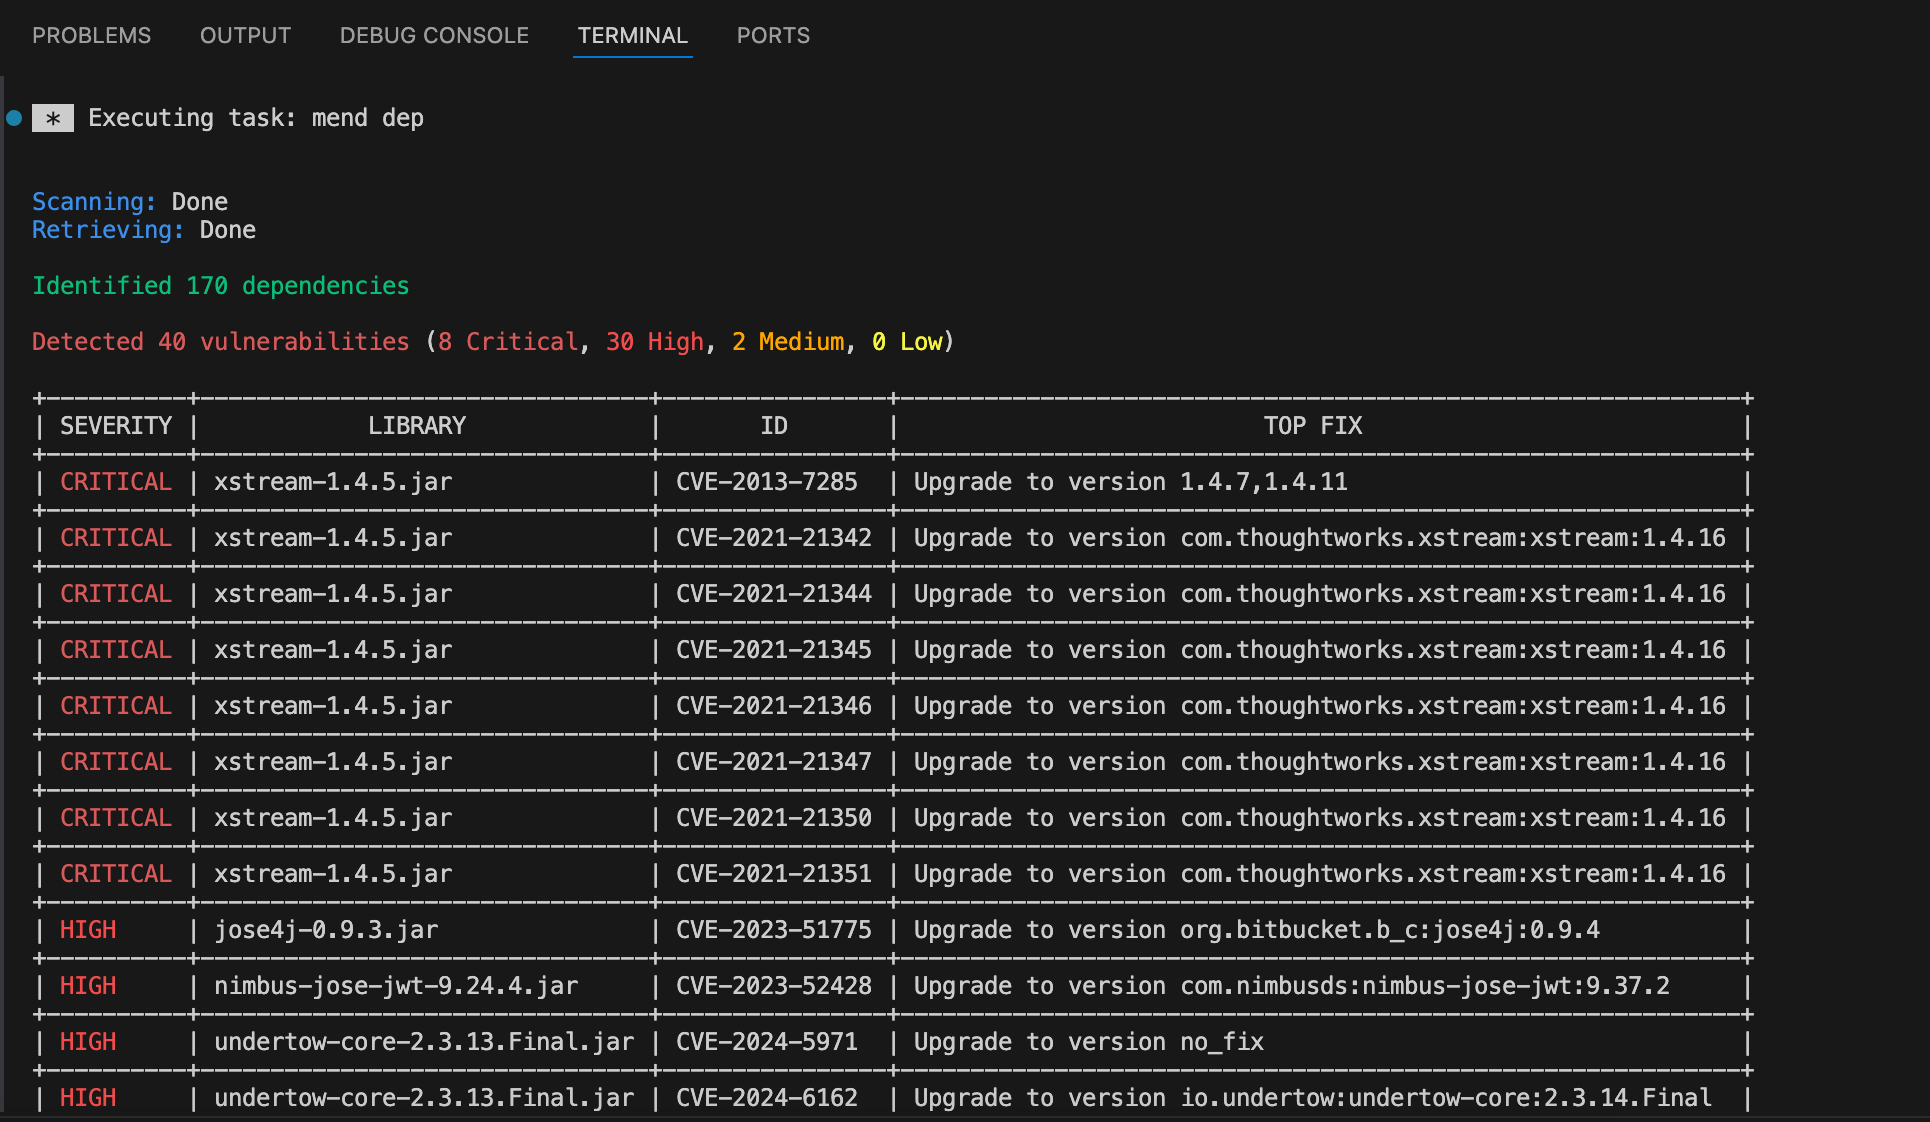
Run an SCA scan with mend dep this will output the results of the scan in the terminal without updating any information in the Mend UI.

image-20240723-142249.png

SAST

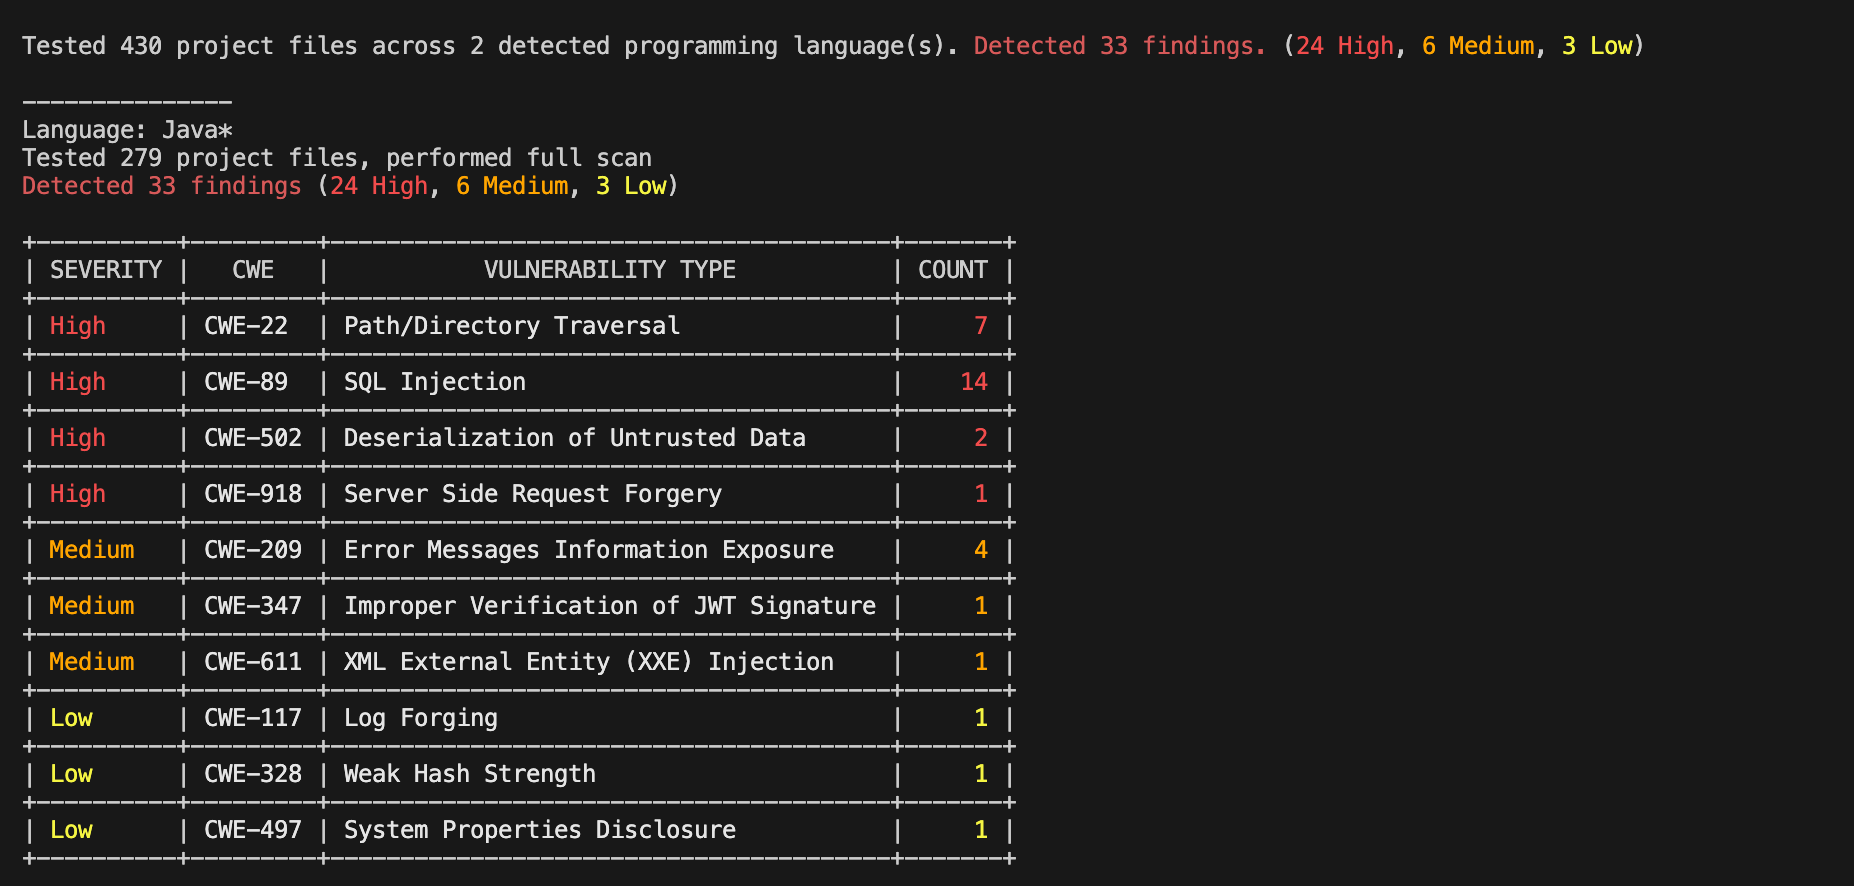
Run a SAST scan with mend code --offline. this will output the results of the scan in the terminal without updating any information in the Mend UI.

image-20240723-204647.png

NOTE: If --offline is specified, then no data will be uploaded to the Mend UI, which also means that no specific data concerning the findings will be reported. Only the types of findings.

--offline still requires the user to have scan manager permissions. If the user is only has scan manager permissions to a specific application the --scope variable must be set i.e. --scope <application>//<project>. This will create a new project if the scope does not exist, no data will be uploaded.

Preferred Method 2: Running the Mend CLI as a task

To run a Mend SCA scan as a task in an IDE, configurations will have to occur.

SCA Scans or SAST scans can be run in the same exact way with these tasks, the only difference will be the commands used to run them:

  • SCA Scans - mend dep

  • SAST Scans - mend code --offline

NOTE: If --offline is specified, then no data will be uploaded to the Mend UI, which also means that no specific data concerning the findings will be reported. Only the types of findings.

--offline still requires the user to have scan manager permissions. If the user is only has scan manager permissions to a specific application the --scope variable must be set i.e. --scope <application>//<project>. This will create a new project if the scope does not exist, no data will be uploaded.

Here are steps on how to set this up:

VSCode

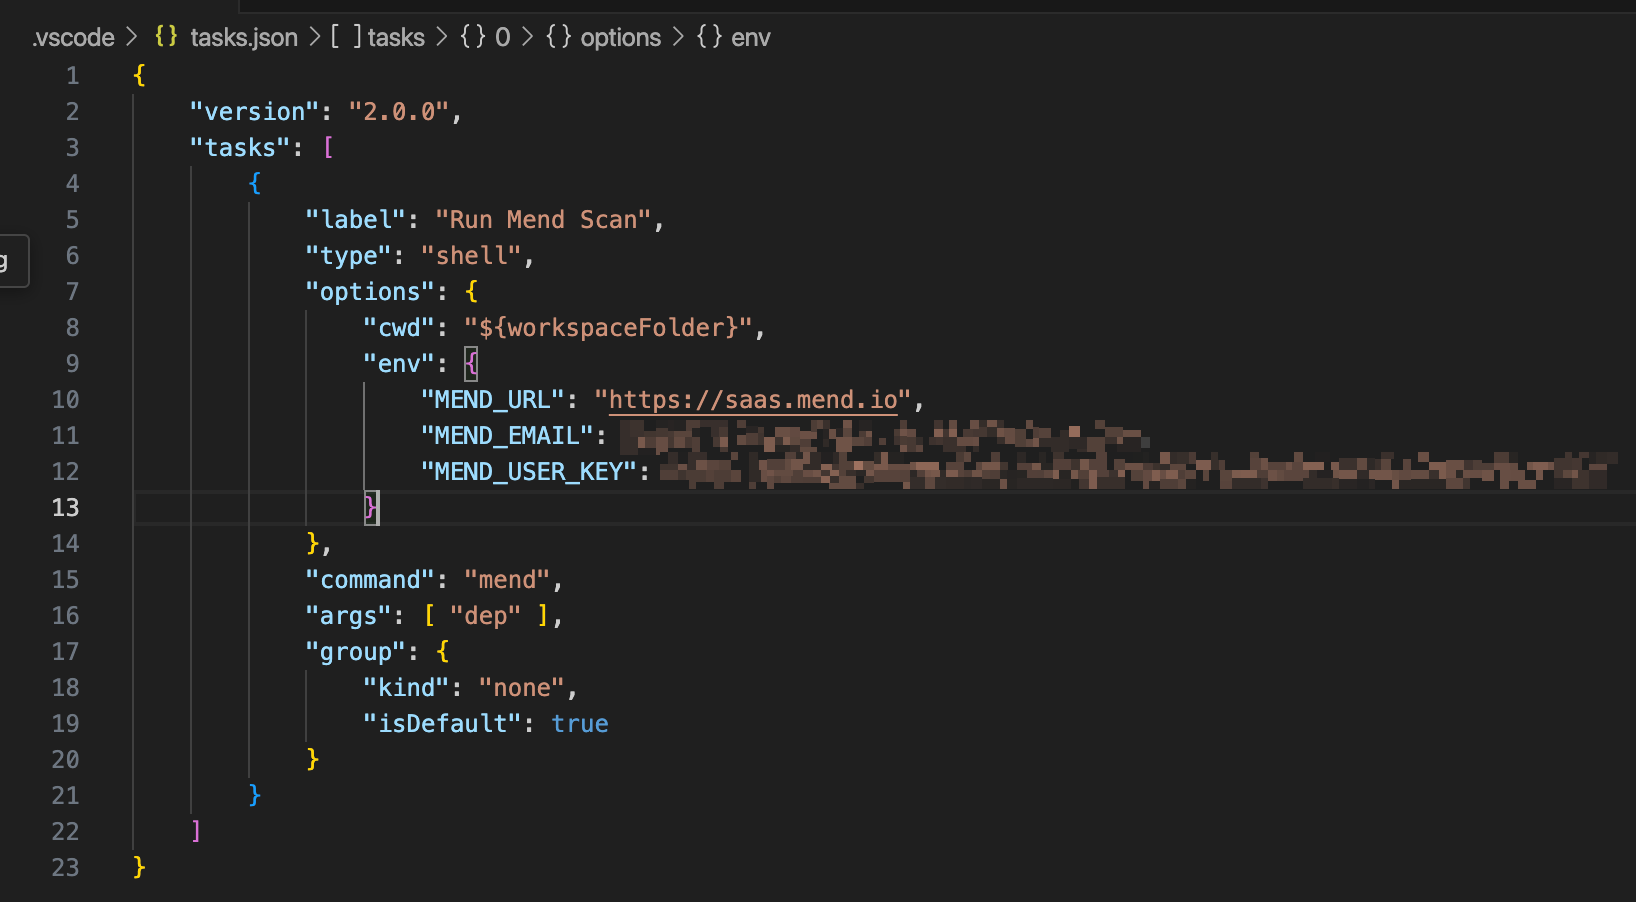
In VSCode, you can create a tasks.json file under the .vscode directory that describes how to run the scan with the following properties:

image-20240723-145534.png

When ready to run the task, the user simply has to open the command palette with <Ctrl> + <Shift> + P or <Command> + <Shift> + P and then search Tasks: Run Task. From there choose the Run Mend Scan task and the results will be output.

image-20240723-145907.png
Visual Studio

For Visual Studio, an external .bat script must be created in the same directory where the Mend CLI was downloaded. Name this script mend_dep_scan.bat:

CODE
set "MEND_URL=https://saas.mend.io"
set "MEND_EMAIL=<your_email>"
set "MEND_USER_KEY=<your_userkey>"

C:\mend\cli\mend.exe dependencies --non-interactive

NOTE: We use --non-interactive because Visual Studio output windows do not support color.

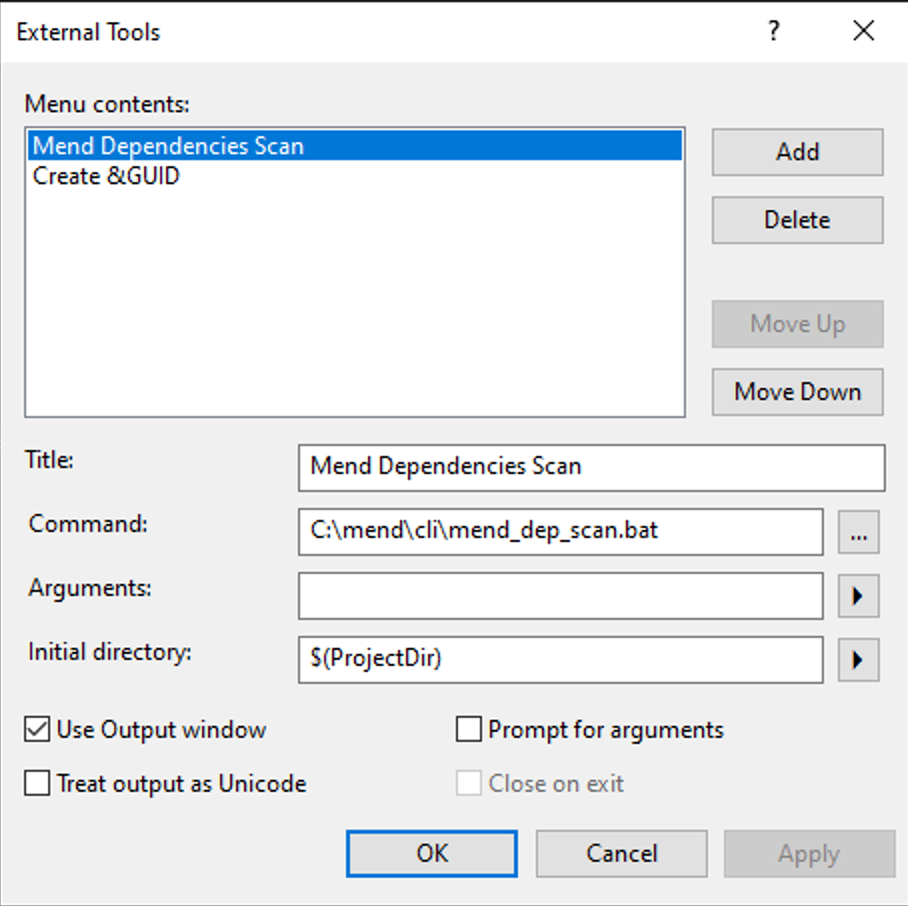
Afterwards go to Visual Studio and Select the Tools Menu → External Tools → Add. Set the following configuration:

image-20240729-210146.png

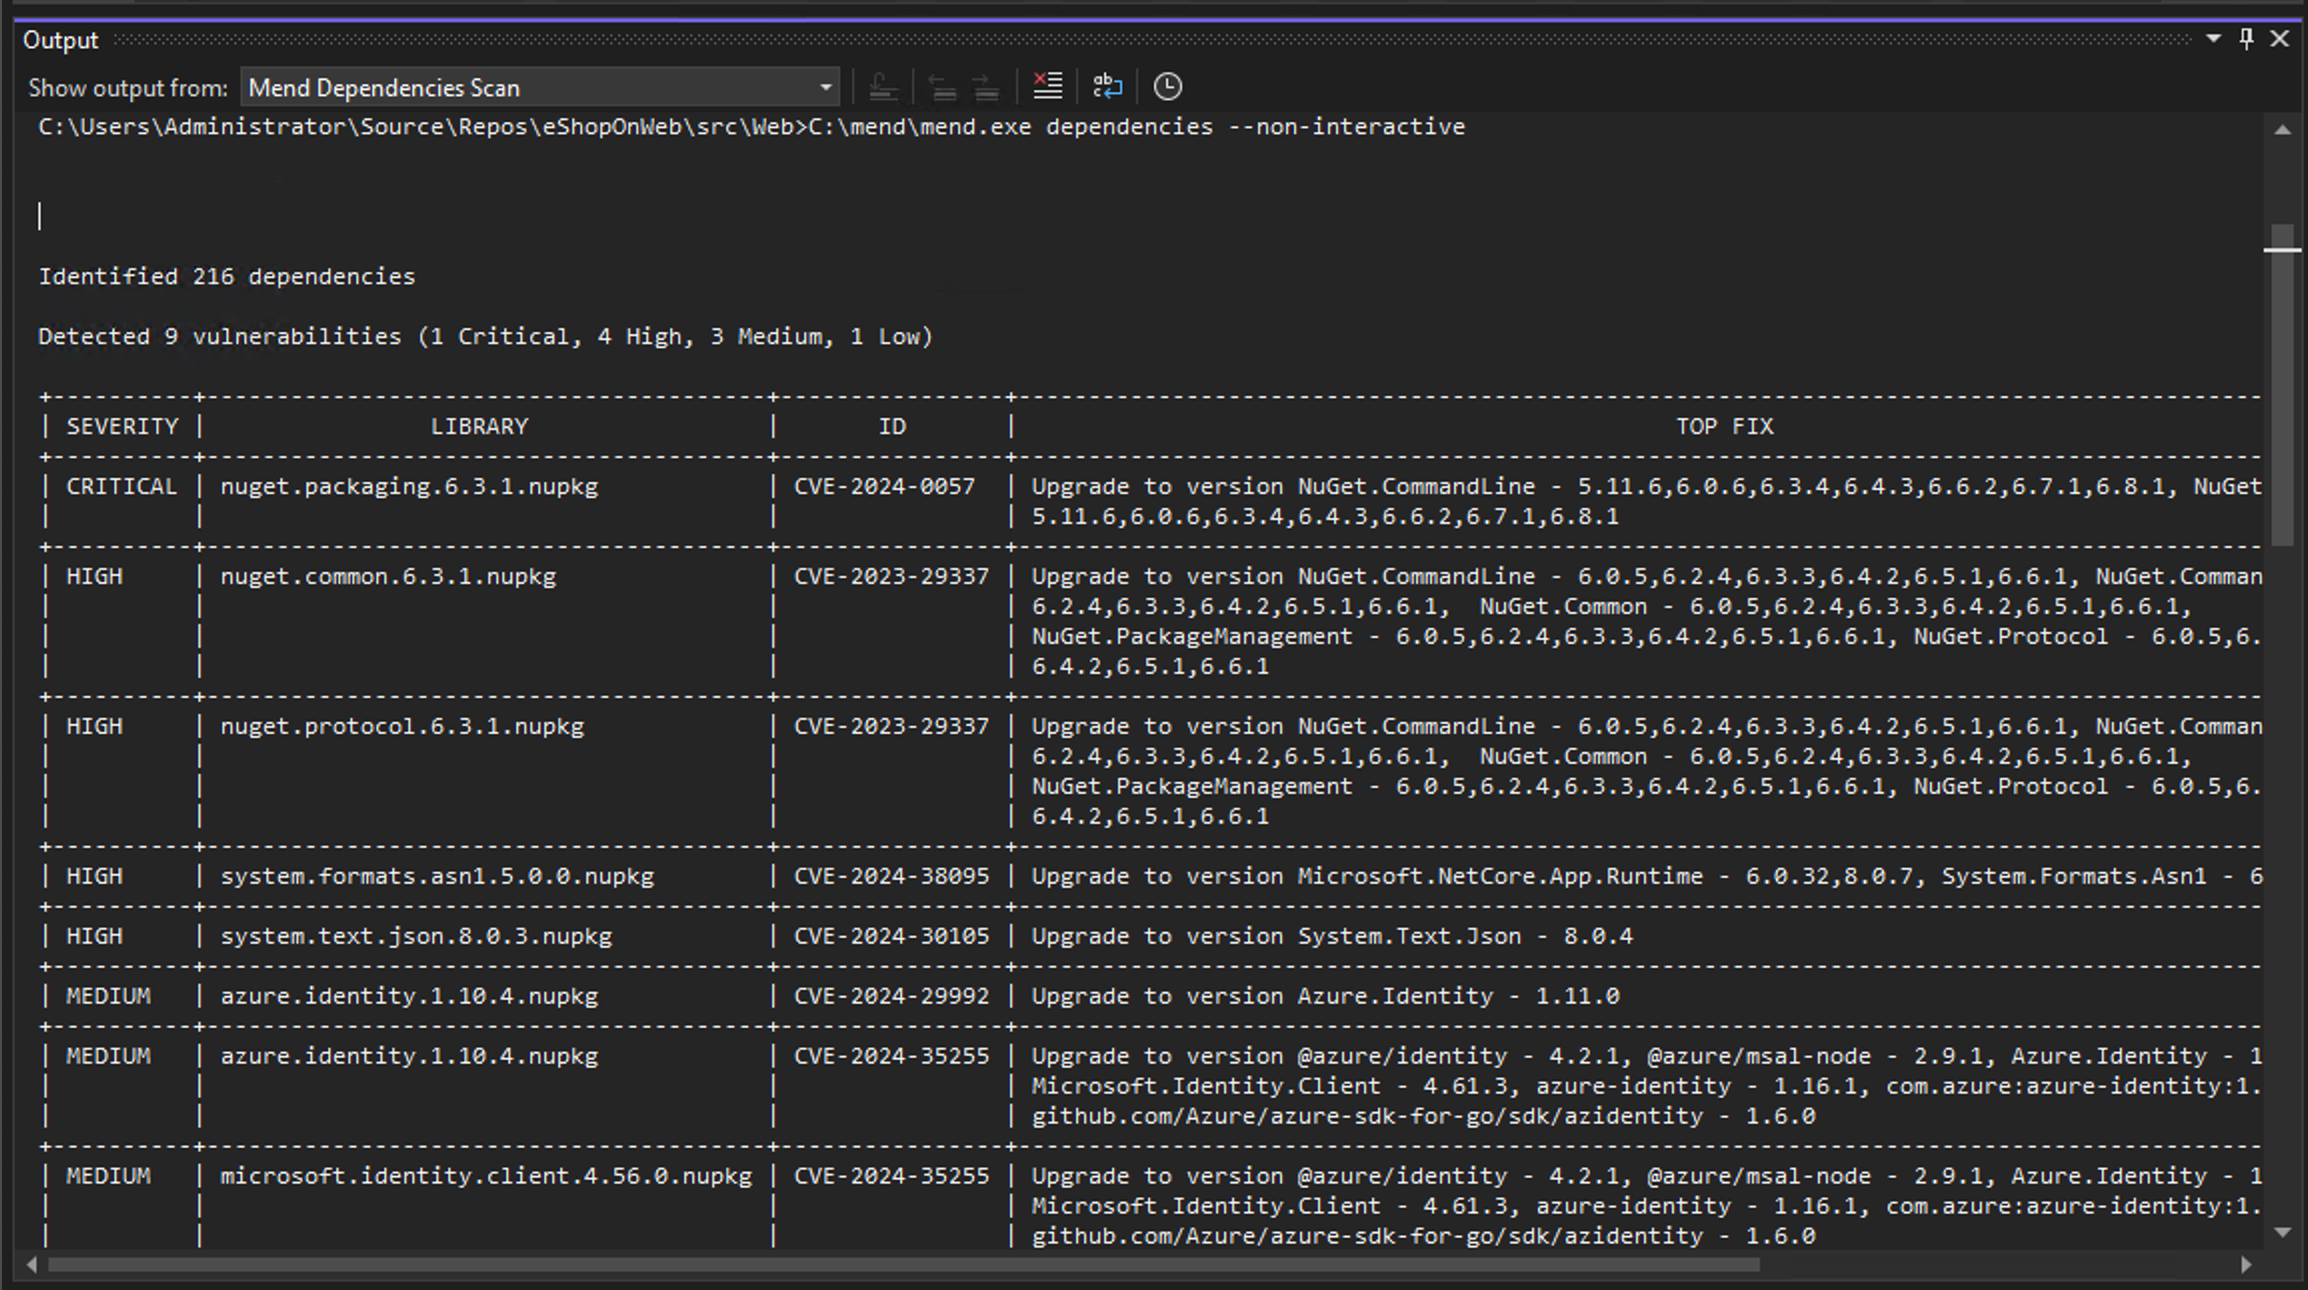
The result is, when running the scan in a project, you will see the output of the CLI:

image-20240729-210249.png
IntelliJ IDEA

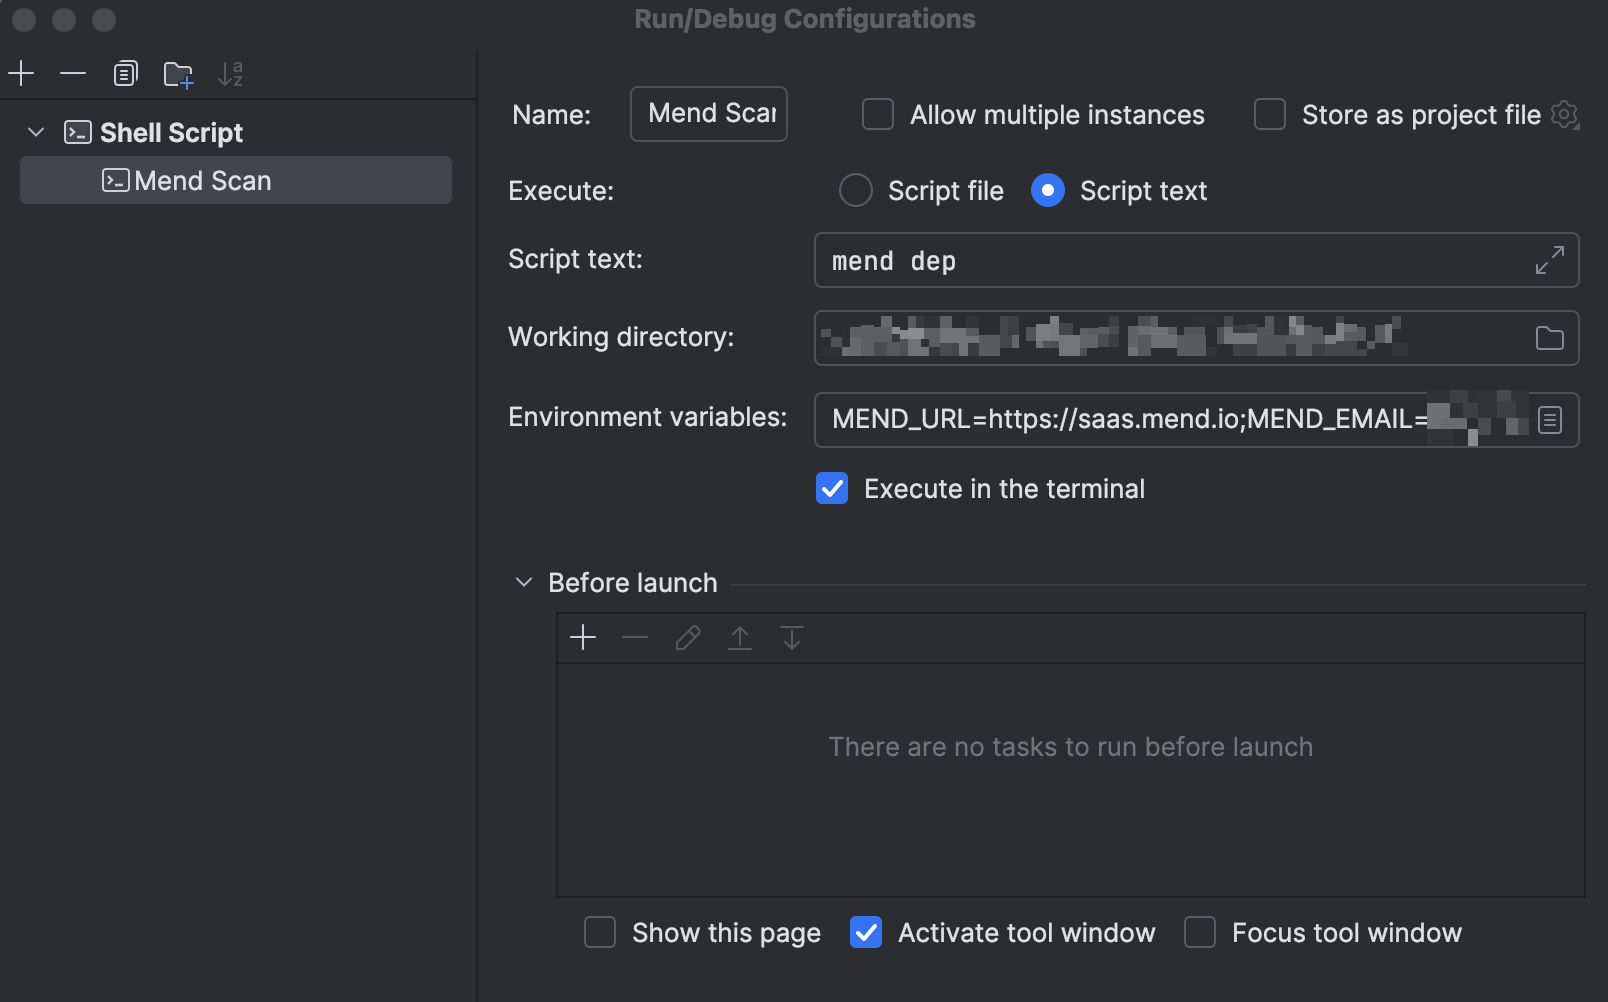
In IntelliJ IDEA, you can create a Run/Debug Configuration as a Shell Script that runs the mend dep command.

image-20240723-163139.png

To run the configuration, simply select the configuration at the top right of the screen and click the “Play” button.

image-20240723-163247.png

The result is:

image-20240723-163612.png

Eclipse

In IntelliJ IDEA add an External Tool Configuration with the following settings:

  • Location: <path to your mend executable> (i.e. /usr/local/bin/mend)

  • Working Directory: ${project_loc}

  • Arguments: deps

  • Environment:

Name

Value

MEND_EMAIL

<your email>

MEND_URL

<your environment url> (i.e. https://saas.mend.io)

MEND_USER_KEY

<your userkey>

PATH

This needs the following entries:
- Path to your Package Manager
- Path to Java executable if a java-based package manager is in use.
- If on Linux/Mac: /usr/bin and /bin.

  • Allocate Console: Checked

Native IDE Plugins

Using the Mend CLI in the IDE is recommended over the Native IDE Plugins due to the following reasons:

  • Language Support Restrictions based on the IDE

  • After the plugin is installed, it runs during every compile which takes extra development time.

  • The Plugins do not run the Mend CLI or Unified Agent, and therefore results can differ.

Here are the currently available IDE Plugins:

JavaScript errors detected

Please note, these errors can depend on your browser setup.

If this problem persists, please contact our support.