Configure Policy Violations with Automation Workflows
Overview
The Mend Platform's Automation Workflow feature enables you to define and manage policy violations effectively. By leveraging advanced violation settings like Violation SLA and Violation Priority, you can prioritize and address issues efficiently, ensuring your organization remains secure and compliant.
Additionally, you can configure workflows to fail the pipeline build immediately when a violation is detected, ensuring that critical issues are addressed promptly during the development process.
This article outlines how to configure policy violations when creating Workflow, including how to create and customize violation settings to suit your organization's needs. For detailed guidance on viewing and managing existing violations, see Viewing Violating Findings.
Getting it done
Setting Up Policy Violations
Policy violations in the Mend Platform are created through the Automation Workflow. These workflows let you automate responses to specific triggers, such as security risks or compliance breaches. To enhance this process, the platform introduces Violation Priority, Violation SLA, and Fail Pipeline on Violation, which provide:
Violation Priority: Classify and prioritize violations based on their importance, allowing focused allocation of resources to critical issues.
Violation SLA: Defined timeframes for resolving policy violations, ensuring timely remediation.
Fail Pipeline on Violation: Enable the option to fail the pipeline build when a violation is detected (Exit Code 9 in the CLI).
Together, these settings empower you to streamline your violation management process and maintain a strong security posture.
Configuring Violation Settings in Workflows
To define SLA and Priority attributes for violations triggered by a Workflow, follow these steps:
Log into the Mend Platform.
Click Workflows in the top navigation.
Choose what type of Workflow you would like to create: (1) From Template (2) Create a Blank Workflow

You can either select a pre-defined workflow template from Mend or create your own custom workflow.
You’ll be navigated to the Create Workflow screen.
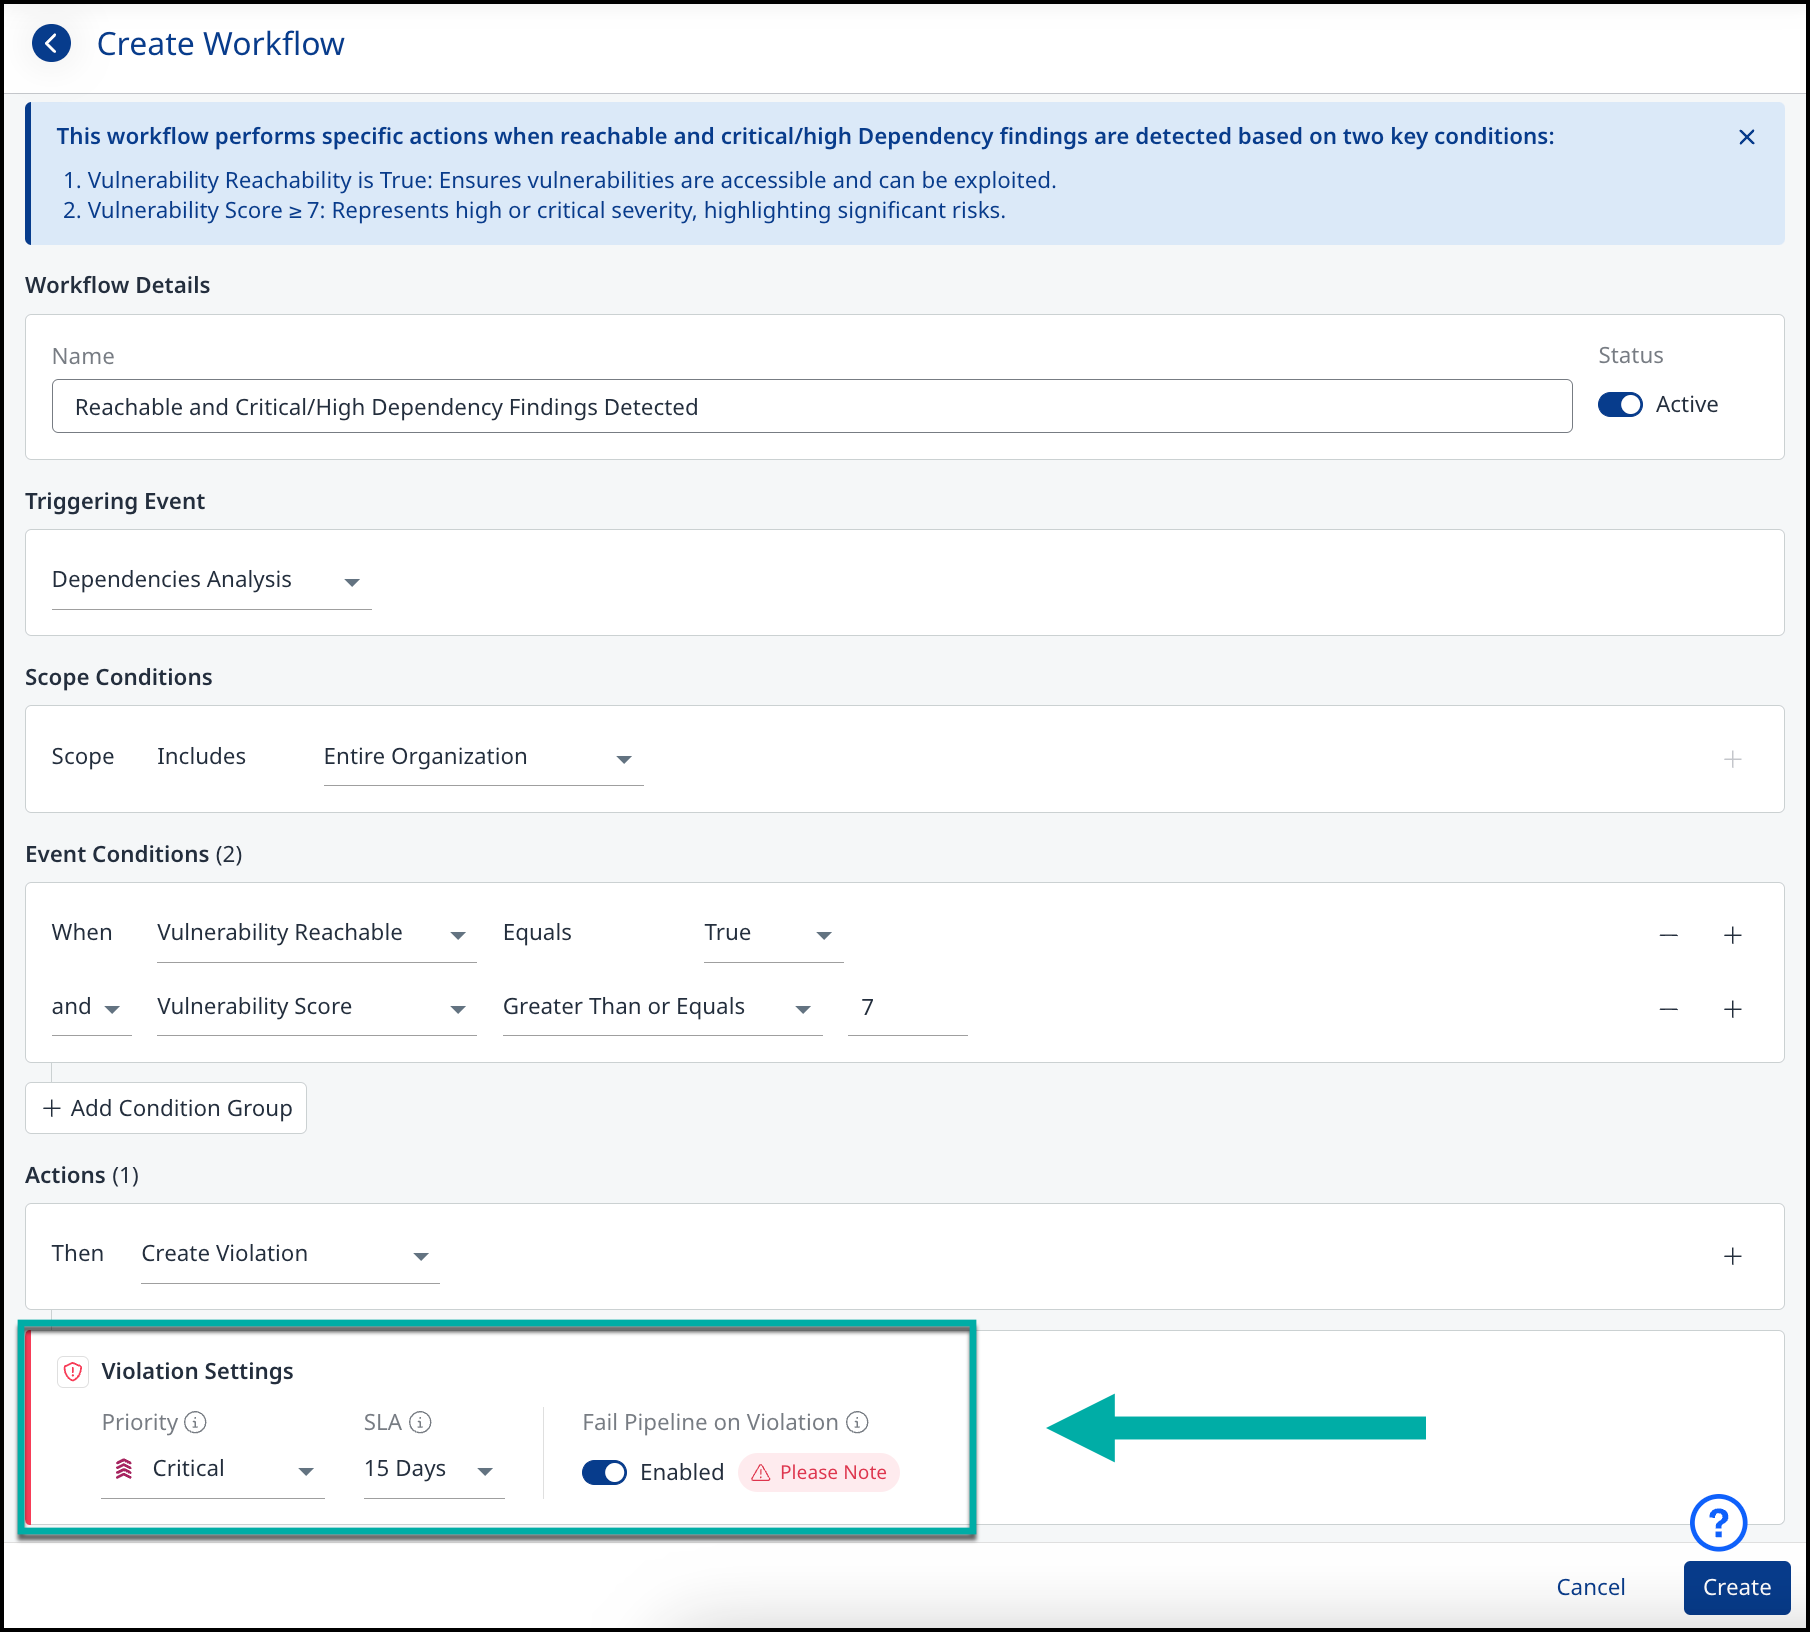
Once “Create Violation” is selected as the Workflow Action, the Violation Settings menu will show up with the Priority, SLA, and Fail Pipeline on Violation options.

Violation Priority - These classifications allow you to prioritize violations according to their potential impact.
Select a severity level: Critical, High (default), Medium, or Low.
Violation SLA - Violation SLA ensures that violations are addressed within a set timeframe, helping to maintain security standards.
Select an SLA value: 15 Days, 30 Days, 60 Days, 90 Days, 180 Days, None or Custom.
The ‘Custom’ option opens a custom SLA days picker, accepting integers between 1 and 1000.
Fail Pipeline on Violation - Enabling this setting will fail the pipeline when a violation is found depending on the pipeline setup (Exit Code 9 in the CLI).
Managing Violations in the Violations Table
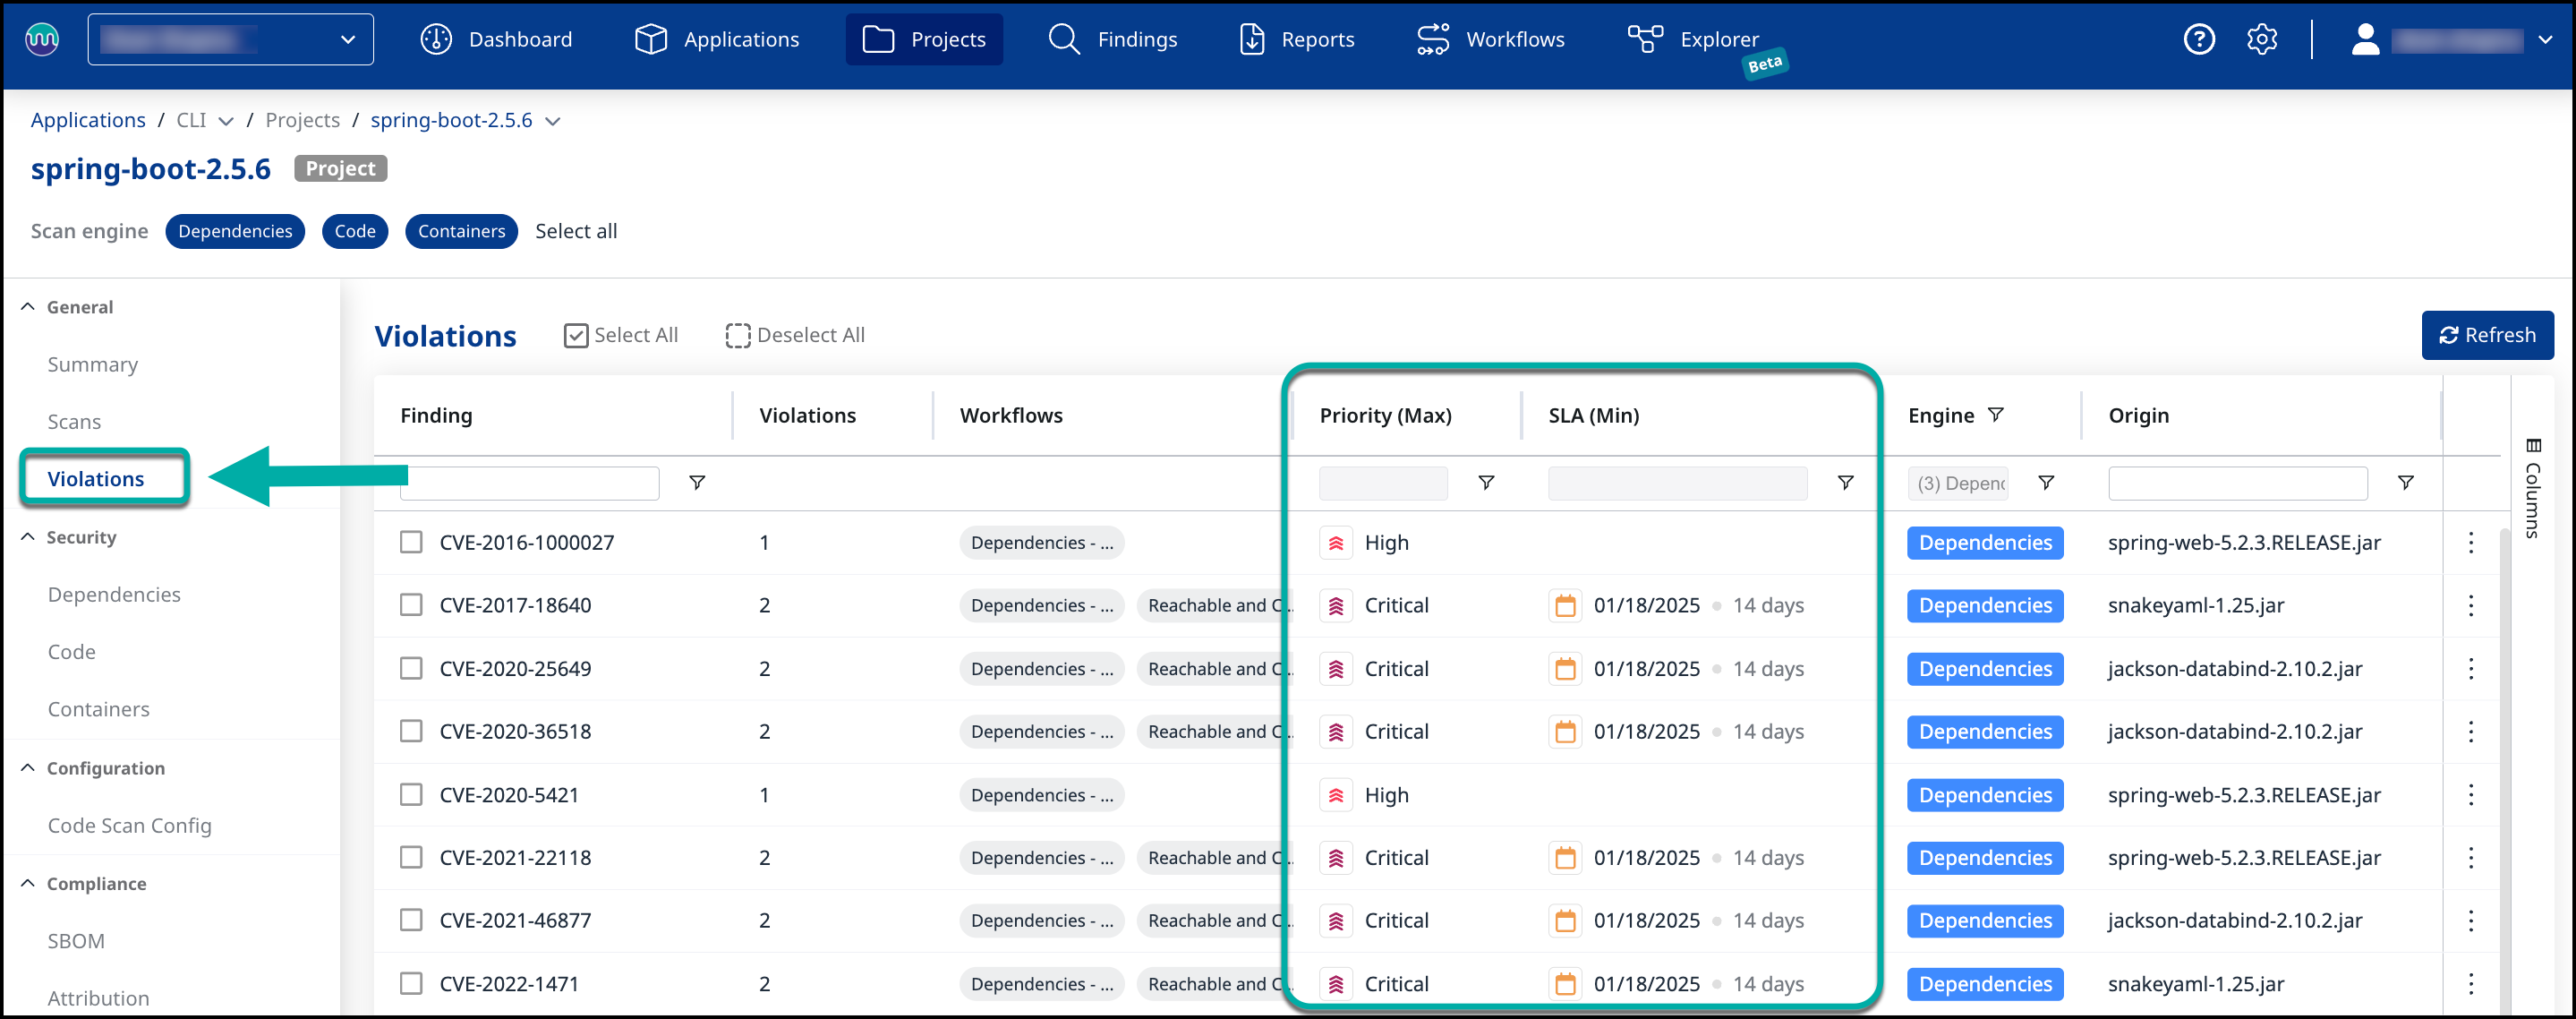
Once violations are created, you can view and manage them in the Violations Table. The table includes columns for SLA and Priority, providing additional tools for effective violation management.

View and Filter Violations
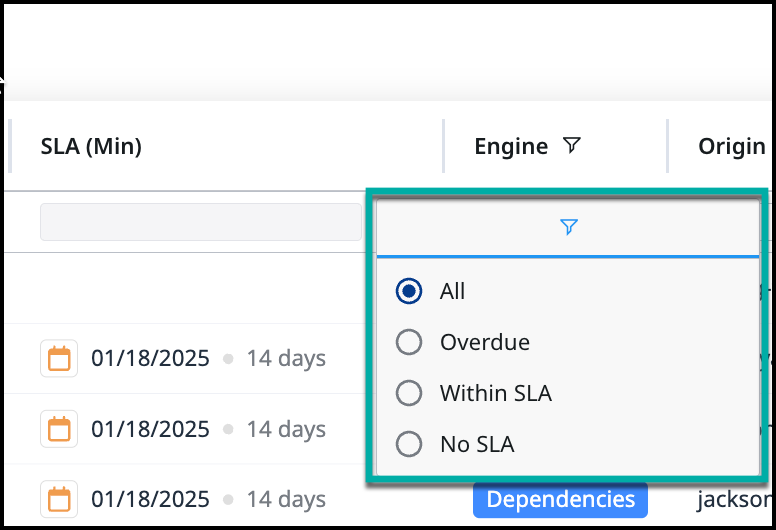
Use the SLA and Priority columns to filter, sort, and prioritize violations (e.g., filter for overdue violations using the SLA column filter).

Manually Adjust SLA
You can modify the SLA directly in the table for one or multiple violations. You can set specific due dates or remove SLA tracking by selecting None.
Notes:
Only users with the roles of Admins or Security Managers have permission to adjust SLA manually.
Manual changes to SLA cannot be reverted to the original value.

For more information on viewing violation details, please refer to View your Violating Findings.
Special Cases and Guidance
Editing Workflows -
Changes to SLA or Priority in a Workflow apply only to new violations detected after the next scan.
Existing violations are unaffected unless you explicitly enable the Apply updates to existing violations in future scans option when editing the Workflow.
Pre-Existing Violations -
SLA: For violations created before this feature’s introduction, the SLA attribute defaults to None. You can manually adjust this value in the Violations table (for existing entries).
Priority: The default priority level for pre-existing violations is set to High, based on the assumption that these violations likely correspond to critical or high-priority issues.
To update the priority level, modify the workflow settings and enable the application of updates to existing violations in future scans. This will override the Priority value for affected violations.
Workflows Without Initial SLA and Priority -
If violations are created by such Workflows, the following defaults apply:
SLA: None.
Priority: High.
You can manually adjust these values in both Workflow settings (for future scans) and the Violations table (for existing entries).
Renaming a Workflow -
Renaming is instantly reflected in all associated violations and tables, without affecting SLA or Priority.
New Violations with Defined Attributes -
SLA and Priority values defined in the Workflow are applied to newly created violations unless the user chooses otherwise. Adjustments to these Workflow settings will only affect subsequent scans, ensuring no disruption to historical data.
