Managing Custom Attributes
Overview
Custom attributes enable you to add customized metadata to libraries in Mend organizations, products and projects.
Custom attributes can be filtered according to their values and displayed in the Custom Attributes Report, where users can see all of their assigned libraries.
Managing custom attributes is done from the Admin menu in the Web Console menu bar.
Adding a Custom Attribute
To add custom attributes, do as follows:
From the Web Console menu bar, select Admin.
The Organization Administration screen is displayed.Under Settings, select Custom Attributes. The Custom Attributes Settings screen is displayed.
In the Custom Attributes table, click Add Attribute.
The Add Attribute dialog box is displayed.In the Add Attribute dialog box, do as follows:
Provide a Name for the custom attribute.
Provide a Description for the custom attribute.
Select the Value Context of the attribute. Options are Organizational, Product, or Project.
Select the Value Type: Text or Link.
Click OK. The new custom attribute is displayed in the Custom Attributes table.
Repeat Steps 3-5 for each custom attribute you want to create.
If you have defined one or more organizational level attributes (see Setting the Organizational Attribute Values), select the Primary Library Attribute from the dropdown menu. The organizational attribute's value is displayed throughout the system for each library.

NOTE: There can be only one Primary Library Attribute.
When you have finished defining custom attributes, click Save in the Custom Attributes Settings screen.
The newly created custom attributes can now be assigned to the libraries in your organization.
Setting the Organizational Attribute Values
An organizational custom attribute is the primary library attribute that is displayed throughout the system for each library. There can be only one Primary Library Attribute.
To set an organizational attribute value, do as follows:
From the Web Console menu bar, select Dashboards > Set Organizational Attributes Values.
The following screen is displayed.Select a library or libraries for which you want to create an attribute and click Set Attribute Value.
The Set Attribute Value dialog box is displayed.Enter an Attribute Value to be applied to all the selected libraries, and click OK.
This value will be applied throughout the whole organization. Existing values will be overridden.
Editing a Custom Attribute
To edit a custom attribute, do as follows:
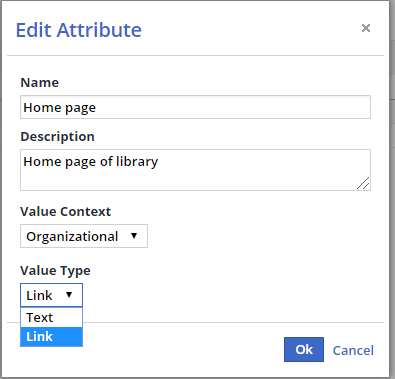
In the Custom Attributes table, click the Edit link next to the custom attribute you want to modify. The Edit Attribute dialog box is displayed.
Modify the attribute's value.

Click OK and then Save in the Custom Attributes Settings screen.
Copying a Custom Attribute
You can copy an attribute in order to quickly create a similar attribute. Do as follows:
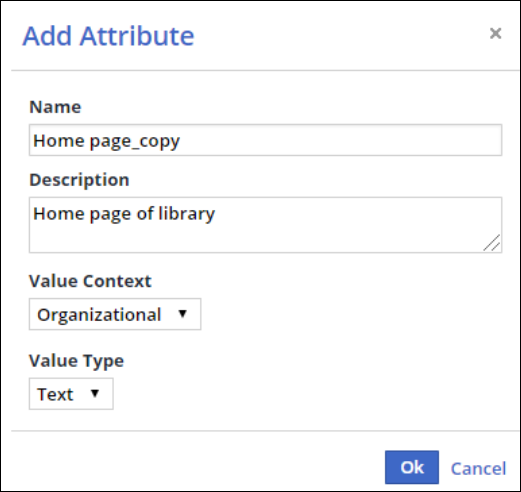
In the Custom Attributes table, click the Copy link next to the custom attribute you want to copy. The Add Attribute dialog box is displayed.
Copy the attribute's value.
Note that the suffix _copy is added to the attribute name. You can always edit the name later, if required.
Click OK and then Save in the Custom Attributes Settings screen.
Removing a Custom Attribute
To remove an attribute, do as follows:
In the Custom Attributes table, click the Remove link next to the attribute that you want to remove.
Click Save in the Custom Attributes Settings screen.
Filtering the Attribution Report via a Custom Attribute Value
In the Attribution Report, you have the option to filter the report according to the value of a specific custom attribute.
To include a custom attribute in the Attribution Report:
Open the Custom Attribute dropdown menu, select the attribute's context (Project, Product or Organizational), then select the custom attribute.
A new column is displayed with the custom attribute's name as its title, and the value per library (if defined).
Custom attributes that include a product/project value context are displayed as a concatenated string that includes the custom attribute name and the product/project name separated by a hyphen: i.e., <attribute name> - <product/project name>.
The following screenshot displays an example of a dropdown menu that includes custom attributes with organization, project, and product value contexts.
Note that the custom attributes index and project manager have a product/project context value.

