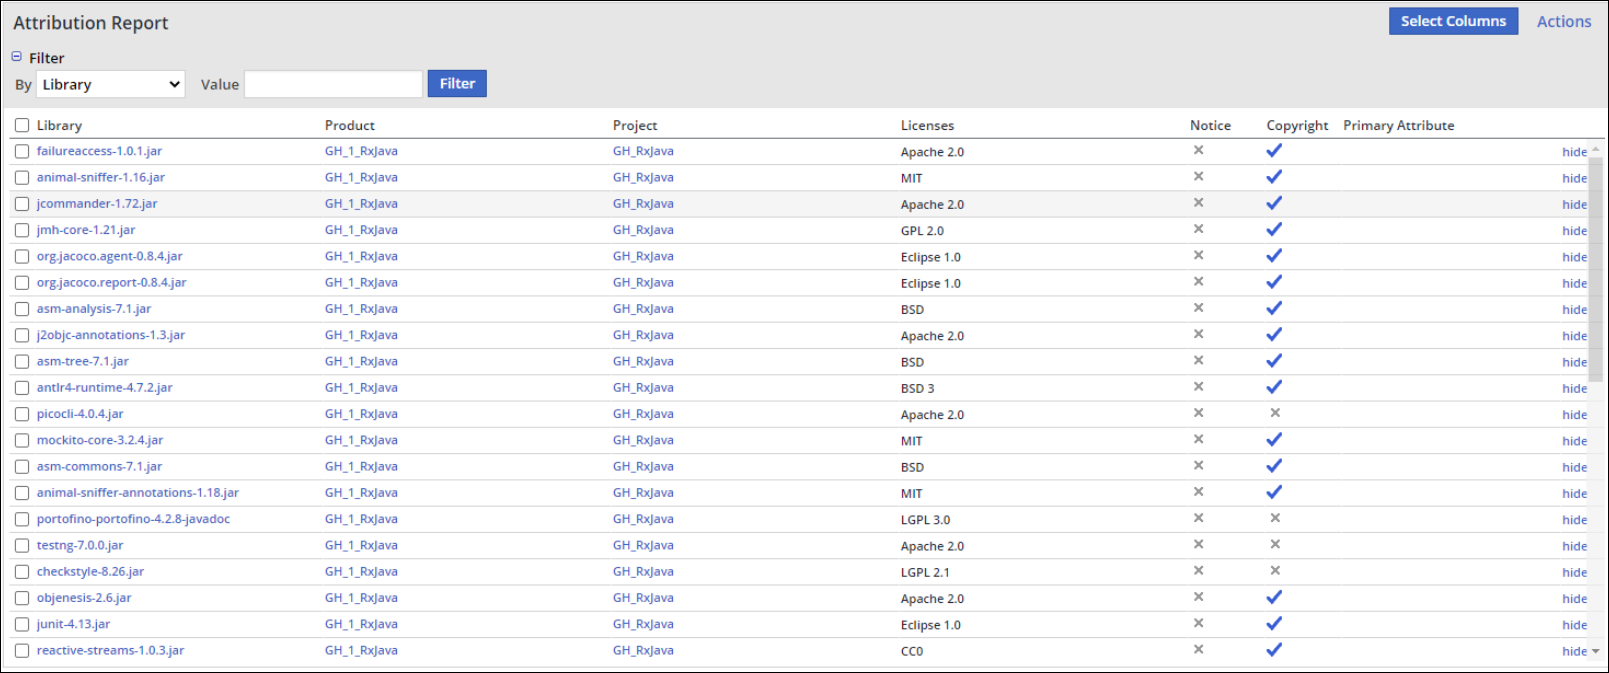
The Attribution Report
Overview
The Attribution Report enables you to generate a report detailing compliance information on open source software components that are managed in Mend products and projects.
Accessing the Report
From the main menu, select Reports > Attribution. The Attribution Report page is displayed.
Select the product, projects, and custom attribute from the filter area for which the report should be created. Do as follows:
Open the Product dropdown menu and select the product to which you want to base the report.
If you want to base the report on specific projects, click Edit to select one or multiple projects in the selected product.
(Optional) to include a custom attribute in the report, open the Custom Attributes dropdown menu, select the attribute's context, then select the custom attribute. A new column is displayed with the custom attribute's name as its title, and the value per library (if defined).
Click Apply and wait for the data to load into the report preview table.
To filter the report preview table to view libraries with a specific value, do the following:
Expand the filter area, select a property, and enter the text by which to filter.
The property options are: Library, Licenses, Primary Attribute, and the name of the selected custom attribute (if it exists).Click Filter.
The Attribution Report is displayed.

Selecting the Report Data
By default, the Attribution Report provides all the available columns of information; however, you can select and deselect which columns to include in your report by clicking the Select Columns button.
The following columns of information can be included in your report:
Library: Name of the library.
Product: Name of the product where the library is used.
Project: Name of the project where the library is used.
Licenses: The library's license. If the library is licensed under multiple licenses, the report will display Multiple licenses.
Primary Attribute: The value of the organization's primary attribute for the library.
Custom Attribute: The value of the selected custom attribute for the library.
Notice: Indicates whether a notice file is included for the library.
✔ - The library includes a notice.
✖ - The library does not include a notice.
Click the icon for a specific library to open the Set Notice pop-up window (see the Setting Notices section).
Copyright: Indicates whether a copyright statement is included for the library.
✔ - The library includes a copyright.
✖ - The library does not include a copyright.
Click the icon for a specific library to open the Set Copyrights pop-up window (see the Setting Copyrights section).
Setting Notices
To set a notice for a given library, use one of the options below and click OK.
Notice Template: Use a notice template that was previously uploaded by selecting it from the dropdown menu. To upload a new template, click Upload new template and select a .txt file to use as a template.
Custom Template: Create a custom notice via the Notice text and Reference fields.
None: Do not set a notice for this library.
Setting Copyrights
To set a copyright for a given library, use one of the options below and click OK.
Custom: Create a custom copyright by doing the following:
Select the relevant years
Specify the copyright's Author
Specify the copyright's Organization
Add any relevant additional comments.
Template: Use a copyright template that was previously uploaded by selecting it from the dropdown menu. To upload a new template, click Create new template and select a .txt file to use as a template.
None: Revert back to the copyright assigned by mend.
Performing Actions on the Report
To perform actions on multiple selected libraries, click Actions and select one of the following actions from the dropdown menu:
Set Notice: See the Setting Notices section.
Set Copyright: See the Setting Copyrights section.
Hide: Exclude the selected libraries from the report.
NOTE: You can also select an individual library in the report table and click the hide link.Restore Hidden: Restore the previously hidden libraries.
NOTE: You can apply an action on All the libraries in the report table simultaneously, by selecting the checkbox above the table in the column titles row, and then selecting the action.
Exporting the Report
To export the report, click the Export button at the bottom of the report, select your preferences in the dialog box that opens, and click Export.
The following preferences are available:
Basic
Title: The title of the exported report.
File format: The file format to which the report will be exported (HTML/TXT/JSON).
Group by: How the exported report will be grouped (Library/Project).
Advanced
Header: An optional header to include in the report.
Footer: An optional footer to include in the report.
Include summary: Include a summary of the report at the top.
Include versions: Include the versions column in the report.
If a license reference cannot be obtained:
Leave license blank: The license text field will display: "Licensing details could not be obtained."
Reference generic license: A generic license text will be shown.
License text placement:
Appendix: The Licenses section will contain a link to the license text in the Appendix.
Licensing section: The license text will be displayed in the Licenses section.
The exported report will reflect your selected filters and preferences.
For examples of exported report types, see The Reports Menu.
