SAML 2.0 - Integrating SCA with Azure Active Directory (AD)
This article contains step-by-step instructions on how to successfully integrate SAML with Azure Active Directory (AD) IdP.
Mend offers SAML integration for two purposes:
Authentication for login
Role management (optional)
This article covers SAML integration for authentication only. Information regarding role management can be found here.
Instructions
Download the metadata file at the following link based on your Mend environment:
WhiteSource:
https://saas.whitesourcesoftware.com/saml/metadata
https://saas-eu.whitesourcesoftware.com/saml/metadata
https://app.whitesourcesoftware.com/saml/metadata
https://app-eu.whitesourcesoftware.com/saml/metadataMend:
https://saas.mend.io/saml/metadata
https://saas-eu.mend.io/saml/metadata
https://app.mend.io/saml/metadata
Within your Azure application, navigate to Azure services > All services > find Azure Active Directory (AD):

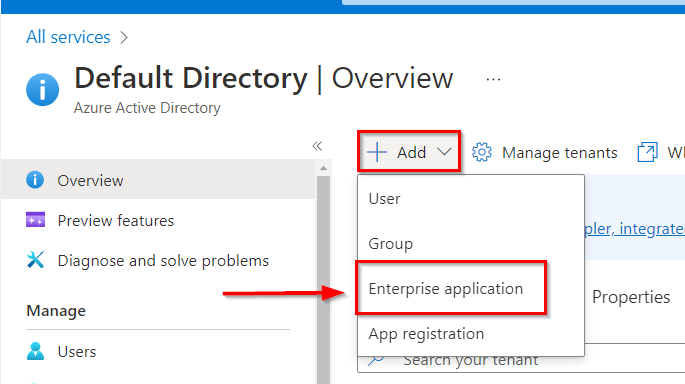
This will take you to the Overview page of your Azure AD. Click on Add > Enterprise application:
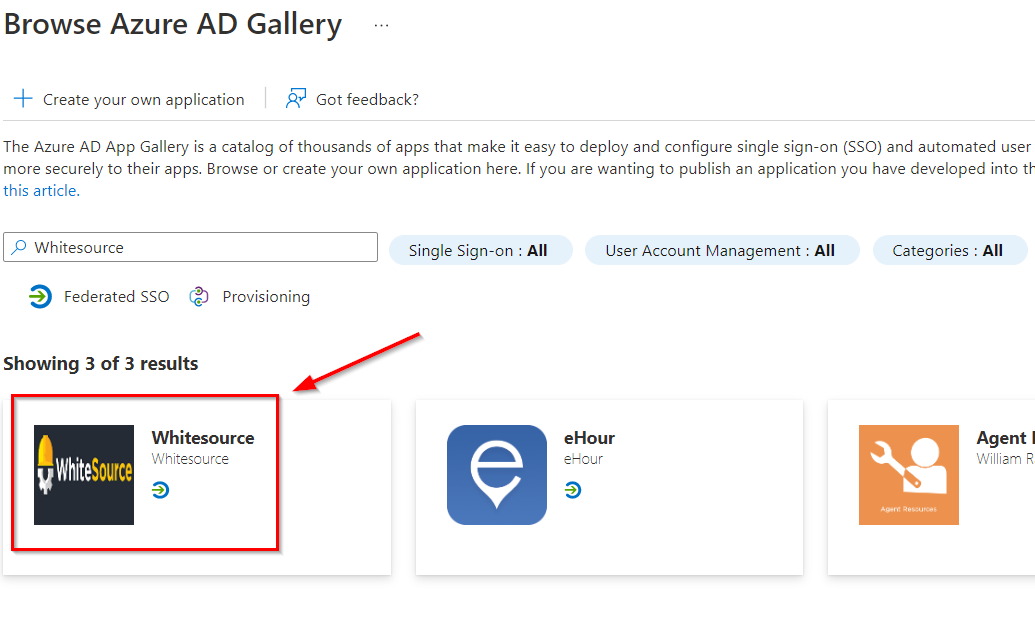
This will take you to the Browse Azure AD Gallery page. Search for Whitesource:
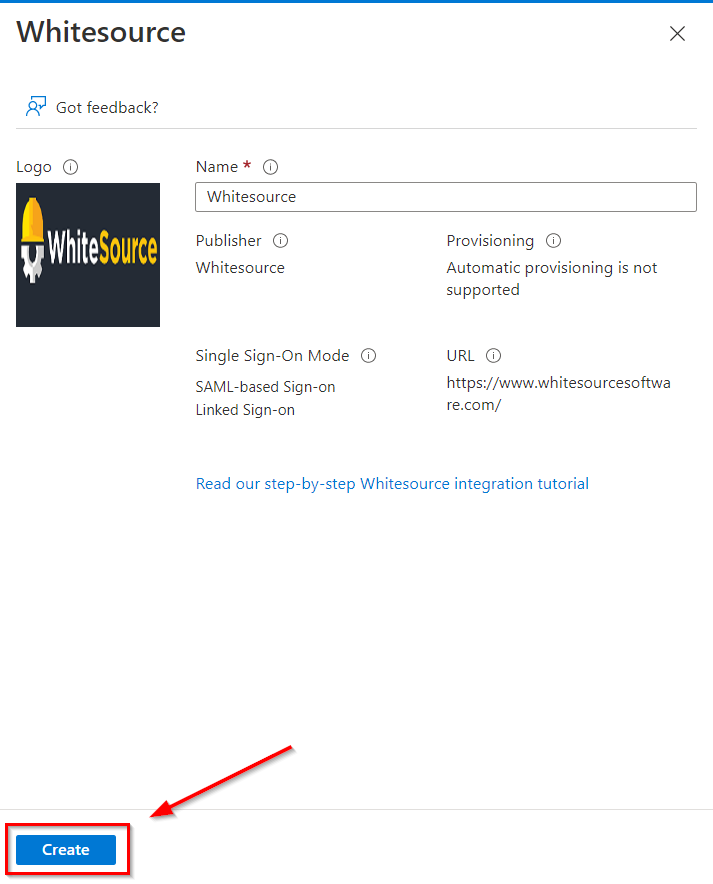
Click on the Whitesource application. This will pull in a window from the sidebar. Click on Create:
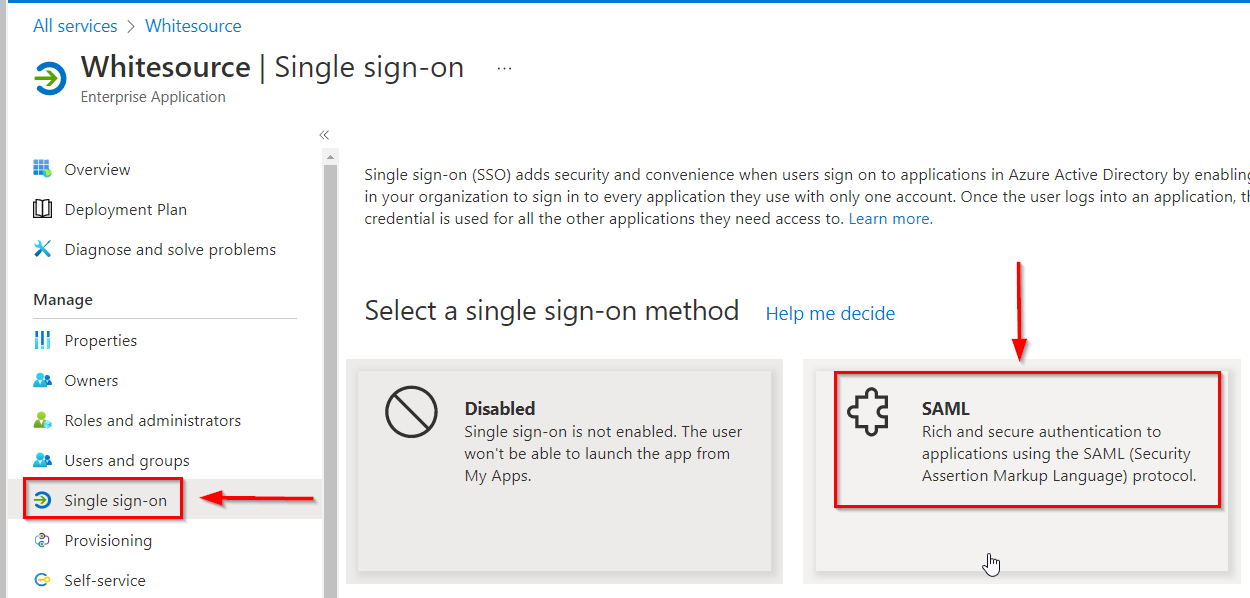
Once the Mend (formerly Whitesource) application is created, navigate to the Single sign-on option in the left sidebar and click on the SAML button:
On the SAML page, click on the Upload metadata file option to upload the metadata file you obtained in step one:

Once uploaded, this will pull in a Basic SAML Configuration window from the sidebar. Your Entity ID and Reply URL (Assertion Consumer Service URL) should be auto-filled. However, if they are not, the values are as follows:
Entity ID: com.whitesource.sp
Reply URL (Assertion Consumer Service URL): https://<instance>/saml/SSO (e.g
https://saas.mend.io/saml/SSO)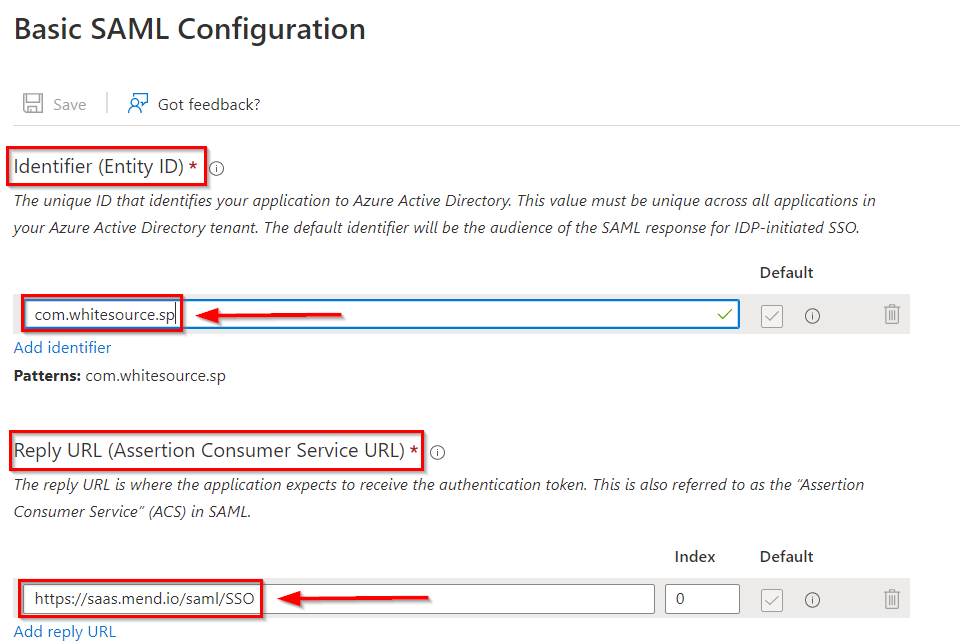
Enter your Sign-on URL, depending on what instance your Mend organization is on:
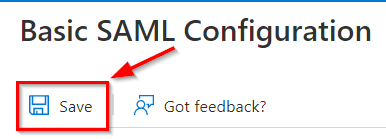
Once these settings have been applied, click on the Save button:
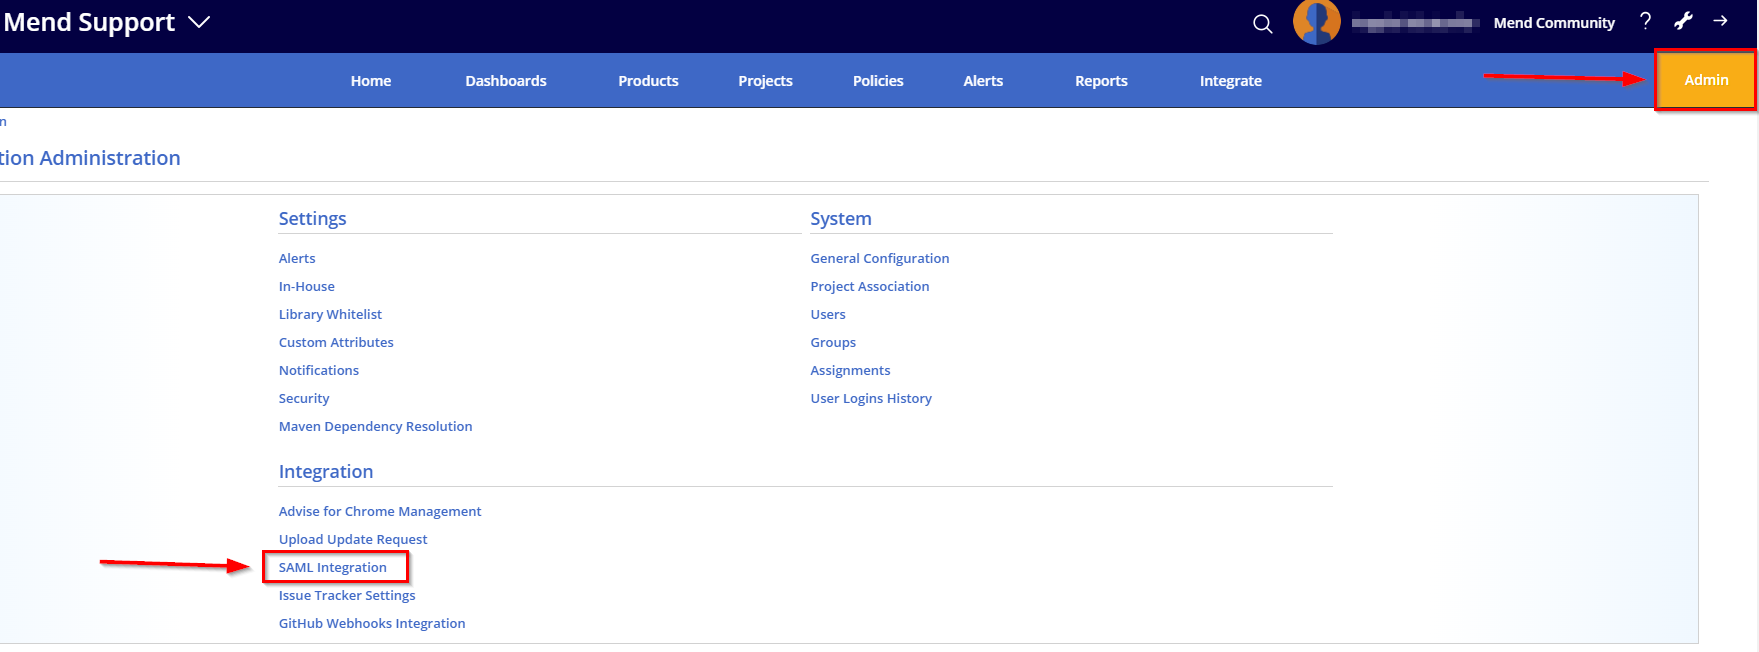
Open Mend in a new incognito window, log in, and, in your Organization, navigate to the Admin > SAML Integration page:
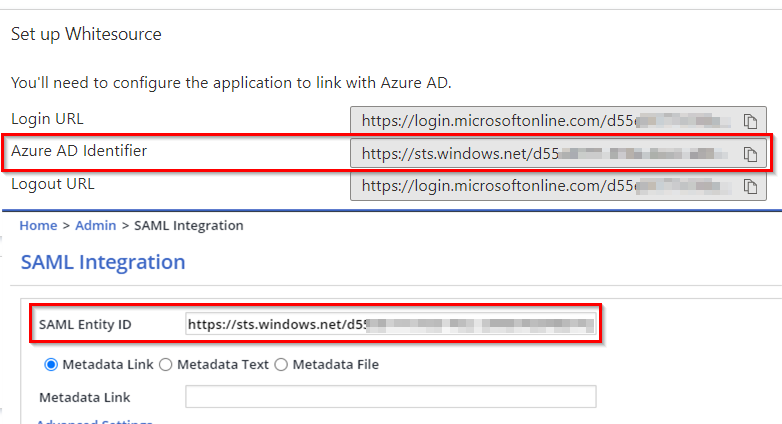
Copy the Azure AD Identifier from Azure and paste it into the SAML Entity ID in the Mend UI:
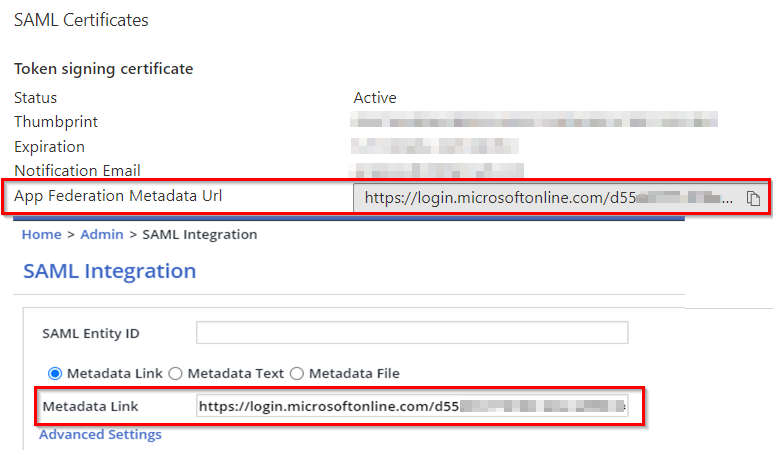
Copy the App Federation Metadata URL from Azure and paste it into the Metadata Link field in the Mend UI, then click Save in the bottom-right corner to save your SAML Integration settings:
A SAML Login URL will be created in the Mend application. Copy and paste this into the Sign on URL in your Azure AD application:

Since the metadata has changed, copy the App Federation Metadata URL from Azure again and paste it into the Metadata Link field in the Mend UI
Click on Update in the bottom-right corner to save your updated SAML integration settings
Open Mend in an incognito window, click on Sign in with SSO, and enter your email
Troubleshooting
Not able to sign in - email mapping
A common issue at this point happens due to incorrect email mapping. If you are unable to log in, follow these steps:
Navigate to the Mend application in your Azure AD > Attributes & Claims > Edit:

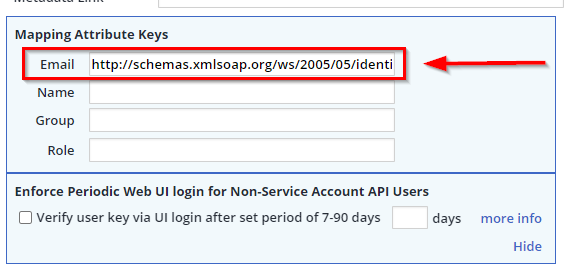
Copy the Claim name for the email value. NOTE: Simply copying the “emailaddress” from the end of the URL value can work. If it does not, you will need to copy the entire Claim name schema URL:

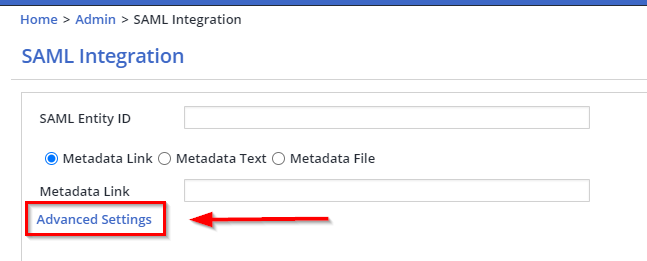
In the Mend UI, navigate to the Admin > SAML Integration page and click on Advanced Settings:
Paste the email value (“emailaddress” or full schema URL) from Azure in the Email field:
Click on Save/Update (depending on if this is your first time setting up SSO) in the bottom-right corner to save your changes
Open Mend in an incognito window, click on Sign in with SSO, and enter your email
“Entity ID is already in use” error
When creating a SAML integration with Mend, you may run into the following error:

This error occurs when the IdP application’s entity ID is already active and in use by another Mend organization or global organization. An entity ID can only be in use by one organization or one global organization at a time.

