Mend SAST supports SAML 2.0 integration for your organization. This article shows step-by-step how to implement this if your SAML 2.0 provider is Okta.
-
In our experience (at least in Firefox), you should disable Ghostery and perhaps other anti-tracking extensions so that all Okta web features will work.
-
If you don’t already have access to Okta and you want to practice, go to Okta Developer & fill out the form in order to get an Okta Developer account
-
Log into your new Okta Developer instance, change the password, add 2FA, etc.
-
-
Click on the "Admin" button in the upper-right corner. You may be asked to reauthenticate.
-
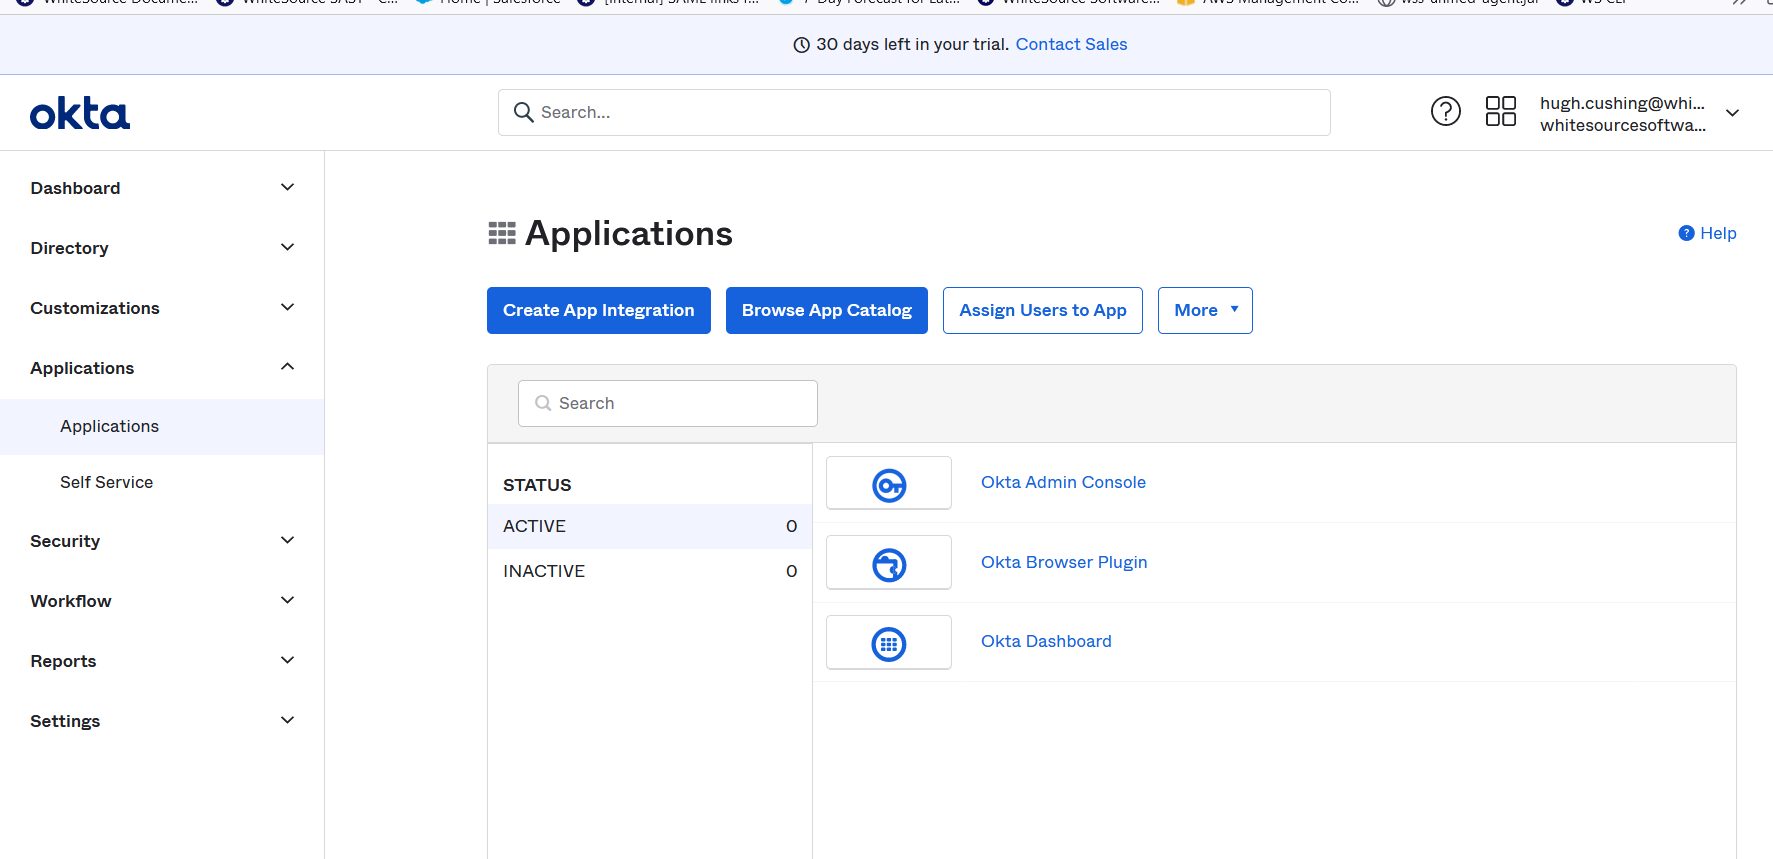
In the new window that comes up, on the left-hand menu, choose Applications->Applications, then click "Create App Integration":
-
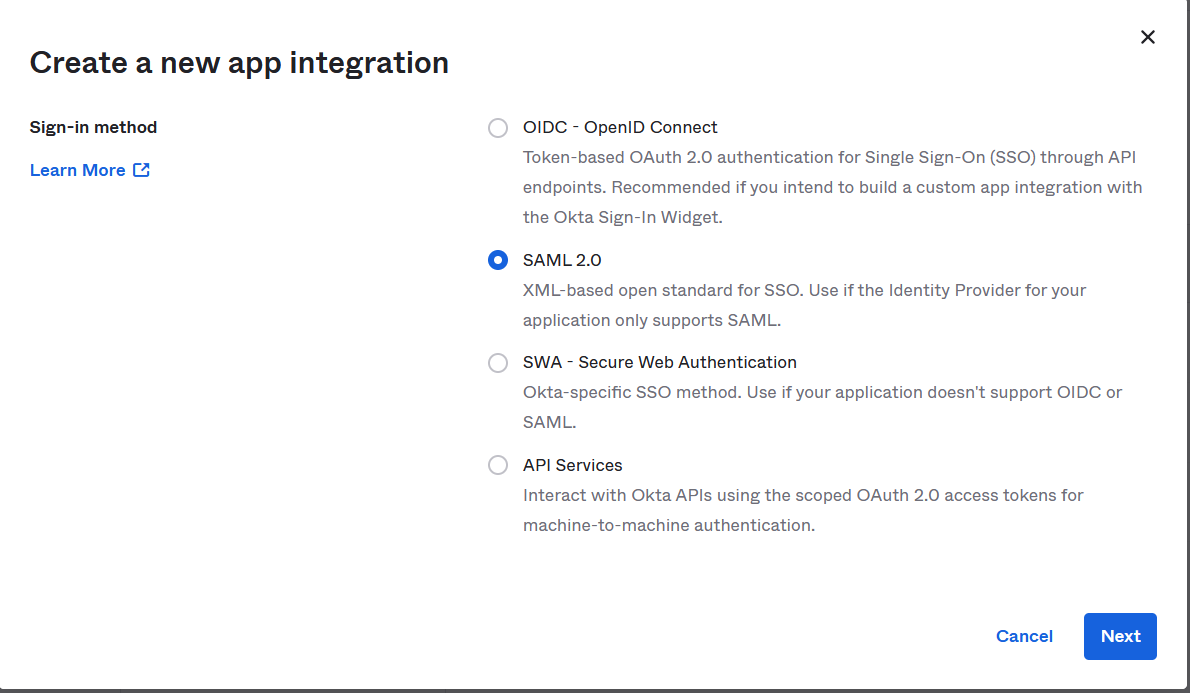
Choose "SAML 2.0" as the sign-in method and click Next:
-
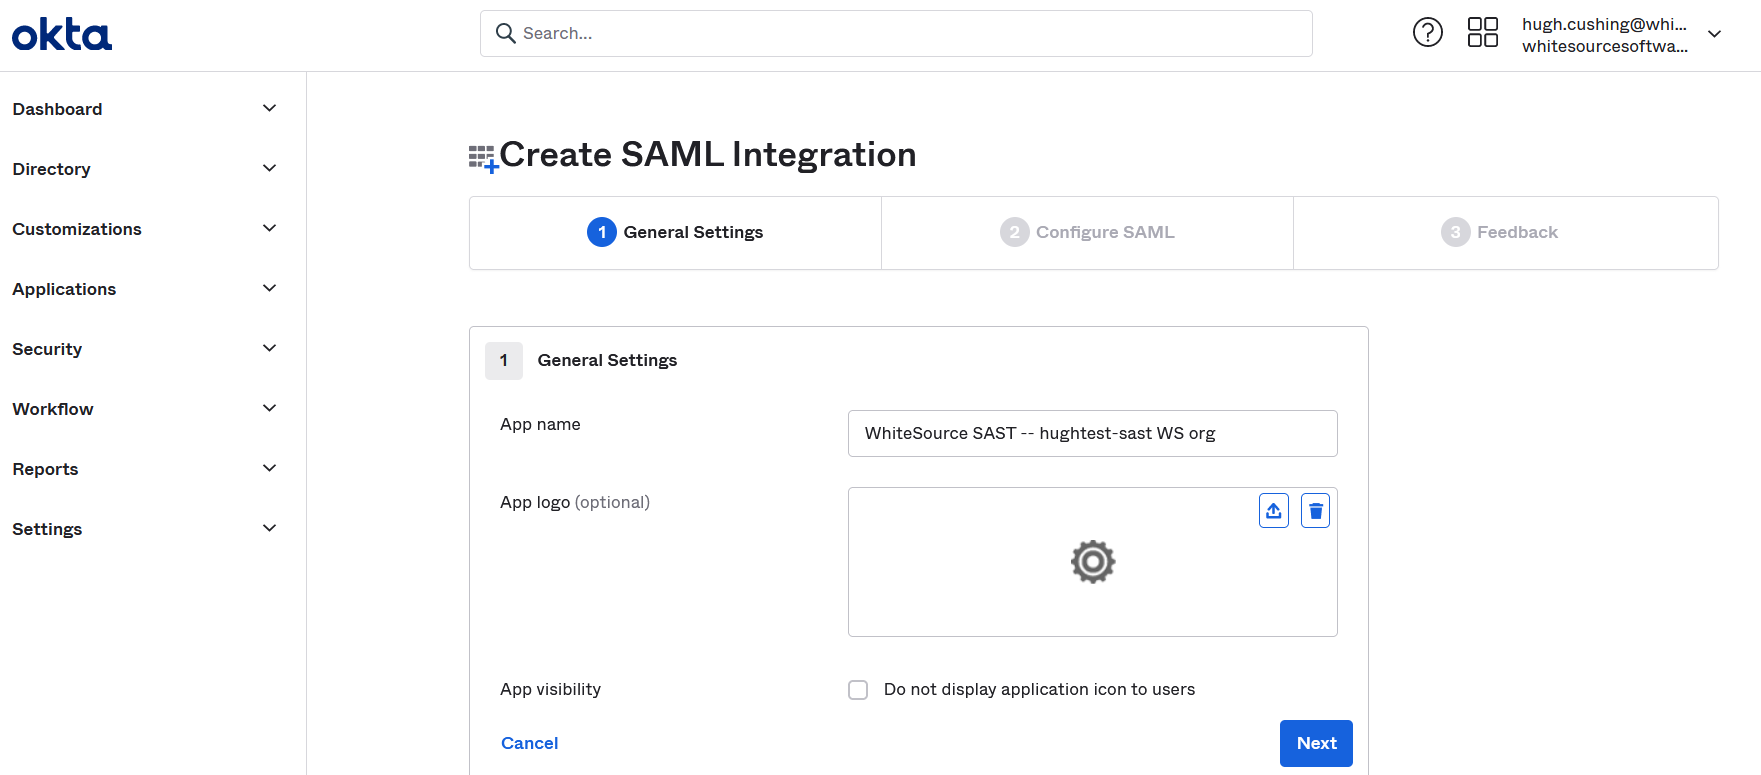
Enter an app name such as "Mend SAST -- <your-SAST-orgname> org, specify any other desired options (e.g. logo), and click Next:
-
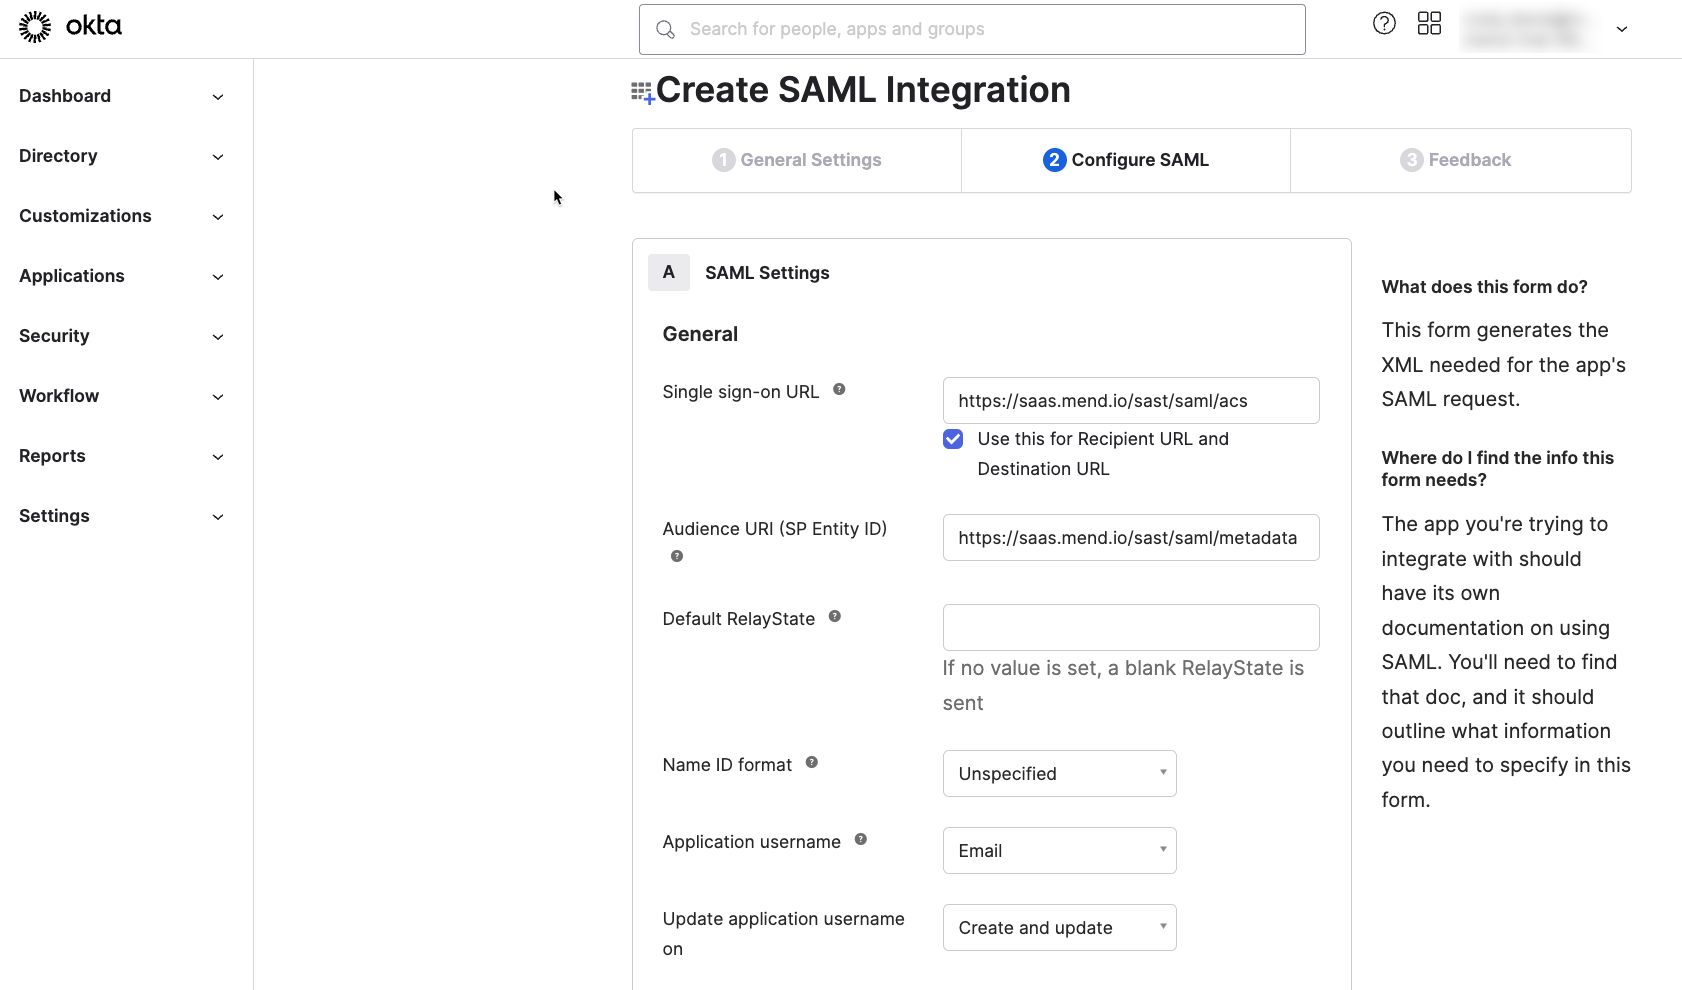
Now, on the SAML Settings page, fill out the first few fields as follows. All fields not mentioned below should be left at the defaults.
-
Single sign on URL:
- WhiteSource:https://<your-instance>.whitesourcesoftware.com/sast/saml/acs
- Mend:https://<your-instance>.mend.io/sast/saml/acs
-
Note: The Single sign on URL must end with “/sast/saml/acs”.
b. Audience URL (SP Entity ID):
-
WhiteSource:
https://<your-instance>.whitesourcesoftware.com/sast/saml/metadata
-
Mend:
https://<your-instance>.mend.io/sast/saml/metadata
Note: The Audience URL (SP Entity ID) must end with “/sast/saml/metadata”.
c. Application username: Email
-
Still on the SAML Settings page, under the "Attribute Statements (optional)" heading
a. Set the field under the "Name" column heading to "username"
b. Set the field under the "Value" column heading to "user.login" -
Click Next
-
For the "Are you a customer or partner?" question, select the "I'm an Okta customer adding an internal app" radio button, optionally fill out the requested fields, and click "Finish"
-
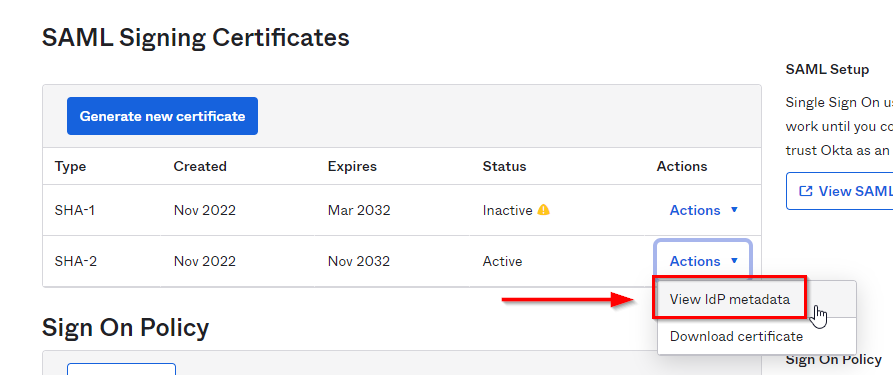
You will be presented with the newly defined Application. On its "Sign on" tab, navigate to the SAML Signing Certificates section → click the Actions dropdown on the Active certificate to reveal “View IdP metadata,” Right-click to copy the link (or "Copy link address" in Chrome). Save the link that's now in your clipboard in your favorite editor; you'll need it later as the "IdP Metadata URL" value on step 15c below:
-
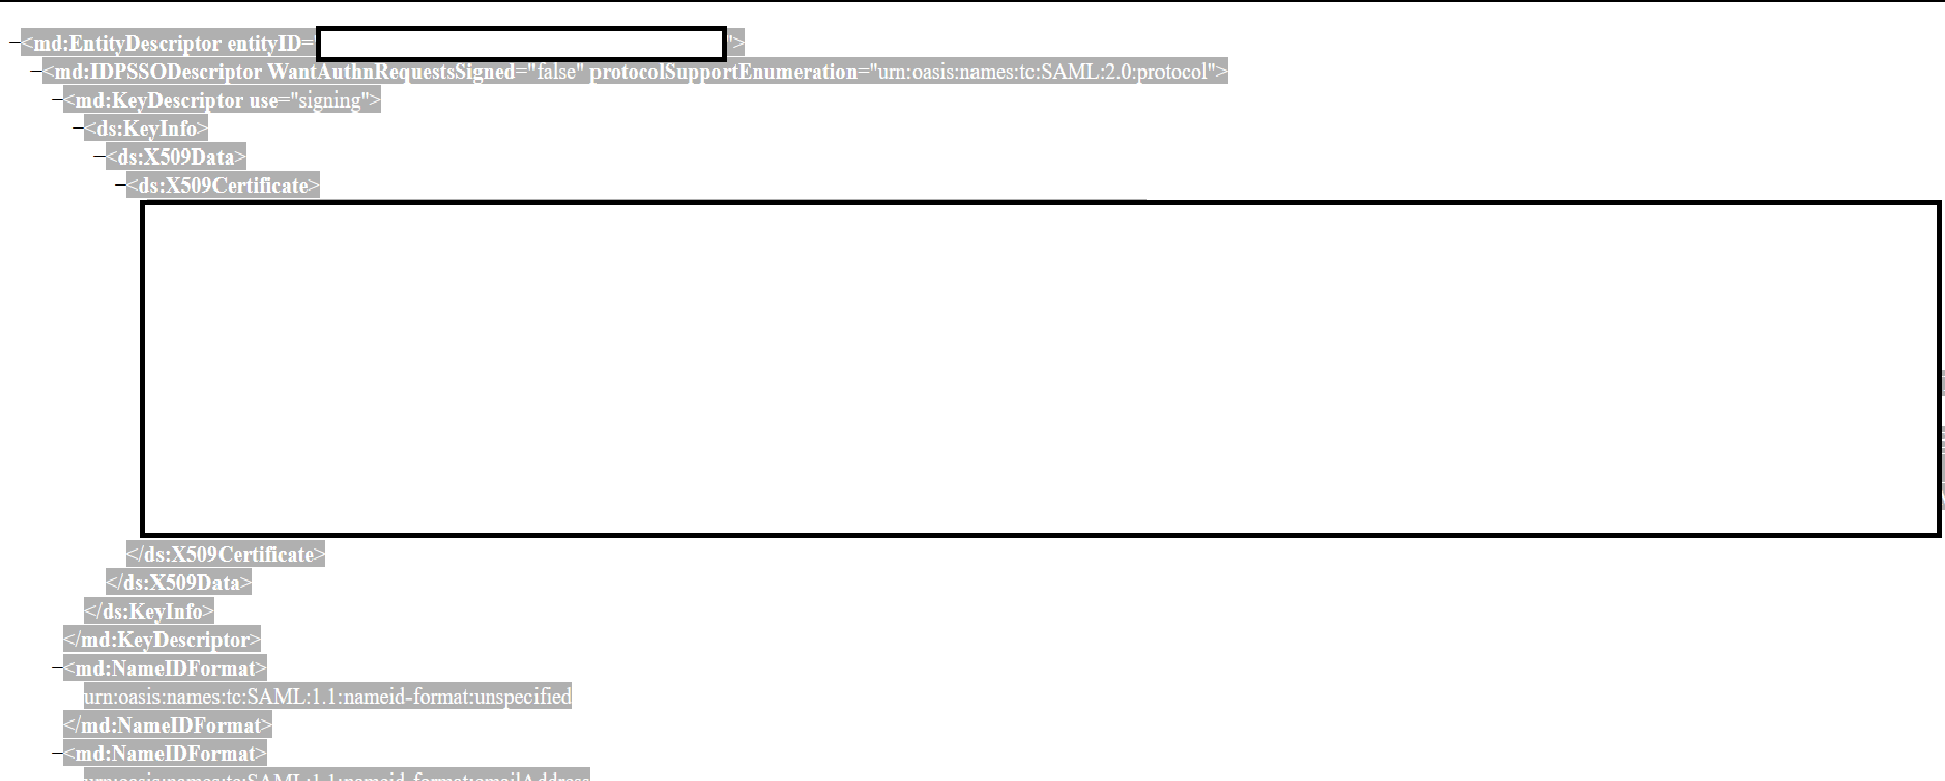
Next, LEFT-click on the same "Identity Provider metadata" link, select all the XML text (not the header) in the page that pops up, and copy it to your favorite editor or a file.
Next, switch to the Mend SAST UI. Take the following steps:
-
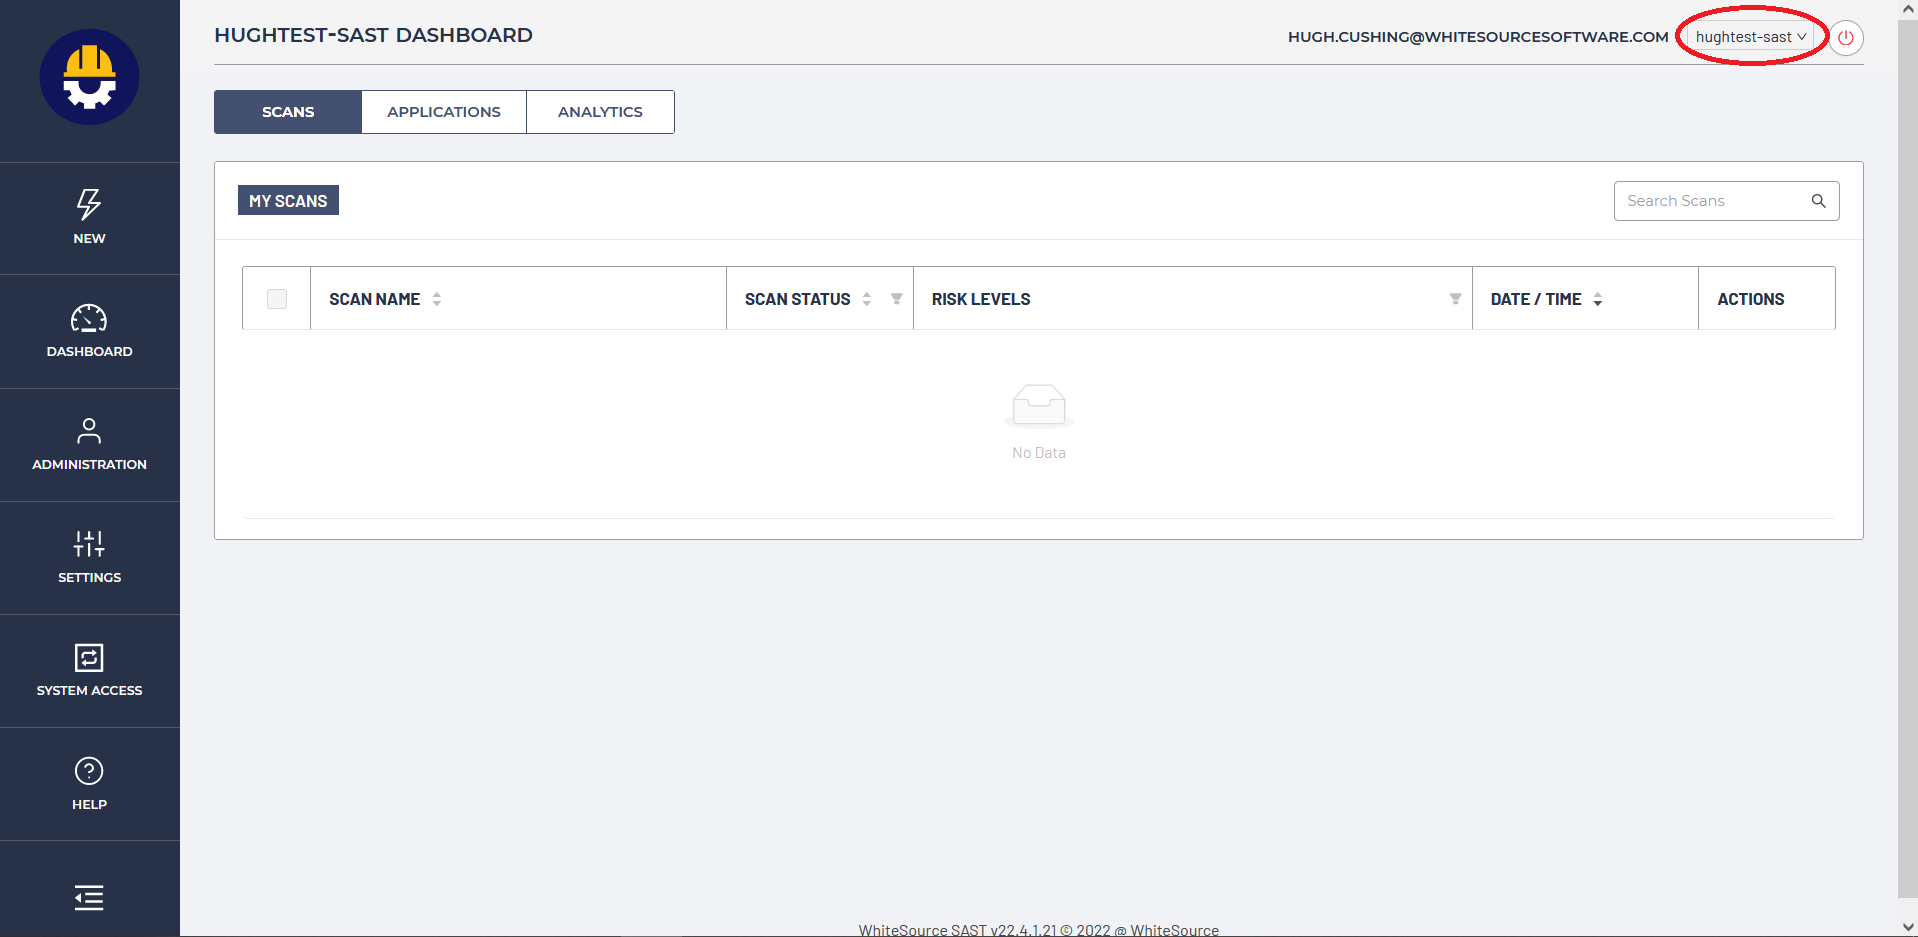
Log into Mend SAST as an administrator and select the org in the upper-right corner that you're going to configure for single sign-on:
-
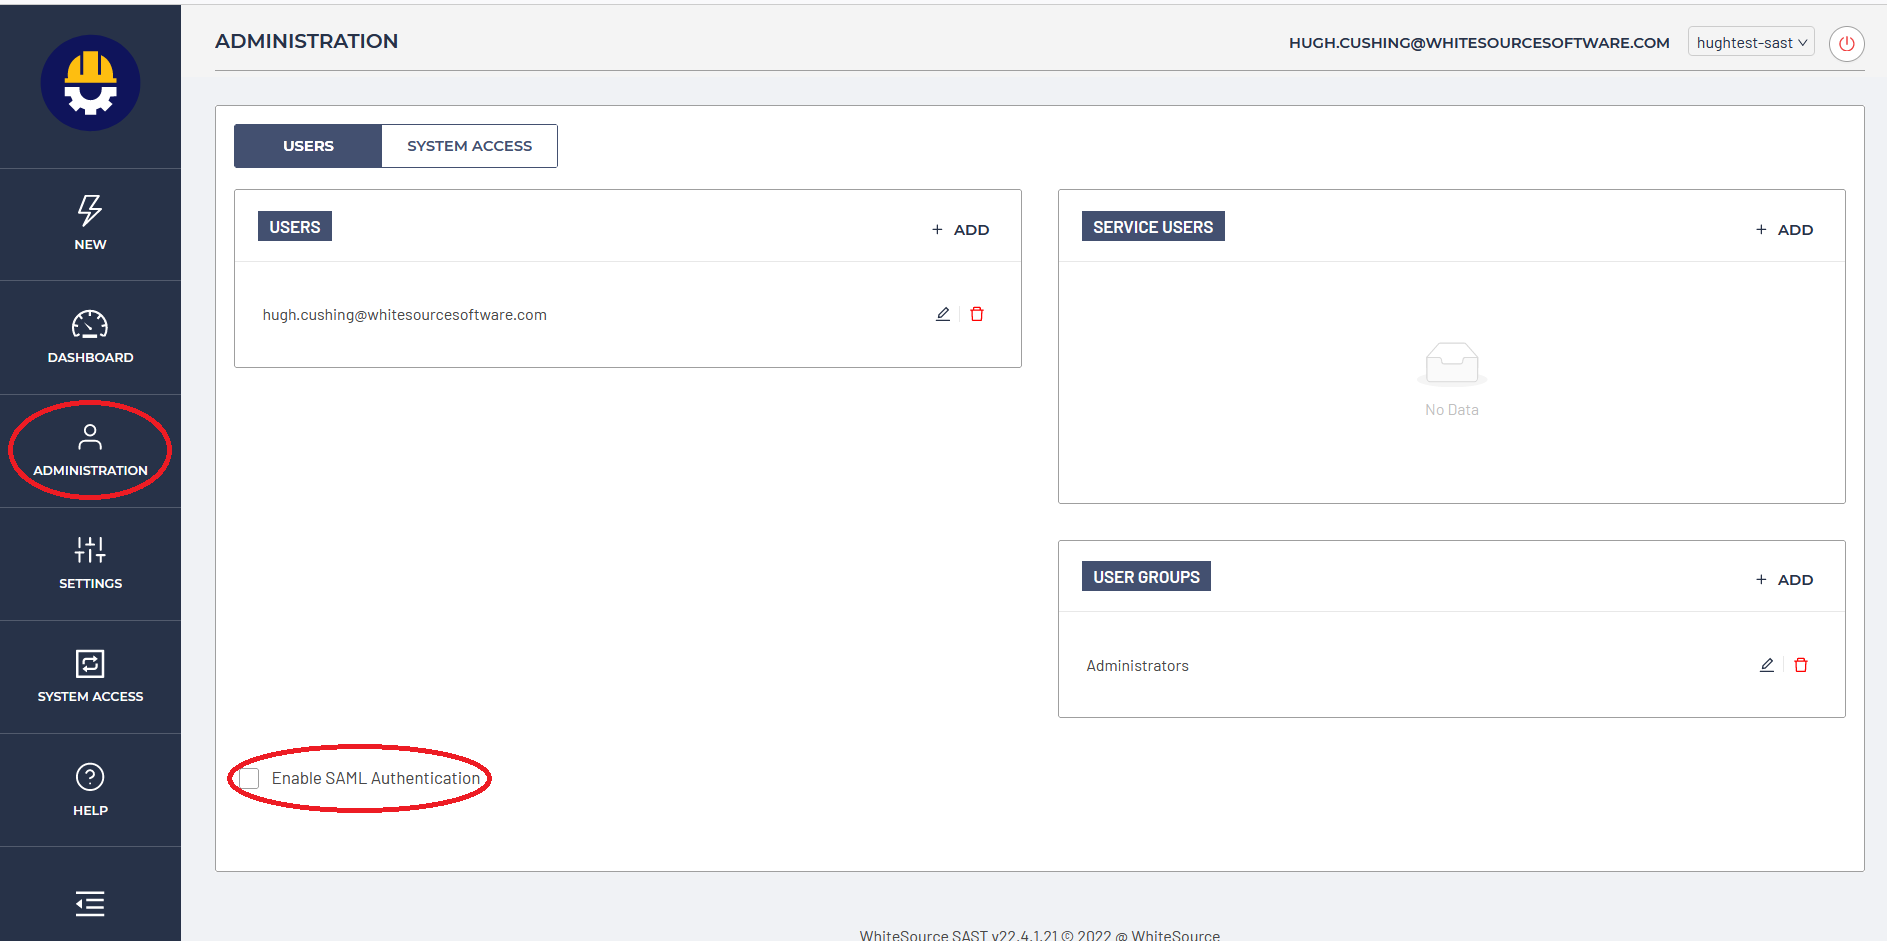
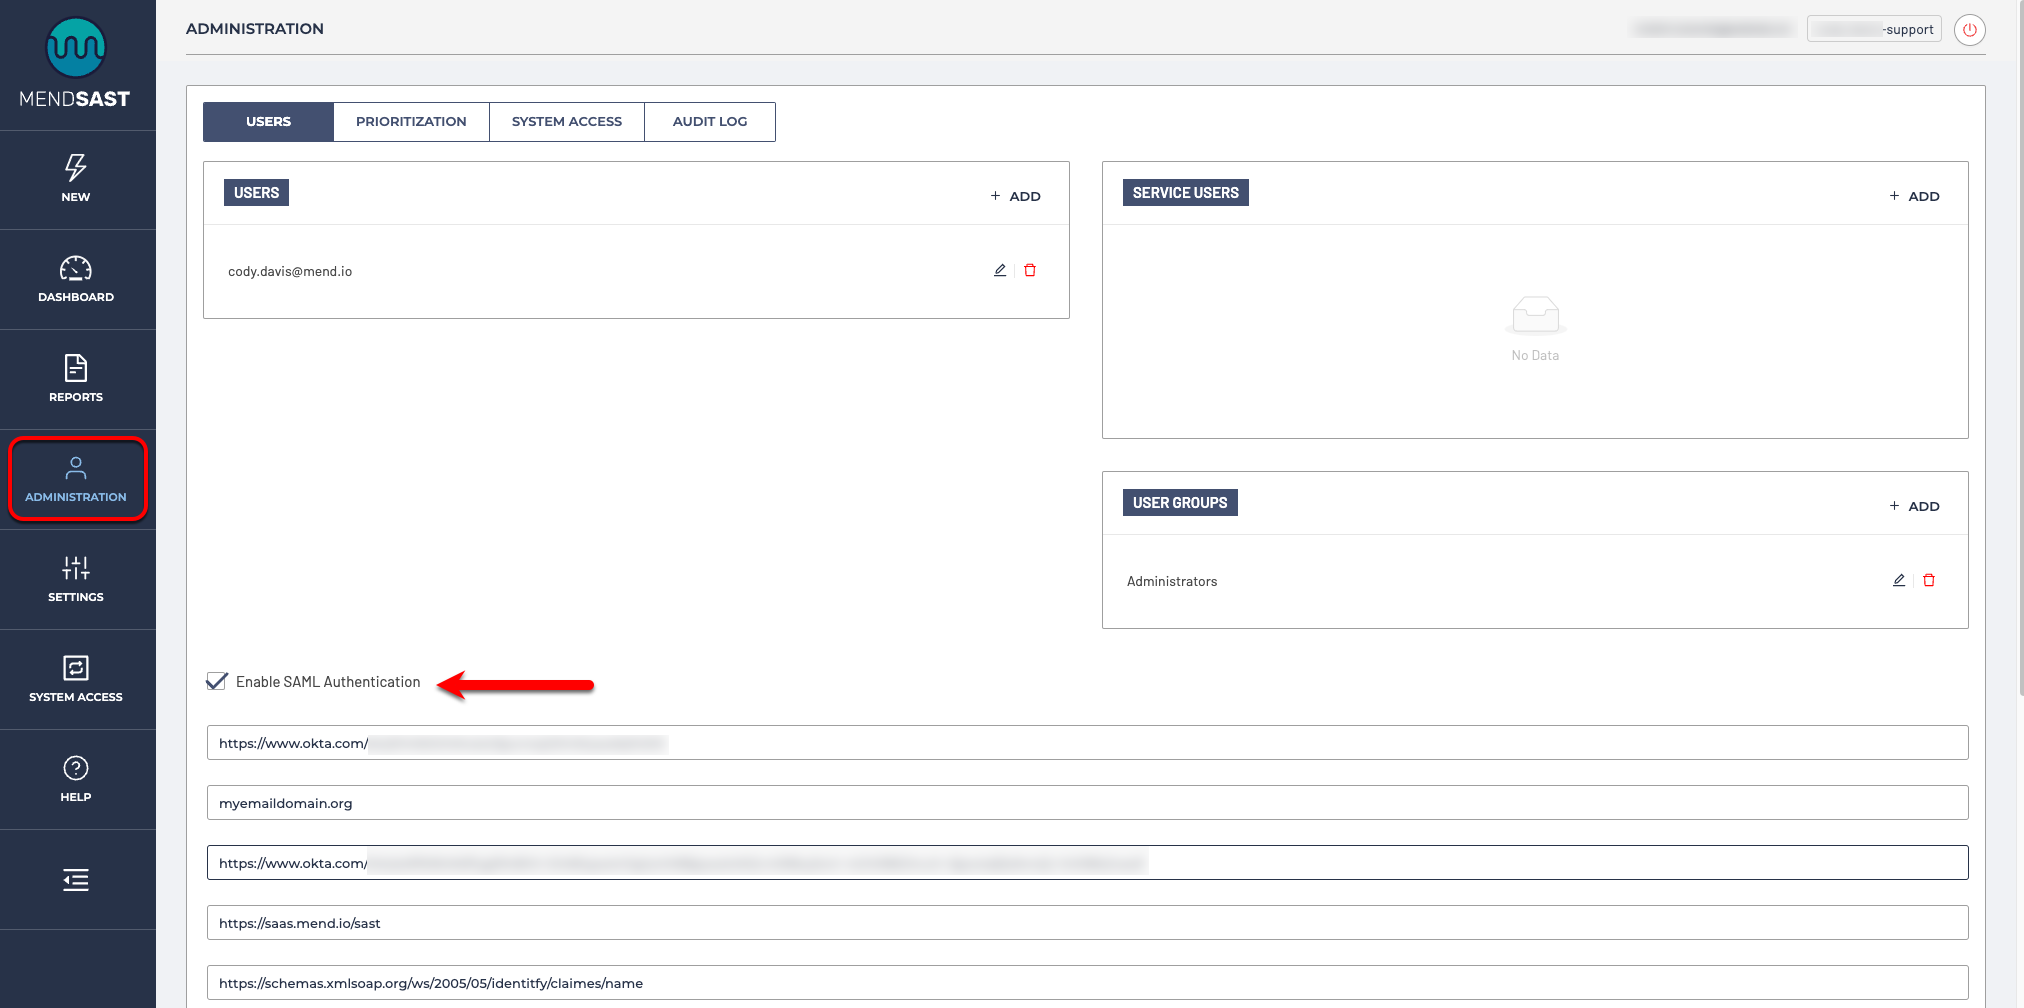
Now select the "Administration" option on the left hand side, and check the "Enable SAML Authentication" box:
-
Fill out the following fields:
-
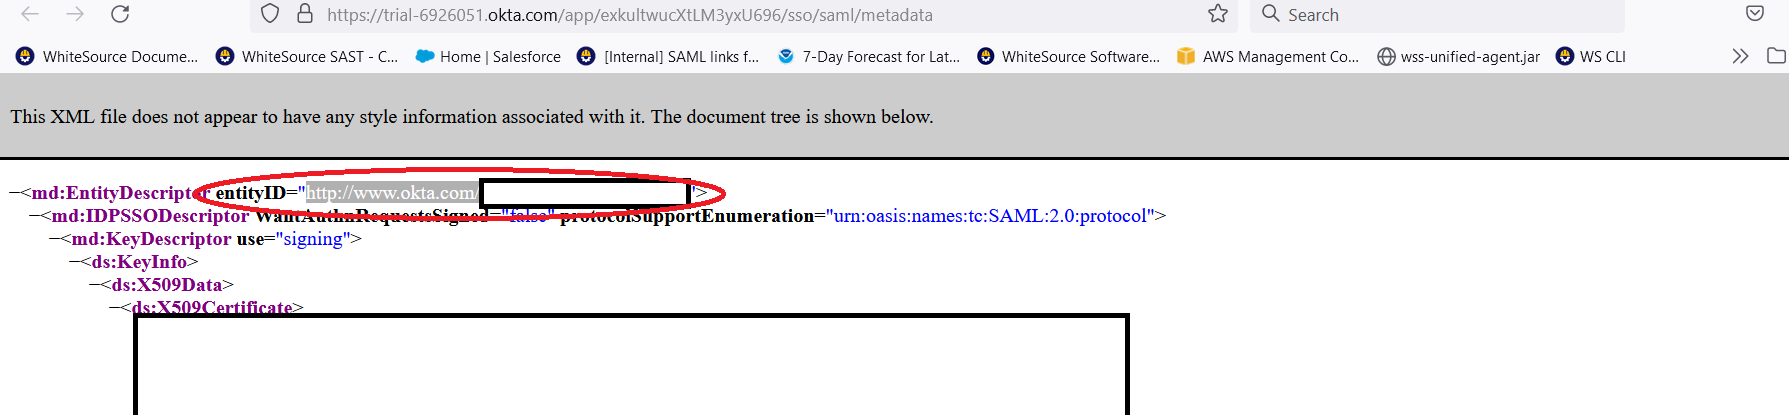
For "Entity ID", supply the "entityID" value found on the first line of the SAML Entity Provider metadata you copied/saved in step 12:
-
For "Domain", put the email domain for the users that will log into Mend SAST via Okta; e.g. "megacorp.com"
-
For "IdP Metadata URL", copy the URL you saved in step 11 above
-
For "Root URL", simply put the root URL of the Mend SAST app (most likely "https://saas.whitesourcesoftware.com/sast " or "https://saas.mend.io/sast ")
-
Note: The root URL must end with “/sast”.
e. For "Username Attribute" field, type "username". (This is the value you entered under Attribute Statements in our Okta app setup above.)
f. Choose an appropriate role for those users who don't have a group assigned by the SAML mapping.
g.Mapping of SSO users to Mend SAST® roles can be done in the Role Mapping section using attributes. If no role mapping is configured or matched, the configured Default Role will be assigned to logged in users.
h. Mapping of SSO users to Mend SAST® groups can be done in the Group Mapping section using attributes. If no group mapping is configured or matched, the default "SSO Users" group will be assigned to logged in users.
i. Mapping of SSO users to Mend SAST® Organizations can be done in the Organization Mapping section using attributes. If no group mapping is configured or matched, the org level at which you clicked “Enable SAML Authentication” will be assigned to logged-in users.
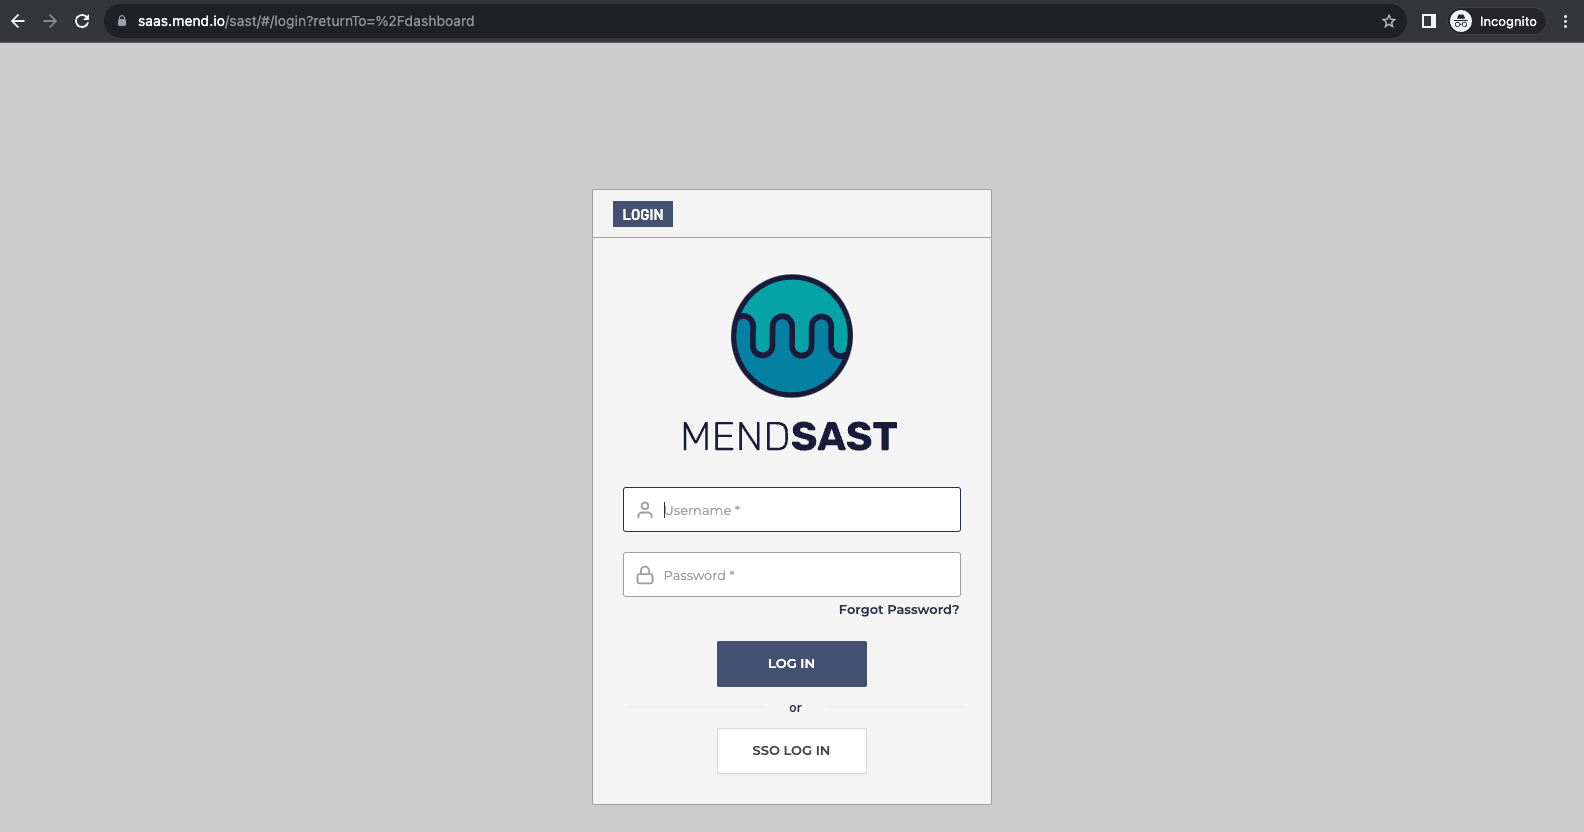
Now, to test the integration, you can do the following:
-
Go to the sign-on page for the appropriate Mend SAST presence. NOTE: at this writing, you cannot log in by clicking on the WS SAST icon on Okta’s “My Apps” page (e.g. https://dev-1234567.okta.com/app/UserHome); doing so will get you a 403 “Forbidden” error. You must initiate login from the appropriate Mend SAST login page (e.g. https://saas.mend.io/sast ):
-
Type your email address in the Username field, leave the Password field blank, and click the “SSO LOG IN” button. You should be logged into Mend SAST, after perhaps needing to authenticate if you haven’t yet. Note that you should only be given the privileges to see scans, applications, and other items for the SAST organization to which the SAML settings have been applied. E.g. if OrgB is a child of OrgA, and you checked “Enable SAML Authentication” when you had OrgB selected, then you should only be able to see scans etc., within OrgB.