Legacy Mend UI - Deleting Projects and Products
Note: Before deleting any projects or products, we highly recommend making sure the selected projects/products really need to be deleted. The deletion of projects and products is an irreversible operation.
In some cases, users (admins) may want to delete specific/multiple projects or products.
To Delete a Specific Project/Product:
Navigate to the desired project/product.
Click on the settings button (the cogwheel button at the top right).

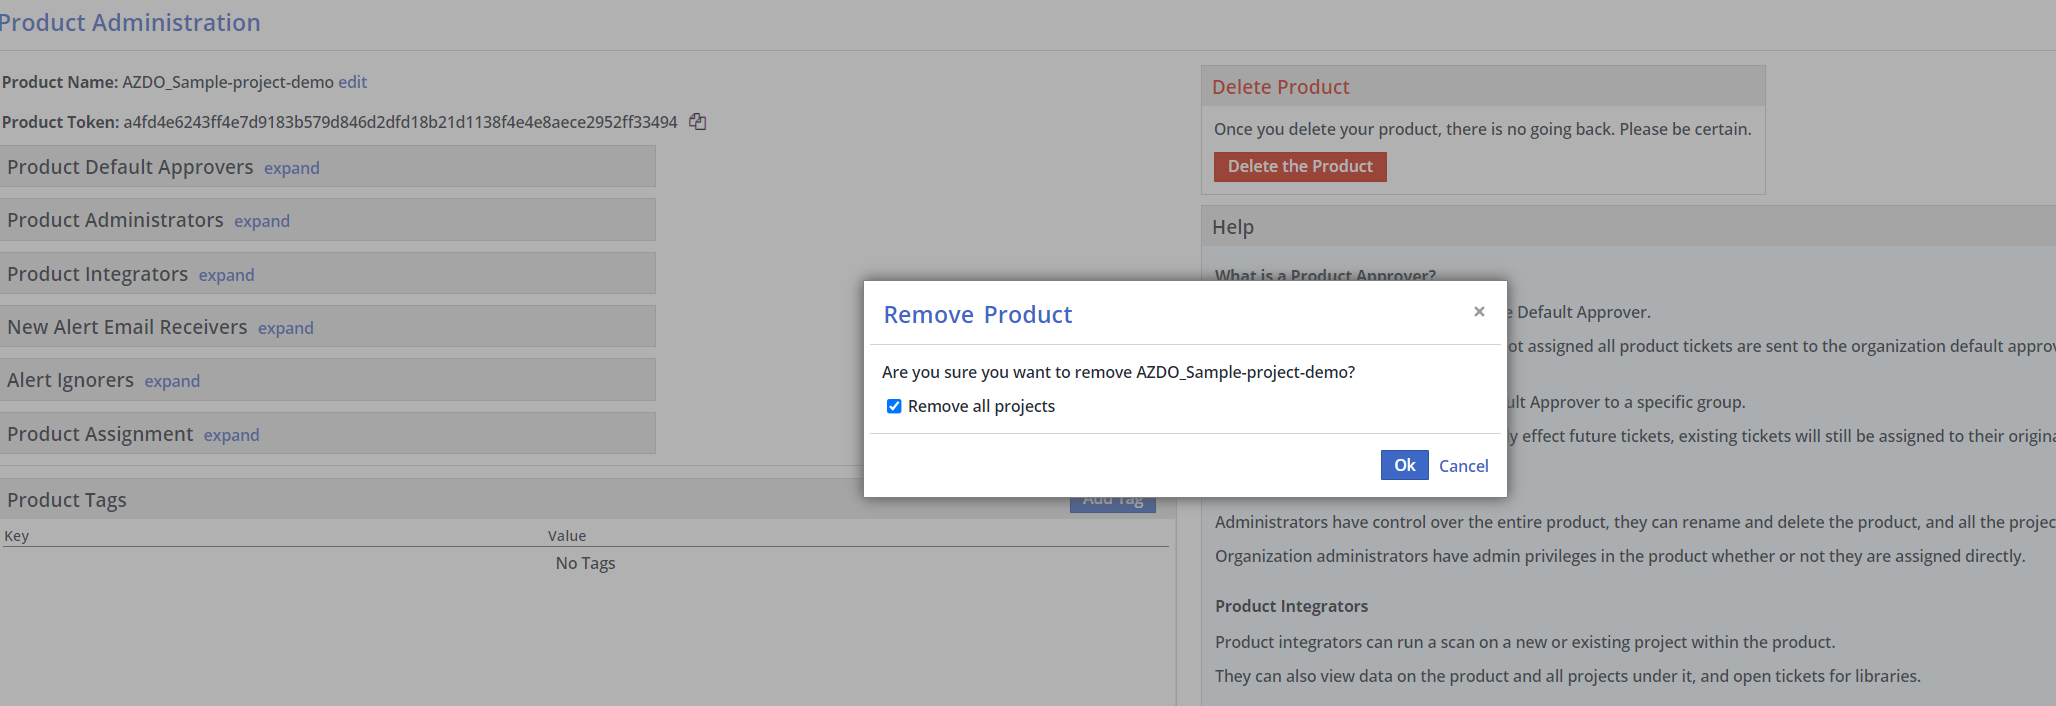
Click the red “Delete the Project/Product” button.
Note: When deleting a product, you can check “Remove all projects” checkbox, which will delete all of the projects under this specific product.
If “Remove all projects” checkbox is unchecked, then all projects under this product will be moved to a default product named “My Product”.

To Delete Multiple Projects (under the same or different products):
Click on the “Admin” menu in the top right of the UI.
Click on “Project Associations”.
On this page, you can move (reassign) projects to different products by clicking “Assign to Product”, or you can delete multiple selected projects at once, screenshot below:

Note: If a user needs to delete multiple projects from different products, please find another method below:
Create a “dummy” product.
Move all of the projects to be deleted to the “dummy” product by using the “Project Associations” page, described just above.
Open the “dummy” product and review all projects within the product to make sure you wish to delete them.
After verifying that all projects within the “dummy” product should be deleted, delete the “dummy” product as described in the steps at the beginning of this article. The deletion of this “dummy” product will remove all of the projects that were moved into it.
