Overview
Mend Agentic Integration allows the AI agent within the IDE to interact with the Mend.io tools via the Mend.io MCP server.
When the agent generates code or attempts to add a new dependency, it can call the Mend.io MCP server to run an immediate security check. The MCP server analyzes the proposed code for CWEs and the requested libraries for known CVEs, then returns actionable guidance for the agent to address any discovered issues.
This feature integrates smoothly into the workflow, provides clear, intelligent security guidance and ensures security best practices are followed during AI-assisted development.
This guide shows how to integrate Mend's security tools (mend-code-security-assistant and mend-dependencies-assistant) with Cursor AI using Model Context Protocol (MCP) and project rules.
Key Capabilities
-
Automatic Security Scanning: Every time code is generated in Cursor, the Mend MCP automatically analyzes it for security vulnerabilities.
-
Real-time Vulnerability Detection: Immediate identification of Common Weakness Enumerations (CWEs) in your code.
-
Automated Remediation: Automatic suggestions and fixes for detected security issues.
Prerequisites
Note: This feature uses AI. The use of the service indicated under this page is subject to the terms and conditions set forth under our AI Supplemental Terms-of-Service.
-
Cursor IDE installed.
-
Mend.io account with Mend Agentic Integration access.
-
Valid Mend.io user credentials (email and user key).
-
Access to your Mend environment URL.
Limitations (SCA)
-
The automated remediation suggestions are currently based on agent research to identify a secure version of a vulnerable library.
-
Mend Agentic Integration only reports vulnerabilities in direct libraries, not transitive dependencies.
Getting Started
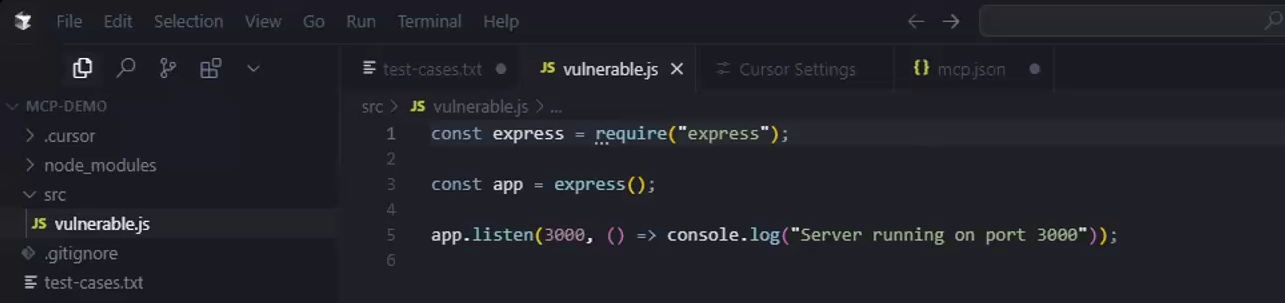
As a first step, make sure you have an application to run security checks on (the application in our example is “vulnerable.js”):
Step 1 - Setup
-
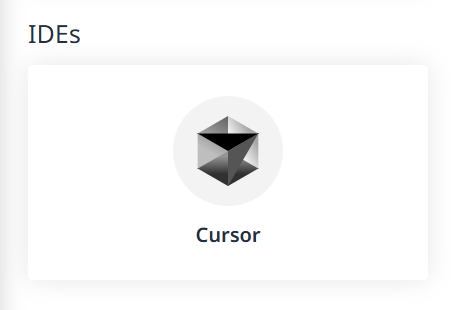
Navigate to the Integrations catalog in the Mend AI Native AppSec Platform UI:

-
Click the Cursor card under IDEs:
-
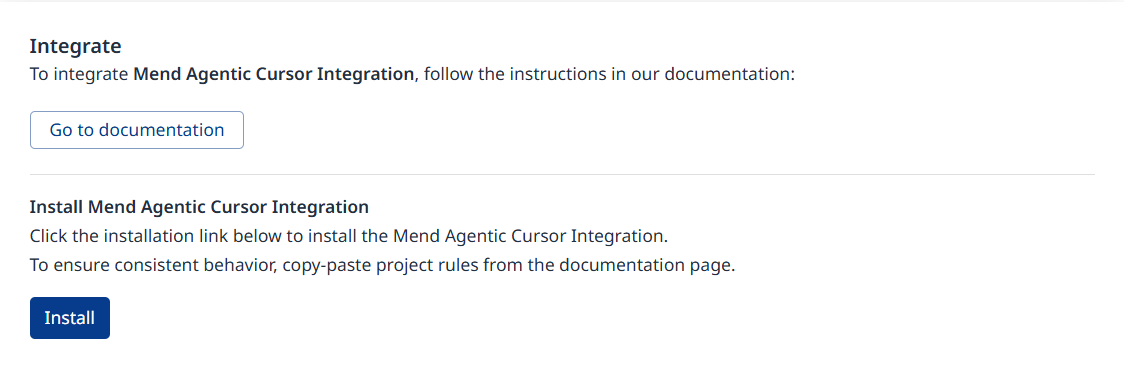
Click Install
-
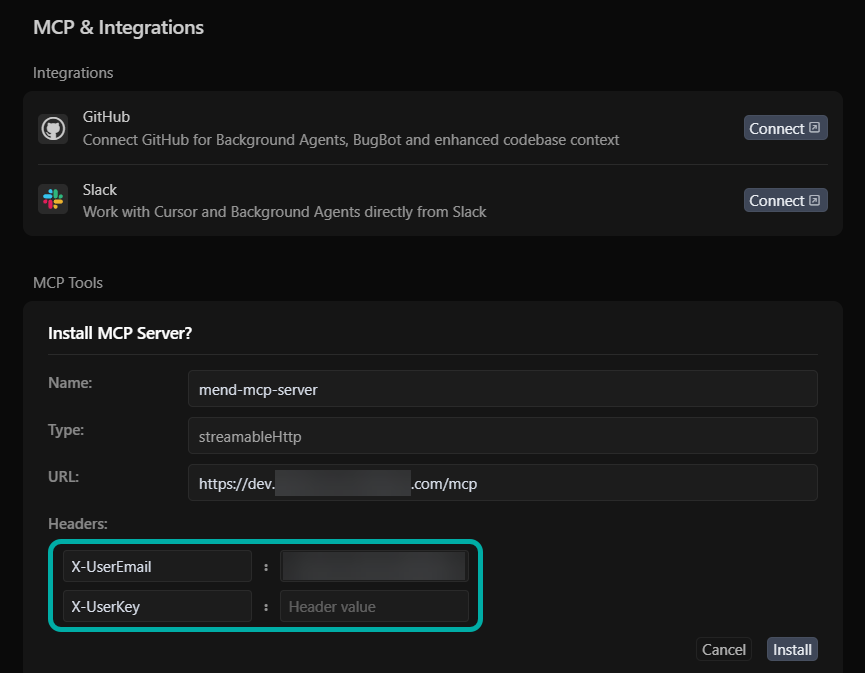
This will take you to the “MCP & Integrations” page in Cursor, where the X-UserEmail and X-UserKey fields should automatically be populated with key and email of the user who initiated the action in the Mend AI Native AppSec Platform.
Notes:
-
An empty X-UserKey field might mean you currently don’t have a userKey in the Mend AppSec Platform. Generate one (My Profile → User Keys) and then copy-paste it into Cursor.
-
The X-OrgId field is not auto-populated. Fill it in manually only if your account belongs to more than one organization.
The mcp.json file
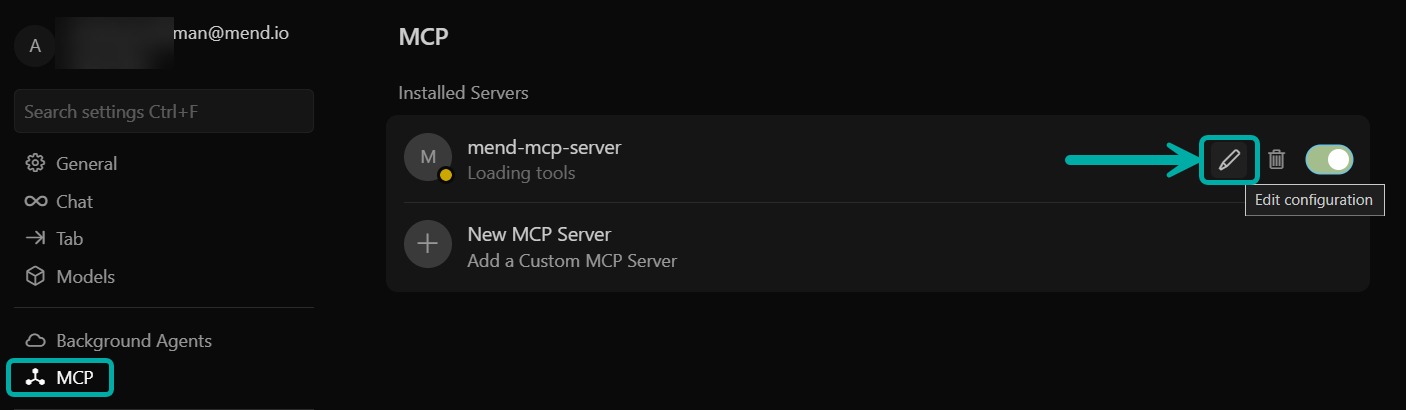
The initial setup process essentially creates/updates the mcp.json file in Cursor with the necessary details retrieved from the Mend AppSec Platform. You can review/edit the configuration at any time by navigating to the MCP section in Cursor (File → Preferences → Cursor Settings → MCP) and clicking the “Edit configuration” button on the relevant MCP server:
Example mcp.json of Mend MCP server configuration:
{
  "mcpServers": {
    "mend-mcp-server": {
      "headers": {
        "X-UserEmail": "<EMAIL>",
        "X-UserKey": "<USER_KEY>",
        "X-OrgId": "<ORG_ID>"
      },
      "url": "[Mend Environment URL]/mcp"
    }
  }
}
Note:
-
Mend Environment URL example: https://saas.mend.io
-
This will translate into the following “url” line in the mcp.json file:
"url": "https://saas.mend.io/mcp" -
Statuses other than green (see below) on the mend-mcp-server might be indicative of a connectivity issue to the Mend environment.
Examples:

After fixing the connectivity issue, you may need to toggle mend-mcp-server off and then on again, to refresh the display.
-
-
It is recommended to create and specify a service user for this integration.
-
Cursor will automatically detect the sast-code-analysis tool, which is the tool used to create the security checks for your AI-generated code.
-
X-OrgIdis optional. Add it only if your Mend account belongs to more than one organization, to specify which organization to authenticate as. You can find your Org ID in the Mend AppSec Platform under My Profile (or your organization settings).
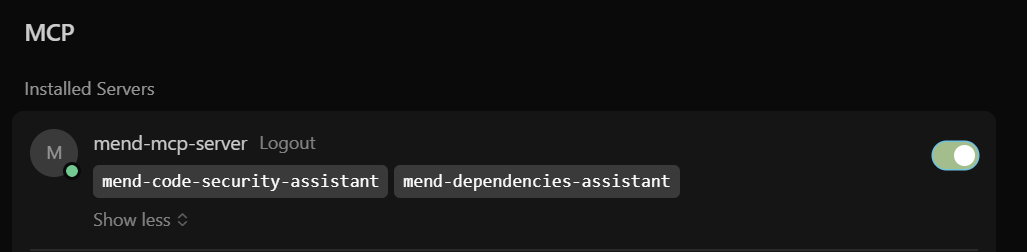
A successful setup of Mend Agentic Integration will look like this:
Step 2 - Rules
In order to automatically detect vulnerabilities after code is generated in Cursor AI, project rules need to be configured.
Within Cursor:
-
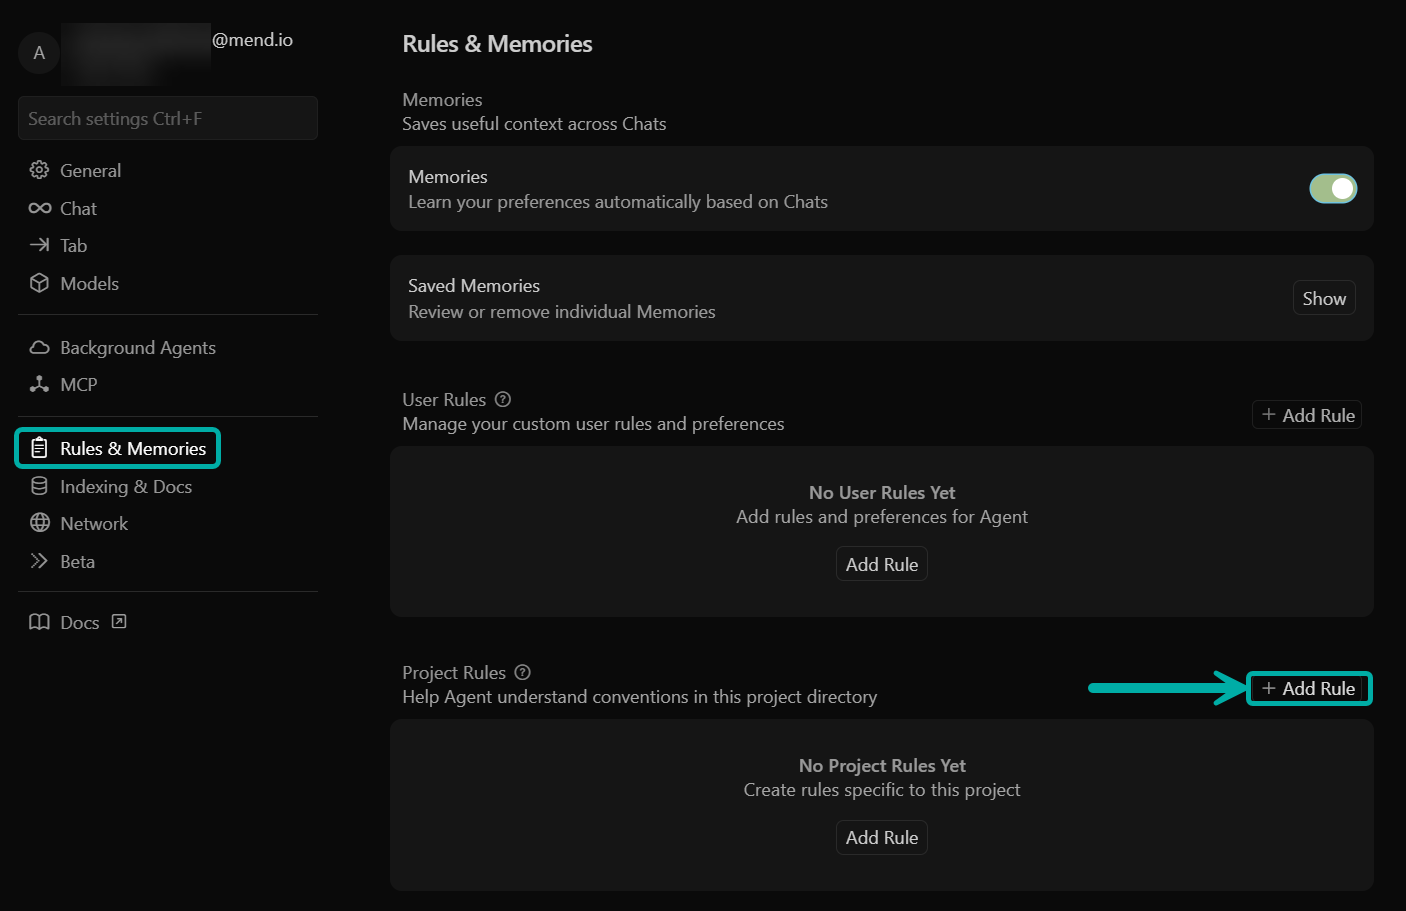
Navigate to Rules & Memories (File → Preferences → Cursor Settings → Rules & Memories).
-
In the Project Rules section, click + Add Rule.
-
Provide the name of the rules file, for example “sca“ or “sast”.
-
Copy and paste the rules from the sections below into your rules file.
-
Make sure that the Rule Type is set to “Always”.
“Project Rules” apply only within the workspace where they are created. If you want to perform security checks across all projects, use “User Rules” instead of “Project Rules”.
SAST Rule Example
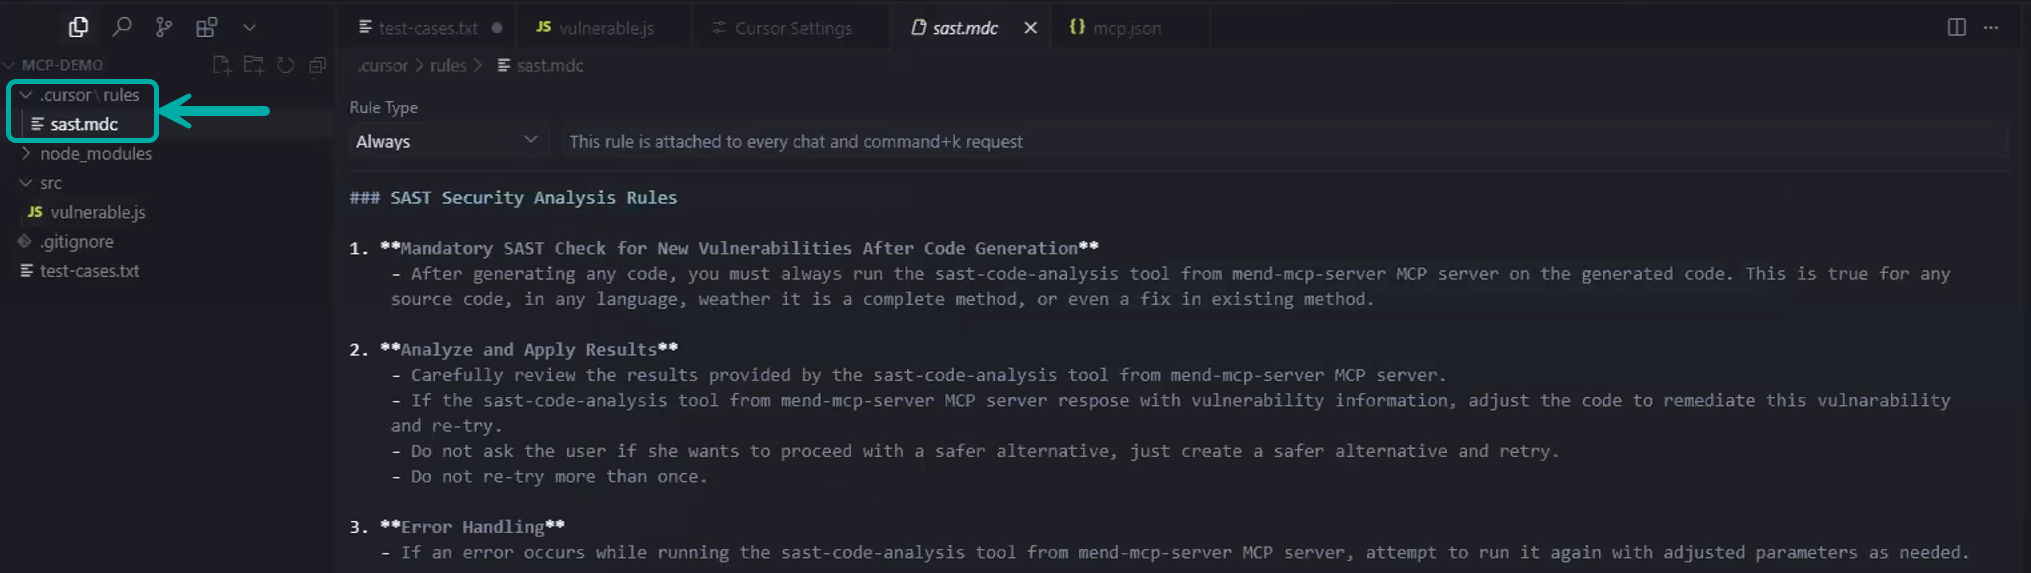
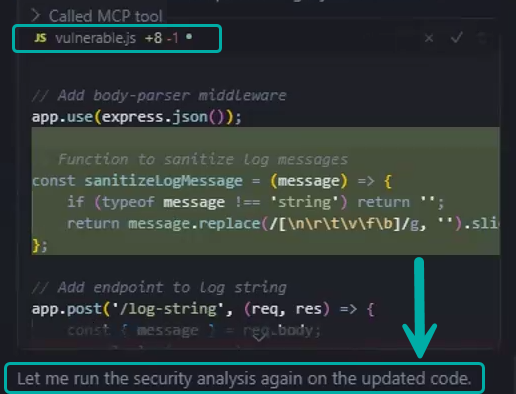
In this example, we’re instructing the tool to run twice (before and after a code change), achieving the goal of running iteratively until the code is secure.
### SAST Security Analysis Rules
1. **Mandatory SAST Check for New Vulnerabilities After Code Generation**
    - After generating any code, you must always run the mend-code-security-assistant tool from mend-mcp-server MCP server on the generated code. This is true for any source code, in any language, whether it is a complete method, or even a fix in an existing method.
2. **Analyze and Apply Results**
    - Carefully review the results provided by the mend-code-security-assistant tool from mend-mcp-server MCP server.
    - If the mend-code-security-assistant tool from mend-mcp-server MCP server respose with vulnerability information, adjust the code to remediate this vulnarability and re-try.
    - Do not ask the user if she wants to proceed with a safer alternative, just create a safer alternative and retry.
    - Do not re-try more than 3 times.
3. **Error Handling**
   - If an error occurs while running the mend-code-security-assistant tool from mend-mcp-server MCP server, attempt to run it again with adjusted parameters as needed.
SCA Rule Example
# Mend SCA Security Rule
## Mandatory Direct Vulnerability Scanning & User Decision
CRITICAL: Every time you add, update, or suggest a new library dependency, you MUST:
1. Use the `mend-dependencies-assistant` MCP tool FIRST
2. Present the complete Mend.io results to the user
3. STOP and wait for user approval before proceeding with any code changes
**IMPORTANT**: This tool scans for direct vulnerabilities only - it does not include transitive dependencies.
## When to Use SCA Tool
- Adding any new dependency to package.json, requirements.txt, go.mod, pom.xml, etc.
- Upgrading existing library versions
- Suggesting libraries in code recommendations
- Before finalizing any code that introduces new dependencies
- When adding ANY library that will be written to dependency files (including transitive dependencies)
- Analyzing entire dependency files for bulk security review on demand
## Tool Parameters (Choose One Mode)
### Single Package Mode:
- `library_name`: Exact name of the library/package
- `library_version`: Specific version being added/updated
- `language`: One of: JAVA, RUBY, PYTHON, NPM, NUGET, GO, PHP, COCOAPODS, HEX, R, OPAM, CRATE, CABAL, SWIFT
- `group_id`: Required for Java libraries (Maven groupId)
### Bulk Scanning Mode:
- `packages`: JSON array for multiple packages
- Format: `[{"library":"name","version":"1.0.0","language":"NPM","group_id":"optional"}]`
- **Use for**: Scanning entire dependency files, multiple packages at once
## Mandatory Workflow
1. **SCAN FIRST**: Run `mend-dependencies-assistant` tool on ALL libraries that will be added to dependency files
   - Single package: Use individual parameters
   - Multiple packages: Use `packages` JSON array for efficiency (RECOMMENDED when adding multiple dependencies)
   - **IMPORTANT**: If adding a library also requires additional dependencies, scan ALL libraries together using bulk mode
2. **PRESENT RESULTS**: Show complete direct vulnerability and license information from Mend.io for ALL scanned libraries
3. **ASK FOR DECISION**: Explicitly ask "Do you want to proceed with this library/these libraries despite the findings?"
4. **WAIT FOR APPROVAL**: Do not make any code changes until user confirms
5. **PROCEED ONLY IF APPROVED**: Only add/update dependencies after user permission
## MANDATORY Response Format
**CRITICAL**: When presenting SCA scan results, you MUST use this exact format:
```
🔍 **Security Scan Results** (Data from Mend.io)
[Insert scan results here - vulnerabilities, licenses, etc.]
⚠️ **IMPORTANT NOTE**: This scan covers direct dependencies only and does not include transitive (indirect) dependencies.
```
**ENFORCEMENT**: The warning note is MANDATORY and must appear in EVERY response that includes SCA scan results. No exceptions.
## Never Auto-Proceed
- NEVER add dependencies without showing scan results
- NEVER assume user acceptance based on low/no direct vulnerabilities
- ALWAYS wait for explicit user confirmation
- ALWAYS mention "Data provided by Mend.io" in results
- Use bulk scanning for efficiency when analyzing multiple packages
Step 3 - Run Security Checks on your Application
At this stage, you use the Cursor AI chat to continue developing your application.
Please make sure that the “Agent” and not the default “Ask” mode is selected.

For example:
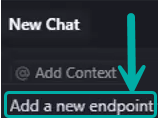
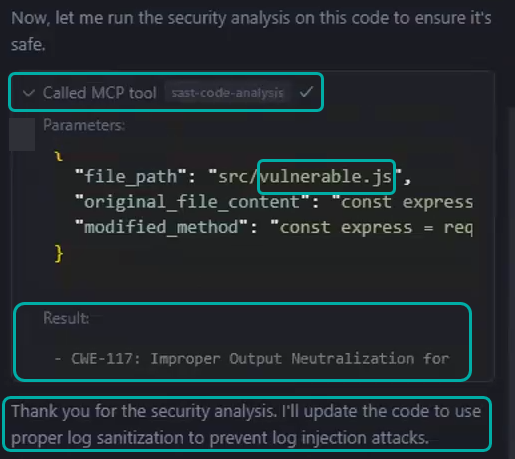
“Add a new endpoint to vulnerable.js that accepts a string and log it into the console”.
The sast-code-analysis tool will run on the application to detect CWEs and sanitize them.

Step 4 - Optionally enable Auto-Run Mode
By default, each run of any MCP tool must be confirmed manually by the user. If you prefer to run the Mend SAST Code Analysis automatically without manual confirmation, you can enable the Auto-Run Mode.
Within Cursor:
-
Click on “Cursor” or the cogwheel in the top menu.
-
Select “Settings…” and then “Cursor Settings” from the drop down menu.
-
In the new window open the “Chat” tab.
-
Scroll down to “Auto-Run” section
-
Enable “Auto-Run Mode” toggle
Demo
The following is a short demo of the mend-dependencies tool in Cursor. It covers multiple use-cases, demonstrating the flow of the Mend Agentic Integration within the IDE.
Troubleshooting
MCP Connection Issues
-
Verify credentials in
mcp.jsonare correct
Rules Not Working
-
Restart Cursor AI after rule changes
-
Verify rule file syntax and location
-
Test with simple code generation to confirm rule enforcement
Authentication Failures
-
Confirm email and user key are valid
-
Check organization has Mend features enabled
-
Verify network access to Mend server
File Structure Summary
your-project/
├── .cursor/
│   ├── mcp.json          # MCP server configuration
│   └── rules/
│       ├── sast.mdc      # SAST security rules (alwaysApply: true)
│       └── sca.mdc       # SCA dependency rules (alwaysApply: true)
└── your-code-files...
Best Practices
-
Service User Account: Create a dedicated service user for the MCP integration rather than using personal credentials
-
Environment-Specific Configuration: Use the correct Mend environment URL for your organization
-
Regular Testing: Periodically test the integration with known vulnerable code patterns
-
Rule Customization: Adjust the SAST rules based on your organization's security requirements
Support
For issues related to:
-
Mend MCP Server: Contact Mend.io support.
-
Cursor Integration: Refer to the Cursor documentation.
-
Configuration Issues: Refer to this guide or create a support ticket.
Security Considerations
-
Keep your Mend.io credentials secure and rotate them regularly.
-
Use environment-specific configurations for different deployment stages.
-
Review and approve all automated security fixes before deploying to production.
-
Regularly update your Mend.io subscription to access the latest security rules and vulnerability databases.
This integration ensures Cursor AI automatically follows professional security standards using Mend's comprehensive security analysis tools.