Overview
Mend for Visual Studio Code provides developers with immediate information about security findings and remediation suggestions directly in the IDE, before the code is committed into an SCM.
As a result, securing applications becomes a lot simpler, as developers can perform crucial actions to triage security findings without navigating away from the IDE.
Getting Started
Prerequisites
-
Supported IDE: Visual Studio Code (VS Code) or any of its forks supporting Open-VSX extensions:
-
Cursor
-
Windsurf
-
Kiro
-
Antigravity
-
-
Authentication: Named user authentication is required. Users can authenticate either from the plugin settings or during the initial setup screen.
-
Mend AppSec Platform Account: An active Mend account is required for authentication and scan result retrieval.
-
Onboarded Repository: The repository you wish to scan needs to have a corresponding project in the Mend AppSec Platform.
Installation Steps
Install the Plugin
Download the Mend for Visual Studio Code App from the VS Code Marketplace and install it.
Note: Mend for Visual Studio Code is available on the Open-VSX registry, making it installable directly from AI-native IDEs such as Cursor, Windsurf, Kiro, and Antigravity.
If you use one of these editors, install the extension from the built-in extensions marketplace.
Once installed, the Mend extension will be added to the left panel of your VS Code.

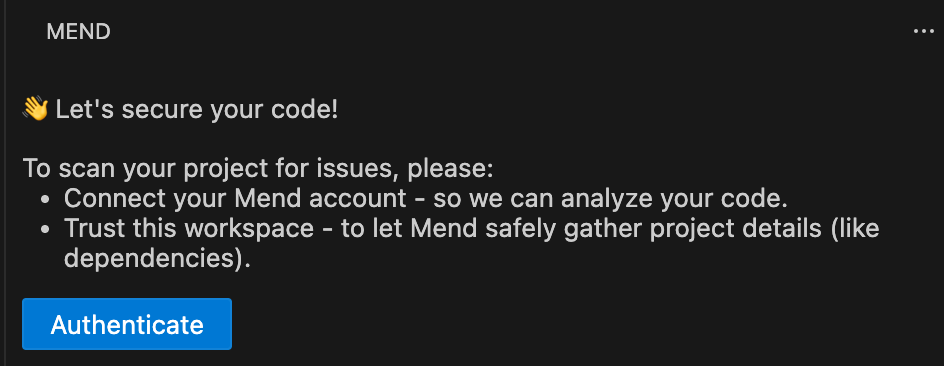
Authenticate
On first launch, the plugin prompts for authentication.
-
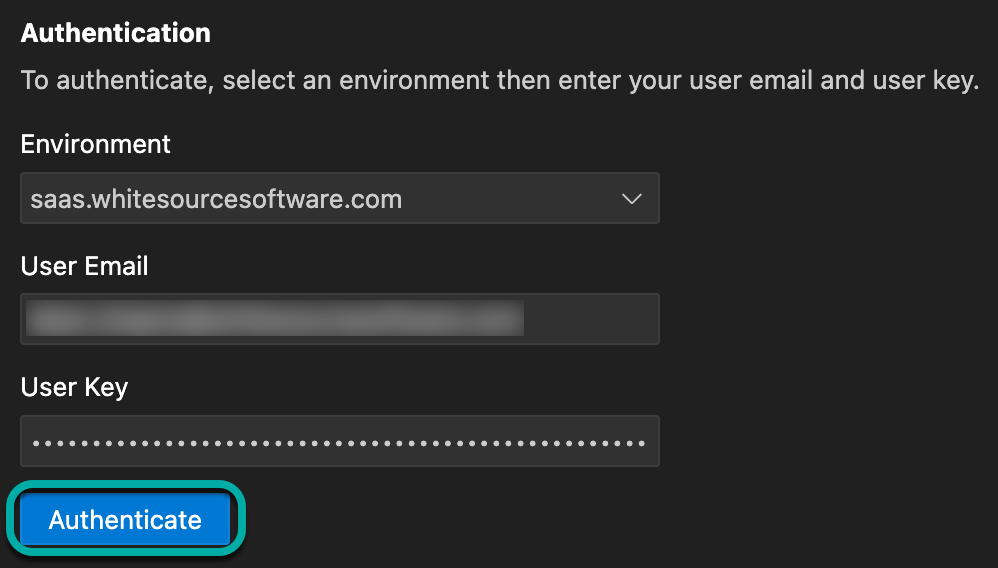
Environment - Select the environment in which your Mend organization is hosted:

-
User Email - fill in the user email used to log into the Mend AppSec Platform.
-
User Key - can be obtained from your profile in the Mend AppSec Platform UI.
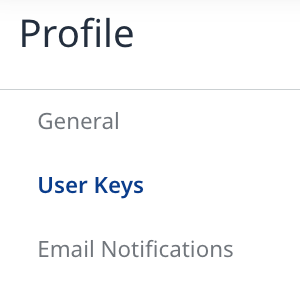
If no user key exists, create one by clicking the Create User Key ( ![]()
-
Authenticate
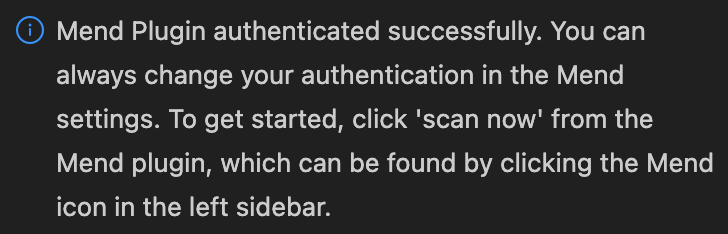
You will be notified when the authentication is successful via a pop-up message at the bottom-right:
-
Organization - Select the desired organization from the list of organizations the specified user is a member of.

Note: You can authenticate anytime via the plugin settings.
Permissions: Grant the necessary permissions for the plugin to access your codebase and communicate with the Mend AppSec Platform.
Application and Project Matching
When you open a repository in VS Code, the extension automatically matches it to a project in the Mend Platform using the repository's git remote URL. Matching is automatic. There is no manual selection, except when projects are matched by git url, then you can manually select one of them.
When a match is found, the Application and Project fields show the matched application and project. Working in that project's context means the extension pulls the project's historical data, known findings, and suppressions, so you see only the new findings in your local code, filtered against the current data.
Requirements for a successful match
Both of the following must be true:
-
Your local repository contains git data. In other words, it was cloned rather than downloaded as a ZIP.
-
The corresponding project on the Mend AppSec Platform has a
sourceUrltag set to the repository URL in the formatgithub.com/owner/repo, with nohttps://prefix.
The sourceUrl tag is set automatically when a project is created through repository integration or a CLI scan. It is not set when a project is created manually in the platform.
Why the Application and Project fields are empty
The fields are empty when no platform project matches the git URL of the open repository. Common causes:
-
The repository was downloaded as a ZIP rather than cloned, so it has no git data.
-
The platform project was created manually and has no
sourceUrltag. -
The
sourceUrltag is set incorrectly, for examplehttps://github.com/owner/repoinstead ofgithub.com/owner/repo.
Where local scan results appear
Results from local IDE scans do not appear in the Mend Platform UI. This is intended. The IDE scans a local revision that may include uncommitted or in-progress changes, so it does not represent the official state of the project. The platform UI reflects only scans run through CI/CD or repository integration.
Intended workflow
-
Open a cloned repository in VS Code.
-
The extension matches the repo to its Mend project using the git URL.
-
Scan locally and review new findings in the matched project's context, with suppressions and known findings applied.
-
Fix findings before committing.
-
Push your code. The CI/CD or repository-integration scan updates the platform UI.
Triggering a Scan
-
Manual Scan: Users can trigger a scan at any time via the plugin UI.
-
Differential Results: The scan analyzes only the changes introduced in the current feature branch compared to the main branch.
-
No CLI Required: The plugin integrates the Mend CLI in the background; users do not need to install or interact with the CLI directly.
Scan Workflow
-
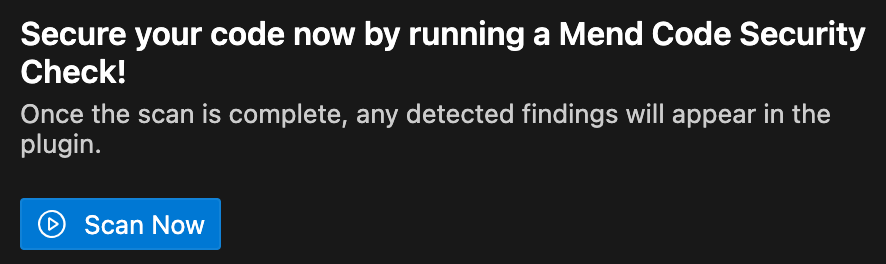
Initiate Scan: Click the “Scan Now” button in the plugin panel.
-
Authentication Check: If not already authenticated, the plugin will prompt for login.
-
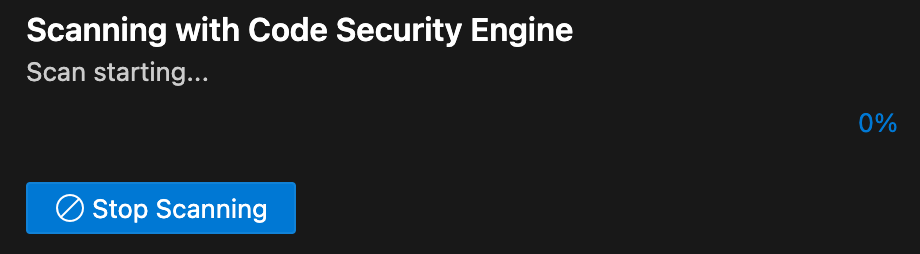
Scan Execution: The plugin runs the scan in the background and retrieves results specific to your code changes.
Viewing Findings
-
Inline Annotations: Lines of code introducing vulnerabilities are underlined in the editor.
-
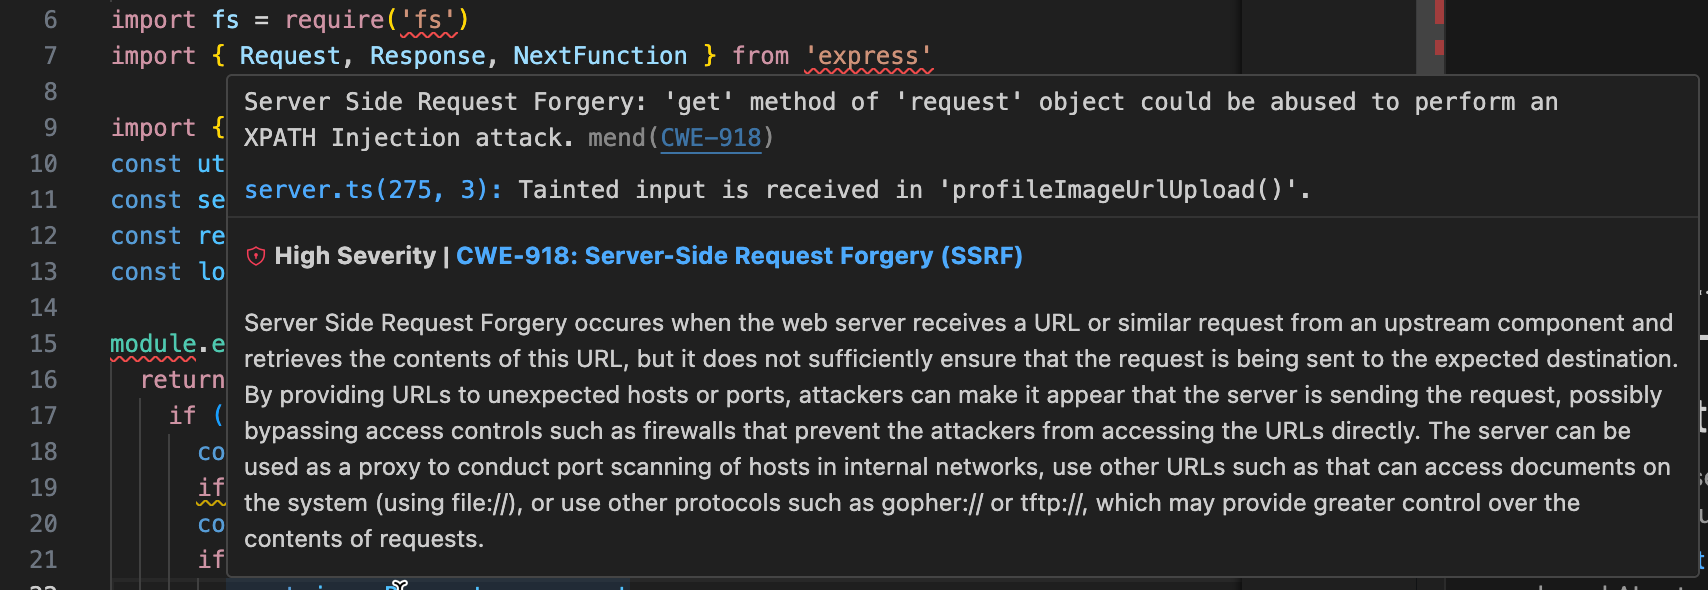
Hover Details: Hovering over an underlined line displays a dialog with:
-
Vulnerability details
-
Remediation suggestions
-
CWE (Common Weakness Enumeration) description
-
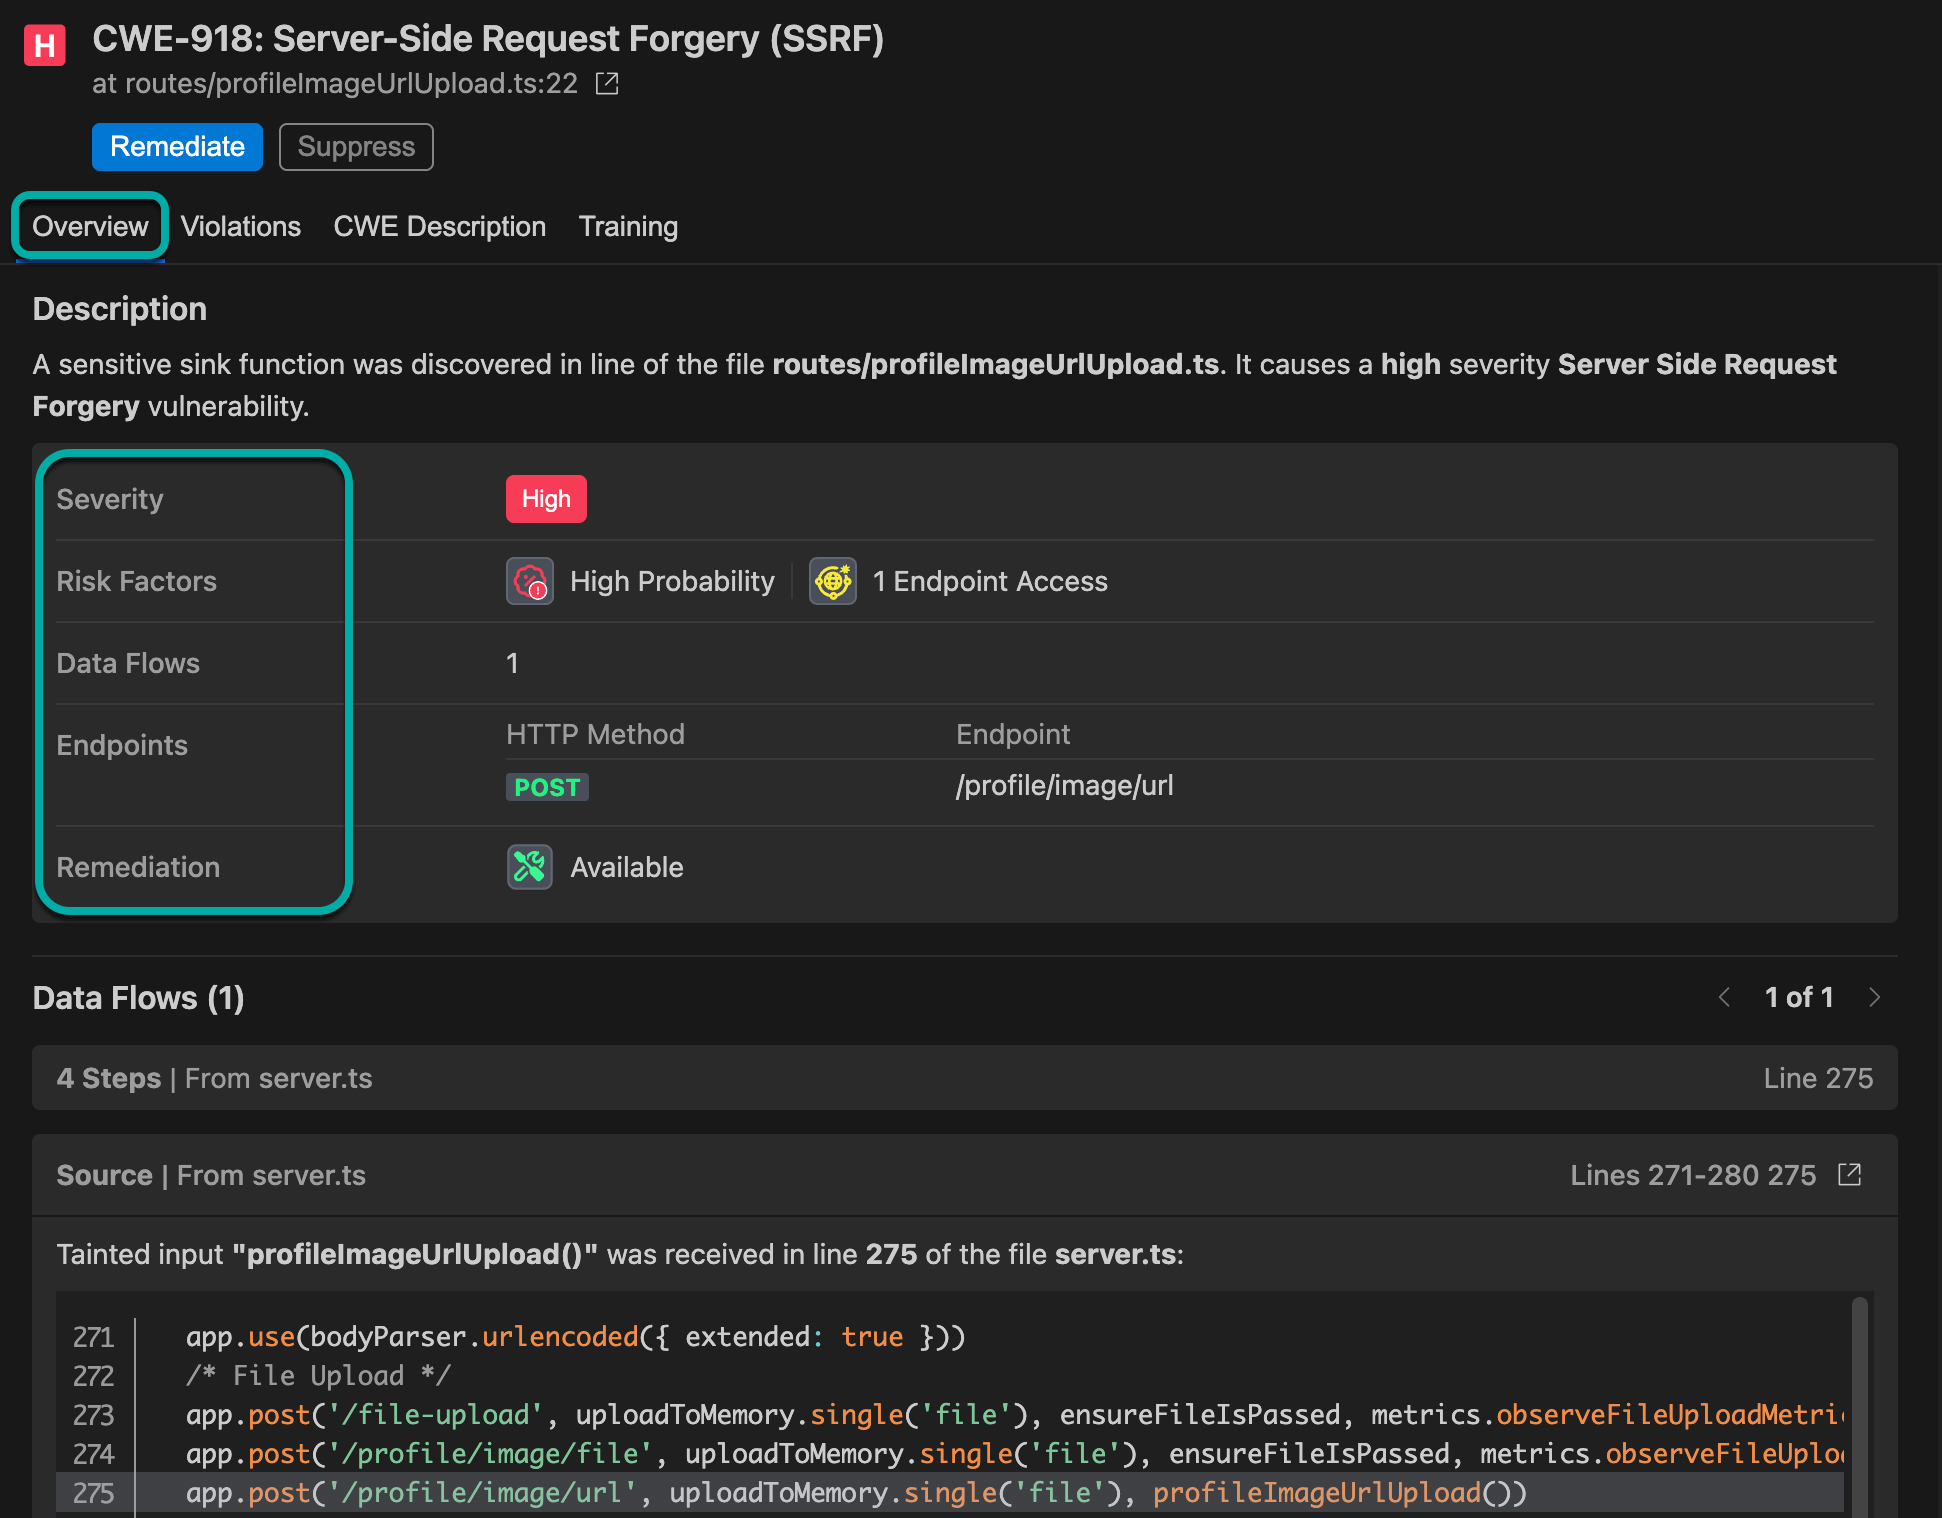
The Finding Details Drawer
-
Clicking a finding will spawn a Finding Details drawer on the right side of the screen, similar to the one in the Mend AppSec Platform UI. It contains the following tabs:
-
Overview
-
Description
-
Severity
-
Risk Factors
-
Data Flows
-
Endpoints
-
Remediation
-
-
Violations
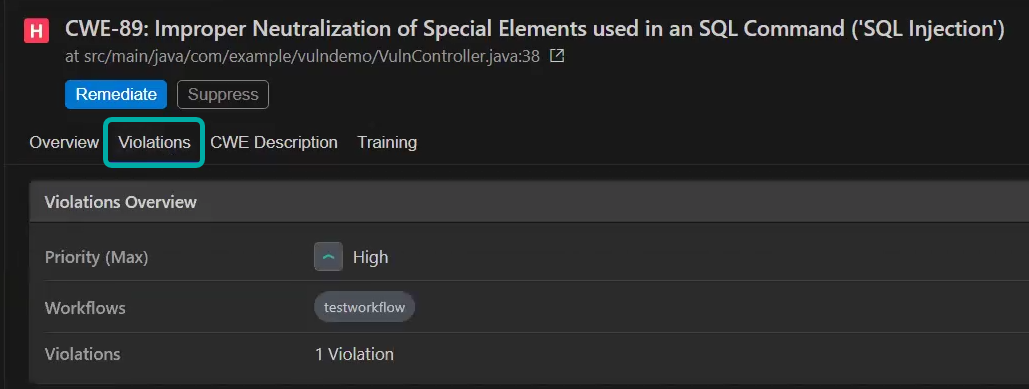
-
Priority
-
Workflow
-
Violations
-
-
CWE Description
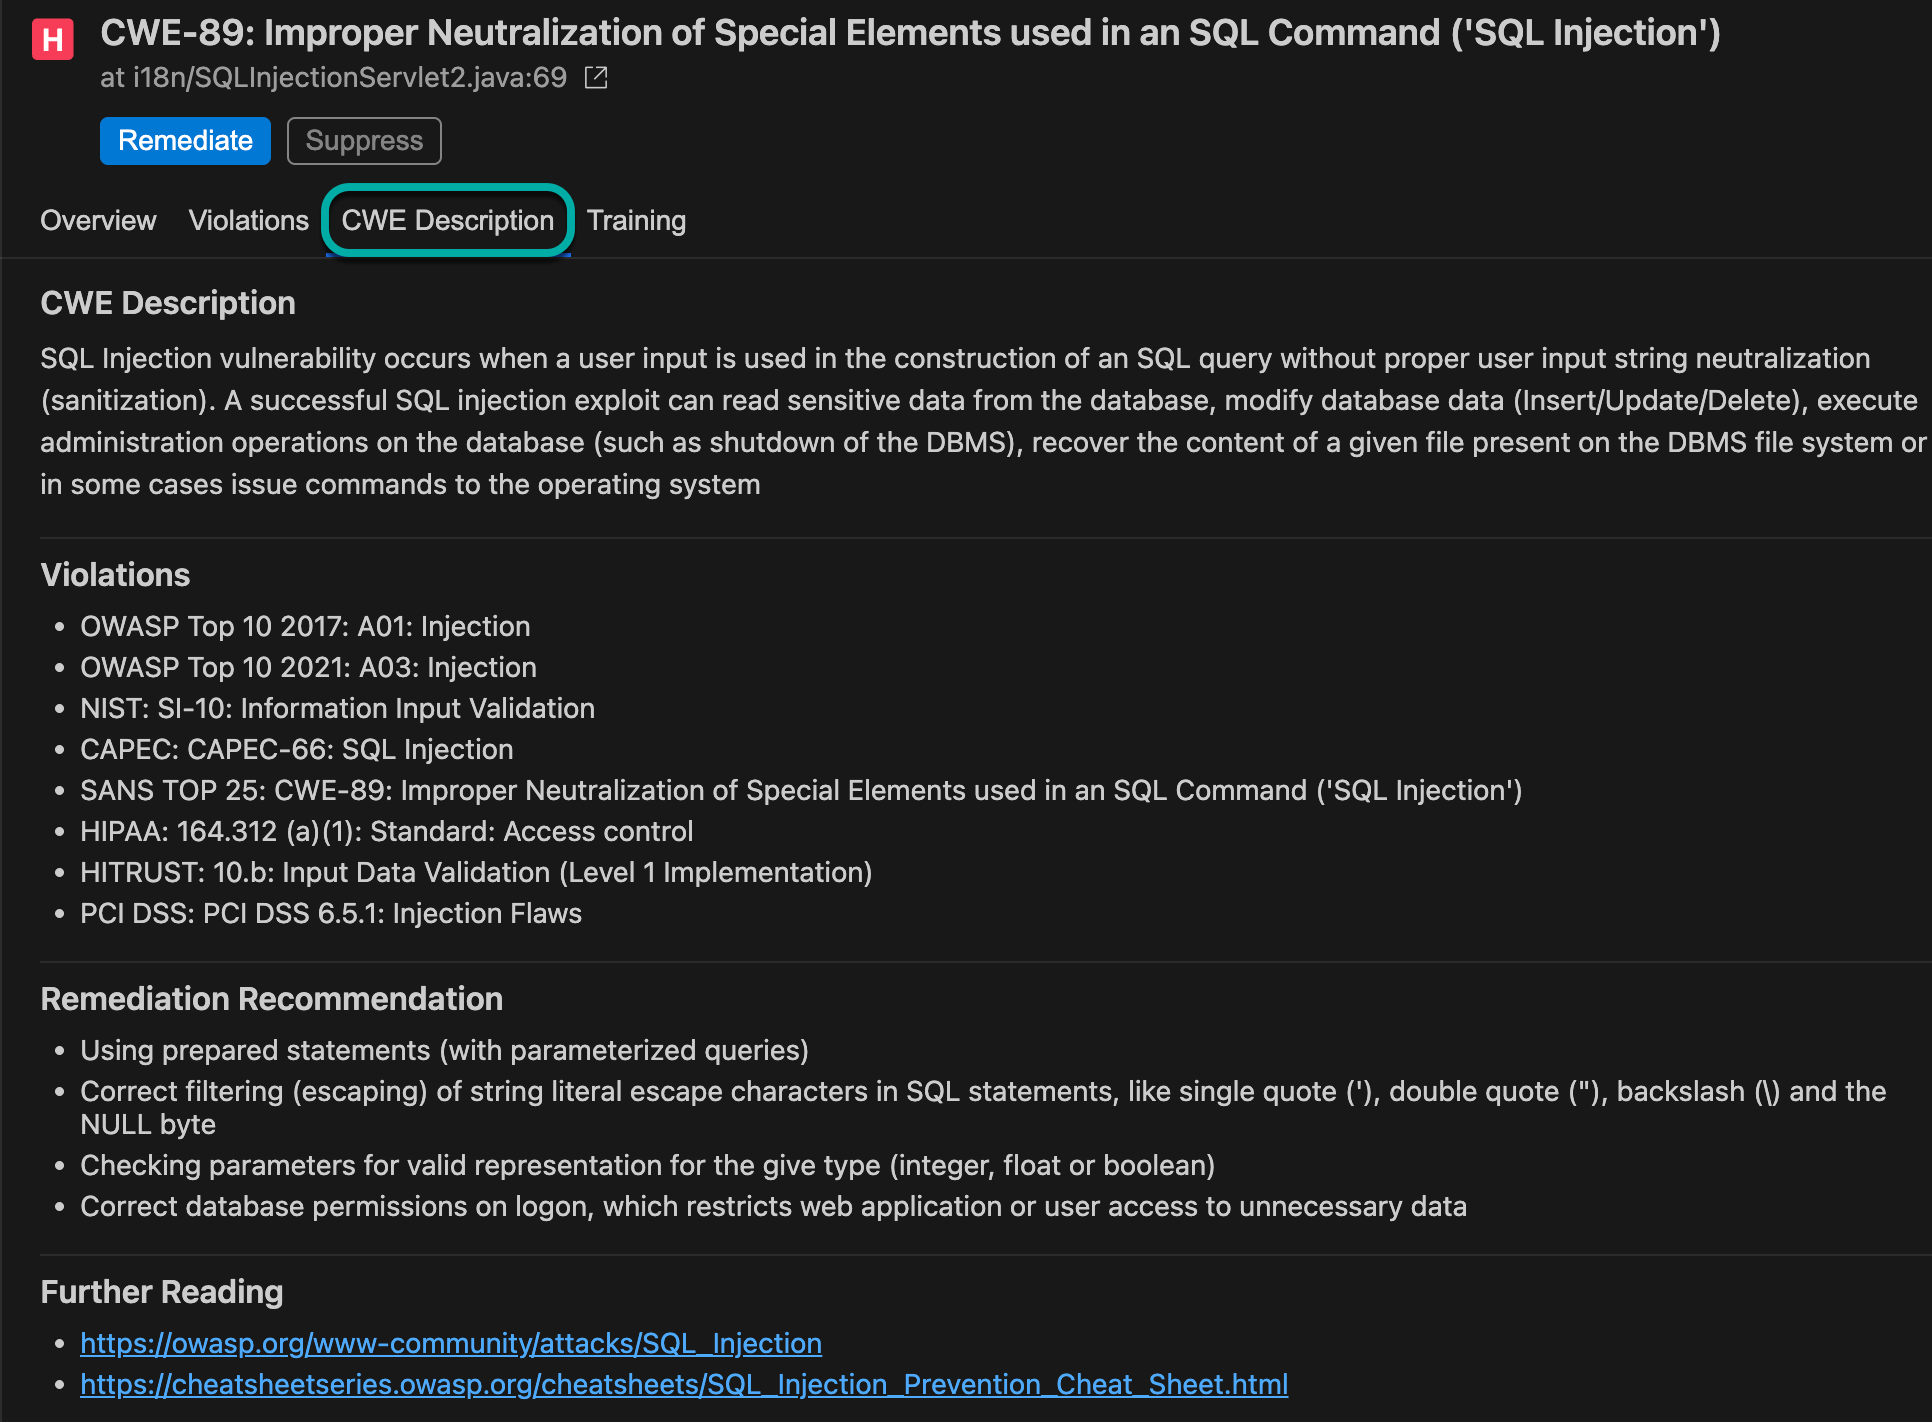
-
CWE Description
-
Violations
-
Remediation Recommendation
-
Further Reading
-
-
Training
-
Training
-
Videos
-
Further Reading
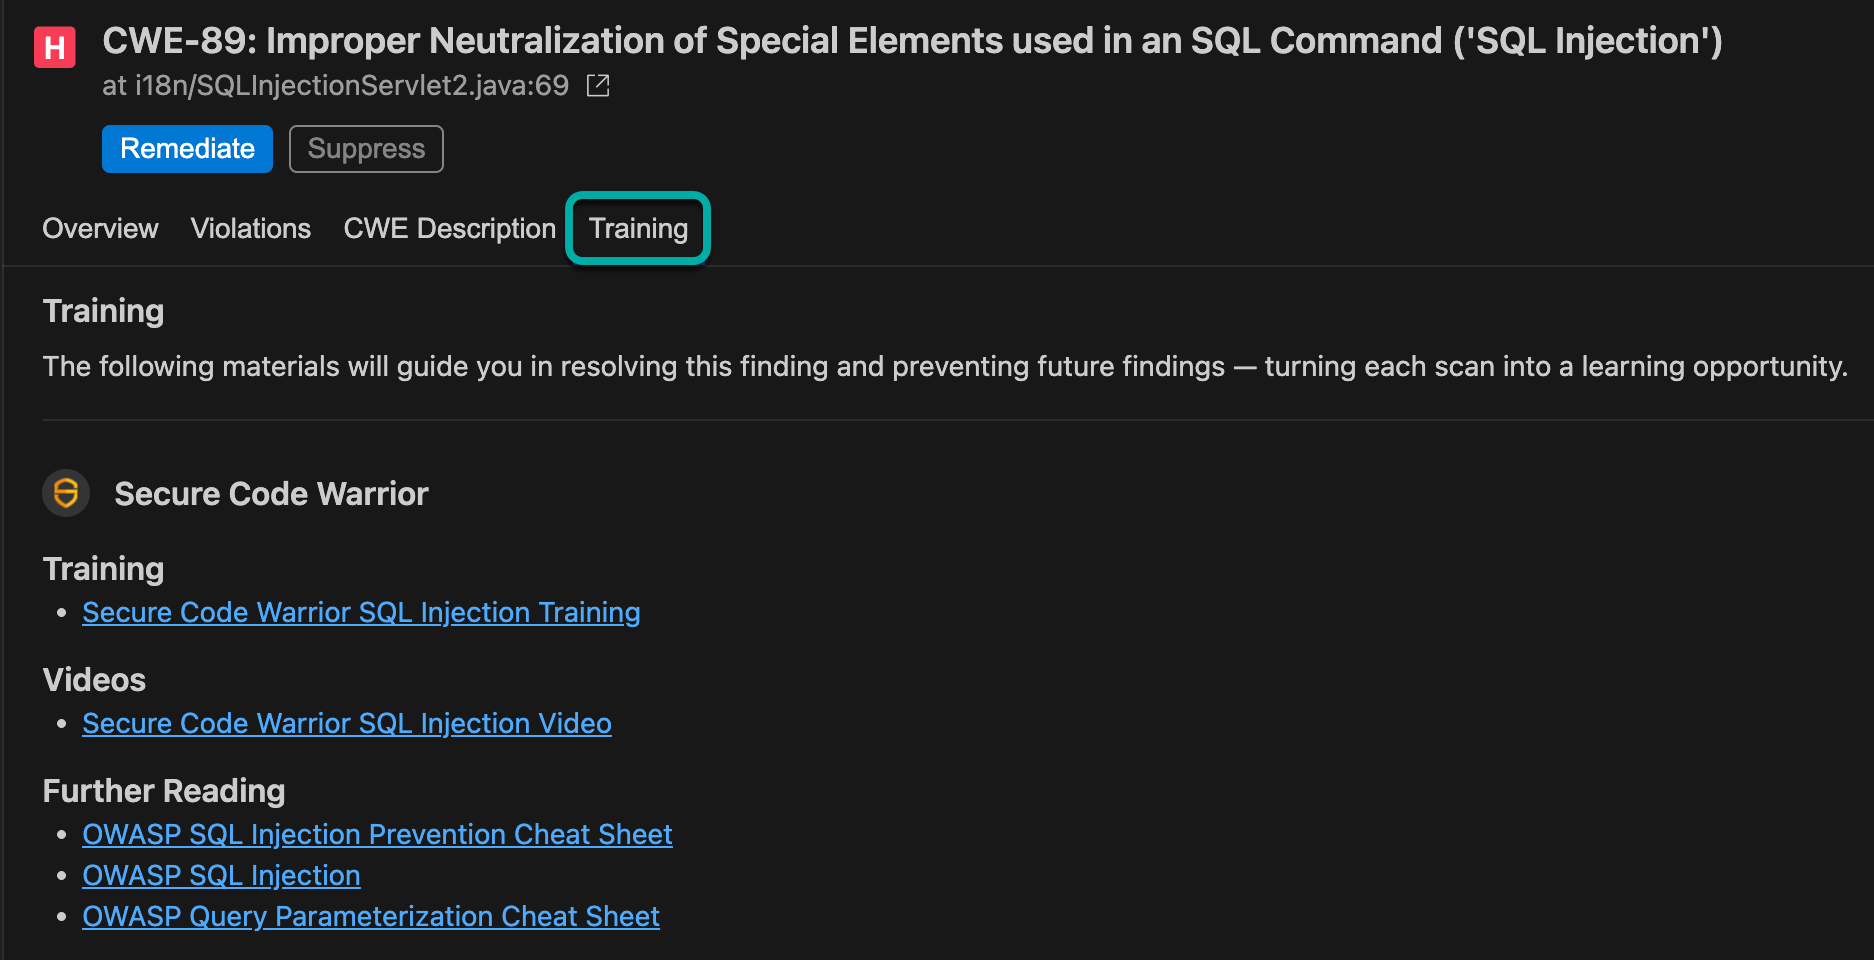
-
-
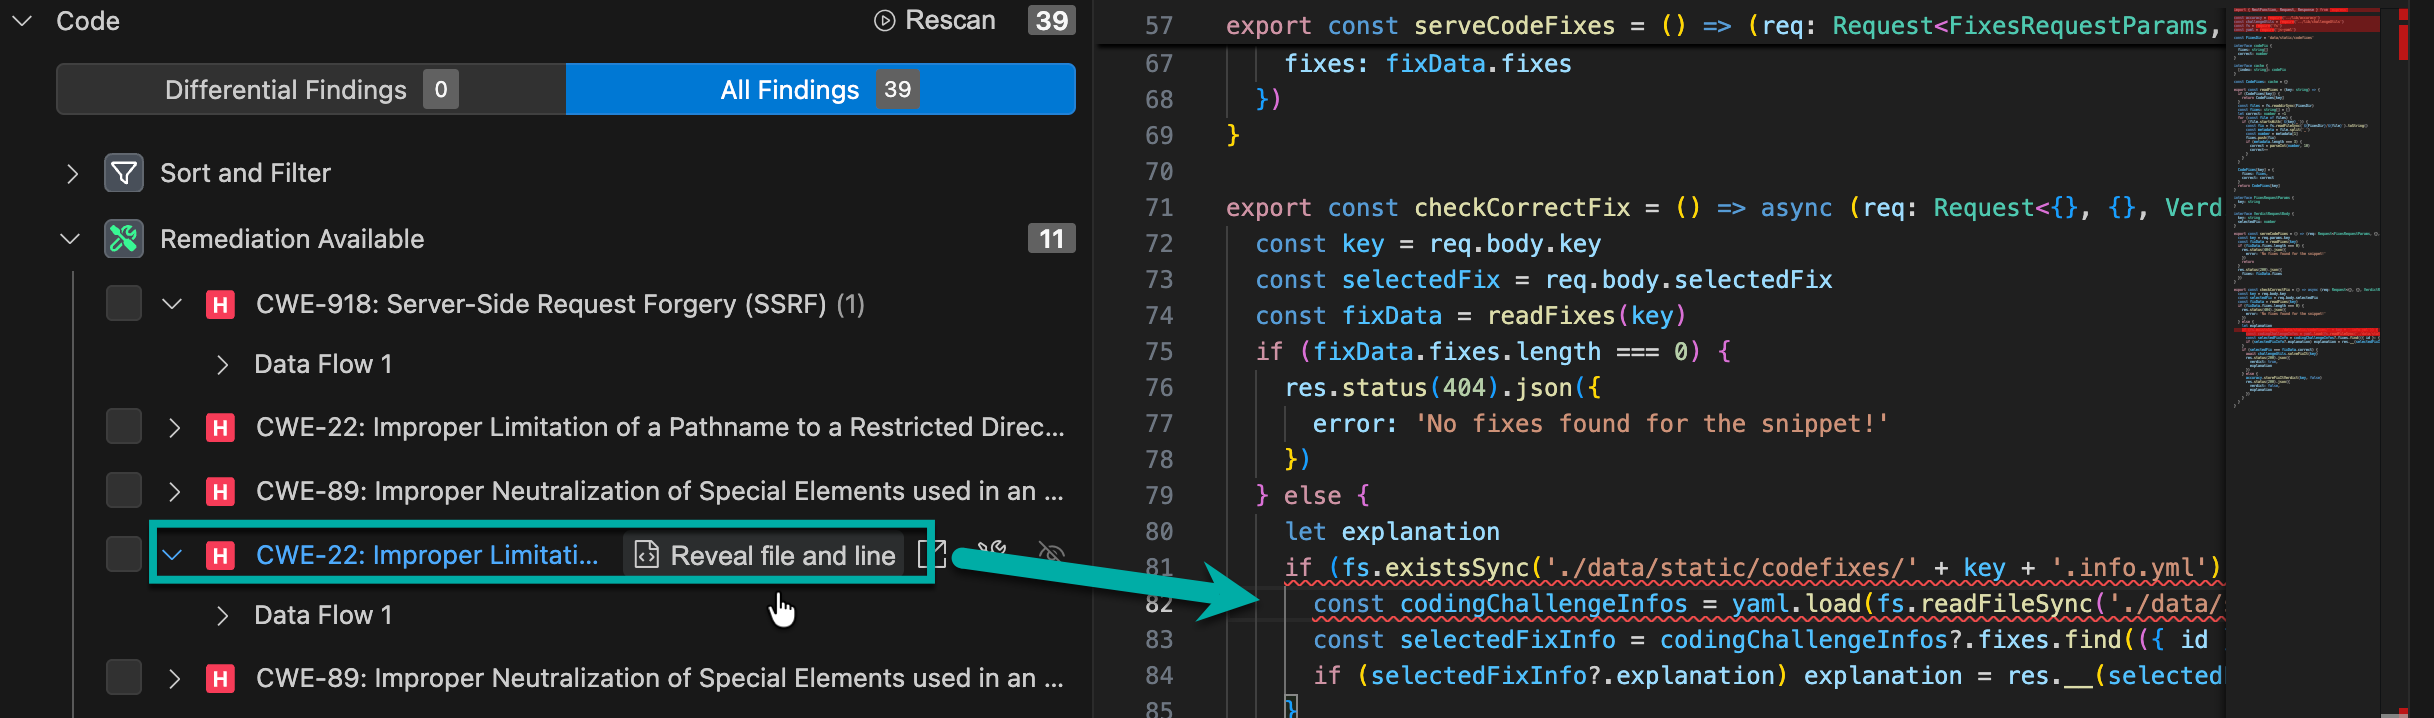
The Problems View
Displays the SAST findings as problems in VS Code.
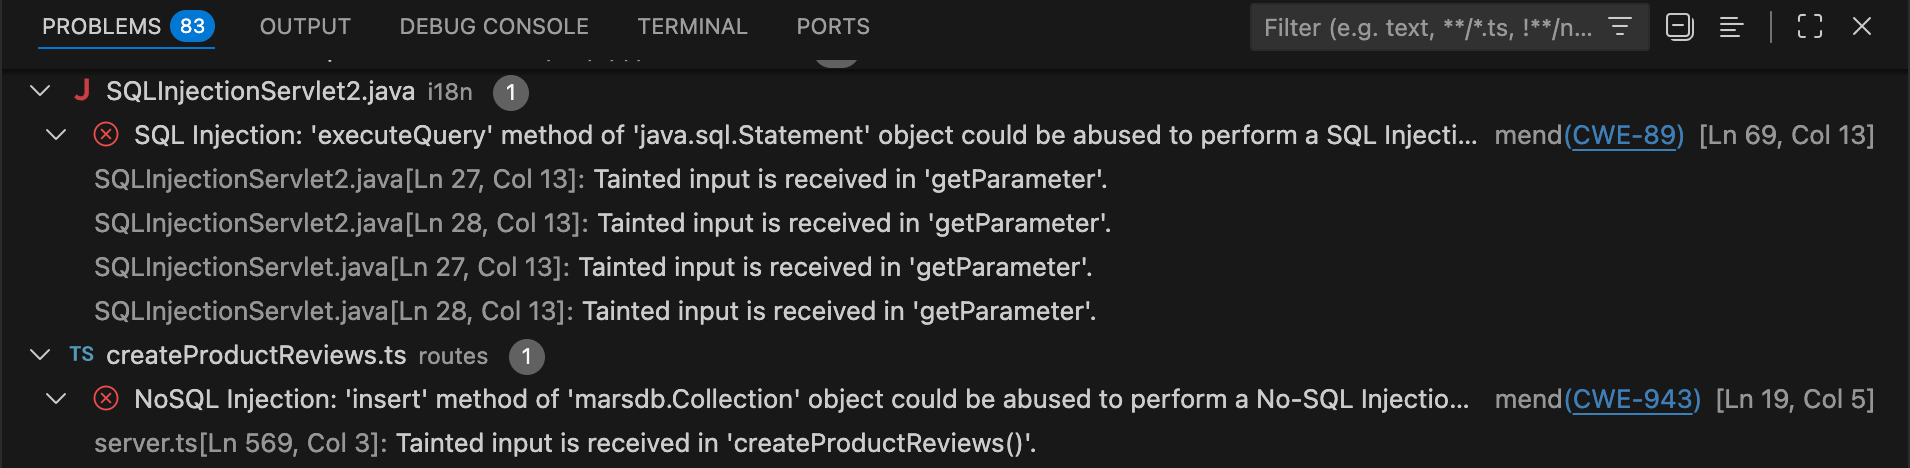
Each listed file can be expanded to reveal the findings that have a sink in that file:
The finding line contains a description and a link to the CWE in Mitre.
Under each finding, related information will be listed, namely, the source of every data flow that leads to that finding.
In the main window, problems will be marked with squiggly brackets. Hovering over them will spawn a pop-up window containing information such as CWE description, Severity, etc.
Click the View Details button at the bottom-left to navigate to the Finding Details drawer.
Navigating Findings
-
Findings Panel: All findings are listed in a dedicated panel.
-
Click to Navigate: Clicking a finding takes you to the relevant file and line in your code.
-
Expandable Data Flow: Expand a finding to view the data flow; clicking on data flow steps navigates to the corresponding code locations.
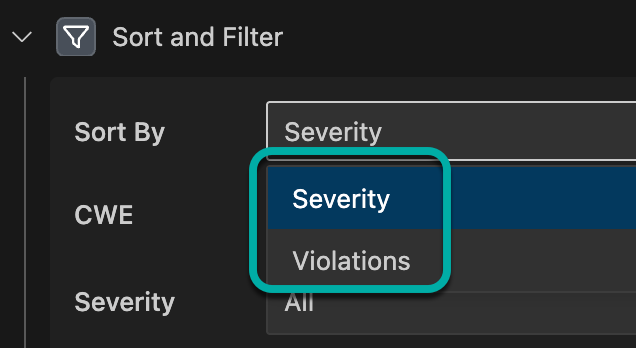
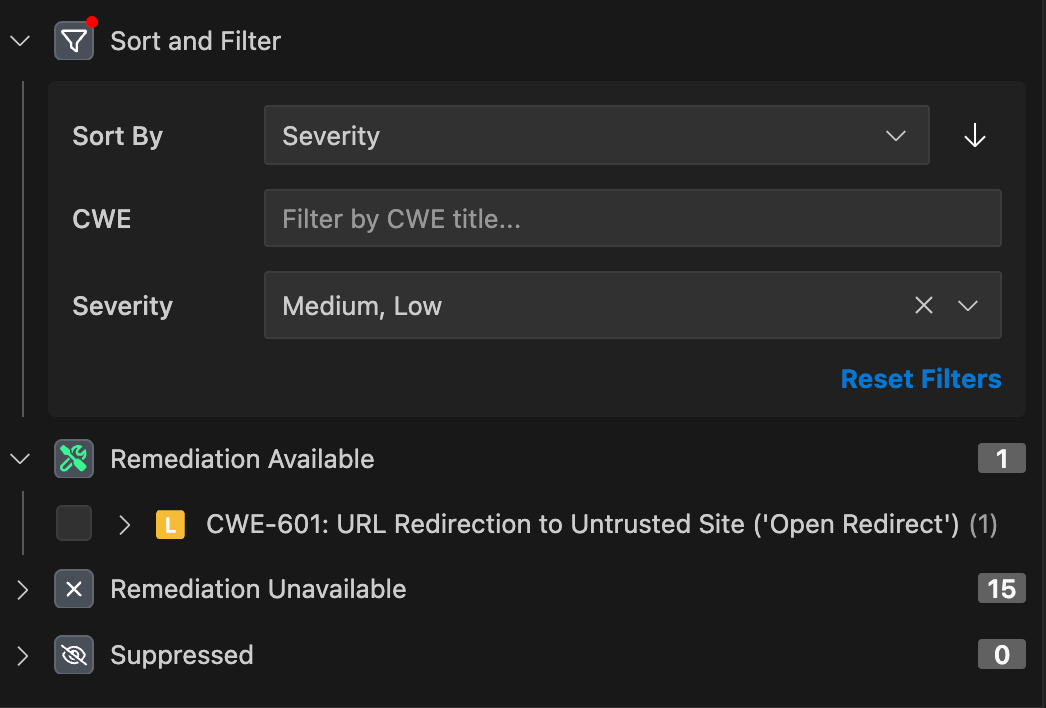
Filtering Findings
Choosing Differential Findings vs. All Findings filters the information displayed in the Problems view accordingly:

In addition, various filters are available for narrowing down the list of findings to triage.
-
Sort By - Select either Severity or Violations. Use the arrow on the right to control the sort order, ascending vs. descending.
-
CWE - Enter the CWE number, e.g., “22”.
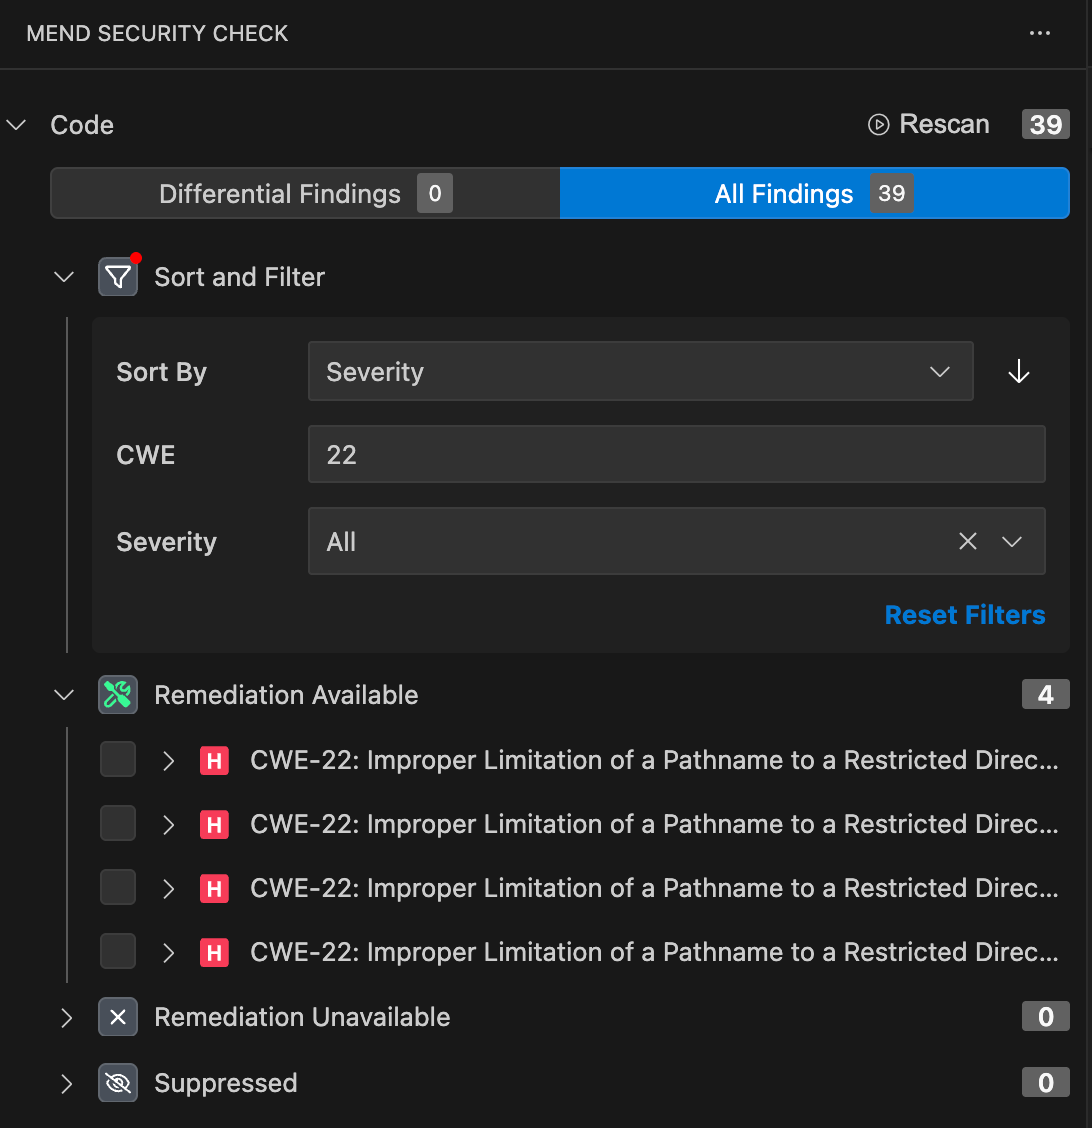
-
Severity - Select the desired severity level(s): Critical / High / Medium / Low.
Multi-selection is supported.
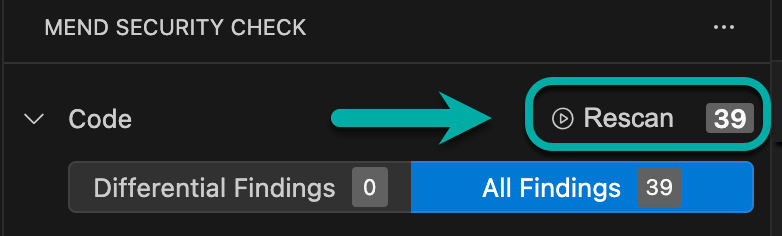
Rescan
Note that you can easily rescan your project by clicking the Rescan button at the top right corner of the Findings Panel.
Remediation
-
Remediation Suggestions: Each finding includes a remediation suggestion.
-
One-Click Fix: Click “Remediate” in the Finding Details drawer.
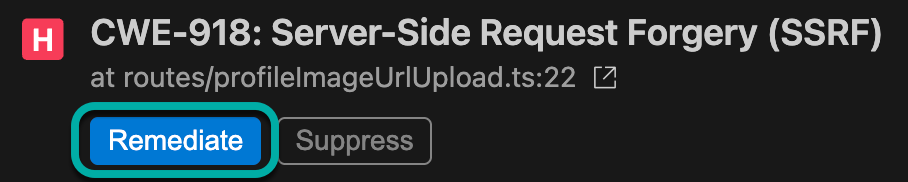
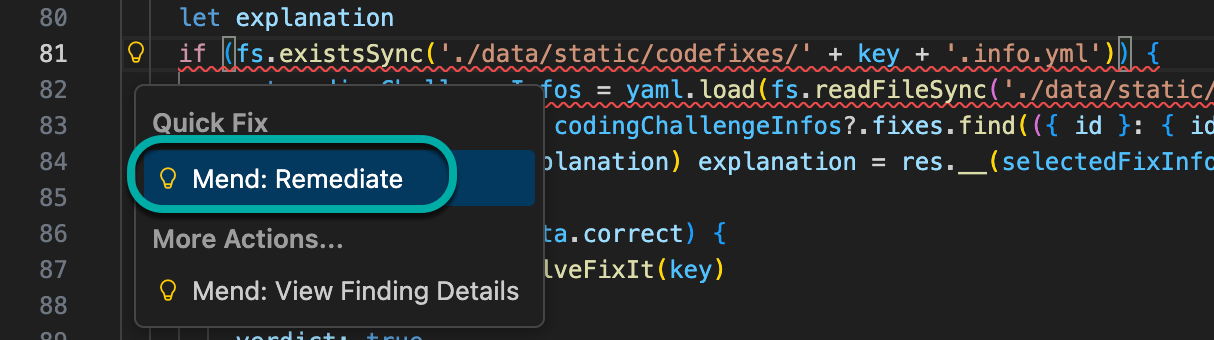
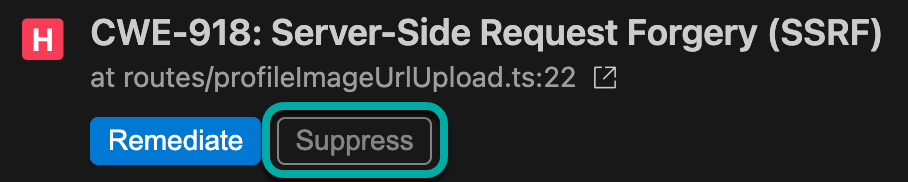
The Remediate button is also available in the Problems view while hovering over a finding and clicking the quick fix menu (lightbulb icon):

It’s also available in the main window:
-
This will trigger the Mend Remediation (

Example:
-
Apply Fix: Apply or discard the remediation using the buttons located at the bottom of the VS Code UI (

Applied changes are made in your file, but remain unsaved until you review and save them.
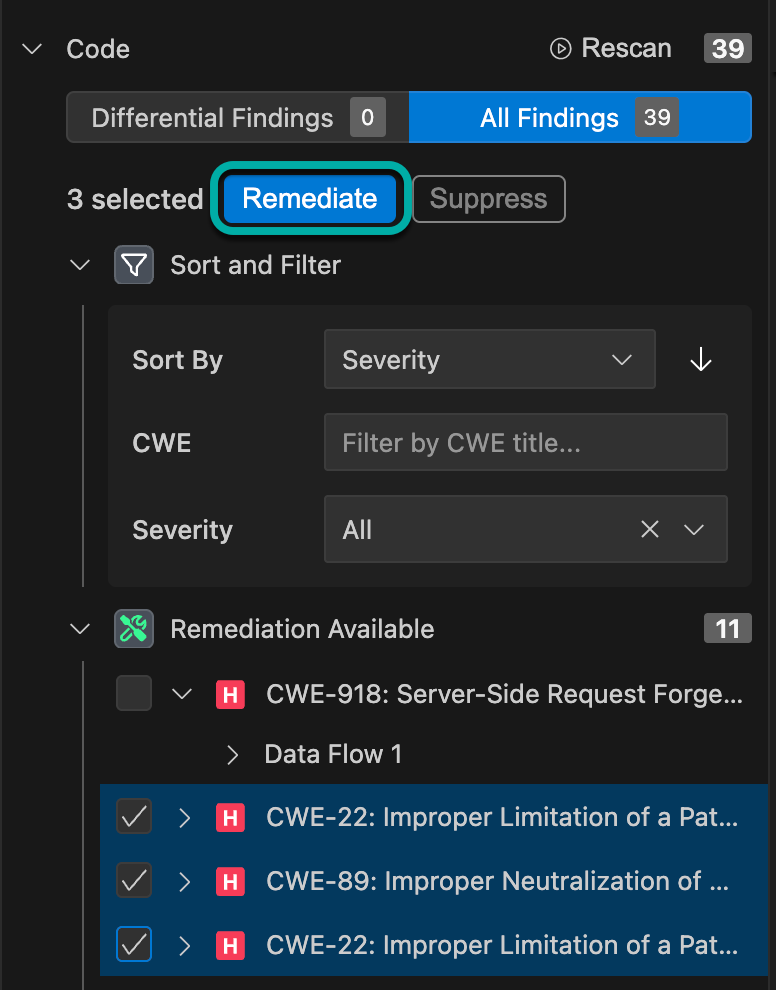
Note: Mend for Visual Studio Code supports the remediation of multiple findings at once. To achieve this, check the findings you wish to remediate on the left-pane and click Remediate:
Suppression
-
Suppress Findings: Click “Suppress” to open a dialog for selecting a suppression reason. Please note that only new findings can be suppressed.
Available suppression reasons:
- False positive
- Acceptable risk
- Temporarily ignore
- Other -
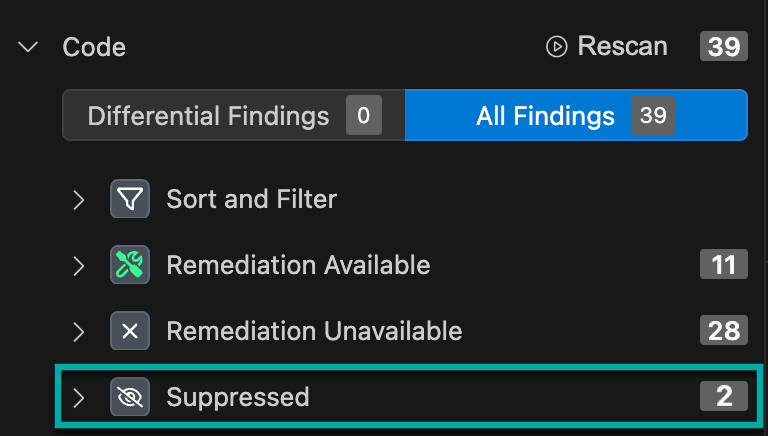
Suppressed List: Suppressed findings are moved to a separate list and can be unsuppressed if needed.
Known Limitations
-
Scanning mono-repos is not supported - if one repository is mapped to multiple projects, each project should be opened as a separate workspace in order to perform a scan.
-
As of November 2025, IDE scans do not affect or appear in the Mend AppSec Platform’s project-level scan history. This capability will be added in a future release.