Configuring Renovate to use a Serverless Redis Elasticache -Self-Managed Repository Integrations
Introduction
For larger customers, storing package information directly in a Redis cache is crucial to not hitting rate limits for dependency lookups. Due to this, Renovate has implemented an option to allow customers to cache any package lookup information directly to a Redis cache.
These instructions show how to set up a server-less Redis cache using ElastiCache.
Prerequisites
A self-hosted repository integration (Github Enterprise Integration, BitBucket Integration, GitLab Integration)
Access to ElastiCache with permissions to create resources
An EC2 instance running your integration
Access to create IAM roles and policies
Access to security groups
Security Group Configuration
To begin with, let’s make sure to configure your EC2 instance with a Security Group that will have access to the Redis cache. The way to do this is to configure the EC2 instance so that inbound requests to port 6379 are allowed. For instance:

Redis Cache Creation
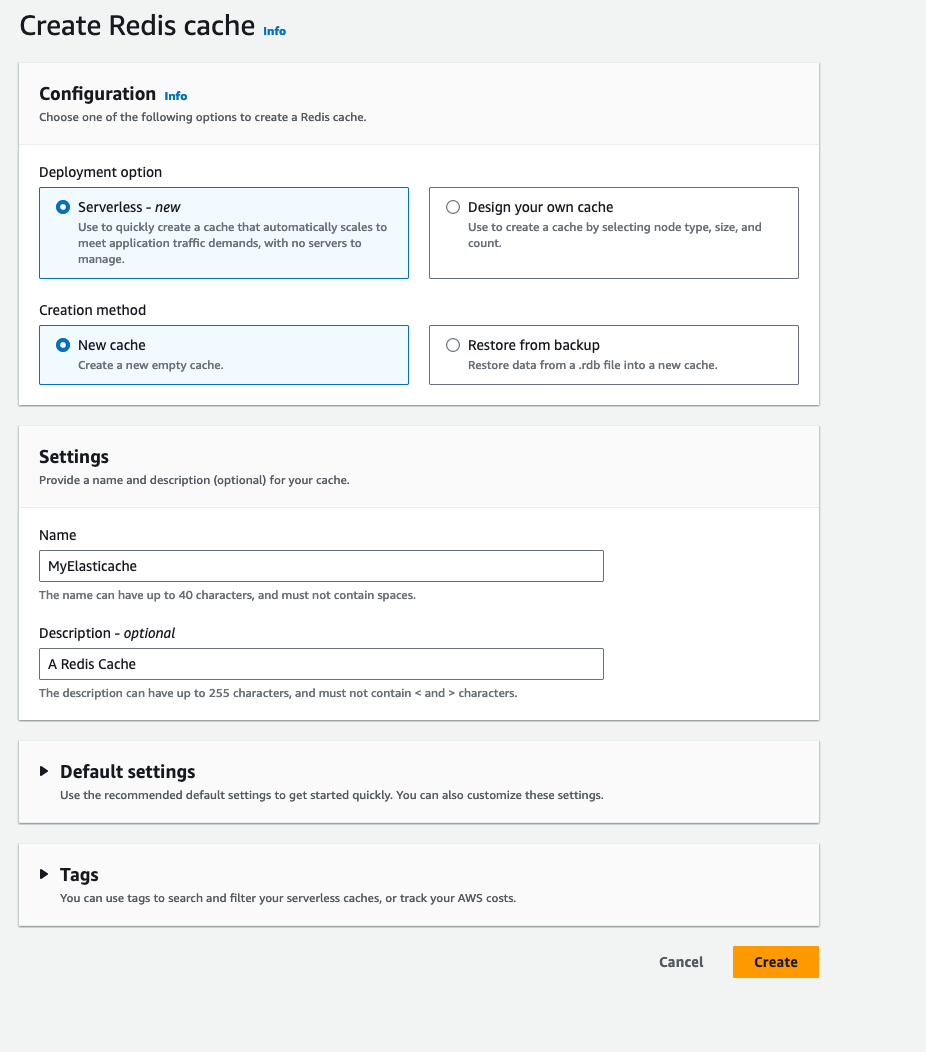
Once the Security group has been created, then create a server-less ElastiCache with the default settings. This should look like:

Use the following instructions to set up a user:
Create a user named
renovatewith the following access string:on ~* +@all.Make the authentication use IAM roles. (Username/password is also acceptable, but will need to be specified in the Renovate Environment variable along with the address to the cache. If this option is chosen, the IAM role/policy will not need to be created).
Add a group named
renovateto ElastiCache and assign the renovate user to it along with the default user (required).Go back to your ElastiCache and modify it, with the following settings:
Add the
renovategroup.Add the ElastiCache to the Security Group configured at the beginning.
Creating a Policy
Once the Security Group and ElastiCache have been configured appropriately, create an IAM Policy with the following contents:
{
	"Version": "2012-10-17",
	"Statement": [
		{
			"Sid": "elasticachepolicy",
			"Effect": "Allow",
			"Action": [
				"elasticache:Connect"
			],
			"Resource": [
				"arn:aws:elasticache:<your_region>:<aws_account_id>:serverlesscache:*",
				"arn:aws:elasticache:<your_region>:<aws_account_id>:user:renovate"
			]
		}
	]
}
This will allow the renovate user we created to connect to the ElastiCache.
Creating a Role
Create an IAM Role with the following Trust Relationship and assign the policy we just created to this Role:
{
    "Version": "2012-10-17",
    "Statement": [
        {
            "Effect": "Allow",
            "Principal": {
                "Service": "ec2.amazonaws.com"
            },
            "Action": "sts:AssumeRole"
        }
    ]
}
Once this has been completed, go to your EC2 Instance and assign this newly created role to that EC2 instance and attempt to connect to the ElastiCache. Afterwards, test your connection to the Redis Cache by using the redis-cli utility. You can install it on Ubuntu with the command: sudo apt-get install redis-tools.
To test your connection, you can get the URL for your Redis server by navigating to the ElastiCache resource on AWS. From there, you should be able to connect with:
redis-cli --tls -h <your_server_address> -p 6379If the redis-cli connects to your server properly, then you should be good to go. At this point, you can add the following Environment Variable to your Renovate workers.
RENOVATE_REDIS_URL: "rediss://<your_serverless_elasticache_address>:6379/0"Try starting the integration. If the container throws connection errors and then reboots, something is probably misconfigured, double-check all configurations and try again.
Note: You should not have to provide a username and password because AWS IAM should handle this automatically and log you into the renovate user created in previous steps. If username/password authentication was selected when creating the user, then those will need to be specified in the URL like: rediss://<username>:<password>@<address>:6379/0
