Access Control Setup Guide - Mend Platform - SAML
Overview
After setting up SAML integration with Mend, SAML Groups and Roles need to be mapped to a Mend Group. These groups needs to then be mapped to a Mend Role in order to properly handle Role Based Access Control. This document will go over the steps needed to assign groups to roles both manually and at scale.
For details on how to set up SAML Integration within Mend, see SAML 2.0 Integration
The following video gives a basic walkthrough of this setup with Okta.
https://youtu.be/197X0_jirh8For Non-Global SAML set ups, Group mapping can be done via SAML Attribute.
Groups
Mend’s Role Based Access Controls can be assigned to individuals and groups. Mend recommends assigning roles to groups rather than individuals.
For Non-Global SAML set ups, once a user has signed into Mend with their SSO, if the group is not present, it will be created and the user will automatically be assigned to the group. When initially created, groups have no roles assigned to them.

Mend Platform
Mend Roles
Mend Platform has two different scopes for roles: Organization and Application.
Both Organization and Application scopes have the same set of roles:
Admin
Security Analyst
Scan Manager
Member
Manually Map Mend Groups to Mend Roles
An Organization Admin can assign a group to both an Organization or Application role with the same workflow.
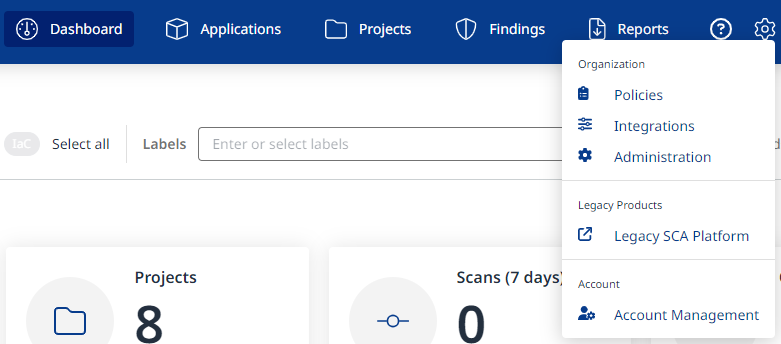
From anywhere on the Mend Platform, Click the Gear icon then select Administration.

On the Administration Screen, Click Groups then click the desired Group name to open the details for that Group

Click the Roles Tab then Add Role

On the Add Group Role Dialog, select the Scope level and the desired Roles for the Group then click Add.

After a Role has been added to a group, it can be managed from the Roles tab.

Global Account - Map SAML Property to Mend Group
For Global Account SAML configurations, there is another layer of abstraction needed in order to assign users to the proper groups within each Mend Organization. A SAML property must be chosen to have it’s value mapped to Mend Groups.
This configuration can only be done by a Global Account Admin
From anywhere on the Mend Platform, Click the Gear icon then select Account Management.

On the Account Management Screen, Select SAML Integration from the top ribbon.

Click the Edit button to modify the SAML integration.

Under Key Attributes, Set the Role field to the SAML property that will represent SAML Roles


Under Role Mapping, Click Add Role.

Set the Role to be the expected value of the SAML Attribute specified in the last step. Then add any number Mend Groups from any of the Organizations in the Global Account.

When all mappings are complete, click Save at the top of the screen

The next time a user logs into Mend Platform, they will be automatically added to the specified groups if their value in the specified SAML attribute matches the value in the Role section of the Role Mapping.
Automatically Mapping Mend Groups to Mend Roles
Currently, there is no process for automatically mapping groups to roles. For guidance on how to use Mend APIs to create a script to assist with the mapping, see Automating Group Assignments.
Roles in Mend Legacy SCA and Mend Platform
Review the role mapping between Mend Legacy SCA and Mend Platform to determine role equivalency between the two platforms
