Overview
This page lists the various Mend AI settings you may want to configure in the Mend AppSec Platform, to tailor the Shadow AI discovery behavior to your organization’s preferences.
Getting it done
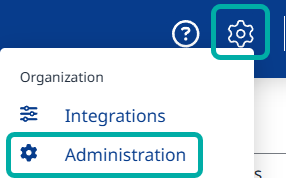
To administer Mend AI, log into the Mend AppSec Platform as an organization administrator.
Click the cowheel icon and select Administration.
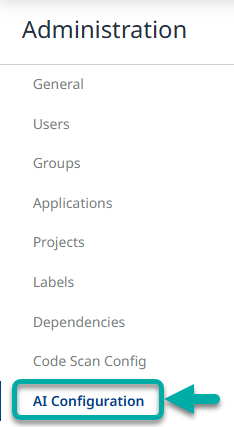
Select AI Configuration from the left-pane Administration menu:
This will take you to the AI Configurations screen, where you can perform 2 main actions:
-
View the system-driven Global Default AI configuration.
-
Create a new configuration
Global Default
On the Global Default row, click the Actions menu button → View.
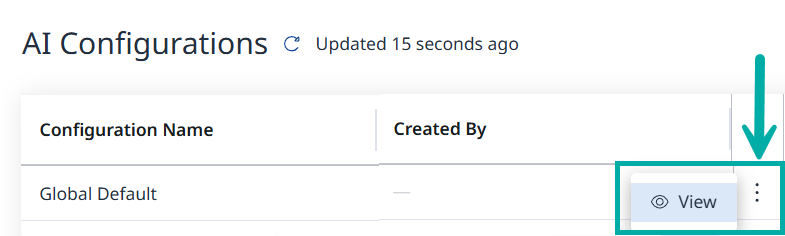
This will take you to the read-only Global Default configuration page, allowing you to view your organization’s effective default configuration.
Create a New Configuration
Create a new configuration by clicking the + Create button ( ![]()
This will take you to the Create AI Configuration screen, containing two tabs:
-
Snippet Processing & Storage Settings
-
Custom Detection Patterns (optional)
Snippet Processing & Storage Settings
Note: If you have a specific project or application you wish to exclude from AI scanning, create a configuration with Mend AI Code Scanning Capabilities set to false, and assign it to the relevant application or project.
-
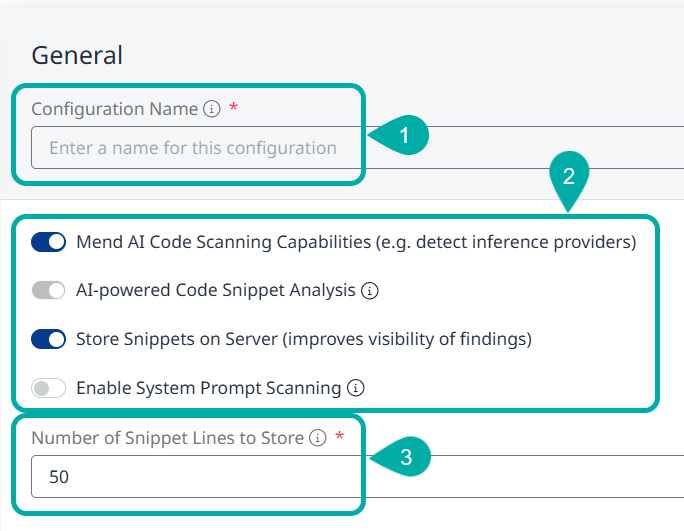
Configuration Name - Type in a name for your configuration.
-
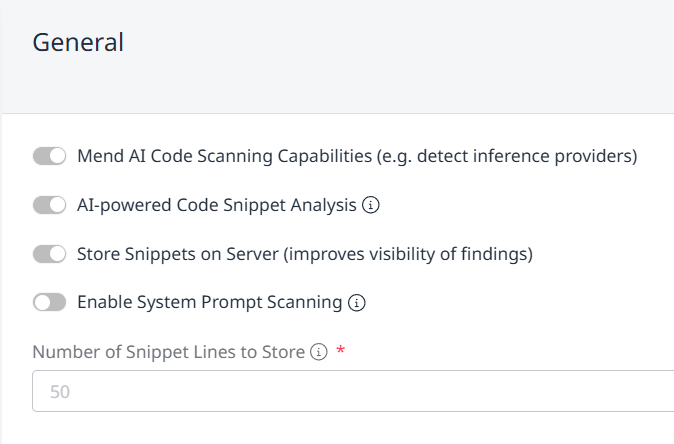
a. Enable Mend AI Code Scanning Capabilities (e.g. detect inference providers) - Enable/disable Mend AI’s code scanning. Enabled by default.
b. AI-powered Code Snippet Analysis - This setting is read-only and represents the value based on your organization’s consent to employing AI-powered features.
c. Store Snippets on Server (improves visibility of findings) - Enable/disable the sending of snippets.
This setting only becomes available when “Mend AI Code Scanning Capabilities” is enabled.
d. Enable System Prompt Scanning - When enabled, Mend AI will scan for system prompt risks within the scope of this configuration (only available with Mend AI Core/Premium). -
Number of Snippet Lines to Store - Enter the number of lines to store. This helps you review findings more effectively for better triage and remediation. Set to 0 to disable storage or leave blank to use the default setting.
Custom Detection Patterns
Your organization may use proprietary SDKs, internal wrappers, or emerging AI frameworks not yet included in Mend.io's global detection catalog. Here you can define custom import or reference patterns that will be considered in your next scans. Patterns are validated for safety and used automatically in scans.
Click the + Add button at the lower right and define a regular expression pattern to match code imports, decorators, or framework-specific patterns. Use .* to match any characters, \. to match literal dots.
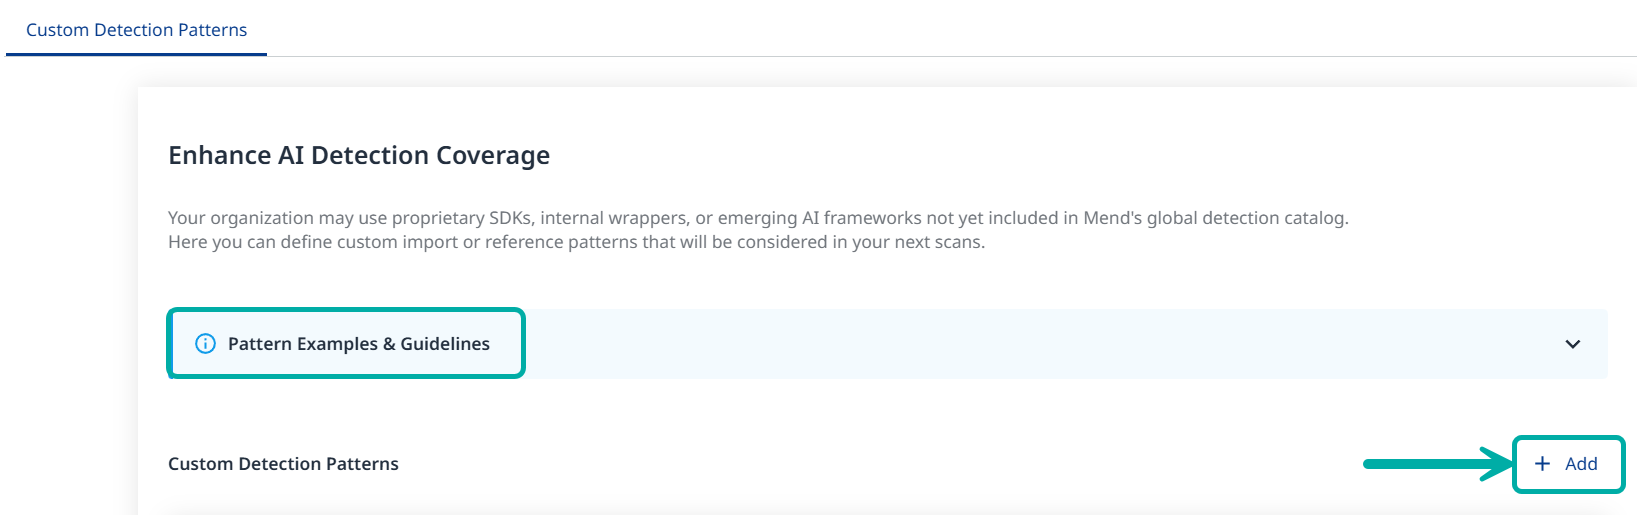
Pattern Examples & Guidelines
Use regular expressions to match import statements, decorators, or other code patterns specific to your organization's frameworks and libraries. Tip: Use .* to match any characters (not just *).
Formatting Requirements:
-
Length: Minimum 8 characters, Maximum 30 characters
-
Specificity: Must include at least one literal token (letters, digits, dots, or slashes) of 4+ characters
-
Wildcard control: Cannot start or end with .* or .+, Only one wildcard (.* or .+) allowed total
-
Syntax Safety: Must compile successfully under a safe regex engine (e.g., RE2). Disallow unsupported constructs automatically rejected by RE2 (e.g., lookbehind, back references)
-
Uniqueness: Duplicate or equivalent patterns are not allowed
Common Patterns:
-
import.*custom_sdk- Matches any code containing 'custom_sdk' (use .* for 'any characters') -
from internal_wrapper import- Matches Python imports from internal_wrapper -
@CustomDecorator- Matches usage of @CustomDecorator
Click Save and then Create to complete the creation of your custom detection pattern.
Assigning Configurations
You can turn your newly created AI configuration into the default configuration for all of the projects in the organization by clicking the relevant configuration’s menu button ( ![]()

Upon doing so, the configuration in question will be labelled Default ( ![]()
Assigning Configurations to Applications
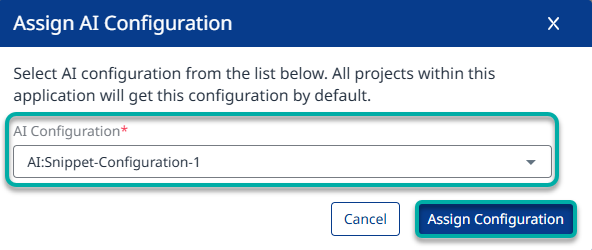
After the configuration has been created, navigate to your Applications via the left-pane Administration menu, select the application to which you wish to assign the configuration and click the Assign AI Config button to select the configuration to assign.

This will spawn the Assign AI Configuration menu, in which you can select the desired configuration from the drop-down menu. Click Assign Configuration to complete the configuration assignment:
Assigning Configurations to Projects
Once assigned to an application, all the projects in the application will inherit that configuration.
If you wish to assign a different configuration to a project or projects in the application, you can do so by creating a new configuration and assigning it to that desired project or projects.
This action will override the configuration inherited from the application.
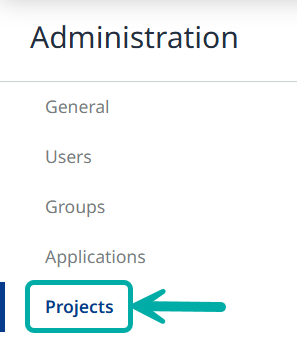
To create a new configuration and assign it to a project or projects, perform the steps described in the previous 2 sections (sequentially) but for the latter use the Projects administration menu instead of Applications.