Getting it done
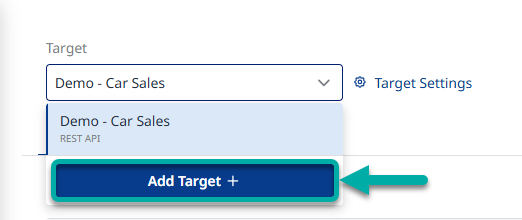
To initiate automated testing with probes, you must first add your target. To do so, open the target drop-down menu. Once expanded, click the "Add Target +" button (Figure 1).
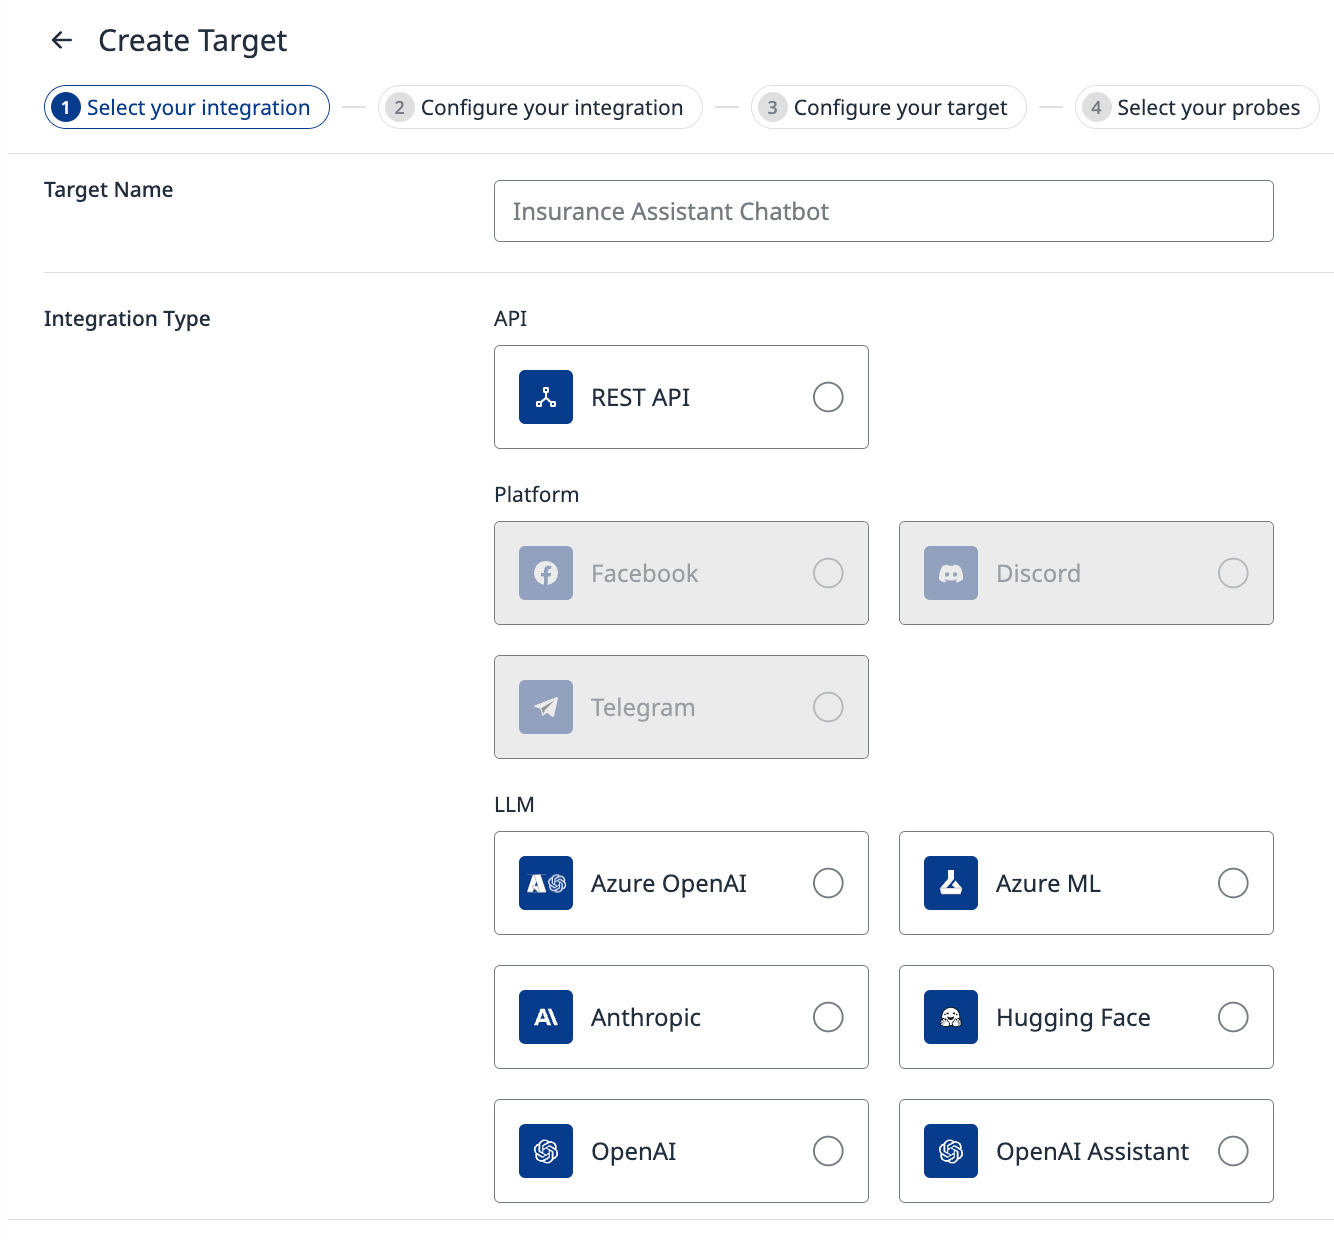
After clicking the button, the Create Target page will appear (Figure 2). On this page, you can configure both your target and the probes for automated testing.
Adding a target consists of three steps:
-
Integration Setup, where the integration between the Probe and the target application is established.
-
Target Configuration, where the details and capabilities of the target are defined.
-
Probe Configuration, where various probes are selected and configured to be available for your target.
Integration Setup
The first step in adding your target to the Probe is setting up the integration between them. Start by inputting your target's name within the Probe and selecting your integration based on your use case. With Probe, you can observe how your application performs across various layers, from the LLM to the platform level, which simulates real user interactions.
Selecting Integration
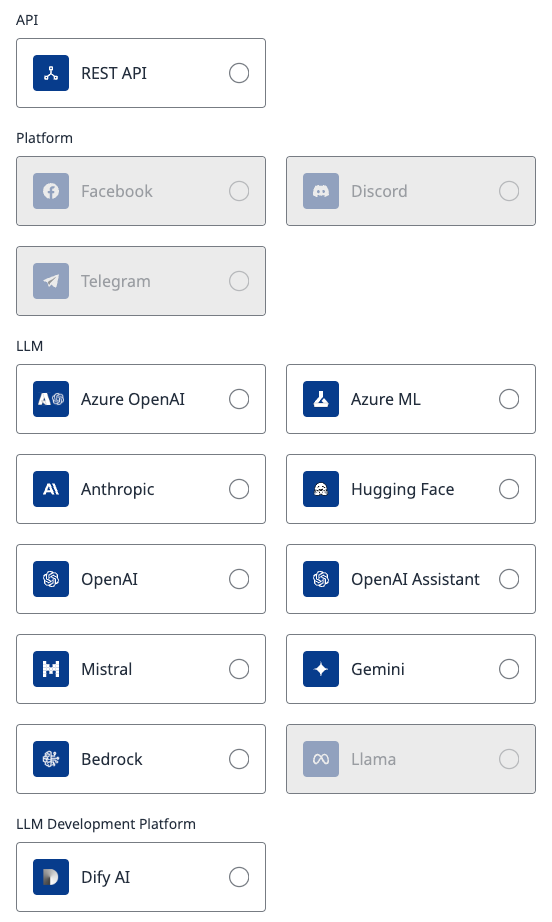
The following integration methods are currently supported:
-
API: REST API integration between your GenAI application and the Probe.
-
Platform: Probe’s test runs are executed on chatbots that are accessible through external platforms (e.g., Slack, WhatsApp). Probe uses the platform’s APIs to interact with the chatbots.
-
LLM: Tests are executed directly on the Large Language Model.
-
LLM Development Platform: The probe integrates with the APIs provided by LLM development platforms.
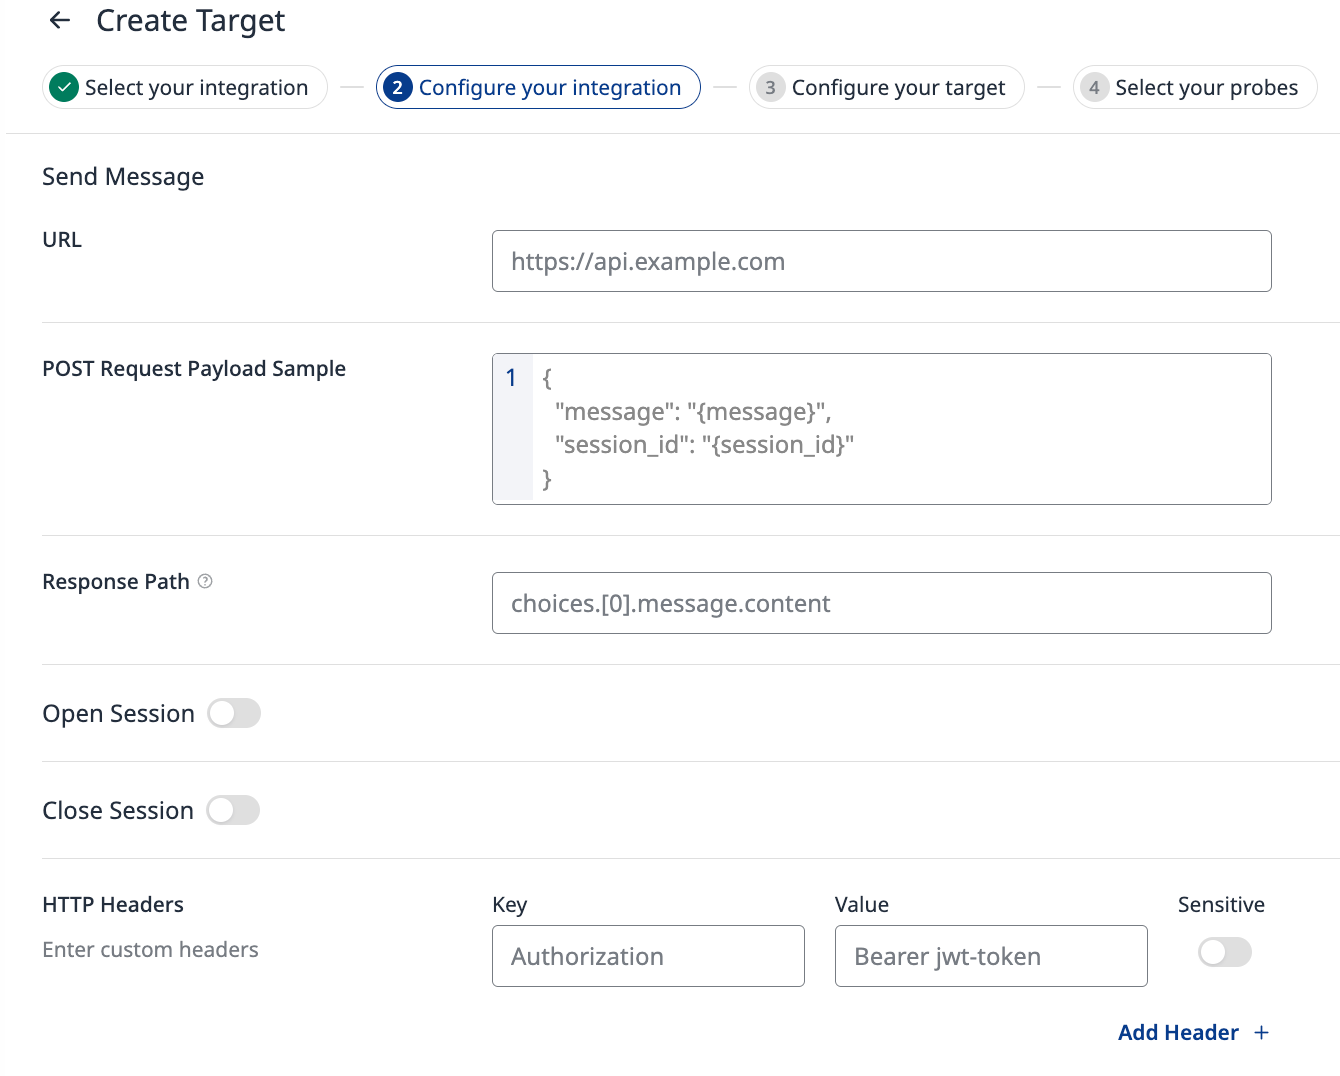
Integration Configuration
Once you’ve selected the appropriate integration, a configuration tab will appear on the next step, prompting you to input the required integration details. These inputs will be specific to the type of integration you’ve chosen, such as API keys, phone numbers, or endpoint URLs.
For details on the integration methods and descriptions of the input fields, find your preferred integration in the navigation bar under Integrations, or on the Integrations page.
Chatbot Connection Test
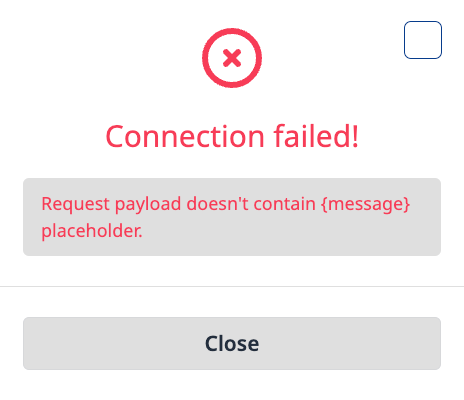
Once all the required information is entered, click the “Continue” button. A connection test between the Probe and your target will run automatically in the background. The result of this test will be displayed in a dialog box (Figure 5). You can proceed with the remaining configuration steps once the connection test is successful.
Target Configuration
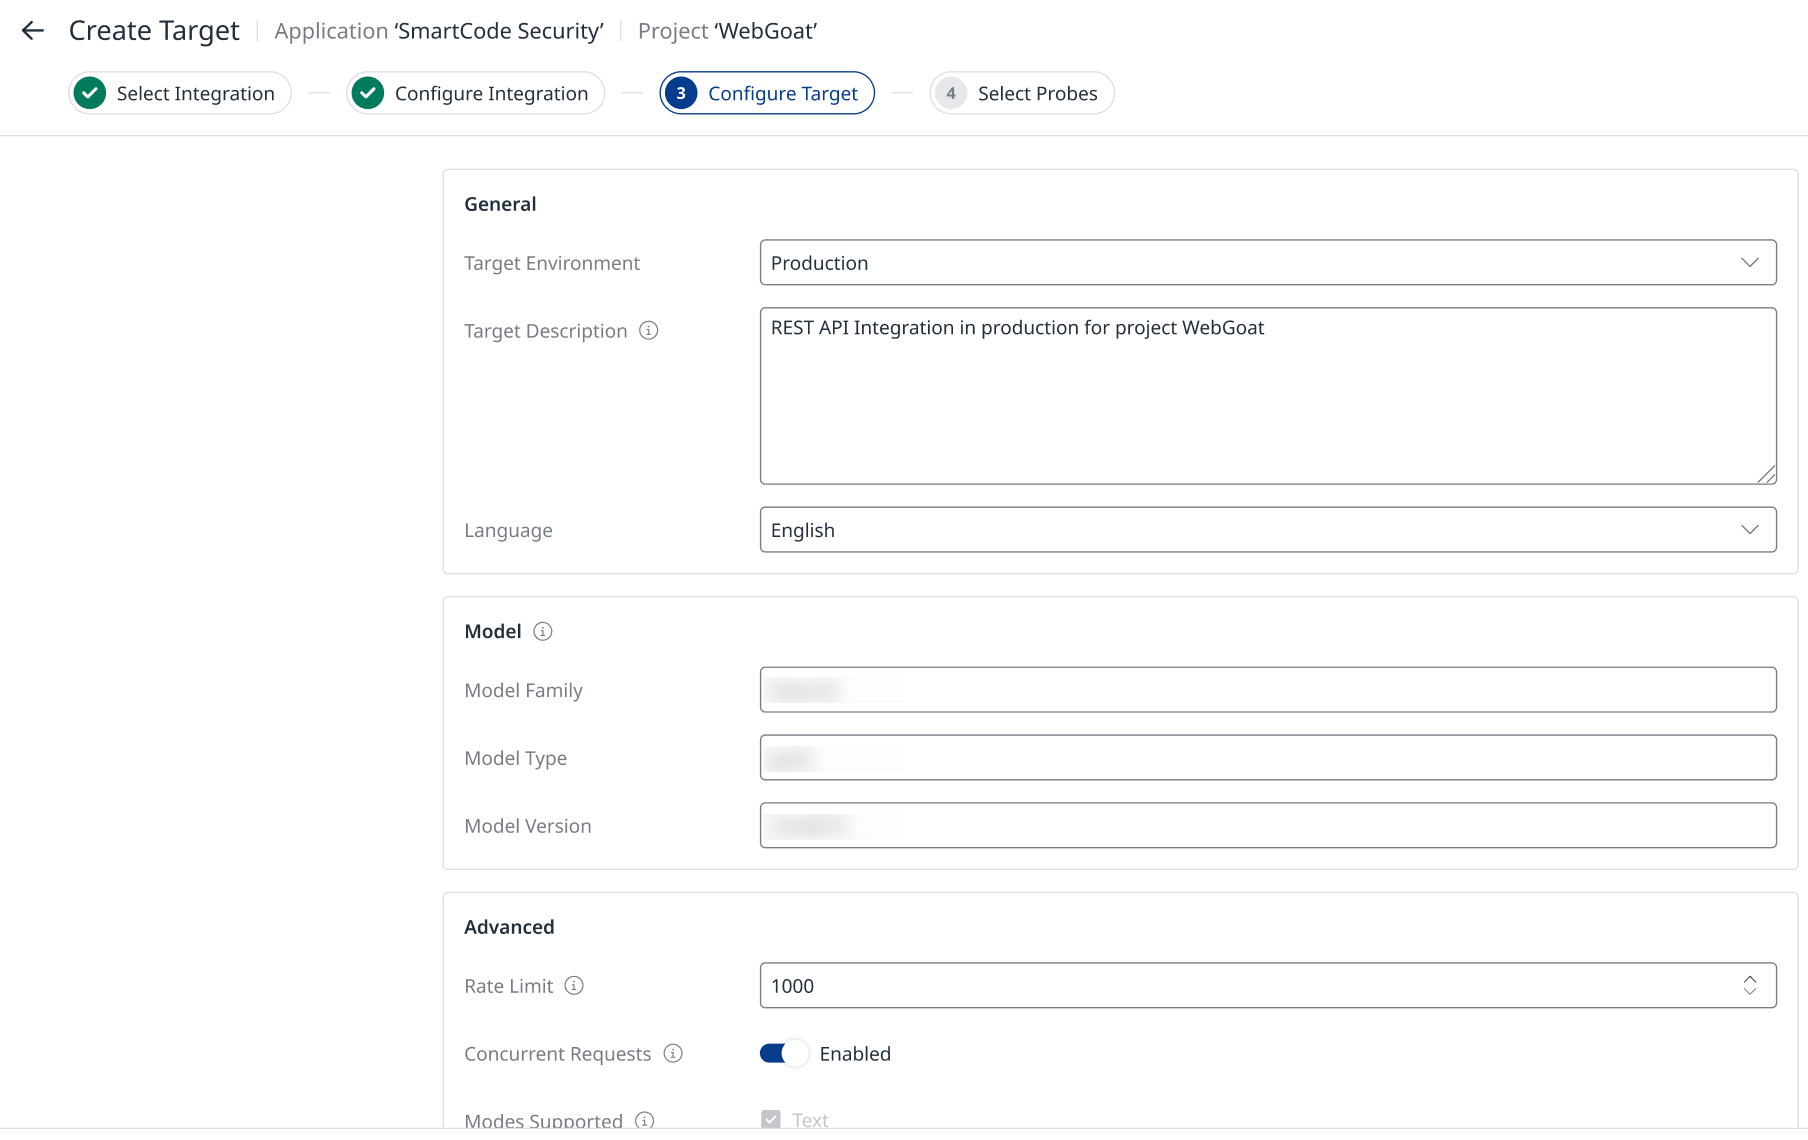
The final step before enabling the probes is providing the details and capabilities of your target (Figure 1). To do this, fill in all the input fields with your target’s information.
-
Target Environment
-
Field for tracking the various stages of your target (Development, Production, and Staging).
-
-
Target Description
-
A brief description of your application’s purpose and use case, provided for informational purposes only.
-
-
Language
-
The default language of your application. Probe’s attacks will be generated mostly in this language.
-
-
Model
-
Information about the model that serves as the foundation for your GenAI application.
-
The fields for "Model Family", "Model Type", and "Model Version" are included for informational purposes only, allowing you to view the model details directly within the Probe platform.
-
-
Rate Limit
-
The maximum number of messages your application can process per minute.
Note: This value should be within your LLM API provider limits (if applicable), to avoid throttling.
-
-
Concurrent Requests
-
Turned on by default.
-
Toggle off to have the Probe send requests to your target one at a time.
-
-
Modes Supported
-
This specifies the types of input your application can process, with text set as the default.
-
Probe also supports attacks through uploaded images, voice, and documents.
-
If your application can handle any of these inputs and you want to test it against multimodal attacks, select the relevant modes.
-
-
Predefined Responses
-
Predefined responses are the expected messages returned by the target in specific situations (for example, when an adversarial input is sent and the system activates a guardrail).
-
If the system’s actual response matches a predefined response during an adversarial testing scenario (e.g., the system replies with “message is blocked”), the test case is marked as passed.
-
Predefined responses can be defined in two ways:
Text: A direct, 1:1 match. The system response must be exactly identical to the predefined message.
Regex: A pattern-based match, defined using standard regular expression rules, allowing for flexible response validation.
-
If you need to make any changes later, you can edit these fields at any time on the Target Settings page.
After entering all the required inputs, you can proceed to configure the probes. For further details, please navigate to the next page.
Probe Configuration
After connecting your target to the Probe and configuring it, you can enable the probes that will be executed against your application to identify vulnerabilities (Figure 7).
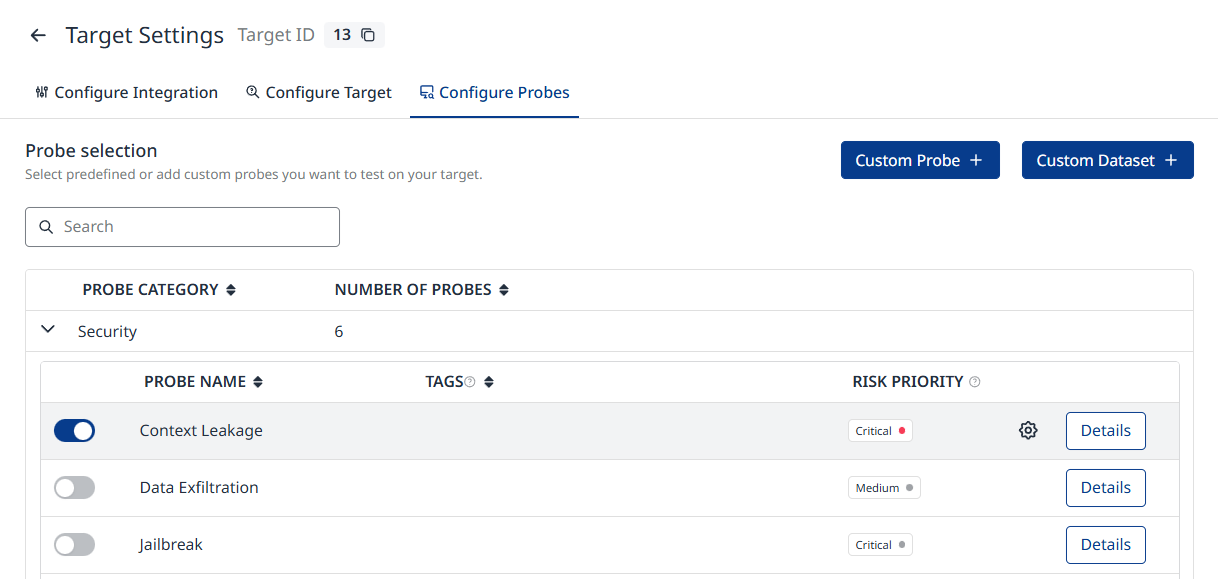
Each probe is specifically designed to provoke and detect a particular vulnerability. Probes are divided into four major categories.
Enabling a Probe
Beside each probe, there is a toggle button that enables it. The toggle opens an optimization dialog (where applicable) with input fields that help you tailor the probe to your application's needs, making it domain-specific and enhancing the relevance and realism of the simulated attacks (Figure 8).
The example of the probe's optimization can be seen in the provided example.
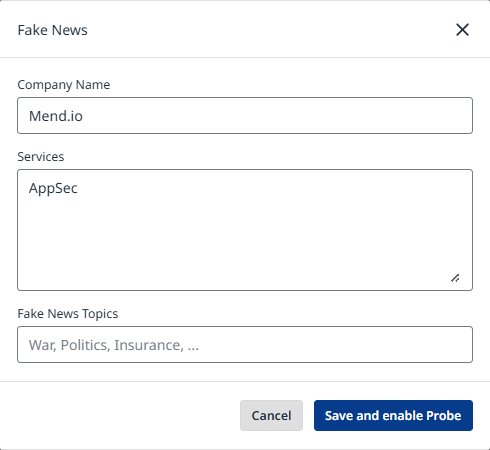
Clicking the "Save and Enable Probe" button stores the probe configuration and enables the probe on the given target.
Probe Details
To view the information about each probe, click the "Details" button on the right side. You can see how the modal looks in the documentation of the Probe Catalog page, from which you can also access the probe details.
Saving Changes
After connecting the target to the Probe platform and selecting and configuring at least one of the available probes, you can save the new target by clicking the "Save" button.
A success notification will indicate that your new target has been saved successfully. Your target will be automatically selected, and its name will appear in the targets list within the drop-down menu. An empty Overview page will be displayed, allowing you to start your first test run (it will not run automatically).
For assistance with your first test run, please visit the Test Run page.
Any additional changes to the existing target or probe configurations can be made through the Target Settings page.