Configure your private Amazon Elastic Container Registry (ECR) with Mend
NOTE: This page is only applicable for users still on the container solution in the Legacy SCA Application (“Cloud Native” UI). Most users will be directed to Mend Container in the new Mend AppSec Platform upon trying to access the Cloud Native UI.

Overview
The Mend container image registry scanning solution can integrate with your private ECR using your provided access and secret keys.
Getting it done
Prerequisites before you scan ECR with Mend
Your Mend user must be an organization administrator in order to access the Cloud Native UI.
Your Amazon ECR user that owns the access and secret keys provided to Mend for authentication must have an IAM policy attached with the necessary actions for all registry resources. See the Amazon ECR setup section of this document for instructions.
Amazon ECR setup
Step 1: Create the access and secret keys in AWS:
Navigate to your AWS Management Console and open the IAM console.
Select Users and click on the user that will be used for the integration.
Navigate to the Security Credentials tab → Access keys section and click on Create access key.
Once you finish, keep the access and secret keys on hand for the integration.
Step 2: Create the policy in AWS:
Navigate to your AWS Management Console and open the IAM console.
In the navigation pane on the left, select Policies and click Create.
Specify the required actions:
"ecr:GetAuthorizationToken",
"ecr:BatchCheckLayerAvailability",
"ecr:BatchGetImage",
"ecr:DescribeRepositories",
"ecr:GetDownloadUrlForLayer",
"ecr:GetRepositoryPolicy",
"ecr:ListImages",
"ecr:ListTagsForResource",
"ecr:DescribeImages"
Step 3: Attach the policy in AWS:
Navigate to your AWS Management Console and open the IAM console.
Select Users and click on the user that owns the access and secret keys generated in Step 1.
Navigate to the Permissions tab and click on Add permissions → Add permissions.
For the Permissions options, select Attach policies directly.
Select the created policy from Step 2 and click on Next.
Click on Add Permissions to attach the policy to the user.
Set up your private ECR configuration in the Mend Application
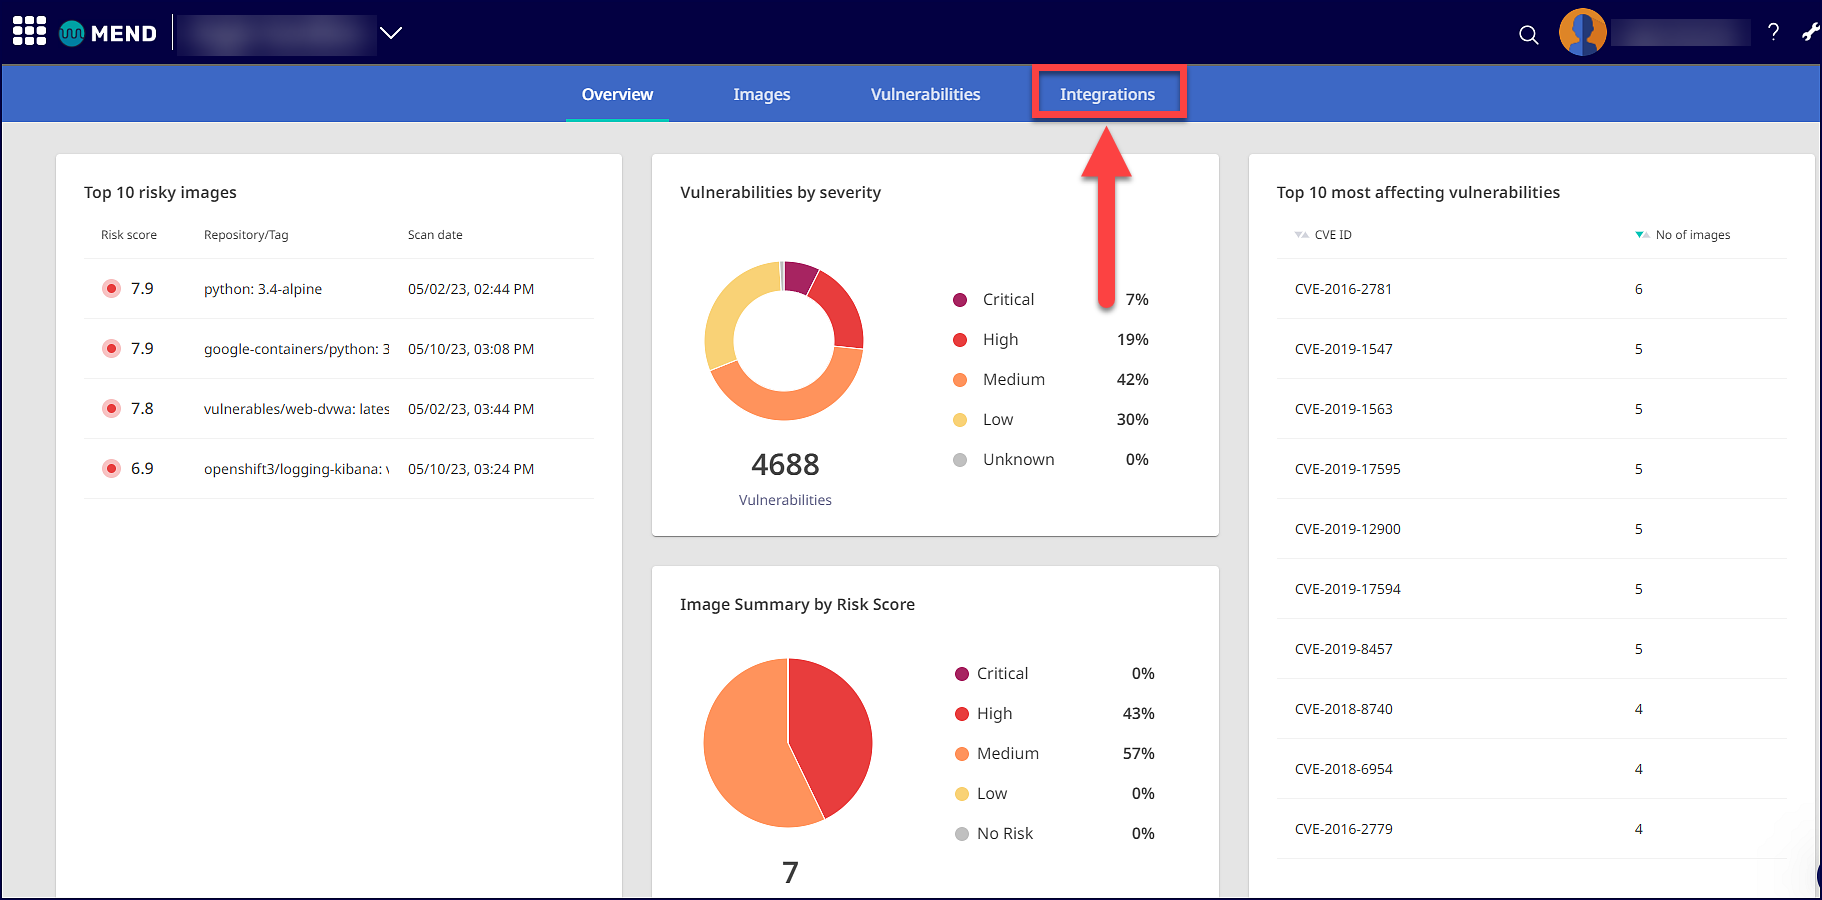
Within the Mend Application, navigate to the Cloud Native UI:

Navigate to the Integrations dashboard:

Click on + Add registry:

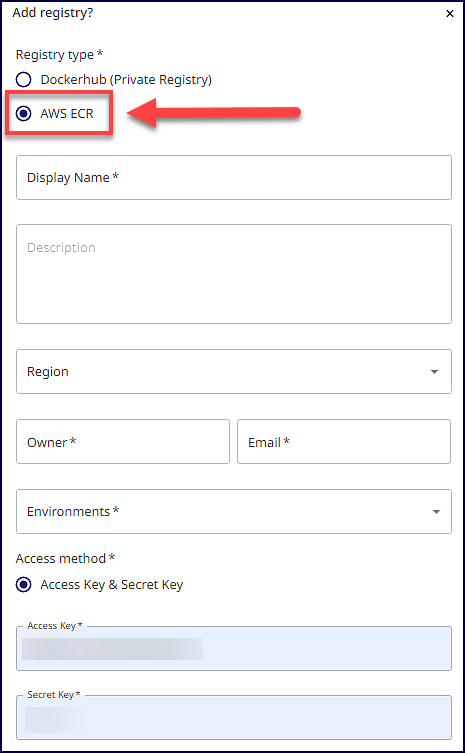
The Add registry? pop-up wizard appears. Select AWS ECR for the Registry Type setting to start the configuration setup for ECR.
Fill out the configuration with your ECR registry information. For more information on the parameters provided, refer to the Private ECR parameters section within this document:

Once you have finished filling out the configuration, scroll to the bottom of the wizard and click on Add to add your private ECR to the registry integration:

The Registry Added Successfully pop-up message displays once the integration credentials and configuration have been successfully verified:

Note: Before adding your registry, we will automatically perform a connectivity check it to ensure the credentials are valid and the registry is accessible for the integration.
Reference
Private ECR parameters
Parameter | Description |
Display Name | Type the name of your registry. This will be displayed in the Integrations dashboard. |
Description | Optional. Provide any text. We recommend providing information that will help you remember the integration and/or the relevant registry. |
Region | Select the AWS region where your ECR is hosted. The region options are:
|
Owner | Provide the name of the user setting up the registry integration. |
Provide the email address of the user setting up the registry integration. | |
Environments | Label your ECR with the environments types that you manage (multiple options can be selected). The environment options are:
|
Access Method | Select Note: For more information on the required permissions, please visit the Prerequisites before you integrate ECR with Mend section within this document. |
Access Key | Provide your ECR access Key. |
Secret Key | Provide your ECR secret Key. |
Amazon ECR resources
Visit Amazon’s documentation below for more information on the topics related to the Mend private ECR integration:
