Creating or Editing an Application
Note: The legacy Mend SAST application was deprecated on April 1st, 2025. For assistance with migrating to the Mend AppSec Platform, please contact your customer success manager or the success team at success@mend.io.
Creating a new application
To create a new application via the UI, click on the New Application setting in the upper right corner of the Applications tab:

After clicking on New Application in the Applications tab, this will bring you to the Application Configuration > Create Application page:

Editing an existing application
Within the Dashboard > Applications tab, you can edit an existing application by clicking on the pencil icon under that application’s Actions:

Basic Options
The Basic Options page includes the fundamentals of creating a new application within your Mend SAST organization:

To create a new application:
Enter a unique Application Name
If you have already defined an application template, select it in the Application Template dropdown
Click Language and manually select the application’s language(s). Or, you may select the Auto-Language Recognition option, which means that the languages used in your project will be auto-detected via scans
Here is an example of a new application setup with a template:

If you want to define additional scanning parameters for the application, click Advanced Options or More Options. Otherwise, click Create to create your new application.
Advanced Options
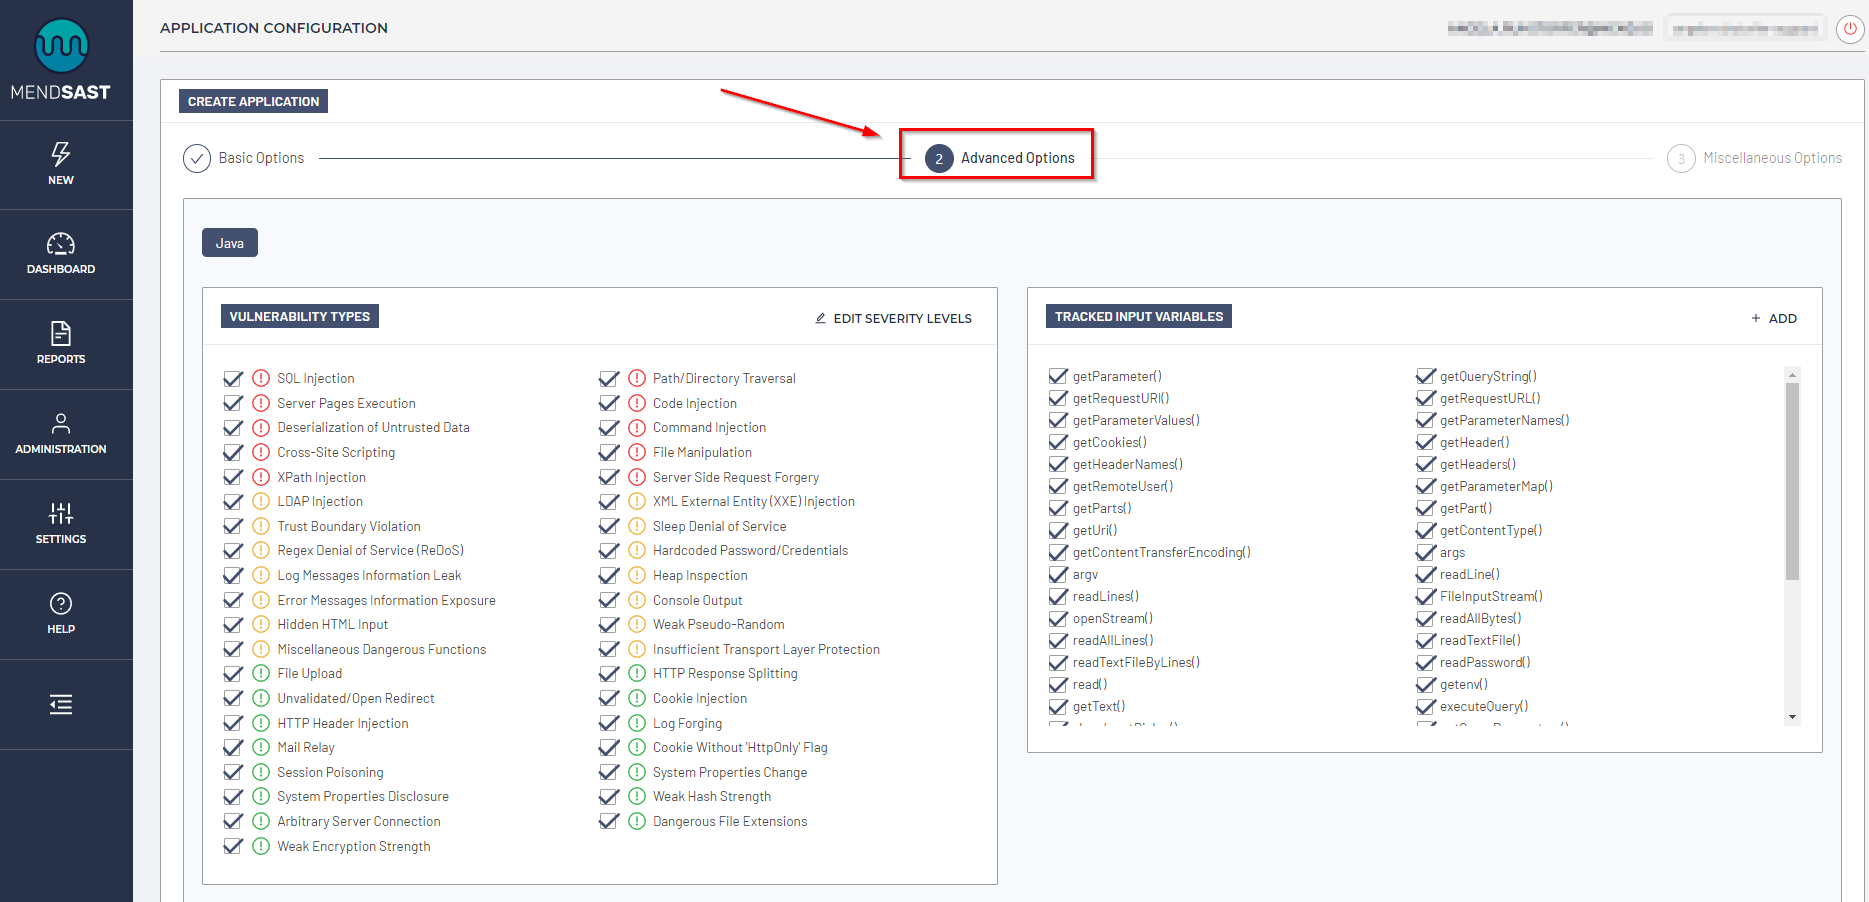
For each of the application’s languages, you can define vulnerability types, tracked input variables, custom filter functions such as sanitization, custom vulnerability rules, and other depth settings:
Vulnerability Types
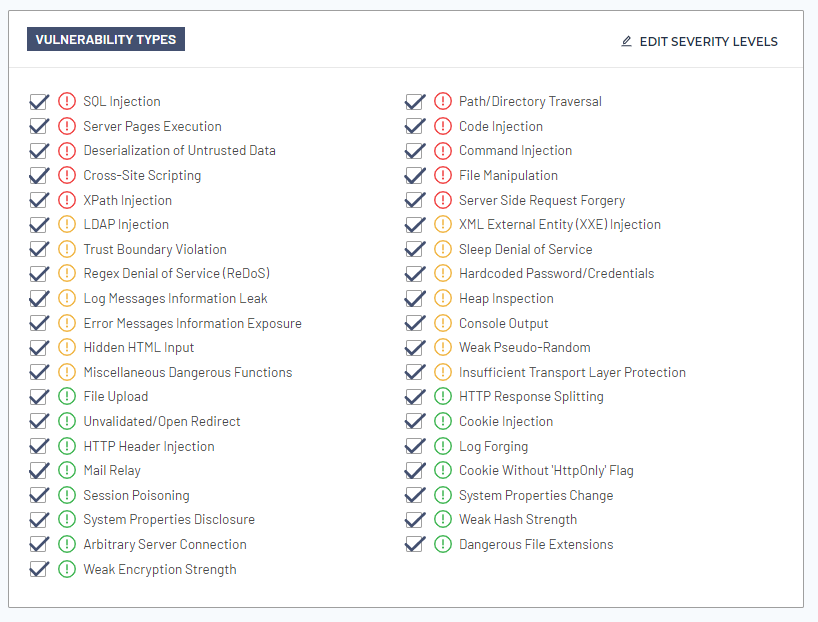
You can enable, disable, and change the severity levels of vulnerabilities within the Vulnerability Types section:
To enable a vulnerability type, check the box next to the vulnerability
To disable a vulnerability type, uncheck the box next to the vulnerability
To edit a vulnerability type’s severity level, click on Edit Severity Levels. Each vulnerability type’s level of severity can be changed to:
High Severity
Medium Severity
Low Severity
Tracked Input Variables
Mend SAST analysis identifies the information flow of untrustworthy input that affects the sensitive sink or part of the system. Tracked Input Variables represent any function or a property that represents an input from a source such as HTTP request parameter, files, command line arguments, and others. To add an input variable or function that you want to track, click on Add:
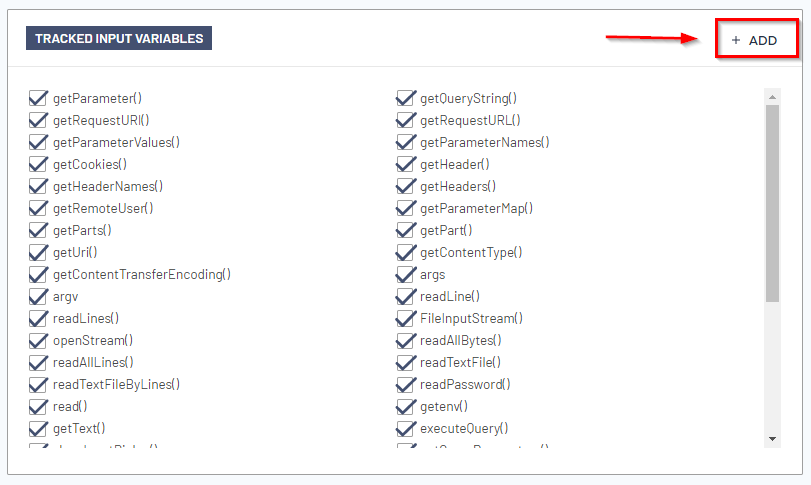
Please Note: Added tracked input functions should include a () suffix.
Custom Filter Functions
Mend SAST should be made aware of any custom input sanitization/filtering functions in order to reduce a false positive rate, which can be added in the Custom Filter Functions. To add a customer filter function, click on Add. To edit an existing function, click on the pencil icon next to it. To delete an existing function, click on the trashcan icon next to it:

When clicking on Add, or, when editing an existing function, this will pull up a sidebar where you can input the function’s Name and Type. Once finished, click Submit:
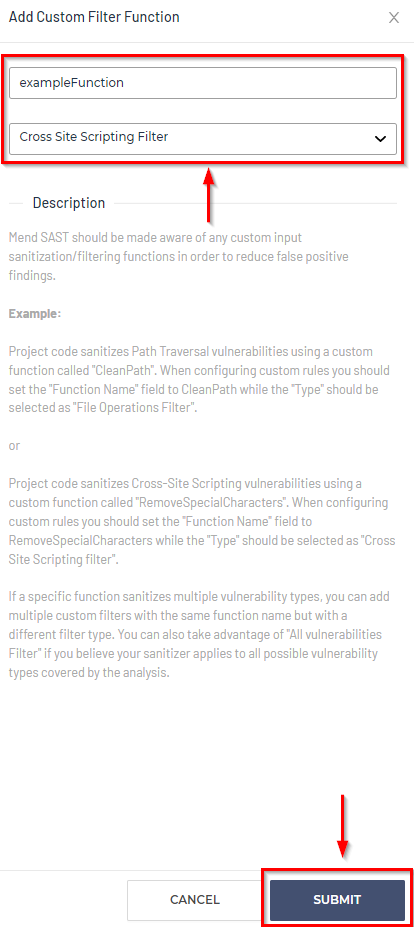
Please Note: Mend SAST will detect standard HTML encoders, string to integer conversions, and similar input cleansers automatically. So, these do not have to be defined.
Custom Vulnerability Rules
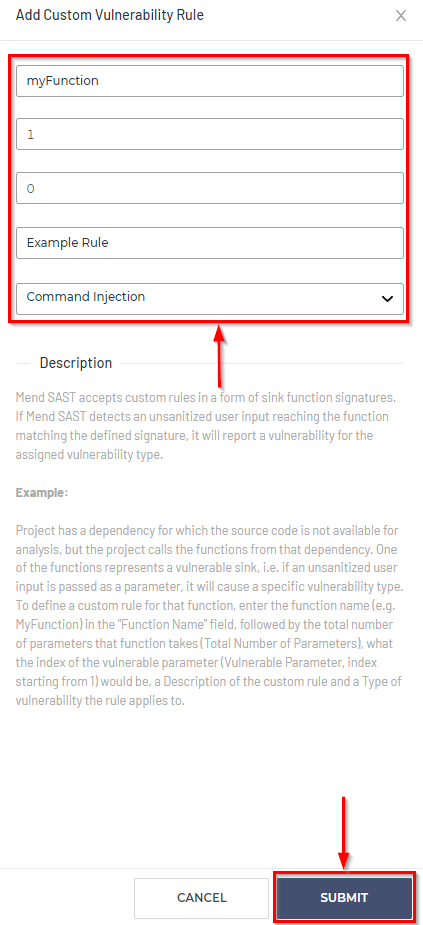
Mend SAST accepts Custom Vulnerability Rules in the form of sink function signatures. If Mend SAST detects an un-sanitized user input reaching the function matching the defined signature, it will report a vulnerability for the assigned vulnerability type. To add a customer vulnerability rule, click on Add. To edit an existing rule, click on the pencil icon next to it. To delete an existing rule, click on the trashcan icon next to it:

When clicking on Add, or, when editing an existing rule, this will pull up a sidebar where you can input the rule’s Function Name, Number of Parameters, Vulnerable Parameter, Description, and Type. Once finished, click Submit:
Depth Settings
To edit the Max Function Depth and Max Variable Copy settings, you may set these configurations in the Depth Settings section:

If you want to define additional scanning options for the application, click Miscellaneous Options or More Options. To review prior settings, click on Previous. Otherwise, click Create to create your new application.
Miscellaneous Options
Additional, miscellaneous options can be set for your application including ignoring stored suppressions, exclusions, as well as issue tracker and notification triggers:
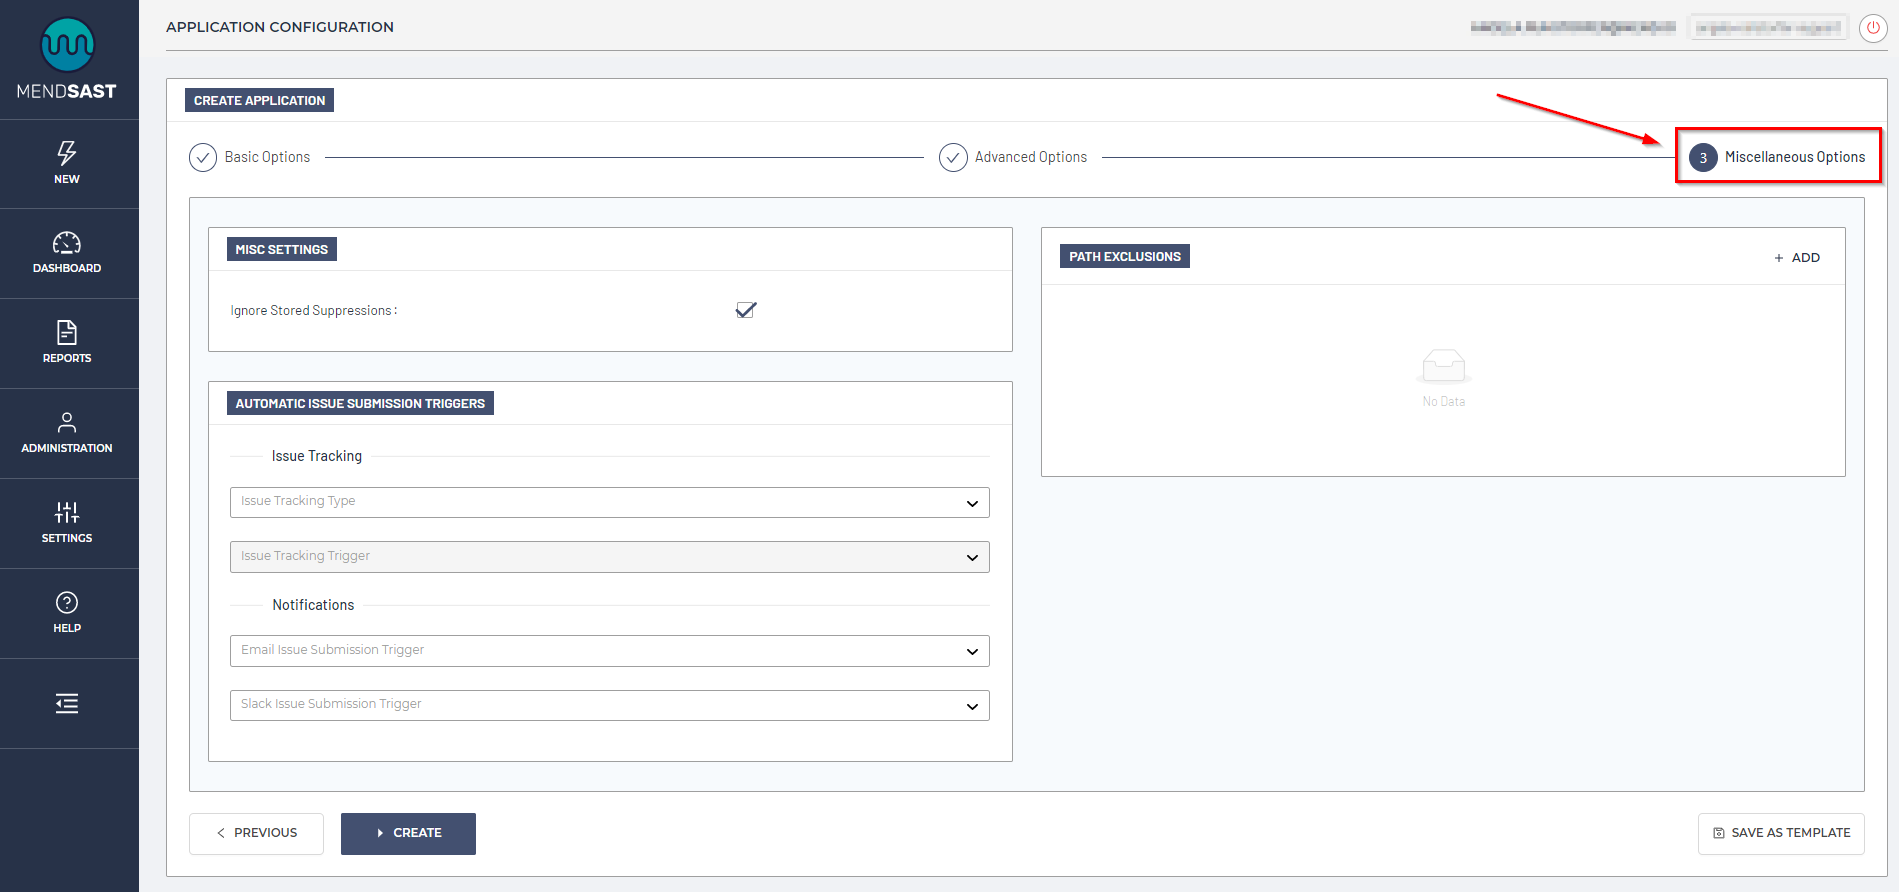
Misc Settings
When a vulnerability is suppressed, the signature of that vulnerability is stored in the database. By checking the Ignore Stored Suppressions option, Mend SAST will ignore all previously suppressed vulnerabilities when analyzing the same source code base:

Path Exclusions
Mend SAST allows analysis exclusions of any files from the target project via the Path Exclusions section. These exclusions are defined as Perl-Compatible Regular Expressions (PCRE) path matching. To add an exclusion, click on Add. To edit an existing exclusion, click on the pencil icon next to it. To delete an existing exclusion, click on the trashcan icon next to it:

When clicking on Add, or, when editing an existing exclusion, this will pull up a sidebar where you can input the exclusion’s Path Exclusion. Once finished, click Submit:
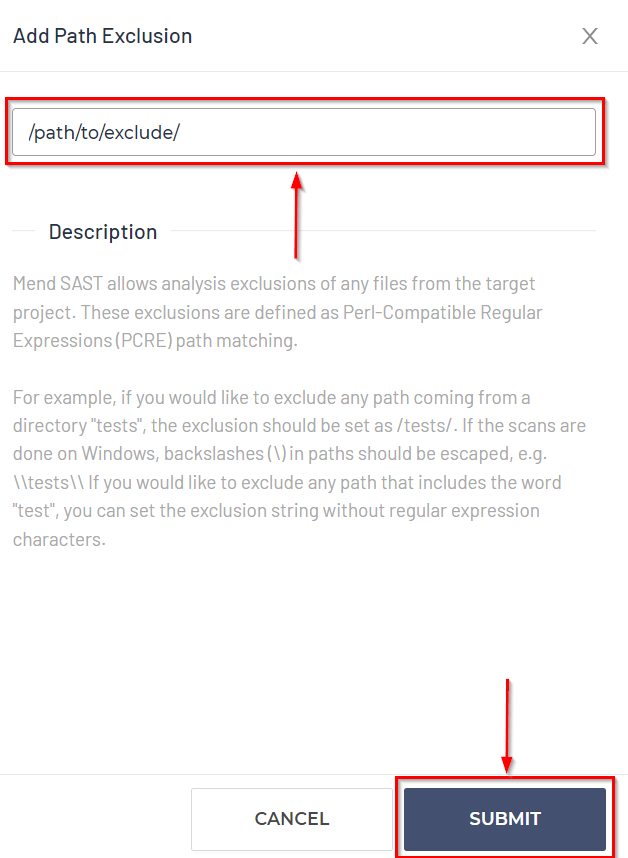
Example: If you would like to exclude any path coming from a directory "tests", the exclusion should be set as /tests/.
If the scans are done on Windows, backslashes (\) in paths should be escaped, e.g. \\tests\\ . If you would like to exclude any path that includes the word "test", you can set the exclusion string without regular expression characters.
Automatic Issue Submission Triggers
Mend SAST offers the capability to create Issues, Email Notifications, and Slack notifications. Organization-wide this can be created via the Settings > Issue Tracking and Settings > Notifications pages. To apply these created triggers to your application, these can be configured via the Automatic Issue Submission Triggers section:
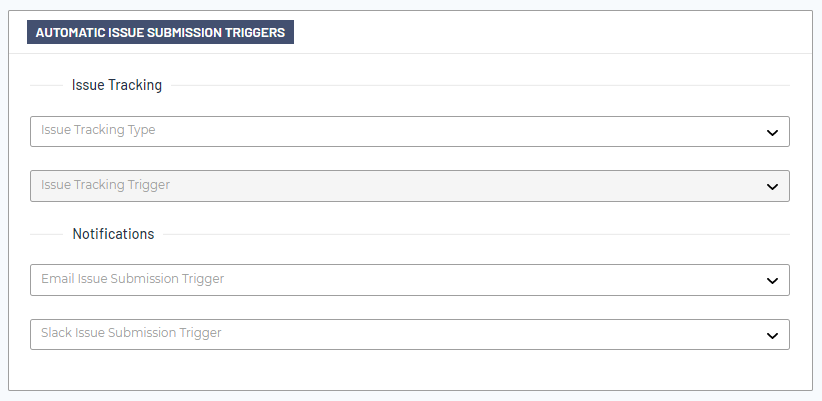
To review prior settings, click on Previous. Otherwise, click Create to create your new application.
Application Templates
If the application configuration is new, and you want to save this configuration for future use, you may save it as a template by clicking on Save As Template. This setting is available on each Application Configuration page: Basic Options, Advanced Options, and Miscellaneous Options:

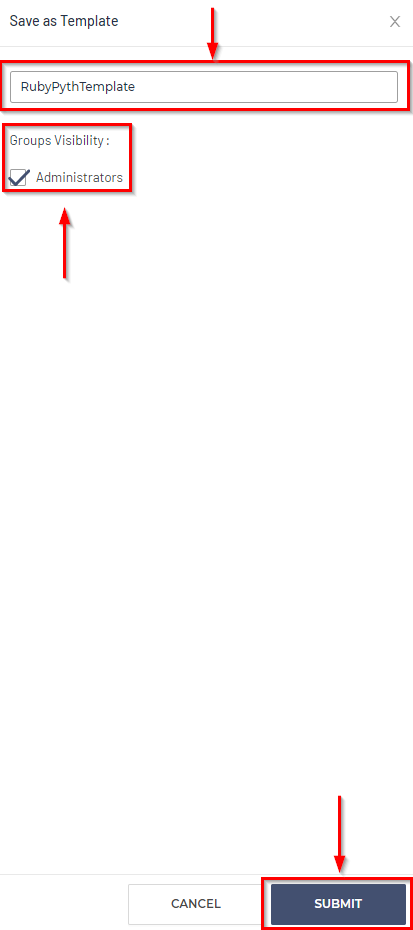
This will open a sidebar where you can add the Template Name and restrict its Groups Visibility. Click on Submit to save the template for future use:
To delete a saved template from your organization, select it during the configuration stage and click on Remove Template:

