Summary
As a Mend customer, you want to use pending tasks to gain more control over which libraries are being used in your projects. We at Mend understand the importance of being able to review libraries, licenses, and vulnerabilities so that you can determine next steps in your SDLC which is why we provide the option to use pending tasks.
Why use pending tasks?
Pending tasks are often used by our customers to let them make a decision on whether a library should be allowed in a project inventory. This allows every library that is added into a project inventory to undergo an approval process so that any unwanted discrepancies can be caught as early in the SDLC as possible.
Enabling tasks
In order to set up these tasks, you will need to be an Organization Administrator. In the Mend UI, you can go to Integrate → Advanced Settings (expand) → Open pending tasks for new libraries (applies to existing projects).
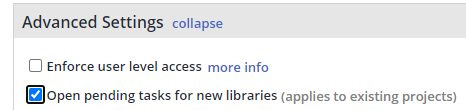
This will open a task for any library that is introduced to an already existing project. Please note that this also means that if a scan is performed for a project the first time, no pending tasks will be created. If you want a task to be created when creating new projects as well, then you can select the “Apply also to new projects” setting.

This is all that we need to set up pending tasks!
How to use
Once a task is created, it will be assigned to a user called the “Default Approver”. You can set this role by going to Admin → Assignments → Default Approvers (expand).
After we create some pending tasks, we will need to know how to use them. You can find them in a few different places. The most common way is going to the relevant project home page and scrolling down until you see a box in the bottom left corner that says “Pending Tasks” like such:

Under this, you can select one of the tasks to view it further.
The screen afterwards shows the Libraries (top level and all transitive dependencies), the Licenses Associated with this dependency, the Vulnerabilities associated with the library, and then the history of the task (comments).
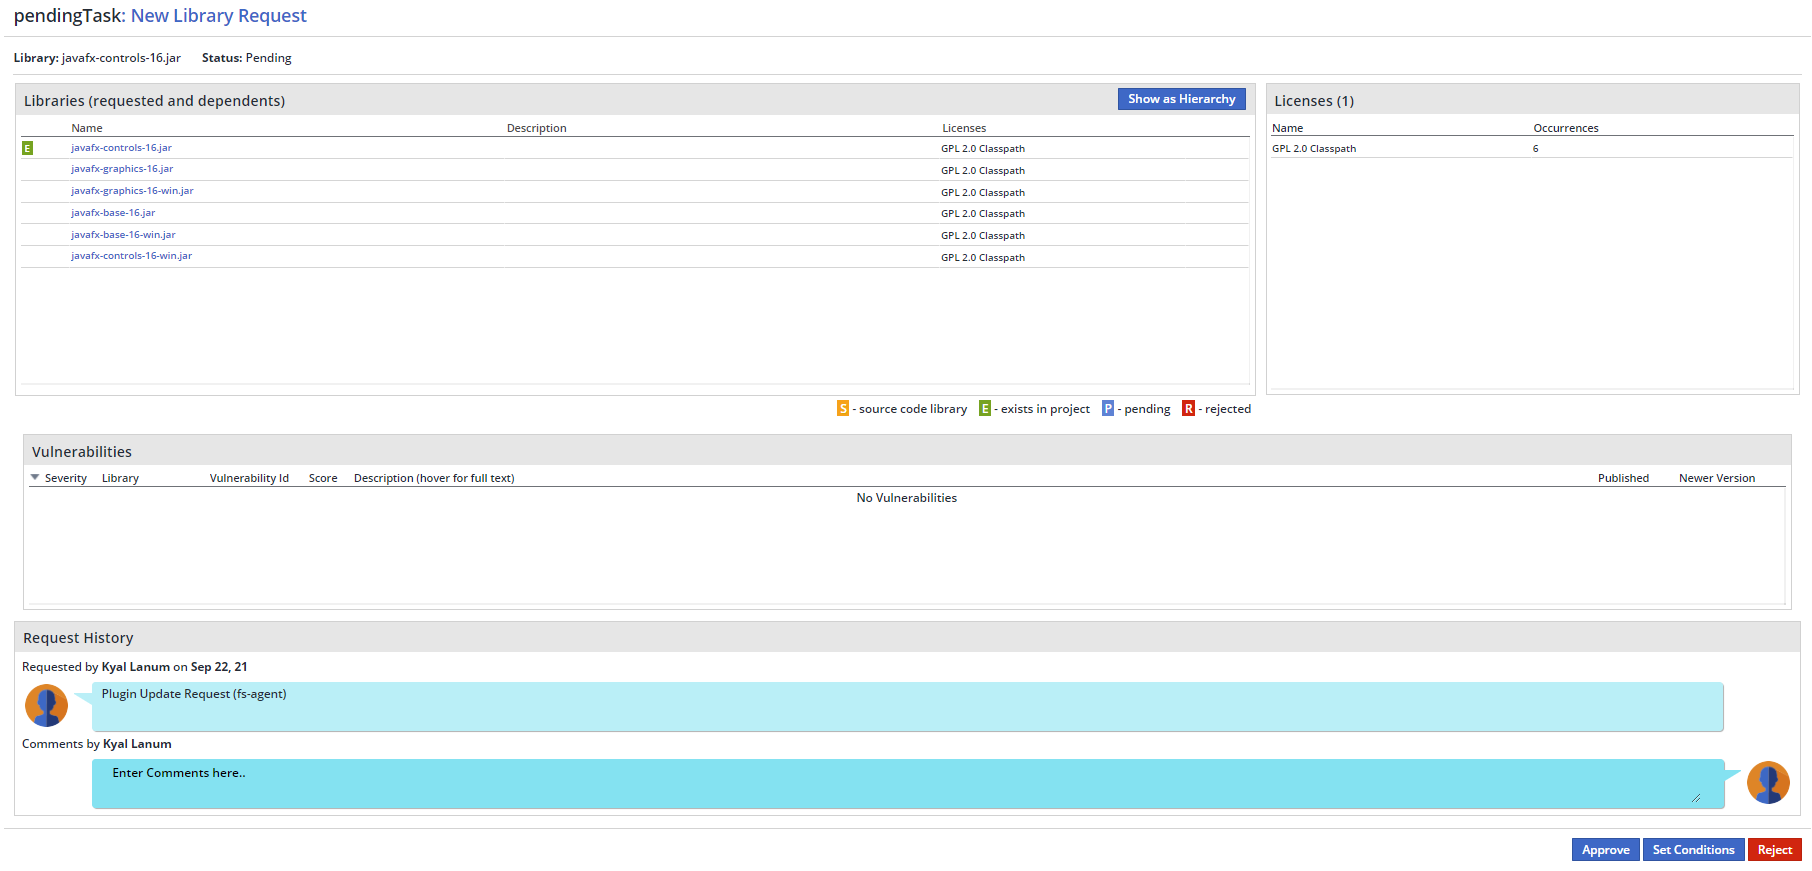
Note that at the bottom you have the ability to Approve the library, Set Conditions, or Reject the library.
If you:
-
Approve the library: Then this library will be approved for all future scans and no other pending tasks will be created.
-
Set Conditions: You will be able to request that other users in the Mend UI approve the library (for instance your companies legal team or security team).
-
Reject the library: This library will be rejected and will show with a red “R” in your inventory report. On top of that it will show under the policy violations and any subsequent scan that checks policies will automatically error out the scan (useful for intentionally breaking pipeline builds, etc.)
NOTE: Pending tasks are created at a project level. If one project introduces a library that is already being used in another project, a new task will still be opened.
The last section that attention should be brought to is the comments section. Here, different users will be able to comment on the task. This is very similar to a commit message in a repository, but for a task.

Policies
There are two different types of policies that affect tasks. Reassign policies and conditions policies.
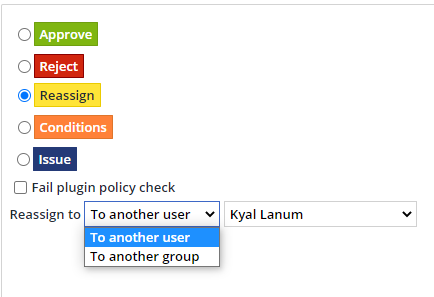
Reassign
A reassign policy will take a pending task that is set to already be created, and reassign it to a given user or group.
NOTE: If the setting to enable pending tasks is not set, then neither Reassign nor Conditions policies will trigger. At the same time, a policy cannot create or change a task for an existing library that does not have a task created as these policy actions are meant to edit already created tasks, not create new ones.
Conditions
A conditions policy will take a pending task and assign it to multiple users or groups for different reasons.
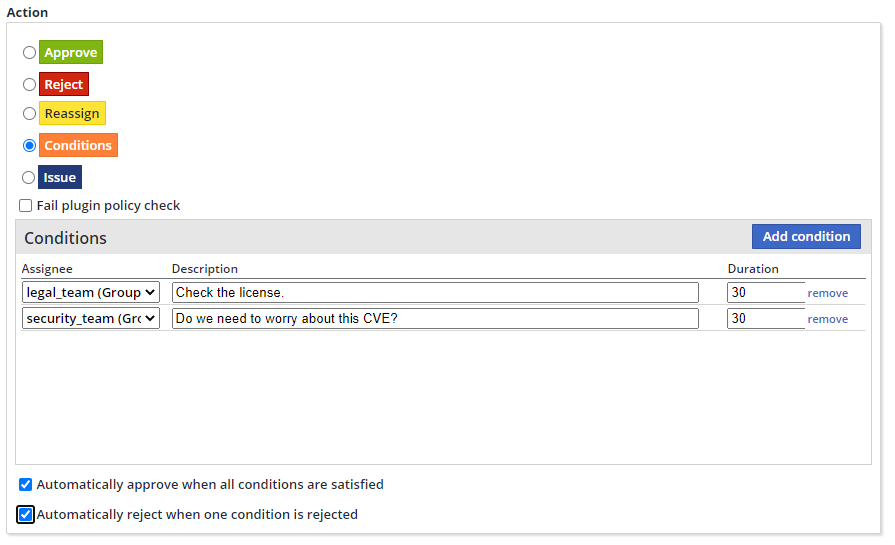
Note that the duration is in days, and you can decide the behavior of the ticket based on approvals or rejections below.
Requests dashboard
One other aspect of pending tasks that you should be aware of is the Requests Dashboard, this will give you statistics about your pending requests, as well as any pending tasks that are currently still open that need to be reviewed.
Requested by me
You may see sections within the Mend UI that says “Requested by Me”. These sections show pending tasks that the user created by running a scan. If the user sees a pending request in the “Requested by Me” section but not the actual “Pending Tasks” section, then that means that the task was opened by the user, but another user or group is assigned to approving or rejecting it.
Request history report
The request history report is the last section users should be aware of. This report holds a complete history of every single pending task created in the organization, along with who requested it, who approved it, the date, and project. This is where an admin should go when investigating the history of past tasks.