Configure Single Sign-On (SSO) for the Mend AppSec Platform
Overview
Integrate your enterprise-level Single Sign-On (SSO) solutions seamlessly with the Mend Platform UI to streamline user management and enhance your organization's access security.
Note:
Enforcing SAML SSO Login prevents your users from logging in using other methods.
Your SAML configuration in the Mend AppSec Platform is effective in the Legacy SCA application as well. Pay attention to this if you are configuring SAML in the Mend AppSec Platform while your users log into the Legacy SCA application using other methods.
How does SSO with the Mend Platform work?
Mend supports SP-Initiated (Service Provider Initiated) Single-Sign-On using SAML version 2.0.
The identity provider (IdP) connects between the service provider and the user. Examples of IdPs include Okta and Microsoft ADFS.
Use Case
The following illustration describes the functionality of Mend as a service provider in exchanging authentication and authorization data:

In Mend, the system parses the SAML permissions sent from the IDP. A SAML-enabled login does not include caching.
Getting it done
Note: Before getting started with the steps to configure and enable SSO for the Mend Platform, we strongly recommend reading through the Prerequisites and Boundaries sections of this article.
Prerequisites before configuring SSO for the Mend Platform
To set up an account SSO within the Mend Platform, you must be a user with account-level Admin role permissions.
To set up an organization SSO within the Mend Platform, you must be a user with organization-level Admin role permissions.
If you are transitioning from organization-level SAML configuration to account-level SAML configuration, you must first remove the existing SAML setup from the organization level.
Failing to do so may result in configuration conflicts or login issues during the migration.
Configure SSO in your IdP
To configure your IdP for SSO with the Mend Platform, you will need to create a SAML 2.0 application within your IdP’s platform. Make sure to include the information below in the relevant application fields during your IdP-side configuration steps:
SSO URL:
https://login-<your_mend_instance_environment>/login/callback?connection=wss-con-<orgUUID>Example:
https://login-saas.mend.io/login/callback?connection=wss-con-<orgUUID>In Okta, as an example, the same string will also be used for ‘Recipient URL’ and ‘Destination URL’.
Audience URI:
urn:auth0:<your_mend_environment's_subdomain>-<2nd_level_domain>:wss-con-<orgUUID>Example:
urn:auth0:saas-mend:wss-con-<orgUUID>
Configure SSO in the Mend AI Native AppSec Platform UI
Note:
Enforcing SAML SSO Login prevents your users from logging in using other methods.
Your SAML configuration in the Mend AppSec Platform is effective in the Legacy SCA application as well. Pay attention to this if you are configuring SAML in the Mend AppSec Platform while your users log into the Legacy SCA application using other methods.
Configuring SSO within the Mend Platform UI is done via:
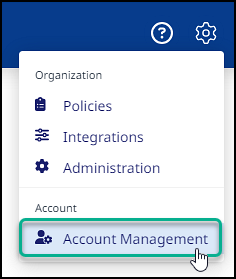
For account SSO:
Click on Settings (:mp_cogicon:) → Account → Account Management:
Click on SAML Integration:

Within the SAML Integration page, click on Edit:

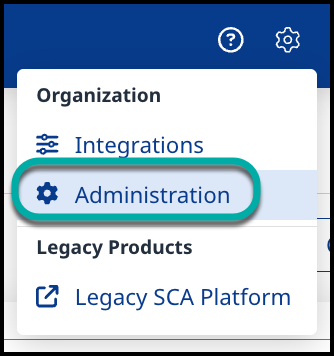
For organization SSO:
Click on Settings (:mp_cogicon:) → Organization → Administration:
Select SAML Integration:
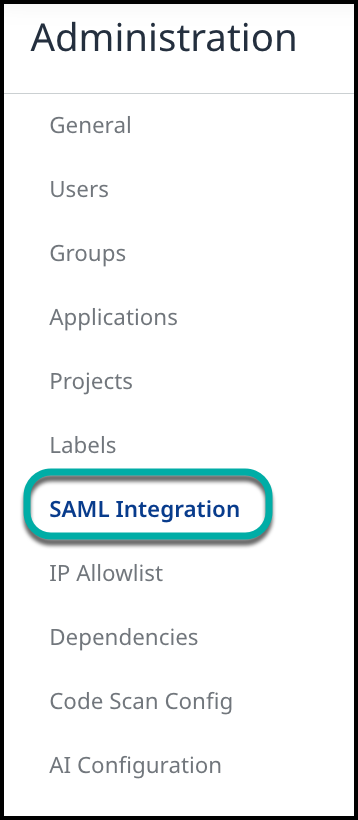
Within the SAML Integration page, click on Edit:

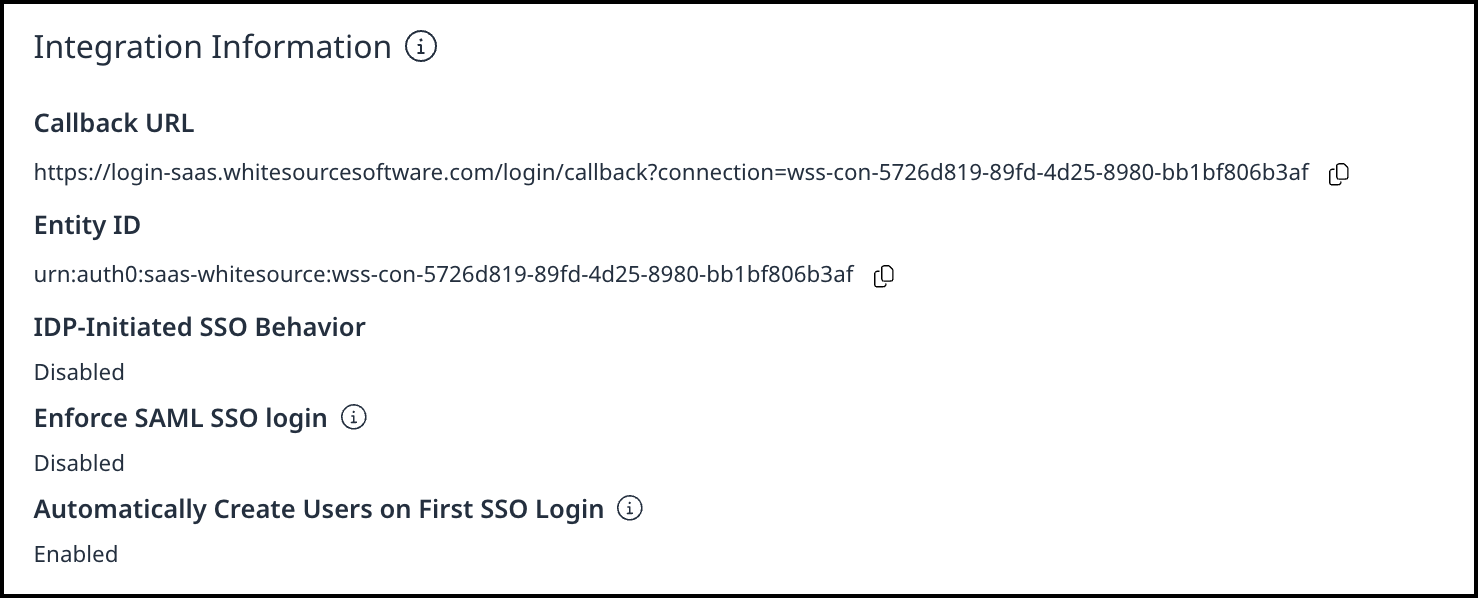
Integration Information
In the Integration Information section, you can find the Callback URL, Entity ID and Metadata Link for integrating your Idp’s platform with the Mend AI Native AppSec Platform. Also, you have the option to enable IDP-Initiated SSO Behavior.
You also have the option to Enforce SAML SSO Login so your users can only sign in via SAML SSO, disabling password-based login altogether.
Another option is to automatically create users during the first SSO login, which ensures new users are created automatically the first time they sign in with SSO. When disabled, users must be added manually by an administrator.
Note: IdP-Initiated flows carry a security risk and are therefore not recommended. The recommendation is to use SP-Initiated flows whenever possible.
Metadata
Updating SAML certificates can be done in one of the following ways:
Enter URL - for specifying the metadata URL of the certificate XML
Upload File - for uploading the certificate XML file from a location on the file system
Enter XML - for pasting the certificate XML directly into the UI

Note: Pay attention to the expiration date (indicated at the top) and make sure to update the SAML certificate before it expires, to avoid login issues for your users.
Metadata URL
In the Metadata section, add your IdP SAML application’s Metadata URL (the syntax of this URL varies across IdP platforms):

The Mend AI Native AppSec Platform supports metadata URLs from the main identity providers, including:
Auth0
AWS SSO
Duo Security
Google
IBM
JumpCloud
Microsoft Azure AD
Okta
OneLogin
Ping Identity
Salesforce
Note: In case a metadata link doesn’t fall into one of these categories, the SAML integration creation will fail with the message: Invalid SAML metadata URL
Metadata URL Validation
Here are some notable measures the Mend AI Native AppSec Platform takes to validate the metadata supplied by the admin, to ensure a secure and smooth SAML integration experience:
Only HTTPS URLs are accepted; invalid or unsafe sources are rejected.
Metadata fetch is proxied, scanned, size-limited, and validated for XML/SAML schema.
Invalid XML or missing SAML elements produce clear error messages.
Only extracted metadata fields are stored; raw XML is discarded.
Optional preview of parsed metadata is available after validation.
Email Domains
In the Email Domains section, click on + Add New Domain to add the email domain(s) used by your organization:

Key Attributes
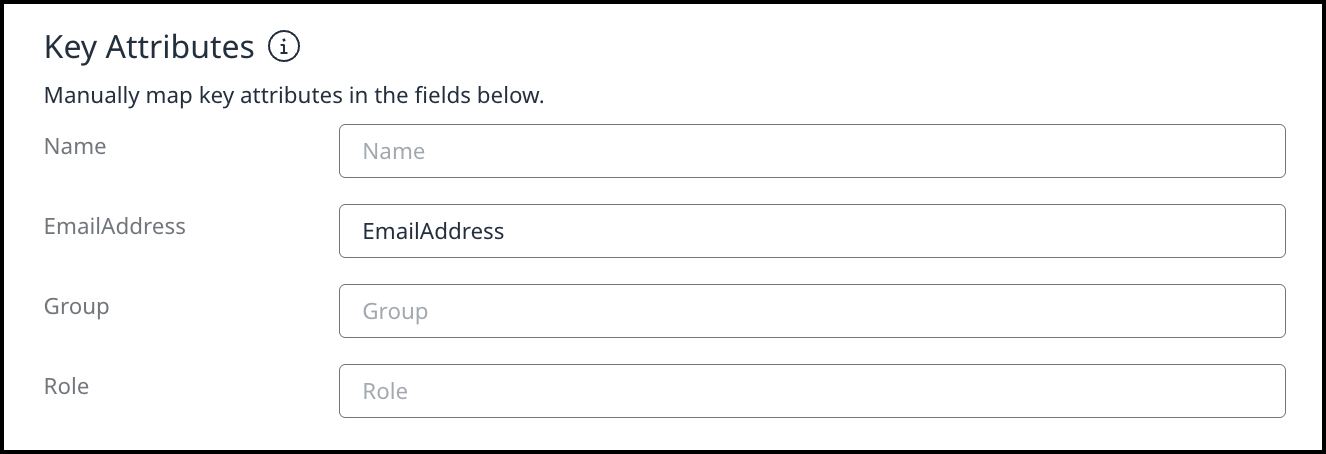
In the Key Attributes section, add the attributes from your IdP that match the Mend Platform key attributes provided (Name, Email, Group, and Role). You can typically find these attributes by viewing your IdP’s SAML assertion. Below is a simple example:
Role Mapping
In the Role Mapping section, click on + Add role to assign SSO users to defined roles in the Mend Platform.

SAML Certificate Expiration Notifications
When a certificate’s expiration date is 60 days away or less, organization/account administrators will be notified of the expiration date via the following methods:
A corresponding banner at the top of the SAML Integration page.
A toaster message that pops up when expiration is 60, 30, 15 and 7 days away.
Note: In the last 7 days before expiration, the message will reappear on every login.
Email (sent to users with the Account / Organization Admin role).
The notifications will stop once a new certificate is uploaded or after expiration occurs.

SAML Certificate Expiration Banner
