Managing Library Whitelist Rules
Overview
Whitelist refers to libraries that were approved for usage by your company. These libraries are part of your inventory, and will appear in any report or license analysis. However, you will never need to approve them, and the system will never create any policy alert for them. They will also be ignored by all policies.
Whitelist rules are regular expressions (regex) for matching libraries in your inventory or tickets.
Libraries can be added to your Whitelist according to the following ways:
Create rules to match the library name
Create rules to match the Maven coordinates of the library
Manually from Product/Project inventory
Accessing the Library Whitelist Rule Settings Screen
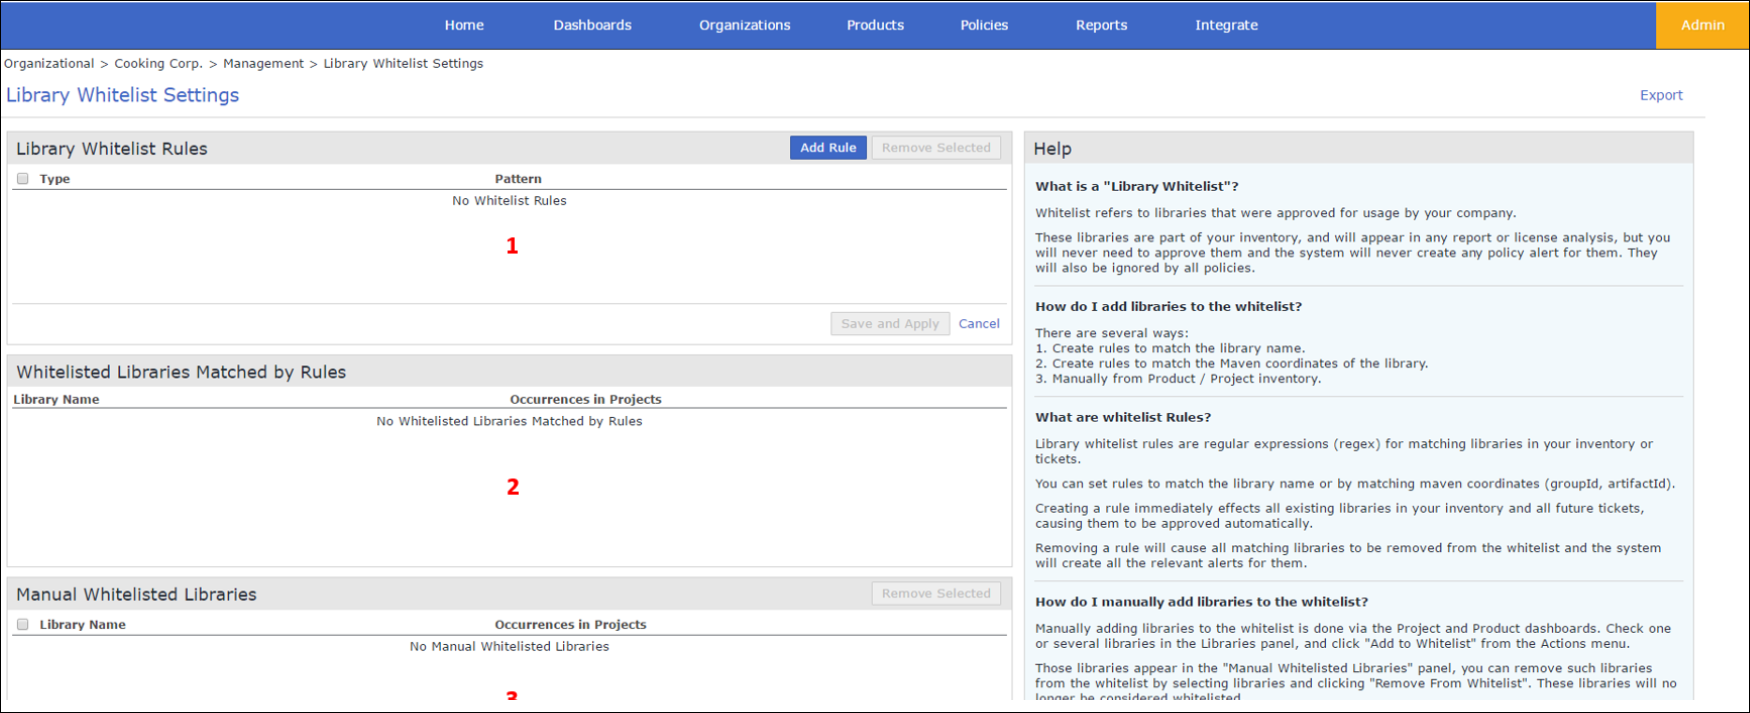
Library Whitelist Rules management is done via the Library Whitelist Settings screen, where rules can be added, removed or viewed.
To access the Library Whitelist Settings screen, do as follows:
From the main screen, click Admin. The Organization Administration screen is displayed.
In the Settings area, select Library Whitelist. The Library Whitelist Settings screen is displayed.

The screen contains these areas:
Library Whitelist rules – A list of all your Library Whitelist rules. A user can add or delete a rule using the appropriate button
Whitelisted Libraries Matched by Rules – A list of all the libraries that will be ignored by your policies since they were matched by one of your rules
Manual Whitelisted libraries – A list of all the libraries that will be ignored by your policies since they were marked by you as “whitelisted”
Adding a Library Whitelist Rule
Adding a rule immediately affects all existing libraries in your inventory and all future tickets, causing them to be approved automatically.
Add a rule via the following ways:
Create library Whitelist rules to match the library name
Create library Whitelist rules to match the Maven coordinates (Artifact ID, Group ID) of the library
To add a new library Whitelist rule, do as follows:
Above the Library Whitelist Rules table, click Add Rule. The Add Whitelist Rule dialog box is displayed.
Select either By Name or By Library Coordinates (see above explanation).
If you select By Name, enter the glob pattern’s name
If you select By Library Coordinates, enter the Group ID and Artifact ID glob patterns.
Click OK.
Click Save and Apply.
Removing a Library Whitelist Rule
Removing a rule will cause all matching libraries to disappear from the Whitelist. Additionally, relevant policies will be invoked on those libraries.
In the Library Whitelist Rules table, select the rule that you want to remove (checkbox on the left), and click Remove Selected.
Click Save and Apply.
Marking a Library as Whitelisted
To mark a library as whitelisted, do as follows:
Go to the Project or Product pages.
In the Libraries panel, select one or multiple libraries.
At the top of the panel, click Actions > Add to Whitelist.
The relevant policy alerts for those libraries will immediately "disappear" from your dashboards and reports.
Unmarking a Library as Whitelisted
To unmark libraries as whitelisted, do as follows:
From the main screen, click Admin. The Organization Administration screen is displayed.
In the Settings area, select Library Whitelist. The Library Whitelist Settings screen is displayed.
Select the library to unmark (checkbox on the left) and from the Actions menu, select Remove Selected.
These libraries will no longer be considered as whitelisted, and relevant policy alerts for those libraries will immediately "reappear" in your dashboards and reports.
