Scans Tab
Note: The legacy Mend SAST application was deprecated on April 1st, 2025. For assistance with migrating to the Mend AppSec Platform, please contact your customer success manager or the success team at success@mend.io.
Overview
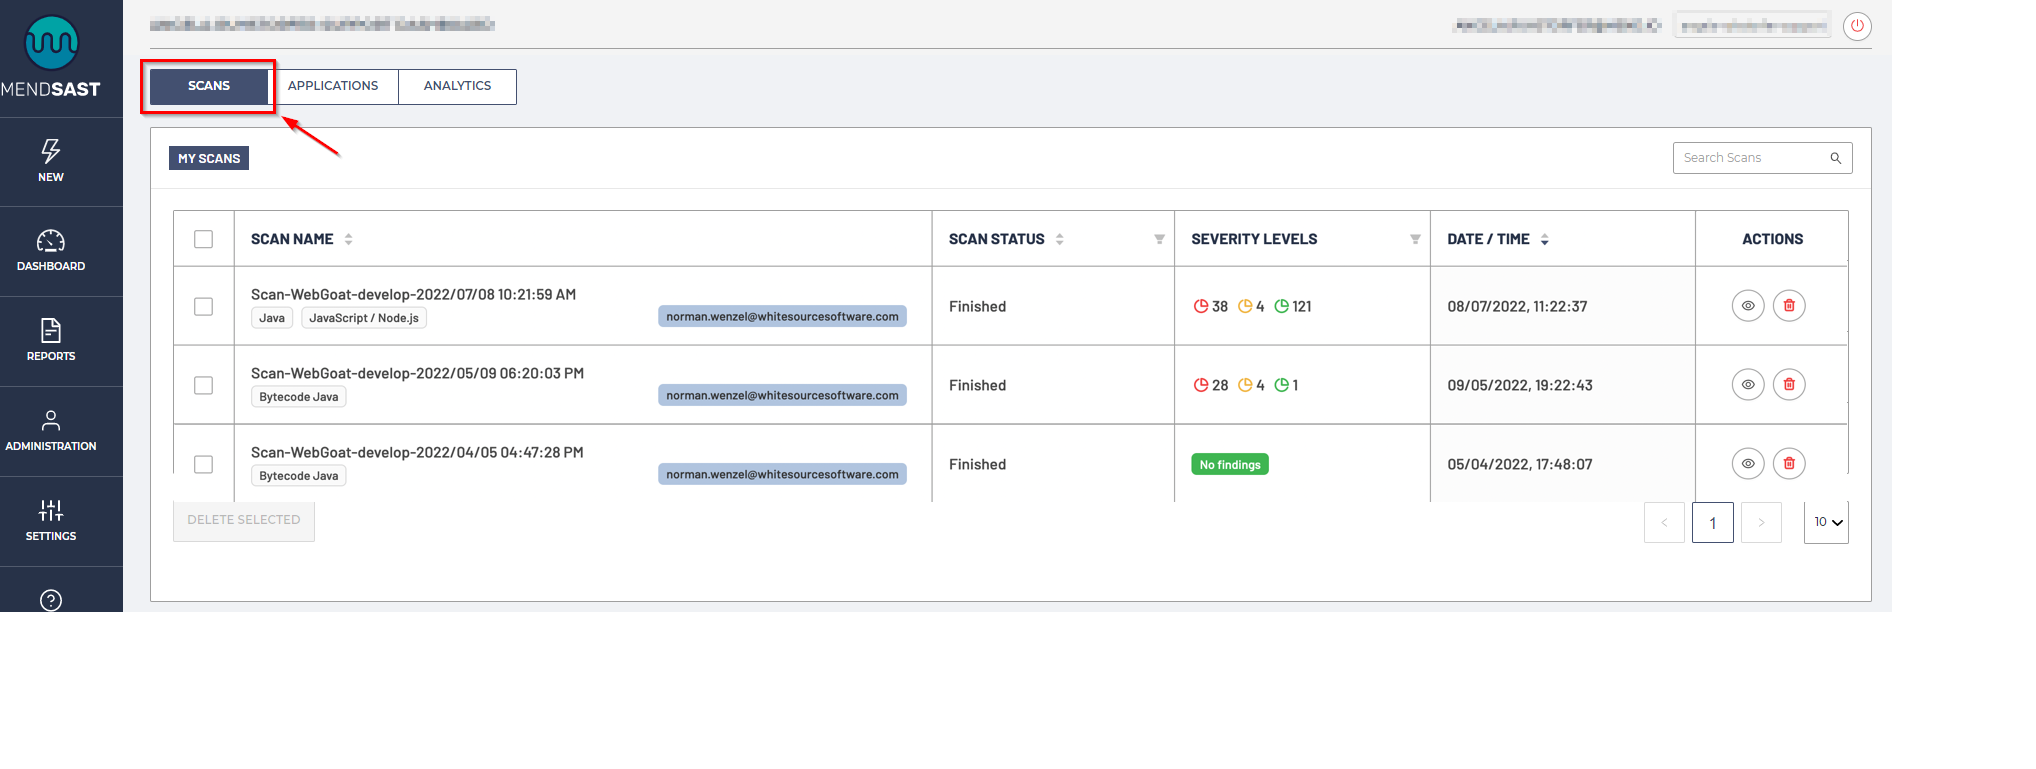
Directly after a scan begins, its scanning state will be visible in the Scans tab. The Scans tab includes a dashboard that represents scan management in terms of searching and deleting scans. Clicking on any of the rows will take you to that scan’s Summary page.
The Scans tab displays all scans linked to your organization:

Table contents
Column Value | Definition |
|---|---|
Scan Name | The name of the scan. The naming convention is as follows: |
Scan Status | The status of the scan:
|
Severity Levels | The severity levels and counts of findings reported in your scan results:
A “No findings” ( |
Date / Time | The date and time the scan completed |
Actions | Eye Icon - This will take you to the scan’s Details page Trashcan Icon - This will delete the selected scan from your organization |
Adjusting the table
Searching scans
Searching through scans is done by entering the search query into the Search Scans field in the upper right corner of the Scans tab:

Paging
The default display will show 10 scans per page, which can be adjusted by selecting the drop-down menu in the lower right corner of the Scans tab (up to 50 scans per page):

Sorting
To sort by any of the four columns click on the column header (Scan Name, Scan Status, Risk Levels or Date / Time):

Filtering
To filter the results by Scan Status, click on the filter icon in the Scan Status column and choose one or more values:

To filter the results by Severity Levels, click on the filter icon in the Severity Levels column and choose one or more values:

Deleting scans
Deleting scans can be done by selecting a scan using a checkbox on the left side of the row and then clicking the Delete Selected button, or by clicking on the trashcan icon on the right side of the row:

